In recent years, the popularity of purchasing smartphones online has been growing. Thanks to the services of international trading platforms, the user receives high-quality goods in a short time. At the same time, any user may encounter the problem of purchasing a device that is not certified for the CIS market, that is, with an interface in English, Chinese, and even Hebrew. In this case, Russian may simply be disabled, or even completely absent. Don’t despair, because you can simply change the language using standard settings, or add it by installing a special application.
How to enable Russian language on your phone
The popular Android OS these days is the base operating system for hundreds of thousands of devices used in every corner of the planet. That is why Google initially builds several dozen languages into it, including Russian.
During the first launch, a notification should appear on the smartphone screen prompting you to select a language. If this does not happen, it means that someone has already turned on the device (or maybe used it). Don’t give in to worry, because you can change the interface and set Russian as the system language on most devices easily and quickly, in just a couple of clicks.
To make it easier to get to the necessary parameters in the menu of a phone with an interface in a foreign language (Chinese, English), we offer a detailed guide with visual screenshots.
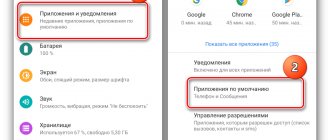
- Open the “Settings” section. The gear shortcut can be accessed from the application menu or quick access panel.
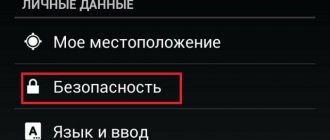
- Find the “Language & Input” item and click on it.
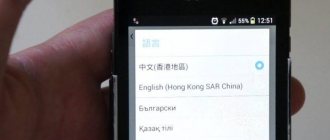
- In the tab that opens, select the line “Language”. Usually it is at the very beginning of the list.
- Next, a list of languages installed by the company will open. Slowly scroll through it, find “Russian” and set it as system by tapping on the line.
Today, many manufacturers create their own shells for their smartphone models. At the same time, the interface changes significantly, which makes it difficult to find language settings. This problem concerns firmware in Chinese. In this case, users (with the exception of those who have specifically studied the language or are familiar with the hieroglyph system of the Celestial Empire) go through all the settings items and find the ones they need at random.
Instructions for old devices
If your device runs Android 4.1 Jelly Bean and older, and there is no Russian in the list of its system languages, then you need to use slightly different instructions:
- Download the MoreLocale 2 application on Trashbox.
- We launch it and on the first screen click the “CustomLocale” button.
In the window that appears, there are two fields that need to be filled out. In the “Language” field you need to select a language. Click the button next to the field and find Russian in the list. In the second we are looking for the country Russian Federation. After this, Russian will appear in the main system menus of the system, but not everywhere. To achieve the full effect, the device must be re-flashed.
How to Russify Android using an application
It’s good if the language pack remains untouched, you can get to the necessary parameters, albeit gradually. More difficulties arise if the Russian language is not on the list at all, because the manufacturer decided to ignore it. But even in this case, it’s not difficult to deal with the problem; you just need to tinker a little with additional software.
There are not many localization programs on Google Play, but among the available ones you can find a decent program. Today it is "MoreLocale 2"
The utility is free and compatible with a huge number of mobile devices. It contains all the locales proposed by Google for the Android operating system by default.
When you first start the program, you must immediately obtain developer rights. To do this, you will have to perform several steps sequentially.
- Go to the “Settings” menu, and then to the “About” section.
- In the tab that opens, find the “Build Number” item. The firmware version installed on this smartphone is indicated here.
- You need to quickly tap this line 7-10 times until the message “You are now a developer” appears on the screen.
- Now you should go back by tapping on the corresponding key. A new option “Developer Options” will appear in the list.
- Having opened this menu, find and activate the “USB (Android) Debugging” option in the proposed list by switching the slider to the “ON” position (move to the right).
- Now on a PC running Windows OS you will need to download the archive and the executive ADB file and unpack it into a folder of the same name located in the root directory of drive C.
- Connect your smartphone to your computer and go to the desired directory by running the command: “cd c:\adb”.
- To make sure that the PC system recognizes the mobile device, enter “adb devices” into the command line and press the “Enter” key.
- After the code name of the device is displayed on the command line, you will need to enter the following combination: “pm list packages morelokale”, and then another one: “pm grant jp.co.c _lis.cci. morelokale android.permission.CANGE_CONFIGURATION."
- Next, you will need to disconnect the smartphone from the PC and run the “MoreLocale 2” utility.
- In the list of languages, find the line “Russian” and click on it.
Russification of the interface will be completed, and the package will be automatically localized.
Method 2.
The second method is more difficult, but necessary, because there are simply no other options to solve the language problem. Therefore, we will be patient and solve the problem according to our instructions below.
1. Let's go to Play.Google either from your device or from a computer and download the “MoreLocale 2” application (Installing this application will allow you to quickly Russify your device). If you don't know how to download and install applications, read this FAQ.
2. After you have installed the application, go to the “Main Menu” and find there the application called “MoreLocale 2”
Main Menu → MoreLocale 2 √
3. Go to the “MoreLocale 2” application and find the Russian language (“Russian”) there
4. Select it. After this, you will see the message “Loading” on your smartphone. Don't be afraid, the program automatically transfers your device (it all takes no more than 10 seconds) .
As you can see, our menu and everything else is in Russian. Enjoy!
You can ask questions about Russification of Android devices in the comments to this article!
If you do not see the icon, then go to the applications menu by clicking on the button as shown in the screenshot - here you will find all the applications already installed on your device. The button may have a different appearance.
This is not difficult, especially if you have at least once dealt with Android devices.
On the desktop, find the gear icon - this is the device settings. Early versions use an icon in the form of several stripes.
If you do not see the icon, then go to the applications menu by clicking on the button as shown in the screenshot - here you will find all the applications already installed on your device. The button may have a different appearance.
You are in the settings menu. Everything here will be in Chinese, so it will be almost impossible to understand what is written and where. Do not worry. In the menu you will need to find an icon with the letter A and an ellipsis, as shown in the picture. No matter what design you use, in 99% of cases the icon will look exactly like this - this is done so that users can independently find the menu section where the language changes.
So, you have found the desired menu section. Let's go into it. At the very top of the screen (remember, this is important!) there is an option to change the language.
Click, and then select from the list the language that you would like to install, for example, Russian or English. It's simple.
What to do if there is no Russian language in the menu? Most likely, you need to either update the software or install firmware with Russian language built in.
In exactly the same way, you can change any language to the one you need, if, of course, it is already built into the firmware.
Friends! If our site helped you or just liked it, you can help us develop and move on. To do this you can:
- Leave a comment on the article.
- Subscribe to our YouTube channel .
- Subscribe to our VKontakte group .
Necessary:
Installing a Russian keyboard
To fully use a mobile device, installing the Russian language and changing the operating system interface is not enough. The virtual keyboard, for example, will remain unchanged, that is, it will contain the same layouts (English, Chinese, etc.). Therefore, it will be necessary to introduce Russian into this block as well. Fortunately, this has become much easier, especially since Google developed a separate application.
In order for the Russian layout to appear on your smartphone, you need to do the following.
- Visit the Google Play app store, download the keyboard and install it on your device.
- Enter the “Settings” menu and open the “Language and input” section.
- Go to the “Google Keyboard” tab.
- Finally, you just need to select the “Languages” option and select the required input languages in the list that opens, moving the slider to the right to activate the “ON” position.
That's all! Now the Russification of the smartphone can be considered completely completed. The user will only have to enjoy the clear interface and use the Russian layout.
Today, owners of mobile gadgets have several hundred excellent keyboards to choose from, but the GBoard program has gained the most popularity. This is due to the flexibility of configuration, the presence of support for continuous input mode, the ability to choose the color, position, shape of buttons, and many other parameters. No wonder today this application is used by more than 500 million people around the world.
For smartphones without Root rights
How to Russify Android if full access to the file system is denied and you do not have superuser rights? It is possible to make a phone in Russian, but for this, in addition to the application described above, you will also need the ADB computer program. It allows you to bypass the limitations of modern devices running the Android 4.2+ operating system. Before performing the operation, be sure to disable FireWall, antivirus and Windows Defender. Because of them, the cracker may not work correctly.
Russification of Android occurs as follows:
- Download the Morelocale 2 application on your phone, as well as the ADB program on your personal computer.
- Enable phone USB debugging mode. To do this, go to settings, “About phone” → “Version information”. Click on the "Build number" line several times until a message appears indicating that you are a developer.
- In the settings, find the new “For Developers” menu, and then simply enable USB debugging.
- Connect your smartphone to your personal computer. Install the drivers necessary for it (if this did not happen automatically).
- In the folder with the ADB program, run the file called Run. The installation will complete, then press any key.
- Launch Morelocale 2 on your device.
- Repeat all the steps described in the previous part.
- Reboot your android device.
The effect of these actions is similar to the method for users with Root rights. This is an ideal option if for some reason you cannot open full rights for your device. It is also worth noting that this method is performed at the software level. In case of a complete reset, the localization will also be deleted.
Possible problems and questions
Despite the simplicity of the Russification procedure for smartphones, many beginners encounter certain difficulties at various stages of installing the Russian language. In this regard, they have a desire to consult with someone. Below are answers to the most common questions.
Vyacheslav
For several years he worked in mobile phone stores of two large operators. I understand tariffs well and see all the pitfalls. I love gadgets, especially Android ones.
Ask a Question
Question to the expert
What should I do if in the “MoreLocale 2” program the language I need is not in the list?
Really. Owners of some smartphones, mainly Samsung, face a similar problem. The desired localization should be specified via Custom Locale, or added to the list of existing ones using the program menu settings.
If I don't like the GBoard keyboard, what is an alternative option?
The following popular utilities are available for download in the Play Market: SwiftKey Keyboard – has a quick input function and hints; Fleksy is one of the best programs for speed typing; Chrooma Keyboard – adapts to the color of the application you are using.
Are there other applications that can Russify the Android OS besides “MoreLocale 2”?
There are several utilities created by various . The application adds Russian language to AndrOpen Office, and also contains a number of templates and reference materials. But “MoreLocale 2” remains the best.
What is ADB?
ADB is a console application for PC that allows you to manage mobile devices based on Android OS. Using this tool, you can debug Android devices, including emulators. Installed with Android SDK.
When buying a phone via the Internet, you need to be prepared for the fact that the device will have to be Russified. There is no need to be afraid of this, since you can install the Russian language on any Android smartphone by performing simple manipulations in the settings or in the downloaded application. If you cannot cope with the problem yourself (due to a lack of knowledge in modern technologies), you can always contact the service center specialists.
4.3/5 — (20 votes)
What to do if you only need keyboard Russification
Most of modern society knows English at least at a basic “school” level, which is quite enough to navigate on the phone. But the presence of the Russian language on the keyboard is mandatory: communicating on social networks, taking notes and searching for information on the Internet is impossible without your native language. In this case, you don’t need to spend a lot of time fiddling with firmware and other manual operations - you just need to download a keyboard program with built-in Russian language.


