Date: 17Oct 2018
Author: iMobile
Many people have been using contactless payments for a long time, not only using bank cards with PayWave technology, but also smartphones with an NFC chip and a customized payment system.
In this article I will talk about how to set up contactless payment using the Google Pay payment system on a phone with NFC, and how to use it.
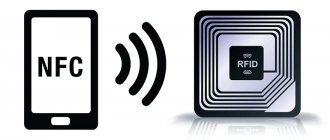
By the way, if you don’t know what NFC is, I recommend reading the article dedicated to it - “NFC on a phone - what is it?”
Turn on NFC
The most important thing at the beginning is to make sure that your smartphone has an NFC chip
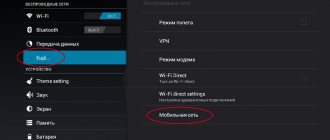
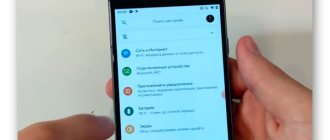
. To do this, you can familiarize yourself with the detailed characteristics of the device or look for the NFC function in the settings. In different shells it is located in different places. Here are some ways:
- “Settings” -> “Additional features”
- “Settings” -> “More” -> “NFC”
- “Settings” -> “Connections” -> “NFC and payment”
NFC enabled
When you find NFC, turn it on. Next, go to “Contactless payment” to see what your main payment method is. Typically this is Google Pay. Other options are possible, but now we will deal with Google Pay, the payment system previously known as Android Pay.
Login to the Google Play program
Setting up the system will be easier and faster if the user has a Google account. In other words, a Gmail address must be created. In principle, this is the base that will make it possible to “closely communicate” with the Google Play Store program in the future. If the account is valid, the application will allow you to easily log in to the system by first entering personal data, in particular, the username and password (the standard procedure for all typical programs). Only if you don’t have a Gmail address, you will have to spend a little time creating one. The primary setup for Google Pay is to have a phone and run this software, as well as step-by-step implementation of the recommendations below.
Setting up Google Pay
Detailed instructions:
- First, you need to download the Google Pay application from the official Google Play application store
(Play Store). Download link – Google Pay - After launching the application, select a Google account that will be associated with the Google Pay payment system, if you have several of them on your phone, of course. Click "Get Started."
- The application should now prompt you to add a card. Don't be shy, add it. In addition to the standard: card number, holder's first and last name, expiration date and CVC code on the back of the card, you must also enter your address and phone number.
- After this, a connection will be established with your bank and the card will be checked. If everything is fine, move on to the next point...
- Setting up a screen lock. Setting means enabling a password when unlocking the screen - digital, graphic, fingerprint or anything else that your phone allows. This is both a plus and a minus. Plus, this is protection in case, for example, your phone is stolen. The downside is that every time you need to unlock the phone using the selected method. Personally, I’m used to just folding back the “lid” of the book case and that’s it. But users who already have a password should not experience any discomfort. By the way, turning on the screen lock is mandatory, otherwise the application will simply delete your bank card data. You cannot use it without a password at your own risk...
- Next, you need to confirm the card linking - enter the code from the SMS received from the bank.
- Ready!
Map is linked
How to link a map to Google Play
You can link a card in several ways, but I’ll look at the simplest and most convenient:
- Launch Google Play and click on the profile icon;
- In the window that opens, select “Payments and subscriptions”;
You can add a map directly to Google Play
- Open the "Payment Methods" tab and scroll down;
You can link almost any card
- Click “Add a bank card” and go to the Google website;
- Enter your bank card details and confirm the link.
Huawei has found an easy way to transfer applications from Google Play to AppGallery
Before linking a card, it is very important to make sure that there is money there. Because Google will charge you and immediately return a small amount. As a rule, it is 5-15 rubles if you choose the “Russia” region and 1 dollar (75-80 rubles) if you choose the USA. If there is no money on the card, then the linking will not work, and you will need to top up your account and do all the same manipulations again.
How to use the Google Pay payment system
NFC is enabled, Google Pay is configured. It's time to go shopping...
- Unlock your smartphone
- Bring it closer to the reader and wait 1-2 seconds
- A checkmark should appear on the smartphone screen. This means that the payment has been completed
Payment by card via Google Pay is confirmed in the application
And some more information that may be useful to you:
- If the payment amount is less than 1000 rubles, then it is not necessary to unlock the smartphone.
- You can turn on location history to see where you've been with the devices you're signed into.
- In Google Pay, in addition to bank cards, you can save loyalty cards, gift cards, and travel cards.
- You can add multiple cards and select a "default" card.
I hope that this publication helped you set up NFC and Google Pay on your smartphone, but just in case, I am attaching a video version of the publication...
Device support
The compatibility with this application is great. The following phones from popular brands support it:
- Samsung
- Lenovo
- Xiaomi
- LG
- Prestigio
The only condition for installing the application is that the phone must be running on a version no lower than Android 4.4. Earlier modifications do not support it. In addition, you can pay in this way only if it contains wireless information transfer technology. Finding out your capabilities is simple - you need to open the “system” function, and then go to the “about phone” link.
What cards does Android Pay support?
This payment system works with Visa and MasterCard cards, but it is not compatible with all Russian banks, but only with 13. Most likely, the list will be expanded in the future.
Android Pay supports cards from the following popular banks:
- "Sberbank";
- "Russian standard";
- "Yandex money";
- "Alfa Bank";
- "VTB 24".
Also received support: Otkrytie (including subsidiaries Rocketbank and Tochka), Tinkoff Bank, Binbank, MTS-Bank, as well as lesser-known Promsvyazbank, Raiffeisenbank, Ak Bars Bank " and "Rosselkhozbank".
Payment for contactless payments using a non-based card
If the user is interested in how to use a payment method that is not the primary one, he should understand that using a non-primary payment card can only be used to make a one-time payment. If you need to use a certain payment method often, you should set it as your main one. If your preferred card is not set as the main one, you must first unlock your smartphone, activate the Google Pay software, and select your preferred one from the list of added cards. Swiping from right to left on the default main map will help you carry out this action.
After this, you should bring the smartphone with the back panel to a payment terminal capable of making contactless payments. After selecting the “Credit” card type, you may need to enter the password for this card (PIN code issued by the bank). The Cards section will help you decide on the payment method. In the list of added ones, it is worth noting the card from which funds will be debited, and then touching the smartphone to the terminal.
Creating a Google Account
After activating the application, the Play Store will automatically indicate to the user the need to log in personally. If you do not have a personal address, you should use the “Create a new account” command (the image is located at the very bottom of the screen). Once the link works, the user will be able to enter their name. The next step is to define a name by which Google will identify the user. The information you provide in your Gmail account will be used by Google. If you have difficulty entering certain words (frequently used names/logins are busy), you should come up with something more original or enter your personal data.
After the name is approved by the system, you will have to provide a password. You should not stop at your date of birth or name; it is better to choose a phrase that attackers will not be able to pick up, but which the user himself will not be able to forget over time. The best password is one that contains uppercase and lowercase letters, and numbers (symbols can be used). The complexity level of the password you create directly affects how quickly it can be cracked.
To connect google pay, in addition to specifying the username and password, you must provide a personal phone number; this information will be useful if the user forgets the information regarding his account. Subsequently, a special code will be sent to your smartphone, with which you can restore access to the system. The phone number will be useful if you need to carry out two-level authorization. Of course, you should not add a personal phone number in a situation where the user has not read or does not agree with the application's privacy policy.
After completing these steps, the final account page will appear. The user will have access to the most popular Google services, interaction with which is established precisely by registering a Gmail address. All features of YouTube and Google Maps will become available only after logging into your account, the user will have access to their settings and will be able to use the saved data.
The program abilities connected through the account should be approved using the “Next” command, agree to the terms of the application, and, if necessary, create a backup copy of all software that is currently installed on the smartphone. Along with the applications you use, Google will “remember” passwords for wireless networks (Wi-Fi) and other personal settings. If you do not want to save and copy everything, you should use the “Next” command, or uncheck the list of listed actions.
At this step, the initial installation and configuration of Google Pay is considered complete. The user is required to enter data that will certainly relate to payment for services and goods. Payment information will be useful so that you can subsequently quickly pay for software, books or music that are sold on a paid basis. By the way, there is no need to add credit cards; this is the desire and need of each individual user.
Instructions for adding credit cards
Instant use of Google Pay is optional; you can add payment information, but not use its functions immediately. Of course, there are a huge number of resources on the Internet that distribute certain data for free; if the user fundamentally denies the purchase of some content, music or software, there is no need to indicate credit card information; it is enough to simply skip this step. However, if you wish, you can enter your credit card information, which will help you make certain purchases.
To understand how to use Google Pay as a payment machine, you should start by adding your first card. If the user has previously linked his card to a specific Google account (probably, purchases were made through the Play Market), the program will automatically “pull up” the data and allow you to select this card. Otherwise, if there are no payment cards, the user will have to provide information regarding the card number, CVV code, and expiration date of the payment card. At the same time, you will need information regarding the owner’s first and last name and mobile number.
As soon as personal payment information is entered, an SMS will be sent to your smartphone containing a confirmation code. Characters from SMS should be specified in a special field in the program. In addition to the fact that the program will send the message, the owner of the payment card will receive a notification from his bank, which will confirm the successful addition of data.


