How to enable data transfer through the notification panel
Data transfer or mobile communication is enabled through the notification panel. This is the so-called “curtain”, which is called by swiping from top to bottom. How to enable data transfer on Android:
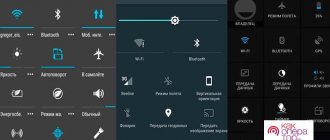
Step 1 . Open the notification panel. To do this, swipe the screen from top to bottom. If necessary, pull the panel down again to see all available functions.
Step 2 . If you are using a device with Android operating system version 4.4 or lower, then after opening the notification panel, click on the icon in the upper right corner to access additional functions.
Step 3 . Click on the icon that looks like two arrows. On devices with a newer version of Android, you may see “Data” or “Data Transfer” next to it. After this, the phone will begin to connect to the network.
Step 4 . Touch and hold the Data Transfer icon to view more options. The Data Usage page opens. Here you can set up warnings when transferring data volumes above a certain indicator, enable traffic savings, and view statistics.
Depending on the connected tariff, the cellular operator may charge an additional fee not only for each megabyte (or gigabyte), but also for access to the network itself.
How to set up a Wi-Fi connection
Let's find out how to set up the Internet on a mobile smartphone using Wi-Fi. To connect to a wireless router via Wi-Fi, you don't have to make any settings. The functionality of any phone or tablet includes the necessary protocols and functions. All you have to do is connect. To connect to the access point, follow these instructions:
- Go to your phone's settings. Select Wi-Fi.
- In the upper right corner, move the slider to the active state. After a couple of seconds, a list of all the access points that the phone has found in the area will appear. Select the one you need. The lock icon indicates the presence of a password.
- Enter your network password.
If you did everything correctly, the connection will occur, and the corresponding message will appear under the name of the access point. Now you can go to the browser and go to the desired site.
You can quickly turn the network on and off through the top toolbar. Swipe down from the top edge of the screen. The quick settings menu will open. Click on the Wi-Fi icon so it lights up. Connection to known networks will be performed automatically.
- How to enable mobile network data on Android
Connection via WPS
Users can connect to Wi-Fi without entering a password. This was made possible thanks to WPS technology. To use it, you need to make sure that your router supports this function. Inspect the router from all sides for a button labeled WPS. As a rule, it is located on the back panel next to Reset. On some models it is combined with a reset button.
If your router supports WPS, follow these steps:
- Go to the Wi-Fi menu, turn it on and go to the advanced settings section. It can be called by a functional touch button or an icon with three vertical dots, as shown in the image.
- Select the "Advanced Features" section. In it, click on the “WPS” line. Names may vary depending on model.
- Next, reading the response signal from the devices will start. At this time, you need to press the WPS button on the router itself. If it is combined with Reset, then hold it for no more than 10 seconds, otherwise the router settings will be reset.
If everything went well, the smartphone will connect to the access point without having to enter a password. You will be able to use the Internet without any problems.
Wireless technologies used on phones
There is a broad classification of wireless communication technologies. If we consider mobile data transmission standards, we can distinguish the following types:
- 2G is the first digital data transmission standard, called GSM in Europe. For the first time, SIM cards were also introduced (before this, the number was sewn into the firmware of the mobile phone). As a result, GPRS packet data transmission appeared. Internet speed was up to 14.4 kilobits per second.
- 2.5G is an improved cellular communication standard. Provided subscribers with speeds of up to 384 Kbps.
- 3G is the most common protocol in most cities. Provides speeds up to 2 megabits. There are also advanced 3.5G and 3.75G standards with download speeds of 14.4 and 42 Mbps, respectively.
- 4G. It is actively used in major cities and regional centers. The LTE standard is widespread. Theoretical download speeds up to 1 gigabit per second.
By 2021, the widespread introduction of the 5G standard is planned, but the exact capabilities provided are not yet known. In the specifications of your Android phone you can find out which standard the smartphone supports. To connect to the Internet, you also need a package that provides the appropriate type of traffic (3G or 4G).
Small local wireless networks include Wi-Fi. This designation refers to the family of IEEE 802.11 standards, which provide data transmission “over the air” at frequencies of 2.4 or 5.0 gigahertz. It is widely used to organize local networks in homes, offices and enterprises.
- Issue: *
- Your Name: *
- Your Email: *
- Details: *
Why mobile internet on Android doesn't work
Even after following our instructions, you may encounter a situation where the Internet still does not turn on. Why data transfer is not enabled on Android is a complex question that is considered individually for each case.
The main reasons for problems with connecting to the global network through the services of a mobile operator include:
- exposure to malware;
- hardware failure;
- virus attack;
- incorrect settings of communication protocols;
- installation of custom firmware.
If, when deciding how to set up data transfer on Android, you are faced with a lack of connectivity, you will need to sequentially go through each of the above reasons.
In some cases, the solution to the problem may be to reset the smartphone to factory settings or install additional software that allows you to scan the utilities available on the gadget for negative effects.
Reset network settings
If none of the above options work, it may mean that some settings have been changed. This is likely network related, so resetting your network settings to factory settings may resolve the issue.
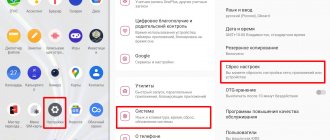
Just go to Settings app > System > Reset. Select Reset Network Settings and follow the instructions.
How to set parental controls on Android
The presence of tablets and smartphones in children is not uncommon these days. These are mainly devices running on the Android OS. These gadgets keep the child occupied, but parents should still think about the purposes for which he uses them.
To prevent your child from visiting inappropriate sites, install parental controls on your device. Find out how to do this from our article.
Built-in Android parental controls
The Android system and built-in Google applications are not rich in popular parental control functions. But still, some things can be configured without resorting to third-party programs.
Worth knowing: the location of the options is indicated for pure Android. On some tablets with their own launchers, the settings may be located in a different place and section, for example, in the “Advanced” section.
For the little ones - blocking in the application
The “App Lock” function makes it possible to run one program in full screen and prevent switching to any other software or Android “desktop”.
To enable these features, follow these steps:
- open Settings, go to Security, and then App Lock;
- run the option (after reading about its use);
- launch the desired program and press the “Browse” key (square), lightly pull the application up and click on the “Pins” image.
As a result, the use of Android will be limited to this application until you remove the blocking. To do this, click and hold the Back and Review button.
Parental controls in the Play Store
The Play Market allows you to set parental controls to restrict the installation and purchase of programs.
- click on the “Menu” button in the Play Store and go to settings;
- open the “Parental Control” tab, move the push button to the “On” position, and enter your PIN code;
- set restrictions on filtering games and applications, movies and music by age;
- To prevent paid purchases of programs without entering your Google account password, use the “Purchase Authentication” section in the Play Market settings.
Parental controls in YouTube
Thanks to certain settings, you can limit the viewing of YouTube videos for children. In the program itself, click on the menu button, go to “Settings”, go to the “General” section and activate the “Safe Mode” item.
Google Play contains programs from Google “YouTube for Children”; the restriction parameters are already set here and cannot be disabled.
Users
Android allows you to create a couple of user accounts. To do this, go to “Settings”, and then to “Users”.
In general (apart from restricted profiles, which are rare), it is not possible to set restrictions for a second user, but the function can still be useful:
- Program settings are saved separately for each user. You can choose not to set parental control settings for yourself, but simply set a password. In this case, the child will have access to the device only through the second user.
- All passwords, codes and payment data are stored separately for different users.
It is important to know! When using multiple accounts, installation and uninstallation of programs is reflected in all Android accounts
Limited user profiles on Android
The function of creating a limited profile has been around for quite some time, but for some reason it has not become popular and is only available on some tablets. This function is not available on smartphones.
You can find this option by going to “Settings”, then select “Users”, go to “Add user\profile” and “Restricted profile”. If profile creation immediately starts during setup, then your device does not have a profile restriction feature.
Third-party parental control apps on Android
Recently, the parental control function has become in demand, but Android’s own resources are not yet enough. For this purpose, there are many programs for parental control in the Play Market.
Screen Time Parental Controls
The application has a Russian interface and is popular among users.
The program's functions are available for free only for two weeks. After this period, only basic options remain available, which are limited to the history of browsing sites on the Internet.
Wireless connection
Connecting via Wi-Fi is the most common method, so it makes sense to start there.
- The first step is to make sure that the wireless modules are connected and working. By lowering the curtain on the tablet’s desktop, you need to see if “airplane mode” is turned on.
- If it is not activated, then you should click on the Wi-Fi icon. The device will open a window with a list of all available wireless networks.
- Next, you should select your network and enter a password. The device will check the data is correct and connect to the network.
Important! In the future, to reconnect, you just need to turn on Wi-Fi. You will not need to re-enter your password, as the device will save it automatically.
Connection via PC
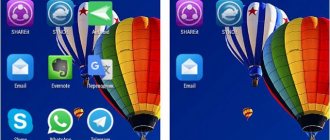
If it happens that you cannot connect your tablet to the Internet via your phone, for example, traffic is expensive, or there is no Internet on your smartphone at all, then you can connect your tablet to the Internet via your computer. There are two options – wired and wireless. In the second case, the PC must be equipped with a Wi-Fi module, in which case you will need the MyPublicWiFi utility. It is the simplest, you just need to install it and turn it on. Everything will work automatically.
The wired version is a little more complicated.
- First, you need to enable developer mode on your tablet. Go to: Settings - About phone - Build number. The last item must be clicked about 5-10 times. A message will appear indicating that the user has become a developer.
- We return to the point above and go to “Developer Mode”. Here you need to check the “Allow USB debugging” checkbox. Some devices have a “More” or “Advanced” option after “Mobile Data”. It may contain the “USB Internet” item. If there is one, then it should also be activated with a tick. This is only possible if the device is connected via a USB cable to the PC.
- The preparatory stage on the tablet is completed, now you need to move on to the PC. The item “Network Control Center...” is interesting here. Go to “Changes adapter parameters”. We find the network through which the computer transmits data to the Internet and open its properties. To connect to the wired Internet in this way, you must give permission to other equipment on the network to use the same Internet. To do this, open “Access” in the properties and activate “Allow other users...”. You also need to select “Local network connection 11” from the list (options in the name are possible). Confirm the settings changes with the OK button.
- If the tablet cannot connect or does not go online, then another change needs to be made. In the list of networks we find the created “local network 11” and open its properties. In the “Network” item we find “IP protocol version 4”, go to properties. We activate “Use the following address” and enter in the first line: 192.168.0.1, save. Now everything will work.
Access to the Internet - not only via WiFi!
I recently spoke with a friend (he is over 50 years old). We were sitting in a bar, and suddenly he wanted to know the score of his favorite football team in the Champions League. Surprisingly, there was no Wi-Fi access point in the establishment. I suggested looking at the necessary information online via the mobile Internet. To which my interlocutor reacted in surprise, saying, “What kind of game is this?”
I explained it to him, now I’ll tell you too. Since the smartphone uses a SIM card for calls, it also allows you to connect to the Internet through “data transfer” (provided that this is provided for by the current tariff plan of your operator). Just call the hotline number to clarify this information.
If you are provided with a certain amount of traffic for a month or may be charged for daily entry, then it is possible to activate the Internet anywhere, wherever you are. You don't need WiFi for this. You just need to use some device settings.
Useful content: