Technical progress does not stand still, new, more advanced devices with convenient functionality are constantly appearing, and regularly changing gadgets has become commonplace for many. But this raises the problem of transferring contacts from an old phone to a new one, and fortunately, there are many solutions. One of them is the ability to synchronize contacts from Android with a Google account - a very convenient feature that allows you to save a lot of time.
Why do you need contact synchronization?
You need to synchronize contacts with your Google account in the following cases:
- The user is going to change, sell or reset the smartphone to factory settings. To avoid losing important contacts, they are duplicated in your Google profile.
- The user needs to transfer contacts from one device to another in the fastest possible way. In this case, you just need to log in with your Google account and the contacts will be added to your phone automatically.
- Also, Google contacts synchronization allows you to open your contacts list on your computer at any time - contacts.google.com.
Other options for importing contacts
Other options for importing personal data to Android include Bluetooth. The method is suitable for those people who have their phone book on another mobile phone, but do not have access to the Internet.
On both devices you need to turn on the Bluetooth function and connect them with a password through “Find phone”. Then, on the mobile phone where the information is stored, select the desired book positions and transfer them by selecting the “Send contacts” menu.
On the second mobile phone you need to confirm the data transfer and wait until it is completed. Import the resulting file into the phone book.
How to set up Google contacts synchronization?
To set up synchronization of contacts on your phone, you need to go to the device settings and follow the following steps:
- Find and select the “Accounts”, “Accounts” or “Synchronization” section (the name depends on the software version and manufacturer).
- All user accounts will be displayed on the screen. Among them you need to select a Google account. If it is not there, you need to click on the “Google” button and add a profile by entering your username and password.
- Having selected an account, you need to find the “Contacts” item in the list of data for synchronization and drag the slider opposite it so that it becomes active.
Option 1: Normal synchronization
In order to synchronize contacts stored on your smartphone with Android, thereby making them available for viewing on other devices, you need to activate one of the options in the settings of the mobile operating system.
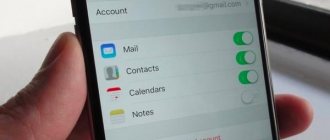
- Open "Settings" of the Android OS, scroll down a little and go to the "Accounts" section.
- Find the account whose contacts you want to sync and tap its name.
- Tap on the “Account Synchronization” item.
- Scroll down the list of available options a little and activate the switch located opposite “Contacts”.
- Wait for the procedure to complete. Alternatively, you can forcefully initiate it by calling up the menu and selecting the only item available in it.
As soon as the data synchronization is completed, the contacts saved in the selected Google account will become available on all devices where it is used. We will tell you how to check this in the last part of the article.
How to display synced contacts on a new device?
In order for synchronized contacts to appear on the new phone, you need to follow the instructions:
- Log in to the desired Google account.
- Go to “Contacts” (the native application on every smartphone).
- In the contact settings, you need to find the “Show contacts” or “Contact filter” item.
- Then select the desired account where the data is stored.
Option 3: Sync with another account
If you have multiple accounts on your Android device and want to save all new contact information to one of them, do the following:
- Repeat the steps from the first two steps of the previous instructions.
- Tap on the settings item “Account for new contacts”.
- In the pop-up window, select the account in which you want to store your address book entries in the future.
In order for new data to be saved correctly, check whether synchronization is enabled for the selected account, in particular, contacts, using the instructions from the first part of the article.
Using third party services
Amateur firmware on Chinese smartphones often suffer from problems with built-in services from Google or conflict with eastern counterparts. How to synchronize two Chinese phones on Android, without access to built-in functions? The most radical way is to reflash the operating system, but there are third-party synchronization programs.
We recommend: How to erase all data from an Android phone
Consider the Dropsync program, it allows you to send files from your phone memory to cloud storage, similar to “Disk” or “Photos”. Unlike the original, the analogue uses Dropbox cloud storage for saving. Before installing the Dropsync application from the Play Market, we recommend creating an account in Dropbox.
Important: to create permanent file synchronization, these steps must be repeated on the second smartphone. Are your contacts duplicated? Read how to fix this in the article: “Why are contacts duplicated on Android?”
Click on the blue “Connect to Dropbox” button for your account. The program will redirect to the login page in the browser or to the official service application. Enter your account information and connect the cloud.
Click on “Synchronization Wizard”. The program allows you to create a trial pairing, to understand the principle of operation, skip this section and move on to creation.
We indicate the directory in the cloud into which files from the phone will be uploaded. In the “Local folder” field, indicate the path from which files will be loaded into the storage. You can change the settings in the future.
We activate the “Two-way” pairing method and connect additional functions by checking them. Tap on “Save”. The program will begin scanning files in the specified folders and send them to the server, showing download statistics.
Synchronizing your mobile phone and computer: applications for Android, iOS and Windows Phone
I will offer the best utilities for synchronizing data between your home computer and smartphones/tablets based on iOS, Android or Windows Phone. We will also consider online services that conveniently keep information up to date on devices for all mobile operating systems. The ability to conveniently integrate a computer running Windows OS into the Google and Apple clouds, as well as secure synchronization of Android devices with a computer running Microsoft OS on a home network, will not go unnoticed.
| iOS | Android | Windows Phone |
| Synchronization with PC via the Internet | ||
| via iCloud - a free cloud service from Apple with the ability to connect an iPhone/iPad/iPod and save media files, contacts and events | via Google - every owner of an Android device has a GMail service account, which allows you to manage contacts, files and calendar. | via Outlook—Windows Phone device users with a Microsoft account can store contacts and calendars online at Outlook.com |
| using Outlook and eM Client | using Outlook, eM Client or Thunderbird | using Outlook, eM Client or Thunderbird |
| Synchronization with web services of other systems | ||
| Google and Outlook.com | iCloud and Outlook.com | Google and Outlook.com |
| Synchronization with a computer via your home network | ||
| using iTunes or BirdieSync | using BirdieSync and MyPhoneExplorer | using Akruto and CompanionLink |
| using Outlook | ||
| Synchronization via home server | ||
| Simple calendar server based on Synology Network Attached Storage (NAS) Synology has direct support for the open calendar protocol CalDAV. iOS and Android can work with it. | ||
| Baikal (baikal-server.com) or ownCloud (ownclowd.com) These server-side utilities synchronize both contacts and calendar, but do not work with the Windows Phone mobile OS. | ||
| Zarafa (zarata.com) or Tine 2.0 (tine20.com) These sophisticated Open Source programs use the Exchange Active Sync protocol and work with all 3 operating systems. | ||
| iOS | Android | Windows Phone |
Using proprietary utilities
To transfer all the necessary data, you can turn to proprietary utilities for help. For example:
- MyPhoneExplorer - this free utility allows you to exchange various information between devices for free. To transfer data, you can use a USB cable, WI-FI connection and even Bluetooth;
- CLONEit is the best application for transferring data without connecting to a personal computer;
- Autosync for Google Drive – using the presented application, you can transfer not only photos or documents, but also the settings of the device itself. Moreover, it is possible to configure certain time intervals at which files will be automatically saved in the service.
Disabling through settings
The cloud sharing feature is very useful, especially when working with multiple smartphones or changing mobile phones. Depending on the selected settings, the following will be loaded:
- Contacts;
- Messages;
- Calendar;
- Mail;
- Documentation;
- Many other company services.
Synchronization with other installed services and applications from third-party developers is available. It just depends on the number of products and the type of products. The action algorithm is no different from how to remove synchronization from account on Android .
Go to the system settings of the phone. This can be done using the gear icon in the notification shade or using the All Apps menu.
Click on the line “Accounts”. Shows apps that use the cloud pairing feature and Gmail addresses that are linked to the phone. In our case, there are 4 profiles attached to the smartphone at once, select the one you need. To completely disable the function, you will have to repeat the steps with each mail.
We recommend: Formatting a flash drive for Android
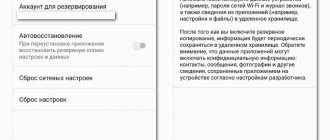
In the panel that opens, you can delete your account. Select “Account Synchronization”.
Set all sliders to inactive. For the changes to take effect, click on the icon with three dots and tap “Synchronize” in the context menu.
Important: for all data to be updated, the smartphone must be connected to the Internet. Don’t know how to distribute Wi-Fi from a smartphone to a laptop? Read the article: “How to distribute Wi-Fi from a phone to a laptop.”
Main advantages
One of the main advantages of this transfer method is that you can never lose this information. The technical protection system guarantees that information will not be available to third parties.
You can edit information both from a personal computer and via a smartphone or tablet. For each person on Google, you can select a photo and add other phone numbers to it.
For ease of searching, the service allows you to divide information into groups: by organization name, address, type of activity, and so on. You can also add:
- Email;
- Date of birth;
- Residence address;
- Personal website on the Internet.
As a result, you receive a unique notebook, where all the necessary information will be described in detail. If your mobile device stops functioning and the information on it is lost, you can restore it through Google.
In order to start synchronization, create a personal account, after which you will understand how to transfer data from your phone