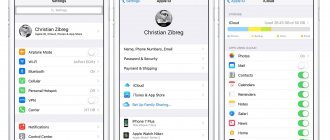
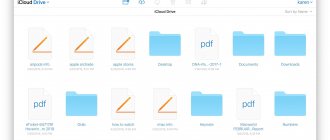
Each owner of Apple equipment, along with the purchase of a device, automatically receives 5 free gigabytes for storing files in a special iCloud application. This “cloud” is used as storage for backing up device settings, contacts, photos and videos, as well as various documents.
Backup occurs whenever the smartphone is within Wi-Fi range and is charging from the power supply. Of course, this helps a lot in cases where your smartphone has been lost, or you decide to switch to another device and want to save settings and data from your previous account. But some owners of Apple devices are not even aware of the existence of such a function, and the device’s memory is increasingly filling up without their knowledge.
After using iPhone, iPad, iPod and Mac devices for a long time, the space on this cloud space is pumped up, which makes it difficult to back up, send photos and videos to the Media Library, and also does not allow you to synchronize files with documents via iCloud Drive.
There comes a time when it’s time for the gadget owner to clean up iCloud. Today we will tell you how cleaning is done with minimal losses.
Understanding what is stored in iCloud on iPhone
To free up space in iCloud, you need to understand what exactly is stored in the cloud, and whether the device owner needs cloud documents. In this article, we are looking at the iPhone as an example, although similar recommendations are suitable for other Apple devices.
What exactly occupies the memory of iCloud:
- Backups take up a significant amount of space. They save the information selected for copying so that in the future the owner of the device has the opportunity to transfer it to other devices that support “cloud space”.
- Along with copies, a large amount of memory in the storage is occupied by the Media Library, namely photographs. Videos take up a little less memory.
- In addition to saving in the Media Library, photos and videos created on the device are saved a second time in compressed form as backup copies, which takes up twice the device’s memory.
- A separate storage space is used to store the cache of programs installed on the device. Obviously, games and applications also weigh a decent amount of gigabytes.
You can easily get rid of all of the above by taking cloud storage under your control.
You can learn more about the storage itself from the video on the HelloMacNet channel, which translates official tutorials for Apple equipment and other popular companies:
Temporary email for registration on sites and services
The development of the idea of aliases for mail was the appearance of temporary mailboxes, which are generated randomly, making it easier to create new accounts on different resources.
The option is available as part of the Authorization via Apple ID feature. The operating system itself will generate a temporary email address and indicate it during registration, hiding the real e-mail.
Who can use the feature: the option works for all users without additional subscriptions.
How to enable: no special activation or additional settings are required. If the site owner or service developer has provided the ability to register via Apple ID, this option will be automatically available.
You will need to select the Sign in with Apple option and agree to hide your email address. You can manage the created temporary addresses on your iPhone in the Settings – Apple ID account – iCloud – Hide email.
Here you can view the created aliases, delete unnecessary ones and select one of your mailboxes to forward mail to it.
Manage iCloud on iPhone for cleaning
Not every iPhone owner knows where iCloud is located on his smartphone. To clear your iCloud storage of unnecessary data, you need to learn the basic functions of this application and understand how it works.
The first thing you should do is open your smartphone’s settings and find a section dedicated to storage, it’s called “ iCloud”.
Here you can not only see the level of storage fullness, but also analyze which programs and documents take up the most memory, as well as what backups have already been created for.
In the settings, you can independently clean the “cloud” of unnecessary data, and now we will figure out what exactly should be deleted from the device.
Method 1. Reducing the Media Library
It is the Media Library files that take up the most space, or rather the originals and backup copies of photos and videos. Even copies of the processing of your photos using the standard Photo program are included in the storage.
If you really need this data, then you can not delete it, but just compress it using the “Storage Optimization” function (see figure):
You can delete unnecessary photos and videos directly from the Photos app. To do this you need:
- open the Photos application;
- press the “Select” button;
- mark the files you are interested in;
- click the “Delete” button.
To completely clear the program's memory of these documents, you will have to spend a little time. The fact is that the iPhone does not have a special button that allows you to erase all data entirely, which forces the smartphone owner to delete each picture and video separately.
Remember that every file you delete is sent to a special “Recently Deleted” folder for the next 30 days. To completely clean your smartphone of “garbage”, you need to go there, select all the files you need to delete and confirm permanent deletion.
This is an analogue of the recycle bin, which will allow you to save accidentally deleted media files. Or restore photos and videos that you changed your mind about erasing.
Method 2. Delete data from unused applications
Most iPhone owners have apps in their memory that they hardly use. If such programs are still necessary, but contain an unnecessary outdated cache, you can free up your smartphone by deleting only this cache.
It is worth noting that in this way you delete information permanently, so it is important to think through your actions in advance.
To begin cleaning, follow these steps:
- find the “Manage” item in iCloud settings;
- in the iCloud storage management, find the application you are interested in;
- click on the “Change” button at the top of the panel;
- Each individual application file will have a minus sign. To clear the excess, you need to click on this minus;
- If you no longer need the entire application, select the “Remove All” button.
The method allows you to free up enough space selectively without deleting really important data.
Method 3. Clean unnecessary documents
If you got rid of everything unnecessary, but the need to clear your iCloud of unnecessary files remains, you should pay attention to the “Documents and Data” or “Other Documents” section (depending on the iPhone version).
To do the cleaning you need to:
- go to the already familiar storage management
- find the “Other Documents” section. Various information from system programs, as well as extraneous or outdated files, accumulate there. You may have already forgotten about many of them, so you can easily clean them;
- You can delete data by clicking on the “Change” and “Delete all” buttons.
The topmost files in the list are the largest and heaviest files.
Method 4. Disable iCloud Drive
In addition to the main iCloud application, iPhone and other Apple devices have a separate iCloud Drive function, which is a separate storage for data from applications that work with files.
This means that even a correspondence in the WhatsApp messenger or a video downloaded in the browser can be saved in this “cloud”.
This kind of function really takes up a lot of space in the device’s memory, so it’s better to clear out the excess or even disable this function altogether.
To do this you need:
- go to iCloud settings;
- find the iCloud Drive function there;
- disable individual applications or deactivate the service completely using the green slider.
For fine-tuning, we recommend choosing which specific applications are allowed to send their data to iCloud Drive storage, and which will be blocked.
Method 5: Remove Media Library files from backup
The media library stores backup copies of photos and videos, and very often they are completely unnecessary. iCloud provides the ability to get rid of unnecessary photo streams by turning off copying Media Library files from iPhone to the cloud.
Remember that if you delete the information, it will not be possible to restore it if you lose your gadget or it breaks down. So it’s worth periodically transferring photos and videos from your device to your PC.
Cleaning instructions:
- go to the cloud storage settings, namely the “Management” item;
- “iCloud Storage” will open, here select “Photos”;
- select “Disconnect and delete” and confirm your choice;
- all photos and videos will be deleted from iCloud.
We were able to clear the online storage of existing copies of the Media Library and stop further copying of photos and videos to iCloud.
Mail aliases
Apple's cloud service allows you to create up to three “virtual” email addresses that will redirect all emails to your main iCloud mailbox. This is convenient, for example, for registering on suspicious sites, when creating fake accounts, or for short-lived accounts.
Having a separate nickname makes it convenient to filter and track spam or useless mailings. Of course, the invented e-mail address must be free.
Who can use the feature: all Apple ID account holders. The pseudonym works without paid subscriptions and additional investments.
How to enable: go to the web version of the iСloud service and open the Mail section. Click the gear to open settings and go to the Accounts section.
Here you can create new aliases and manage existing ones. For each virtual address, you can specify a username and a special label for convenient mail filtering.
Increasing iCloud storage
For those who do not want to suffer from constant cleaning or do not have the opportunity to free backup copies from existing data, there is an option to increase the storage size.
It’s worth warning right away that you will have to pay extra for such services. To do this you need:
- open iCloud management;
- find there the function “Buy more space” or “Change storage plan”;
- in the window that opens, you can select the tariff that suits you most.
Current Tariffs:
- 50 GB – 59 rubles;
- 200 GB – 149 rubles;
- 2 TB – 599 rubles.
You will have to pay for additional gigabytes monthly, and the required amount will be debited from your account automatically.
Remember, your card, which is linked to the AppStore, must have the amount to pay for Cloud at the selected rate.
Disposable mailboxes
This is an expanded feature of the previous feature for owners of a paid Apple subscription. It allows you to create a new temporary address at any time with the ability to forward mail from it to your main iCloud mailbox. This is done without reference to registration in any service.
You will be able to use the new address for registration even on those sites that have not added the ability to log in via Apple ID.
Who can use the feature: the option works if you have an iCloud+ or Apple One subscription.
How to enable: after you sign up for a paid subscription on your iPhone, go to Settings – Apple ID Account – iCloud – Hide email, the Create a new address section appears. With its help, you can create a new e-mail for your purposes in a couple of taps.
Let's sum it up
There are many different ways to quickly and efficiently clean the iCloud of your Apple device from unnecessary data, without deleting really important information. The main ways are:
- reducing your Media Library by deleting unnecessary photos and videos;
- deleting programs or their files with information that is no longer relevant;
- cleaning the storage from outdated documents;
- disabling and cleaning iCloud Drive;
- clearing backups of unnecessary documents and disabling copying for individual applications.
Each method frees up a significant amount of iCloud memory. Also, cloud storage can be increased in volume by paying extra for additional gigabytes, if necessary. We hope that our article was useful and understandable for you.
Private node
At WWDC 2021, the Cupertino team presented an update to the iCloud cloud service. One of the new additional features is an analogue of the VPN service built into iOS and macOS. It allows, with the help of special content providers, to mask the user’s IP address and provide him with access to some of the sites blocked in his region.
At the same time, everything works at the operating system level and practically does not reduce the speed of the Internet connection. The option can display the approximate location of the user so as not to interfere with the operation of delivery services, taxis and similar services, and can completely encrypt the location of the device.
Who can use the feature: all subscribers of the iCloud+ service or holders of an active Apple One subscription. However, access to the chip is blocked in a number of countries due to local legislation restrictions.
It is not possible to use the VPN analogue built into the system in Russia, Belarus, Kazakhstan and a number of other countries.
How to enable: after activating any paid subscription (iCloud+ or Apple One) on your iPhone, go to Settings – Apple ID Account – iCloud – Private Site and enable the feature (if you are in a country where the service officially operates).
General access
But that's not all. Wondering how to view photos in iCloud from iPhone 6 S and more? You can activate the so-called “Sharing”. In this case, the person will have access to his photos and will also have the right to view images of other devices.
To activate the parameter, you need to open iCloud and set the switch for the “Sharing” item in “Photos” to the “On” position. Next you will be prompted to create shared albums. By placing pictures in them, a person will actually share the images with others.
Device backup
Users can back up their device using iTunes or iMazing after making sure encryption is turned on. Backup features are free on iMazing, and encryption is fully supported on Windows. iMazing can add a backup password in Windows Credential Manager to prevent the user from accidentally losing the password. To try iMazing, first download and install it, then perform the following operations:
A clear example in 2 minutes
The popular channel about world news Apple ProTech clearly shows several of the methods described above for cleaning storage using its example:
Sources
- https://tehnotech.com/kak-ochistit-icloud-hranilishhe-na-ajfone/
- https://virtualniy-mir.ru/kak-osvobodit-icloud-xranilishhe/
- https://yablyk.com/782362-kak-osvobodit-icloud-ili-kak-ochistit-mesto-v-oblake-apple-na-iphone-ili-ipad/
- https://lumpics.ru/how-to-clear-icloud-on-iphone/
- https://www.orgtech.info/xranilishhe-icloud-zapolneno/
- https://MyApples.ru/icloud/ochistit-hranilishhe
- https://inmob.ru/gadzhetologiya/apple/servisy-apple/kak-pravilno-ochistit-icloud-upravlenie-hranilishhem
Using third party tools
The last way to free up some space without having to edit your sync settings is to use third-party tools that are downloadable for your PC and tell you where and what to delete. The best example of this is the PhoneClean service. The advantages are that it works in several modes (paid and free), helps in finding system vulnerabilities, and solves problems with optimization and garbage accumulated on the internal memory. It also automatically searches for duplicate photos and compresses browser data. As a result, in a few minutes, more space has been added on the smartphone, which means that in a few hours iCloud will be rebuilt (during synchronization) to accommodate the changes that have appeared.
Clearing the application cache
Without knowing it, we clog up the iPhone's memory by simply using games or instant messengers. Cache, being temporary files, can linger longer than its allotted time. We recommend that you go to “Settings” at least once a month and check how much a particular application weighs or clear the cache in the program itself (for example, in Telegram or WhatsApp this section is located in “Data and storage”, then “Clear cache”).
The fastest way to do this is by going to “General”, then clicking on “Reset” and selecting “Erase content and settings”.
“Photo” sections
How to view photos from iPhone in iCloud? Now this is not such a problem. You just need to follow the guides above. Then there will be no difficulties with the process of bringing the idea to life.
In the “Photo” section, a person can see 3 sections. They, as already mentioned, help you switch between different shots. Here are their purposes:
- “Photos” is a section that displays all the pictures copied to iCloud;
- “Public” - images that are accessible to all users;
- “Albums” is a folder in which all existing pictures are sorted into albums.
To switch to one or another section, you just need to tap on the corresponding inscription at the bottom of the “Photo” window.
File synchronization
There are dozens of large cloud storage services that are used to sync files across devices. A user might have photos on Google Drive, documents on Dropbox, and music on OneDrive. If he prefers to save all the contents of the cloud synchronized content in one place, then he needs to learn how to make “iCloud” in “iPhone”, and then easily move everything to iCloud.
You may be interested in: Application designer for Android: review of the best applications, features, operating instructions
Starting with macOS Sierra, you can store all your desktop documents in iCloud and access them from any device. This saves space on your device, making it easier to retrieve important files on any other iCloud-enabled device. iOS 11 and macOS High Sierra let you share and collaborate on documents in real time directly from the iCloud Drive app and files.
Watching from a smartphone
How to view photos in iCloud from iPhone 7? Just like from any other Apple device. This is a fairly simple operation. It’s just not recommended to use it before directly setting up the Apple cloud service.
Let's assume that setting up iCloud is over. Now what? You can take photos and save images. How can I watch them?
The instructions for achieving the desired goal are as follows:
- Turn on your iPhone or other Apple device.
- On the main screen, click on the icon that says “Photo”.
- Wait.
A few seconds and the job is done. After the described steps, the main photo menu will open on your smartphone. There are 3 buttons at the bottom of the screen. They help you switch between images.


