Apple smartphones are characterized by high reliability and performance, which is why they continue to remain popular even at a relatively high price. And the availability of iPhones of different generations, including on the secondary market, further increases the number of their owners. At the same time, not every user knows how to transfer contacts from Android to iPhone and not lose a single important number when changing phones.
Do you agree?
Carrying out such a transfer is not difficult - moreover, there are different ways to ensure that almost all the information from the old mobile gadget ends up on the iPhone. Some of them require downloading and launching special applications, others allow data movement using the smartphone settings.
How to Transfer Contacts to iPhone Using Gmail Account
Anyone who has used a smartphone based on the Android operating system for a long time knows very well how tightly Google services are integrated into the OS. For example, on Android, every person is required to register a Google account. It can be configured to synchronize a variety of parameters, including contacts:
- Open the settings of your Android smartphone.
- Go to the Google section.
- Select the account you are interested in.
- In the synchronization settings o.
- Save your changes.
Now the numbers from your phone book will follow you no matter what device you are using. Contacts will be displayed even on your computer if you are authorized in one of Google services.
But let's return to the iPhone. Apple devices do not require mandatory synchronization with Google. Therefore, many users simply forget that contacts have already been saved. In addition, on the Apple iPhone you need to make a few simple settings, otherwise the phone book entries will not appear:
- Open iPhone settings.
- Go to the "Mail, Addresses, Calendars" section.
- Click "Add Account".
- Select "Google".
- Log in using your existing Google account.
At this point, the contact transfer process can be considered complete. By enabling synchronization, the user will receive on his iPhone all the numbers previously recorded in the phone book. There is no need to rewrite anything manually, so this method is considered first.
Remember that if synchronization was not enabled on Android, and is not currently activated on Apple iPhone, contacts will not be transferred.
Through synchronization with Google account
This method, in our opinion, is the most convenient. It is based on creating a backup copy of the phone book in Google cloud storage.
To transfer contacts from Android to iPhone via Google, you need to make sure that synchronization is enabled on Android, and then add your Google account to iPhone:
- On Android, a Google account is required (without it, you would not be able to properly use the device’s smart services). Go to “Settings” - “Synchronization” (Accounts) - “Google”;
- Make sure that there is a checkmark in the “Contacts” line (the switch is in the “On” position);
- You can turn the item on or off to update the data;
- Now it’s the iPhone’s turn - go to “Settings”;
- You need the "Account" section;
- Click on the “Add account” command;
- Select Google, enter your login password, click “Add”;
- Now go inside (you may have to go back to “Settings” - “Account” - “Gmail”, depending on the iPhone model);
- Find Contacts and turn on the switch. After this, the numbers will be synchronized and automatically uploaded to the iPhone phone book.
- Done, you managed to transfer data from Android to a new smartphone based on IOS.
The good thing about this method is that you can access your contacts from any device that opens a Google account. That is, from a computer, laptop, tablet, smartphone, both from your own and from someone else’s.
How to Transfer Contacts from Android to iOS Using the Move to iOS App
A good way, which involves using the Move to iOS function, which is integrated into every iPhone. The option is a simplified option for data transfer. When moving from Android to iPhone, not only multimedia files are transferred, but also contacts. The user is only required to carefully follow each step in the instructions:
- Install the Move to iOS app on Android, available on Google Play.
- Turn on your new iPhone.
- Complete the initial setup.
- Select "Transfer data from Android".
- Remember the code that appears on the screen.
- Open Move to iOS on your old smartphone.
- Click "Continue" and accept the terms of the user agreement.
- On the “Find the code” page, click the “Next” button and enter the numbers that were previously displayed on the iPhone screen.
- Specify the type of information required for transfer, and then click “Next.”
- Wait for the process to complete.
If your iPhone has already been activated, you will have to perform a factory reset and reactivate it. But it's better to just use another method.
Information transfer will be carried out via Wi-Fi. Therefore, both phones must connect to the Internet in advance. You should also understand that the process will take some time, the duration of which depends on the amount of data and connection speed.
Transfer via SIM card
Praise be to the developers who prohibited transferring contacts from iPhone to SIM card, but allowed the reverse action. Thus, if you are looking for how to quickly transfer phone numbers from Android to iPhone, export them to a SIM card, transfer it to the Apple gadget and import it to the device.
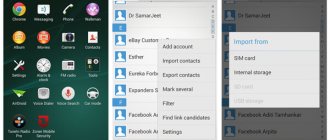
- On Android, go to the “Contacts” section (via the main menu);
- Click on the three vertical dots in the corner of the screen (possibly three bars, depending on the phone model);
- In the context menu, select Import and Export;
- Click on the “Export to SIM card” command;
- Select the numbers you want to transfer and confirm the action;
- Transfer plastic from Android to iPhone;
- Go to “Settings” - “Contacts”;
- At the bottom of the section, find the command “Import files from Sim”;
- Ready.
The method is certainly fast, but not the best. Firstly, you cannot transfer more than 255 numbers to a SIM card. Secondly, you can write very little information there, besides the number. Sometimes even surnames and first names are exchanged in abbreviated form. Thirdly, you will lose additional data - date of birth, notes, other contacts in a separate entry.
Transferring contacts using a SIM card
This is perhaps the simplest option you can think of. It's no secret that to access communication services, the owner of a smartphone must have a SIM card. This plastic component not only allows you to make calls, send messages and use the Internet, but also allows you to save numbers.
Therefore, a person who has saved numbers in the SIM card memory does not have to worry about transferring contacts. All of them will be displayed on iPhone and any other mobile device. But if the contact data was saved to the internal memory of Android, you must first place it on the SIM card:
- Open the Contacts app.
- Click the button that looks like three dots.
- Select "Export to SIM card".
- Please indicate the numbers you are interested in.
- Confirm the operation.
Please note that depending on the version of the Android operating system and the phone brand, the names of menu items may differ. If you manage to transfer, all contacts will appear on the iPhone.
Sync Google Contacts with iPhone
In order to transfer numbers from an Android phone to any other device, you must have a Google account on it.
Remember your password?
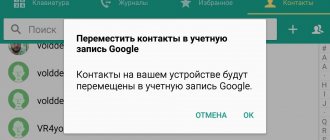
It's time to go to the gadget settings on the Android platform, select the accounts section and the desired profile, and then enable contact synchronization.
After a few seconds or minutes (depending on the amount of information being copied), the data will be associated with the selected account.
The next step is setting up a Google profile on your iPhone.
To do this, go to the settings of your Apple smartphone, select passwords, addresses and calendars and add a new account using the appropriate command.
The following user actions may vary depending on user requirements:
- You can add a Google profile, and only then choose what data will be transferred and synchronized with the iPhone - notes, contacts, calendar or mail. Without this selection, all information is transferred by default.
- To transfer only numbers, select “Other” and go to the CardDAV account. It is filled out using the following information - google.com is selected as the server, the login and password are taken from the Google profile. After saving the recording, the data will be synchronized.
When two-factor authentication via SMS is enabled, the user will have to create an application password. This code will need to be entered each time you log into your profile from your iPhone.
Export to a file with telephone records
An alternative option that is perfect for those who were unable to achieve their plans using one of the previously discussed methods. Android functionality allows you to export contacts to a separate file in VCF (VCard) format. In the future, you can easily send it to your iPhone.
The complete instructions are as follows:
- Open Contacts.
- Select "Export contacts".
- Instead of SIM card, specify internal storage or SD card.
- Confirm the operation.
- Send VCard in any convenient way. For example, via email.
- Open the received file on your iPhone and confirm saving the new contacts.
If everything is done correctly, the numbers will be displayed in the internal memory of the iPhone and will also be available for making calls and sending SMS.
Copy without synchronization
Did you know...
You can transfer information without synchronizing phones with different operating systems or using a Google account. To do this you will have to perform the following steps:
- Go to the Contacts app on your Android device.
- Open the menu and select first import/export, and then transfer information to the drive.
- Wait while the .vcf file, which contains contacts from the mobile device, is saved on the phone.
- Transfer the received file to your iPhone by choosing the appropriate method.
Data can be sent by mail to an iCloud email address by attaching a vcf file to the message. To import contacts, just open the letter on your iPhone and run the file.
Further more…
Another way is to transfer the information to your computer and move it to iTunes, which is synchronized with your Apple phone. Owners of a Mac or MacBook can drag the vcf file into the Contacts application - when iCloud synchronization is turned on, they will automatically appear on the iPhone.
The cloud helps you move information using any computer – not necessarily with macOS or OS X. To transfer, you need to enable synchronization with iCloud on your iPhone, and then go to iCloud.com from your computer. Here you select the contacts item, import vCard and specify the path to the vcf file.
To move, in addition, other data from the Android operating system to the iPhone, you can use special programs for computers. Suitable software can be found for Windows PCs and Macs.
The most popular programs for solving such problems are Wondershare Mobile Transfer and CopyTrans.
They are characterized by high speed and the ability to copy almost any information. A serious disadvantage of Wondershare is the limitations of the free version - to increase functionality you will have to pay for a subscription.
How to transfer contacts from Android to iPhone via Bluetooth or Wi-Fi
Both smartphones based on the Android operating system and the Apple iPhone have Bluetooth and Wi-Fi wireless sensors. All this can help in the process of transferring contacts from one device to another.
The operation is performed similarly to the previous method. That is, first the user needs to create a VCF file where all the numbers will be placed. Then he can choose any option. It doesn't have to be email. You can easily send contacts both via Bluetooth and Wi-Fi.
Similarly, it becomes possible to transfer VCards using social networks and instant messengers. It doesn’t matter whether a person uses WhatsApp, Telegram, VK or FaceBook. Any of the platforms given as an example assumes the presence of a data transfer function, which will be useful in a situation with the transfer of contacts.
Using special applications
Many users have the problem of transferring contacts from Android to iPhone. Mobile software developers have been concerned with this for a long time, so now they can offer a lot of ways to transfer numbers from one phone to another using special applications.
Among the most popular transfer programs, the following should be highlighted:
- Immediate contact transfer (CyberValue LLC);
- Easy Backup;
- MCBackup.
There are also a bunch of other similar programs in the app stores. They all work the same way, so let’s look at the algorithm using the example of software from the CyberValue LLC studio.
- Download and install the application on both phones.
- Launch the program on your old device.
- Select the option to transfer contacts.
- Mark the numbers you are interested in and then move on to the next step.
- Please indicate the transfer method. “Via the application” if the program is installed on an iPhone or “By email” if the application is only available on Android.
- If you choose the first option, you need to remember the numbers that appear on the screen.
- Launch the application on iPhone, select the “Receive contacts” option and enter the code that was shown on Android.
- Wait until copying finishes.
Typically, the operation takes just a few seconds. All contacts will be automatically saved in the iPhone's memory. Of course, only if the person downloaded the application on both devices.
How to transfer via iTunes from computer
At the very beginning of the article, we told you how to transfer contacts from Android to iPhone 5, 6 s via Gmail, and emphasized that you will have to add a Google account to the Apple gadget. If for some reason you do not want to see Google services in your new device, you can use the iTunes program.
iTunes used to allow you to import phone numbers from Windows, Google or Outlook, but today this option is not available. To transfer contacts from Android to iPhone via iTunes today, you will have to install a supporting application with access to the file system in your Apple gadget. We recommend the Good Reader utility, iZip Pro, Parallels Access. By the way, you don’t even need a smartphone with Android, but a computer will come in handy!
- Log in to your Google account via Android;
- In settings, synchronize contacts with your account;
- Connect your iPhone using a cable to your computer and go to iTunes;
- Find the mobile phone icon (at the top, closer to the center);
- After going inside the section, look for the “Synchronize” - “Synchronize with Google” block in the left column;
- Now activate Google contact synchronization on your iPhone;
- Check your contact list;
- Ready.
The names of the commands may vary depending on which application you choose, but the principle of operation is the same. In our opinion, this method is too complicated. You need to synchronize with Google, connect your computer, and download additional software to your iPhone. Why take so many steps if there are other, easier options?
As you can see, to transfer contacts from Android to iPhone via a computer, you will need more time. The fastest option, in our opinion, is Google synchronization. If desired, you can then delete the account from the iPhone. Of course, it’s up to you to decide, but our task is to familiarize you with all the current methods. We hope we managed it and were useful to you!
Transfer contacts to iPhone via iTunes
A person who bought an iPhone probably knows that in the near future it will be closely connected with the iTunes program, which is installed on the computer. It is through this that the Apple iPhone is synchronized with a PC. You can also use iTunes to transfer contacts.
The method will work if the person has previously synchronized the numbers with a Google account. In the future, you just need to make just a couple of clicks so that the contacts are in the iPhone’s memory:
- Connect your iPhone to your PC using the included cable.
- Open iTunes.
- Go to the "Details" section.
- Check the “Sync contacts with” checkbox, and then select “Windows Contacts” as the source.
- Click the "Apply" button.
Now all contacts will be on the new Apple iPhone. There is no need to take any additional actions, but remember that the numbers must be transferred to the computer in advance. Synchronization with Google services is also allowed. All this will help iTunes determine the location of the contacts file in order to correctly transfer the information.
0 0 Votes
Article rating
