Having looked at the articles that are displayed in the search engine for this request, I was simply shocked. A seemingly ordinary procedure, without any complications, is written in such a complicated way and with a bunch of inaccuracies and nonsense. In one of the articles I came across this recommendation: “You should definitely turn off Wi-Fi on your laptop.” Question: “Why is this necessary?”
In general, all the articles that I have seen or were written by amateurs who do not understand anything about routers. Or carbon copies copied with errors and with screenshots of old models that have long been no longer on sale. That is why I decided to write more detailed and normal instructions on how to properly reflash your router and change the software on it.
I’ll say right away that most systems have the ability to update firmware offline. That is, the router itself searches the Internet for an update on the official server, downloads it and installs it. To do this, you just need to go to the administrator panel of the transmitter and click on the appropriate button.
But sometimes the search fails or an error occurs. In more rare cases, the system itself cannot find the update. How to flash in this case? Then you can do it manually. Download the file from the site and install the new system. I will write about this in more detail in the article.
Why do you need to update the system?
Router firmware often improves system performance and makes it faster. This will also help against constant freezes and failures in the Wi-Fi network. For example, it constantly crashes or falls off, and you have to reload it.
For example, during an update, my system added support for a mobile application. Now I can access the router from anywhere in the world thanks to cloud technology, which did not exist before.
On some models, the Internet starts to work a little faster, without packet loss and a decrease in response. And now I will tell you how to update the firmware of the Internet center manually.
Restoring previous operating parameters
After successfully updating the router, you need to restore the previously existing settings. The file that was created earlier is just useful for this.
You need to go to the “Backup and restore” section and simply load the file with the previous settings by clicking the “Restore” button.
Thus, the procedure for flashing the router is quite simple and does not require a lot of time, however, it must be done with a certain amount of care, since incorrect actions can lead to damage to the device. After correct flashing of the router, the device will work stably, quickly and without any failures, providing the signal quality declared by the manufacturer.
Connecting and logging into the Web interface
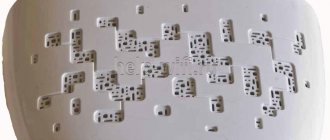
Our task is to connect to the router’s network. This can be done via cable by connecting to the LAN port of the device. The same goes over the air by connecting to WiFi. After this, you need to enter the router address. If you haven’t changed it, then the standard IP or DNS is located on a piece of paper under the router body.
I have a DNS address specified, but very often they also write IP using addresses such as 192.168.1.1 or 192.168.0.1. The login and password for the “Administrator” may also be indicated there. The addresses must be entered into any browser. But this only needs to be done in the address bar at the very top.
Preparing the device
In order to update the router, you need to disconnect the provider's network cable, and also disable Wi-Fi on all devices that are connected to it. These measures will protect the device from possible interference and interference from outside.
Thus, the device must be connected only to the electrical network and the computer from which the router firmware will be updated.
IMPORTANT! Since the device is turned on and off several times during flashing, it cannot constantly support one Wi-Fi network. That is why firmware is installed only via a network cable and cannot be done via a Wi-Fi network.
TP-Link
First, we need to find out our hardware version, that is, what version the router was released under. To do this, turn it upside down and look at the label. You need to look at the number after the letter “V”.
Now go to the page – https://www.tp-link.com/ru/support/download/.
Select: “For home” – “ Routers” – “ Wi- Fi routers” . Now you can enter the router model, but it’s easier to select it from the list below.
Select the hardware version and click on the “Firmware” button.
Click on the download button. Download the file to your desktop and unzip it. On new firmware, go to: “Advanced settings” - “System tools” - “Firmware update” . After that, click “Browse” and select the firmware file that was inside the archive.
For older models, go to “System tools” – “Firmware update” – “Select file” . At the very end, click “Update”.
Why flash a router at all?
Over time, firmware is improved, optimized, and individual modules are updated. A newer firmware version may add new features that were previously available in hardware, but not implemented in software, and the stability of the router may improve. Sometimes it happens that with the firmware that comes with the router from the factory, the device simply refuses to work normally - a striking example is the D-Link DIR-615 K1 and D-Link DIR-615 K2. Moreover, the normal firmware version for D-Link DIR-615 K2 was only released as the 14th version.
D-Link
- Let's look at the version of the device. To do this, look under the router and look at the piece of paper. We are interested in what comes after “ H/ W Ver.:” or simply “ H/ W”.
- We go to the website – https://www.dlink.ru/ru/products/5/. We choose our router. Go to the “Downloads” tab.
- Download our software version.
On classic firmware, go to: “System” - “Software Update” , click “Browse”, select the file and click “Update ”. You can also click on the "Check for Updates" button below.
On new devices, select “Advanced settings” at the bottom, click once on the arrow and select “Software update”. Next, “Review” and “Update”.
Where to begin
The process of installing updates is almost identical on all routers, regardless of the manufacturer's brand. Therefore, we will consider the general course of action, but first of all, pay attention to the following nuances that need to be taken into account before flashing the device:
- Be sure to connect it to your computer via a network cable—it is not possible to change the software via a wireless connection.
- Disconnect the provider cable from the device during installation, turn off Wi-Fi on the computer.
- The router remains turned on all the time until the flashing is completed, otherwise it may fail.
Now let's move on to the update process itself, which occurs as follows:
- Go to the official website of the router manufacturer.
- Find the latest firmware for your model - you will see its number on the back of the equipment. Under no circumstances download programs from unfamiliar sites; be careful when choosing the installation file - if you install the wrong update, the router may stop working.
- Download the required archive with the firmware and unpack it on your computer.
- Go to the router settings - to do this, enter your IP address in the address bar.
- If you have a TP-Link brand device, then select the “System Tools” section, “Firmware Upgrade” tab. For D-Link models, use the Maintenance menu, then go to “Firmware Update”. On ASUS equipment, select the “Firmware Update” section.
- Having selected the required menu item, click on the file selection in the download line and add here the firmware that you previously downloaded to your PC. After starting the update process, the router will install the new firmware and reboot to start operating in the new mode.
IMPORTANT. When performing an update, all settings are deleted and the normal factory data for it to work is reinstalled instead.
ASUS
- We go to the website – https://www.asus.com/ru/Networking/Wireless-Routers-Products/.
- Choose your router.
- Go to the first tab and select the “ BIOS and software” section. Next, download the latest version.
- In the “Admin Panel” select “Administration” , then go to the “Firmware Update” tab. After that, select and download the file. You can also update the software without downloading by clicking on the button above.
Where can I find the firmware for the router?
As a rule, firmware for routers is freely available on the manufacturer’s official website or FTP server. Firmware for D-Link routers - link. Official firmware for ASUS routers - link. Unofficial firmware for ASUS routers - link. Firmware for Zyxel routers - link. Firmware for TP-Link routers - link. Firmware for NetGear routers - link. Firmware for Linksys routers - link. Firmware for Sagemcom routers - link.
ZyXEL Keenetic
Some have a hardware version and some don't. You need to know it so as not to download the wrong firmware, which can break your Internet center. So let's look under the body.
We are interested in the inscription " Rev." – remember the meaning after this word. Now go to the SITE. Select your Wi-Fi device. Now select the software for your version. If there is no such letter at all, then download any version - but best of all, the latest one.
In the router, select the “System” section at the very bottom. Then “Files” and click on “ firmware”. Next, select the firmware file with a similar name that was downloaded earlier and load it onto the device. This method helps when you see an update error on the main page, but the transmitter refuses to update the firmware automatically.
What does it mean to flash a router?
Each router (from the English router - router) is an independent device with its own operating system, similar to the one installed on your computer, only “tailored” for networks. In simple terms, an operating system is one large program consisting of many small programs - modules. Why is it called firmware? The thing is that the router software - firmware - is, as it were, hardwired into the device’s permanent memory. Accordingly, the procedure for installing a new firmware in the router ROM is called flashing , and the firmware itself is called firmware .
Advanced Tomato
Advanced Tomato is also an improved version of the original Tomato firmware with an improved user interface. It has a new network monitor, more advanced QOS and access restrictions.
As well as new features such as WDS, client mode, more maximum P2P connections, the ability to run custom scripts and Telnet/SSH connections. It is possible to reprogram the SES/AOSS button and much more.
AdvancedTomato uses a double version format that looks like this: 2.5-124. This means the GUI version is 2.5 and the Tomato by Shibby version is 124. The firmware is based on many open source projects that are released under the GPL license. Therefore, its source code can be found on Github.


