How to connect the router correctly
- First you need to choose a convenient location for the router. A provider cable must be connected to the device, so the location of the device mainly depends on the length of the wire. It is best to install the router next to a desktop computer. Because many PCs do not have a connection to the Wi-Fi network and you will have to lay another cable from the router.
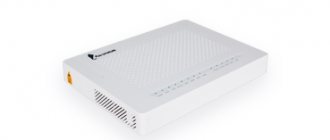
- Then you need to prepare the device itself. Pay attention to the appearance of the router.
- Antennas need to be straightened. However, this part of the device is not always part of the body; in some models these components must be screwed.
- After this, you should connect the power supply to the device and check its functionality. The device operation indicator on the router should light up.
- Then you should directly connect to the Internet to set up the Wi-Fi signal. First, you need to connect the Internet cable - this is the wire that the technicians installed when connecting the Internet. It must be inserted into the router. To do this, you need to find a port on the device signed “WAN”. It is into this window that the cable must be inserted.
- Another panel on the router will light up, which is responsible for connecting to the network. From this point on, the connection to the router is complete.
However, before using it, you need to configure the signal the device receives. To do this, you need to connect your computer or laptop to the Internet. The name of the Wi-Fi network will correspond to the name of the router model. If the PC does not have the ability to connect to a wireless network, then it must be connected to the router using an additional cable. This wire comes with each router. It must be connected to any free port of the device and a personal computer. After connecting to the Internet, you can begin directly configuring the Rostelecom router.
The settings are wrong or the password is lost: what to do?
Now we’ll find out what to do if the settings of the Rostelecom router are lost, how to configure and restore them. The easiest way in this situation is to reset the data and configure again, including changing the password on the Wi-Fi router.
Here are the simplest instructions on how to reset the Rostelecom WiFi router settings to factory settings (although there are others, you can learn about them in our separate article):
- Find the WPS/RESET button on the device.
- Press and hold it.
- Hold for about 10 seconds.
- Wait for the indicator signal - it will blink.
After this, you should connect and configure the device again. And if necessary, you can always call the operator on the hotline.
Reset before setup
Before setting up a Wi-Fi router, you need to reset the settings. This process is necessary both for a new Internet distribution device and for a purchased router.
Resetting settings is the first step in setting up Wi-Fi.
To reset the router to factory settings, you need to find a special “Reset” button on the device. Typically this panel is located on the back of the appliance next to the switch. Externally, “Reset” is a narrow hole. To make it easier for the user to find a reset, this button is labeled.
In order to reset the device to factory settings, you need to insert the thin key that usually comes with the device into the “Reset” hole. Then you must wait at least 10 seconds and the reset process will be completed. If the router components provided to the user do not include a reboot key, then any thin wire, toothpick or unfolded paperclip will do.
Possible problems and their solutions
Often users are faced with the problem of lack of access to the Internet. There are several possible causes of the problem, each with a solution:
- Problems with the provider . Usually this is technical work or failed server equipment. The problem will be resolved by the provider himself. You can find out about its availability on the official website or from a technical support operator. There is nothing you can do except find out the approximate time for the connection to be restored.
- Incorrect router configuration or reset . Settings may be reset due to a voltage drop or after a power outage or power supply failure. In any case, the equipment must be reconfigured. You can also use the software by selecting Factory Reset. If the tray icon contains a yellow triangle, then you need to enter the WAN parameters. If the receivers do not see the access point, then Wi-Fi configuration is required.
- Router failure . Often the reason lies in voltage surges in the network, when the power supply or other elements simply burn out. Replacement of individual parts or the entire router is required. If the equipment was not purchased from the provider, then you should find a warranty card that contains the contacts of service centers. When purchasing a router from a provider, you need to call a technician to your home; the problem can be solved on the same day.
- Poor quality router . You need to solve the problem with the provider’s technical support or contact the service center with a warranty card.
- Large distance or obstacles in the signal path . An additional access point, which is configured to duplicate the signal, helps solve this problem.
There is nothing complicated in following a clear algorithm for setting up a router from Rostelecom. It is better to purchase the equipment from the provider, since the technician will perform the first setup for free, and the user can easily contact technical support in case of any problems.
Source
How to enter the settings of the Rostelecom router
Router is a menu for setting the signal that will be transmitted by the Wi-Fi router. Each device has its own router appearance. But, despite the different interface, the functions of each device are approximately the same.
However, before the user can start working with the router, it is necessary to enter its configuration menu.
To do this, you will need to connect your laptop or desktop computer to the required Wi-Fi network via wireless connection or via a network cable. Moreover, the device itself does not necessarily have to have access to the Internet; it is only important that the PC works on the same network as the router being configured.
After connecting, you need to open any user-friendly Internet browser.
To enter the settings of the Rostelecom router, you need to know the following information about the purchased device:
- router address;
- factory model name;
- password required to enter the settings system.
The last two data can be viewed on the device itself. The factory model name and password are provided on the back of the router. There is a special sticker containing the necessary information.
The router address is identical for all models of devices working with Wi-Fi. To access authorization, you must enter one of two values in the address bar of your browser (located at the top of the screen): 192.168.1.1 or 192.168.0.1. After entering these numbers, you must press “Enter”. If one of the above values does not apply, you must enter the second. This will be the address for entering the router settings.
Please note that the address must be entered into the address bar of the browser. If the value is typed into the search line, the transition to the settings menu simply will not occur.
After going to the router address, the menu will ask you to log in. Basically, the login and password values for each new router are the same: admin and admin. However, for more expensive device models, this data may be different. Then you should look for the login and password on the router case or in the documents that came with the kit when purchasing the equipment.
After entering the router settings, the system will ask the user to change the login and password to increase the security of the network. After changing the data, you will have to re-enter the address and log in.
Accidentally pressing RESET
A separate category of cases is when the user accidentally presses the reset button. In this situation, the router parameters automatically return to the values set by the manufacturer. Some router manufacturers took this circumstance into account and made it more difficult to accidentally press the button by burying reset in the device body. However, some models also have a design solution that is far from the best - combining the reset functions and activating WPS on one button or key.
The presence of the reset function is very useful, since at any time if failures occur and poor-quality, as a rule, independent, configuration of your router, you can return it to the state it had when removed from the factory packaging box.
General principle of setting up a router
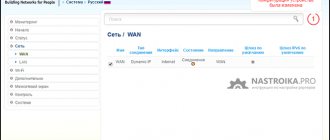
After connecting to a Wi-Fi network and entering the router menu, the user can proceed directly to setting up the router. Due to the fact that the interface for working with a Wi-Fi network is different for different models of routers, the tabs that you will need to connect to the Internet are named differently. Despite this, everyone has a common connection principle.
The easiest way is to run the router's quick setup. In this mode, the device will independently find the IP signal that comes through the cable from the provider. However, this mode does not always work, especially in the case of Rostelecom.
The company's technicians enter the information necessary for the Internet to work independently. But if the subscriber refuses the help of connection specialists, then he will have to enter the network data himself.
First you need to find out the IP values and default gateways. The company freely provides this data to its customers. The subscriber only needs to call the technical support number (8-800-100-08-00) and ask for the required values. The values are entered in the “IP address” and “Default gateway” lines.
You can also configure additional settings in this menu:
- change Wi-Fi network password$
- parental control for connection;
- setting up IPTV broadcast.
However, this data does not affect operation, so not everyone needs such settings. Now let's look at the router interface of certain models.
Router D-Link dir 300
After authorizing the D-Link dir 300 router, you just need to turn on the wireless network. This action replaces the router’s quick setup:
- First you need to go to the “Wi-Fi” tab.
- In it you need to find the “Basic Settings” menu. In the window that opens, you need to check the boxes next to the “Enable wireless connection” and “Broadcast wireless network” options.
Router TP-Link TL-WR841N/ND
Wi-Fi devices from TP-link are also distinguished by easy setup of their equipment. To start quick setup, you need to open the tab of the same name and click the “Next” button.
Router Zyxel RT-1W4L1USBn
The router from Zyxel requires more detailed configuration:
- First, in the “Interface Settings” tab, you should find a menu called “Wireless Network”.
- In the window that opens, you need to enable the access point.
If after this action the Internet does not work, it means that the router is missing some network values:
- In the “SSID” registry, enter the value from the router case.
- In the "Authentication Type" option, you must select "WPA2PSK". You can also enter a new password for the access point.
Router Sagem fast 2804 v7
The Sagem router also connects to the network through quick setup. In the “WAN service” tab, you must click apply.
Huawei HG8245 router
Huawei equipment does not have automatic configuration, so a user who refuses the services of an Internet connection wizard will have to enter all the necessary data independently.
To configure a Wi-Fi network in the “WAN” tab, the user needs to create a new connection. To do this, click the “New” tab and enter all the necessary values:
- WAN Mode;
- Service Type;
- VLAN ID;
- 802 1 p.
All necessary data can be found in the Rostelecom technical support service. After entering the values, you must confirm their correctness by clicking the “Apply” button.
Setting up a Wi-Fi connection on a Rostelecom router
If automatic configuration does not help to gain access to the Internet, the user will have to configure the Rostelecom router independently.
To configure the connection, follow these steps step by step:
- Enter the router setup address and log in.
- Log in.
- Open the manual settings tab. Basically this menu is called "Interface Setup" or "Wireless".
- You must provide all required data: AES, WPAPSK, access key.
- Save all changes made.
After the configuration has been completed, all that remains is to click “Continue” and use the wireless connection to the network.
What to do if the Internet still doesn't work?
It is possible that your DNS servers are configured incorrectly in your operating system. Follow these steps.
- Press Ctrl + R, enter the command ncpa.cpl and click OK.
- Right-click on the current connection and select “Properties”.
- Select IP version 4 (TCP/IPv4) and click the “Properties” button.
- Set automatic detection of DNS servers and click OK.
- Click Close and close the Network Connections window.
- If this does not help, you need to call the support service and ask for help.


