Losing accumulated photos on your smartphone is very unpleasant, but don’t get upset in advance. Let's figure out how to recover deleted photos from a phone if the user or the OS unintentionally deleted them.
The manual is universal and suitable for all models and manufacturers: iPhone, Windows Phone, Alcatel, Asus, Lenovo, Meizu, Philips, Nokia, Oppo, Phillips, Prestigio, Sony Xperia, HTC, Samsung, Xiaomi (Redme), ZTE, BQ, Vertex , Micromax, Umidigi, Oukitel, Texet, Leagoo, Dexp, Doogie, Huawei (Honor), HomTom, etc.
Simple ways
There are several ways to find files from the gallery. All options will work on phones running the iOS and Android operating systems. Some will require installing applications from the App Store or Play Market.
Check cart
The first method is the simplest - searching for deleted images in the system trash. Not all users know that photos are not deleted forever and immediately. First they are moved to the basket.
From Android
- In the Android system, open “Google Photo” → click on the three dots (bars) → go to the trash can → check the boxes on the pictures that you want to return → tap on the “restore to device” option.
- In addition, the photos are stored in the Google cloud service. If during the initial settings, in the Google account settings, synchronization with the gallery was set, then we recommend trying to download the missing files from there (more on this below).
From iOS
It's a little easier for iPhone users. To get back an accidentally deleted picture, just go to the gallery → find the album called “Recently Deleted” → mark the missing photos → click restore.
Images moved to the trash bin are subject to a time limit of 30 days. After this, iOS will delete the photo from memory.
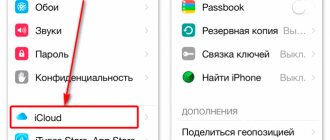
In addition, the photos are stored in iCloud cloud storage. If the user initially linked to the cloud and synchronized the device. Now you can pull the photo from the cloud service.
Programs
Sometimes deleted photos cannot be found in the trash, in the cloud, or on a removable storage device. For such cases, there are additional applications that allow you to find and return erased images or videos.
DiskDigger
Free program for Android (download here). Allows you to find lost or erased files in the device’s internal memory and SD card. Great for restoring information after a factory reset. Does not require root rights to quickly search.
Instructions:
- Open the DiskDigger application.
- Click on the “start simple image search” button. The full scan operation requires root rights.
- After scanning is completed, the utility will display what it found in the form of a tile.
- Select a photo and click "recovery" in the top field. The system will ask you for the save location: cloud, folder or FTP server. Tap on the most convenient option.
- Photos will appear in the specified location.
iSkysoft Toolbox for Android Data Recovery
A program with wide functionality. Unfortunately, search by image is not available on the trial version. You will have to pay for a license. The current version is available on the developer's website. Subscription cost for 1 year: $40.
Instructions:
- Launch iSkysoft Toolbox and go to the “Data Recovery” window.
- We connect the smartphone to the PC via a USB cable.
- As soon as the application finds the gadget, check the box next to “Gallery” and click “next”.
- Select the item “Scan for deleted files”. We are waiting for the scanning process to complete.
- The program will display the found files. Click on “Recover”.
- Everything is ready!
For correct operation, you will need to enable USB debugging mode. How to activate it - read below in the article.
Undeleter
A smartphone application is a link to the Play Market, requiring root access to fully search for deleted media files after formatting. Otherwise, access will only be to the cache of some utilities and temporary files. The program is distributed free of charge. “Probing” takes place in the internal memory and on a flash drive (SD card).
Instructions for Undeleter:
- After installing the application, you must obtain root rights. There will be a point about this later in the article.
- After several clicks on the “next” button, we move on to setting up the “Storage” search area. We specify the location: card or internal memory.
- We wait for the scanning to complete, after which we select the “images” tab at the top of the interface. The program will show the found images.
- Click on the desired photo, in the new window, tap on the floppy disk icon in the top field. In the window that appears, click on the inscription “restore”.
- The restored image will be displayed in the system gallery.
Restore Image & Photo Recovery
Another free application that is very similar in functionality to DiskDigger, but does not require root rights to work.
To find all the images you will need:
- Open the utility and click on the green “scan” button.
- When the program shows a checkmark in a green circle, click on the “show” button.
- The system will display the found photos in the form of tiles.
- You can restore a specific image or select all of them and click on the “restore” button.
- Photos will appear in the gallery.
Reasons for failure
In general, the reasons for such a malfunction in a mobile device can be divided into two categories - hardware problems and software problems. Software problems include any damage to the cache in the standard Gallery software, the effects of viruses and other malware, problems related to the memory card or internal memory. Hardware problems include technical damage to the card or internal memory.
In this case, the first action of the user is to make sure that photographs are available. All you need to do is connect your mobile gadget to the PC and start the file transfer mode.
If the computer recognizes the photos, then it is likely that the user has encountered a software-type problem. If the computer does not even see the photos or, moreover, prompts the user to simply format the drive, then we are talking about a hardware problem.
Complex ways
Sometimes simple actions or installing applications are not enough. Or, searching for deleted photos requires root access. In this case, advanced methods are used. But for this, you need to know how Android works at a higher level.
Root access
All devices running Android OS have a so-called super user, or account called ROOT. Full access is activated if flexible system configuration is required. In fact, the functionality is implemented for developers or advanced Android users.
We recommend that inexperienced users obtain root rights through special software. For example:
- Framaroot;
- CF-Auto-Root;
- UniversalAndroot;
- iRoot;
- KingRoot.
Warning: such an action automatically removes the device from warranty service.
Developer Mode
Another feature for fine-tuning the Android OS is activating developer mode. It gives access to debugging the operating system via USB.
To switch the device to debug mode:
- Go to your smartphone settings and find the “about phone” or “help” section.
- At the bottom of the new menu the line “build number” will be highlighted. You need to click on it 7 times.
- A notification “you are a developer” will pop up. Now go back to the settings menu.
- In the new item “For Developers” that appears, activate the “USB Debugging” tab.
This mode is often required for the operation of third-party software. In particular, for connecting and fine-tuning a smartphone from a PC.
Using ADB
ADB - Android Debug Bridge, is specialized software that allows you to manage and configure almost any cell phone running Android OS. The exception is for gadget models where the manufacturer has specifically disabled this option.
To get started with ADB you will need:
- Download the software for your smartphone model on the developer’s official website. The utility comes with the official Platform Tools package.
- Install the program on a computer or laptop running Windows.
- Reboot the system.
The initial stage has been completed. Now you can begin the preparatory part.
Preparation
Brief algorithm:
- Download and install the BusyBox application. The program will be required to execute commands from the gadget itself. You need to set root rights in the utility.
- Connect your device to your PC via mass storage mode.
- Unzip the downloaded Platform Tools to any convenient folder on your PC.
- Open the command prompt (Win+R) and enter: “ADB” (without quotes).
Boot into recovery mode
System Recovery mode gives access to some fine settings of the hardware part of the gadget. To get there, do the following:
- Turn off your smartphone. Press two keys at the same time: turn on the device and decrease (in some models - increase) the volume. Hold them for about 7-10 seconds until a line-by-line menu appears on a black background.
- In this menu you need to select the “Recovery Mode” item. Line navigation is carried out using the volume up/down hardware keys. Command confirmation – power button.
- If the actions are performed correctly, an inverted Android logo will appear on the display.
The Recovery menu can be accessed through the console. To do this, type the command: “adb reboot recovery”, then enter: “adb shell”. Write all commands to the console without quotes.
Select section
Now you need to find out the partition from where the photos were deleted. To do this, enter the command into the console: “mount | grep /data". Press enter. The system will indicate the required block.
Change configuration file
The next step is to connect the smartphone memory to the PC. To do this, you will need to make changes to the configuration file. They look for it through the command in the console: “find /sys -name lun”. Here we find the path leading to the f_mass_storage directory.
Now enter the command: “echo path to partition> location of configuration file/file”.
Please note that a new path to the section is added with the name “file”. You get his address in the previous command.
Remount partition
The penultimate step is to remount the partition:
- Enter the command into the console: “umount /data”.
- Disconnect USB. Now we turn on the device in mass storage (MTP) mode.
- We enter the command into the console: “echo 0 > enable && echo “mass_storage,adb” > functions && echo 1 > enable.” This will terminate the connection to ADB.
If the system shows an error during the process, reboot the device. The changes made will be rolled back.
Recover files
The recovery process is similar to the procedure for a hard drive, flash drive or other PC memory partition. This may require installing additional software, such as Recuva or Pandora Recovery.
From a computer - Recuva program
The program is distributed shareware. To recover photos from a smartphone, a trial version of the software is sufficient. The found images will be saved in *.jpg or *.png format. The utility is Russified and has a simple interface.
Work algorithm in Recuva:
- Perform initial setup. Set the Russian language, if necessary: Options -> Languages.
- When you open it for the first time, the recovery wizard will start automatically. Click "next".
- In the search settings, select the required file extensions. Usually these are pictures or videos.
- We recommend establishing a more precise location where the deleted photos were stored.
- Check the box next to “in-depth analysis” and start the process.
- After some time, the program will display the found images. Recover missing photos.
It is important to specify a new directory. Found fragments are marked in three colors: green, yellow and red. The color indicates the degree of damage to the element.
Recovery
If both methods do not bring any results, the problem may be with the drive. In this case, you will need to restore the files. To do this, for example, you can install DiskDigger and first perform a simple and then an in-depth search. There are similar programs for the computer. For example, GT Recovery. It works on the same principle.
· Published July 14, 2021 · Updated July 16, 2017
Users, due to their carelessness, often erase necessary data, for example, photographs. But fortunately, there is a chance to recover lost files. In this article we will look at how to recover deleted photos on Android.
More options
In addition to these methods, there are a couple more ways to recover erased photographs.
Specialized Applications
The user can install specialized applications on their mobile phone that can find both individual photos and entire photo galleries:
- FonePaw Android Data Recovery. A convenient utility for searching and recovering various information from a PC, flash drives, and external hard drives. Distributed free of charge. Works under Windows and iOS OS. The interface is completely Russified. The controls are intuitive. All the user needs to do is connect the smartphone to the PC and enter the program. The utility allows you to extract data even from broken or non-working devices.
- MobiKin Doctor. Another powerful program for the “reincarnation” of various types of data. For full operation, you will need to install USB debugging mode and root rights. Interface in English. To recover pictures, the free version is sufficient.
If these methods do not help, you can go to extreme measures and put the phone in the hands of specialists.
Authorized service
At an authorized service center, the gadget will be checked using diagnostic equipment to make sure it is possible to find the data (photo) or not. It is worth understanding in advance that the procedure is paid. The service is not included in the list of warranty cases. The exception is the board burning out due to reasons beyond your control or manufacturing defects of the chips. True, in the latter case there is almost no chance of recovery.
Clearing cache
To clear the cache, you must perform the following steps:
- Open phone settings.
- Go to application settings or application manager settings.
- Find the “Gallery” application among a large number of programs.
- Go via “tap” to the page with information about the application.
- Find in the settings and information about the application a mark called “cache”. And, depending on exactly how many photos and pictures are on the phone, the cache of this application can vary in size from 100 megabytes to several gigabytes. To clear the cache, you need to click on two buttons - “Clear”, and then, after that, “Clear data”.
- After clearing the cache, you need to go back one step, that is, to the application manager. There, in the general list, you need to find “Multimedia Storage”. For this application, you must also find its properties in order to clear the cache and all data.
And the last step is to reboot the gadget. In the event that photos have disappeared due to a glitch in the Gallery application, these steps will correct the situation. If nothing happens after these actions, you can use the following methods.
Question answer
Let's look at some questions that users have when trying to recover photos.
If your cell phone is smashed to smithereens
Yes. It can be done. There are two ways to recover data, even if the phone is broken due to a strong impact or the display is cracked:
- Use of specialized programs. For example: FonePaw Android Data Recovery or Dr.fone toolkit. This method helps when the motherboard and main memory chip are not damaged.
- Wiring out the memory chip on the donor smartphone. This operation can only be performed by experienced craftsmen on special soldering stands. An extreme step, and a very expensive operation.
If the phone is badly damaged and you are not confident in your abilities, it is better to immediately take the device to a specialized workshop.
Drowned or lay under water for a long time
It all depends on how long the gadget was in the liquid. Was it dried immediately after "bathing". If the smartphone is taken out of the water within 5 minutes and dried immediately, the likelihood of the images being restored is high.
When the phone is left in water for a long time, the contacts on the motherboard become oxidized. The chip deteriorates at the physical level, and it will be extremely difficult to solder it to a donor board. Read more here.
Won't charge or turn on
Lack of charging and inability to turn on is not a death sentence. Perhaps the power controller simply burned out or the battery died. In any case, you can try to restore the device using special software or take it to a service center. The main thing is that the memory chip is not damaged.
Disappeared in correspondence in instant messengers
If you want to recover photos in messengers, remember:
- On VKontakte, multimedia is stored on their side and is not downloaded to the cell phone. Therefore, if you delete a graphic or text message from a conversation, it disappears forever.
- It’s the same on WhatsApp, the application does not upload photos to the smartphone, storing everything on Facebook servers in the cloud.
- In Viber, everything is different; the messenger uploads video and graphic files to the internal memory. When you delete it from your phone, everything disappears.
- Telegram – pumps information into the cell phone, but leaves messages in correspondence and does not overwrite the information. Returning photos sent via Telegram is not difficult.
How to return photos to Samsung if they are missing
You can fix the problem when photos from the Android gallery disappeared on Samsung in one of the following ways:
- Disable automatic transfer of photos to the Samsung cloud.
- Clear application cache on Android.
- Remove ".nomedia" files from the gallery folder.
- Restore images using third-party tools.
All these options with instructions are described in more detail below.
Photo recovery via DiskDigger
If Recuva does not live up to expectations, then in this case you can use the telephone utility. There are a lot of such programs in the Play Market: Photo Recover, GT Recover, DiskDigger. We'll focus on the last one. DiskDigger is a photo recovery program for Android devices. With its help, you can conduct a full system scan, which requires root rights. But there is a regular search in DiskDigger that does not require administrator rights. This is what we will use to recover deleted photos on the phone.
How to recover deleted photos from phone using DiskDigger? You need to do the following:
Is it possible to find pictures that were not included in the “Gallery”
You can only find them if they are actually saved on the phone (Gallery simply refused to show them). To check for them, connect your phone to your computer using USB. Open the folder where all previously taken pictures are stored. If the photos are not there, you will not be able to restore them, since, most likely, the system did not really save them.
First, restart your phone and clear the device’s memory and, most importantly, the “Galleries” cache. Try creating a new DCIM folder by renaming it. Reset your camera settings. If all else fails, you need to reset your smartphone. The last resort method is a complete flashing of the device.
Sources used:
- https://lumpics.ru/photos-missing-from-gallery-on-android/
- https://games-instel.ru/pochemu-v-galerei-ne-otobrazhayutsya-foto-na-androide/
- https://droidov.com/kak-vosstanovit-foto-na-android
- https://upgrade-android.ru/stati/stati/5122-kak-vosstanovit-galereyu-na-androide.html
- https://kompkimi.ru/interesnoe/pochemu-ne-sohranyayutsya-foto-na-telefone
SHARE Facebook
- tweet
Previous articleCommunication programs: TOP 15 instant messengers for phones in 2021
Next articleWhat mobile device resolutions should the website be adapted to?
DiskDrill
A program for recovering deleted images from any storage media: from a phone or tablet, memory cards, external devices, HDD/SSD.
Functions:
- Three modes - quick search, deep scan and undelete;
- Recover photos after formatting;
- Protection against accidental deletion in the future.
DiskDrill has two versions available - free and PRO. The free option includes recovery of up to 5000 MB of information, data protection, and unlimited preview. In the PRO version, fast and deep scanning, partition search and unlimited recovery of all formats are added to the specified capabilities.
| Advantages | Flaws |
|
|
