In the field of media players, the most widespread, despite all the efforts of competitors, is still iTunes. Apple's brainchild offers convenient access to the user's entire media library, without having exorbitant system requirements. The ability to install the program not only on a computer running macOS, but also on Windows of various bit levels makes it practically no alternative. Let's look at how to install it.
How to install iTunes on a computer
System requirements of the program
Before installing iTunes, you should familiarize yourself with its minimum hardware requirements. This will make it possible to understand whether the utility is suitable for the user’s device. In addition, you will have the opportunity to decide to upgrade your PC.
iTunes requirements differ in what media files the device can ultimately play.
| Device/Media Quality | Standard quality | HD video (720p) | FullHD video (1080p) | 4K video (2160p) |
| CPU | Intel Pentium D with SSE support, 1 GHz | Core2Duo 2 GHz | Core2Duo 2.4 GHz | Core i3 3 GHz |
| RAM | 512 megabytes | 1 gigabyte | 2 gigabytes | 4 gigabytes |
| Video card | DX 9.0c compatible | Intel GMA X3000 | Intel GMA X4500D | Intel HD Graphics 400 |
| Screen resolution | 1024x768 | 1280x800 | 1280x800 | 1280x800 |
The given hardware configurations are capable of providing comfortable viewing of media files of different formats and decoding various audio elements. It is worth noting that the minimum supported sound card is any 16-bit integrated or discrete model.
In addition, there are two versions of the client for Windows computers:
- Desktop version – downloaded from the official website, installed and launched using standard tools of the program itself.
iTunes desktop version - . Exists only for Windows 10, can be obtained through the Microsoft Store.
UWP version of iTunes
They differ from each other only in the way they are obtained. The functionality, included codecs and supported file formats are absolutely the same and include:
- music – files with the extension WAV, MP3, OGG, AAC, AIFF and many others are supported. There is the possibility of hardware decoding of Lossless formats;
- video – MP4, 3gp, QuickTime and Apple's own M4V containers are supported.
And other derivatives of these two types. Through iTunes, you can listen and watch podcasts, follow TV shows, including Apple TV, and listen to various radio stations.
Next, we will discuss the differences in the installation process of these two versions and indicate the nuances that may arise during their operation.
How to install iTunes on your computer
iTunes is a practically irreplaceable program for all users of Apple mobile devices. Using this program, many basic operations for working with mobile devices are performed. For example, iTunes is used to download music, videos, photos, backup, restore, and more.
Due to such a wide range of features, many of our articles that focus on the iPhone or iPad mention the need to install iTunes. But not all users know where to get this program and how to install it on their computer. Therefore, we have highlighted this issue as a separate material.
Step No. 1. Download the iTunes installation file from the official Apple website.
To install iTunes on your computer, you need to start by downloading the installation file. To do this, go to the website https://www.apple.com/ru/itunes/download/ and select the 32-bit or 64-bit version of the program. The bit size of the program depends on the version of Windows you have installed. If you have a 32-bit version of Windows installed, then select the 32-bit version of iTunes. If you have a 64-bit version of Windows, then, accordingly, choose the 64-bit version of iTunes.
If you don’t know what version of Windows you have, then press the Windows-Pause/Break key combination or open the “Control Panel” and go to the “System and Security - System” section. A window will open with information about your system. Among other data, the bitness of your operating system will be indicated here.
If you still can't figure out what bit size your version of Windows is, then just download the 32-bit version of iTunes, it should work anyway.
Step No. 2. Install iTunes on your computer.
After you have downloaded the installation file, you can begin installing iTunes on your computer. To do this, run the downloaded file and click on the “Next” button to begin the installation.
After this, a screen with settings will appear in front of you. Here you can enable or disable adding a shortcut to your computer's desktop, using iTunes as a player, and automatically updating iTunes. Here you can also select the iTunes language and the folder in which it will be installed. You can change all these settings at your discretion. If you don’t understand this, then just click on the “Install” button.
Next you need to wait until iTunes is installed on your computer. This may take about 1 minute.
At the end, you will need to finish installing iTunes by clicking on the “Finish” button.
At this point, the iTunes installation is complete, you can start setting up and using it.
Step No. 3. Launch and configure iTunes.
Once iTunes is installed on your computer, you can immediately start using it. If iTunes does not launch after installation, then launch it manually using the icon on your computer desktop or in the Start menu. When you launch it for the first time, a window with a license agreement will appear, read it and click on the “Accept” button.
After this, you will be asked to agree to send information about your media library to Apple. If you agree, then click on the “Accept” button; if not, then click “Cancel”.
After this, the main iTunes window will open in front of you, ready for use.
In principle, once installed, iTunes does not require any configuration. But, if you spend a few minutes on the initial setup, it will save you time in the future. To get started, open the Account - Sign In menu and sign in using your Apple ID.
If you don't use Apple Music, you can turn off this feature in iTunes. To do this, open the “Edit – Preferences” menu and in the window that opens, disable the “Show Apple Music features” option.
It can also be useful to turn off iTunes automatic syncing with connected devices. To do this, in the same settings on the “Devices” tab, you need to enable the “Prohibit automatic synchronization of devices” option.
If you do not do this, then every time you start iTunes will try to synchronize the connected devices, which may not be convenient if you connected the devices just to recharge them.
See also:
- How to completely remove iTunes from your computer on Windows 7 or Windows 10
- How to Sync iPhone with Computer via iTunes
- How to Connect iPhone to iTunes on Computer
User reviews and comments
There are many discussions on various sites about the experience of using the program, all its advantages and the advantages of the paid version. According to users, 68% recommend this offer. There has been a real debate on the site about the pros and cons of this application. You can also stay tuned and write your comment about your experience using iTunes on our website. We will be grateful for your activity and feedback.
4 / 5 ( 2 voices)
Description
iTunes is the best way to listen to music, watch movies, keep your collection organized and expand it by purchasing new content. Download iTunes for Windows for free and choose the entertainment you want.
Apple has popularized this full-featured multimedia center, which, together with its famous mobile devices (iPod, iPad, iPhone), is ideal for music, film or reading lovers.
By downloading and installing iTunes for free, you will receive full integration with iCloud and the iTunes Store. In addition, the new Apple Music service is included in the player and all new features will be available to you.
Hurry up, download and install iTunes on your PC and enjoy.
Synchronization options
There are two ways to synchronize your device and iTunes, as mentioned above. Below you can familiarize yourself with each of the methods separately.
By cable
Perform all the above steps correctly, in the order in which they are described.:
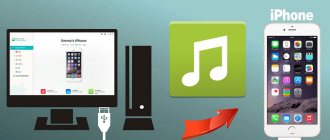
1. Connect your Apple device to your computer;
2. Launch iTunes;
3. In the side menu of the program, select your device;
4. In the work panel (located to the right of the side menu), find the “Synchronize” button and click it. After the above steps, all files added to the media library will be transferred to your gadget.
Using a Wi-Fi network
The second option for syncing iTunes with your device is using a wireless Wi-Fi network. Two mandatory conditions: the presence of a Wi-Fi adapter on your personal computer and working Wi-Fi on your device (in 99.99% of cases it works). So, let's get started with the setup and synchronization itself.
Setting up the program
1. Connect your device to your computer and launch iTunes;
2. Select your device in the sidebar;
3. To the right of the side menu, in the work area, go to the “Overview” tab;
4. In the “Options” field, check the box next to “Sync this iPad over Wi-Fi.”
Synchronization from device via Wi-Fi
1. Go to the settings of your device;
2. Select “Options”;
3. Select “Sync.” from iTunes via Wi-Fi”, then click the “Sync” button.
