Smartphones running on the Android operating system have long captured the market. Every day there are more and more new Android users. The question immediately arises: “How to transfer contacts from Nokia to Android?” Read more about this!
There are several ways to organize number porting. Let's consider the most practical and popular:
- transfer using a SIM card;
- transfer via Nokia PC Suite and Google mail;
- transfer using phone memory and Google mail;
- transmission via Bluetooth;
- transfer via the MOBILedit application;
- other methods;
Using a SIM card
One of the most common and fastest ways to transfer contacts is the SIM card method. To implement this method, you only need two devices and one card. This is done like this:
- After inserting the card into your Nokia phone, go to the Contacts menu
- Click "Select All"
- Select “Move to SIM card” from the drop-down menu. Now the numbers are saved on it
- Remove the SIM card and insert it into your Android smartphone
- Go to Contacts and select the “Show from SIM” option
- Ready! Numbers can also be transferred to the device
Despite its effectiveness, the method has one significant drawback - the limited number of free slots on the card.
Because of this, users will not be able to transfer a large number of numbers at once.
Copying data without a computer
Transferring data using a SIM card is a simple and easily accessible method that does not require the help of a PC. Information from the old mobile device is transferred to the new one along with the SIM card .
With this method, no additional programs are installed. It is not possible to completely transfer contacts from the phone book at once. Some of the information is lost during movement, as a result of which the method is considered unsatisfactory. As a result, users are wondering how to copy contacts using SD card . The owner of a new smartphone must follow a simple algorithm of actions:
- In the Nokia menu, find the “Save contacts to SD memory card” option.
- Transfer the information to your Android phone.
- Find the option “Contacts - Options - Import / Export - SD card”.
- Save data.
Some feature phone models do not support SD cards. Therefore this method may not be suitable.
You can also transfer contacts from Nokia to Android via Bluetooth . Both mobile devices must support wireless data transfer. You need to follow 4 simple steps:
- Enable two phones with Bluetooth.
- In the “Contacts” section of Nokia, select all numbers.
- Click the “Functions” option.
- Then "Transfer via Bluetooth".
The device should accept and confirm the data transfer and automatically move the information to the address book. The disadvantage of this method is that the Nokia phone cannot transfer the address list in one click. This method is considered simple, but ineffective.
Via Nokia PC Suite and Google Mail
Another option for transferring contacts would be PC Suite and Gmail. Nokia PC Suite is an official program for Windows that allows you to synchronize your mobile device and PC. You can download it here (https://nokia-pc-suite.ru/). Google Mail is a mailbox, if you don't have one, you need to open it.
- Install the program
- Take a USB cable and use it to connect your Nokia model to your computer. Select PC Suite mode. The program should correctly recognize your device
- Through the application interface, click on Contacts
- The “Synchronize” button will appear at the bottom
- A list of numbers will appear on the screen; you can select everything using the combination Ctrl + A
- File → Export contacts. Save them on your computer
- Now you will have many files that need to be combined into one. Using Notepad, create a text file, open it and type: copy /B *.* contacts.vcf. Save with the BAT extension and run.
- A file with contacts should appear - contacts.vcf
- Open Gmail mail, click on Gmail -> Contacts
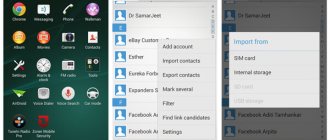
- Click on the drop-down list More → Import
- Click "Import from CSV" -> "Import"
- If synchronization with Google Account is correctly configured on your Android device, the numbers will appear in your address book
- If the numbers do not appear, then go to Contacts and select “Show all”
Use vCard
Almost all phones, both new and old, support the virtual business card format - vCard. If you cannot export your entire phone book, then one way to transfer numbers is to convert them to a vCard.
- Go to Contacts on your old device.
- Select the desired entry and call up the menu.
- Among all the items, select “Export vCard”, “Send contact” or something similar. Here you perform actions on one record.
- On some devices, you can select all numbers: phone book - “Options” - “Select all”, and then also convert them into a vCard.
- You can save the number in the memory of your push-button phone or send it via Bluetooth or email. In general, the actions with them will be the same as in the instructions described earlier.
Using memory and Gmail
If you have a memory card, and almost all models with the S60 system and higher have one, you can perform a backup. Make sure Google synchronization is enabled on your Android device.
- Select Options / Settings / Settings on your Nokia phone
- Find and click on "Backup"
- Next, select Create a Copy → Contacts
- Connect your phone to your computer and find the backup.dat file in the Backup folder
- Copy it to PC
- Open Gmail
- Click on the inscription and select Contacts
- Import from CSV and Import
- Done, as in the previous case, the contacts will appear on the Android smartphone
If the contacts still do not appear, then it is worth checking whether synchronization is enabled on the device.
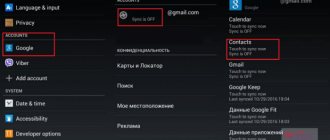
It is advisable to enable the Synchronize All option in your Google Account settings. It is also worth checking the contact display options - Address Book → Show Contacts → All.
Via SD card
Most Nokia models have a built-in backup system. And if there is also an SD card in the phone, then there will be no problems at all.
- On your Nokia, go to “Settings” and find “Backup” there. Click there.
- Next, click on the “Create a copy” tab, and then go to the “Contacts” tab. Confirm the operation, as a result of which a file with contacts in dat format will be saved on your card.
- Connect this device to your computer, go to the SD card through Explorer and find a file with dat format in the directory called backup.
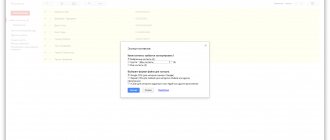
- In the browser, log in to your Gmail, go to the “Contacts” tab and select “More” there, then click on “Import”.
- Specify the path to our saved dat file and confirm the operation. Now all you have to do is log in to this account on your Andro >Copy to Symbian 9.x
If your Nokia has the Symbian 9.x operating system installed, you can synchronize contacts directly from your phone. For this you need an Internet connection.
Go to “Settings” of your device and select “Synchronization”.
Create a new profile with any name and save it. Here, in the general list, select the “Contacts” application. Next, in the field called “Base” we indicate the name - Contacts. Be sure to enable this entry for synchronization.
Now enter the following data in the settings:
- Server version: 1.2;
- Identifier: Google ;
- Access point - select depending on the operator;
- Server: - https://m.google.com/syncml;
- Port - 443;
- Enter your login and password from your email.
Now we go to the list of created profiles, select the one we just saved and synchronize. The system will automatically synchronize with your mail and save contact information there. All you have to do is log in under the same account in Android and synchronize the information on the new phone.
Via Bluetooth
Many Nokia models and Android devices are equipped with a Bluetooth component. With its help, you can transfer all your contacts in a few minutes without using third-party programs and services.
- Turn on Bluetooth on both phones. Make sure visibility is turned on on your smartphone
- On Nokia, go to Contacts → Options → “Select all”
- Click "Transfer" -> Bluetooth
- Confirm receipt on your Android gadget
- A file with the VCF extension will appear in memory
- Check the numbers, if they do not appear, then find the file through the file manager and run it
How to transfer contacts from a feature phone: all methods
To transfer contacts from a feature phone to a smartphone, you need to export them and then rewrite them in one of the following ways:
- Via SIM card.
- Using a USB cable.
- Via Bluetooth.
- Send by email or message.
- Use vCard.
- Use a special program.
All methods are based on the fact that you first export the phone book data. This is a universal part of the instruction that must be followed in almost all methods. Here's how to do it:
- Go to "Contacts".
- Select Options.
- “Import / export” – “Export”. The names may differ for different models of push-button dialers, for example, “Advanced” - “Copy contacts” or other options.
- Select all entries and click Confirm.
- Depending on which method you are using, click “SIM card” or “Internal memory”.
If you were unable to complete this instruction, then go to the “Use vCard” or “Use a special program” instructions. Otherwise, you can choose any method. Read about them in more detail, with step-by-step instructions, below.
Via MOBILedit
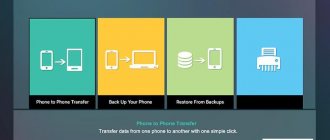
This program allows you to fully control any phone via a computer. It is available at this link https://www.mobiledit.com/downloads/.
- Launch the software and connect your Nokia phone
- Go to the Devices tab → Export → Contacts
- Connect your smartphone and select Import → Contacts
The only disadvantage of this method is that the software is paid and requires a key to work.
MOBILedit
Before you transfer contacts from Nokia to Nokia, you will need to download this software to your computer. You can find “MOBILEDIT” on the official website of the developer, then you need to install the program on your PC and launch it. There shouldn’t be any problems with downloading and installing – everything is intuitive and simple.
Before transferring contacts from Nokia to your computer, you need to install drivers in MOBILEDIT. To make the process go faster, select your phone model from the drop-down list and agree to the installation.
After the drivers are installed correctly, you need to go to the “Phone -> Cable connection” tab. If the program asks for the connection type, then select PC Sync (synchronization with a PC) and in the next step enable debugging on the phone.
Before you transfer contacts from Nokia, you need to enable USB storage on your phone. To do this, go to the device settings, then open “Developer Options” and check the box next to “USB Debugging”.
Google Drive
Transferring Nokia contacts to a new gadget can be done using a similar imported Google search engine and its proprietary Google Drive application. For this, as in the first case, we will need a personal computer connected to the network and special software.
The basic principle of Google Drive is synchronizing the data of your devices. This is quite practical, especially if you want to make some changes to your phone and don’t have it at hand.
In order to synchronize contacts, you need to activate your account on Google Drive both on your phone and on your PC. On the left side of the screen, select “Gmail” and then click on the “Contacts” tab. Next, you will see the import options, which you can configure according to your wishes, and then begin the synchronization/import procedure.
It also allows you to recover lost data that was erased within the last 30 days.
Export data
Then you need to go to the “Phone Book” tab and select “Export Contacts”. The utility will ask for the type of file being saved and the location where it will be located. Enter the required information and save the export file.
Next, you can transfer contacts from Nokia to Android via MOBILEDIT. To do this, you can use a USB cable, Bluetooth or Wi-Fi. In the utility, select the “Import” item, and then import the previously saved file with contacts. Using this software, you can export contacts from Nokia to an iPhone or any other gadget with an iOS platform.
