09.07.2017 [14:23], nastya
To transfer contacts from Windows Background to Android, you can use several methods:
- Using Google Mail
- Synchronizing Windows and Android accounts
First way. Transfer contacts from Windows Background to Android using Google Mail
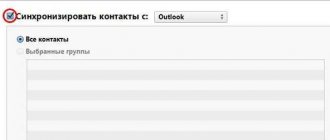
To manually import, you need to download the phone book via the Outlook website to your computer. Then:
- Log in to Google mail using your account
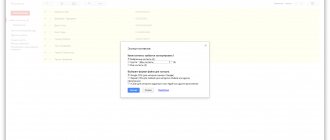
- In the top left corner, click on Gmail to open the menu
- In the drop-down menu you are interested in the “Contacts” item
- You will be redirected to this section, where you need to click on the “Advanced” button
- Select “Import” to download contacts
- Click “Browse”
- Specify the item for the file that you downloaded from the Outlook website and click “Import”
Now your contacts will appear on all Android devices where you are logged into your Google account.
Second way. Transfer contacts from Windows Background to Android using Microsoft and Google account synchronization
For this method you need to use Windows Background. Go to it along the path “Settings” – “Mail + Accounts”. In the window that opens, find the “Add service” item. After clicking on this item, you will be asked to select which service you want to add. In our case, Google. Click “Connect”, then enter the data from Google Mail and in the “Windows requests...” window with a list of access rights, click “Accept”.
After this, synchronization will occur automatically.
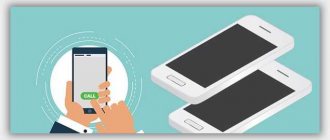
Transfer contacts from Windows Phone to Android via bluetooth
The easiest way, which does not require additional devices, software or an Internet connection, is to transfer contacts via Bluetooth.
To do this, use the Data Transfer application, which is available for almost all Nokia gadgets.
Using the program is simple:
- Go to the menu of the old device and open the “Data Transfer” application.
- In the window that opens, instructions will appear that you must read carefully, and then click the “Continue” button.
- Select the “Import/Export” section and the “Export to device” item.
- In the drop-down list, click on “Supports Bluetooth” and the “Next” button. Be sure to turn on Bluetooth on both smartphones and create a pair between them.
- A list of devices will appear. Click to select the device to which you want to transfer contacts.
- The new device will ask you to allow contact importing. You should click OK.
- In the “Import contacts to” window that appears, select the “Phone” item.
- The phone book of the new gadget will contain all the data from the old device.
This method is not suitable for all smartphones. But it is the fastest, simplest and most understandable.
Via SIM card
Provided that all numbers were saved on the SIM card, it is possible to transfer contacts to another phone by simply moving it to a new device. But there are several features:
- there is very little storage space on the SIM card, so you can only record a limited number of numbers on it, which is very inconvenient if the subscriber has a large phone book;
- if the SIM card is damaged or does not fit the new device in format (for example, a standard card and mini), then this option will not work.
The method is suitable if the user requires specific numbers, for example, relatives and friends. If we are talking about transferring numerous data, the volume of which is quite large, using a SIM card storage device will not work.
Using a memory card
The next option is similar to the previous one, only a computer is not used as an intermediate link for import, everything is done through a memory card.
The process occurs using the built-in Data Transfer program, which is found in new models of Windows Phone devices. If for some reason there is no such application, you can download it for free from the store.
Then follow this algorithm:
- Launch the Data Transfer application.
- Select the “Export to SD card” section from the menu.
- A new window will prompt you to import the following types of data: “Contacts,” MMS, and “Messages.”
- Check the box next to “Contacts” and click on “Start”.
- After 10 - 15 seconds, a window will appear with information about transferring data in vcf file format and indicating the path address on the memory card.
- Remove the card from the old device and install it in the new device.
- On Android, select the “Import/export” and “Import from card” line in the “Contacts” menu.
- In the “Copy to” window that opens, select “Device” and click OK.
All data from the memory card was transferred to the smartphone’s address book.
Transfer contacts using Gmail
Google user mail is used to transfer contacts through Outlook cloud storage. This method was described above.
There is another life hack when you don’t need to transfer contacts, but simply link, that is, synchronize two accounts with each other - Microsoft and Google.
The algorithm is as follows:
- On a Windows Phone device, open the Settings menu and select Mail + Accounts.
- On a new page, click to open the “Add service” item, select Google in the drop-down list and click the “Link” button.
- After this, the system will open a window where you will need to enter the Gmail login and password used on the new Android OS device.
- You must agree to the Windows access permission request by clicking OK in the new window.
- Log in by clicking on the account icon and make sure there is a checkmark next to the “Contacts” column. This means that synchronization has begun.
- On Android, all data will be synchronized as soon as you log in under the linked account.
This method will be appropriate if there is a need to use both phones and change them from time to time. Thus, contacts will not need to be constantly transferred from one gadget to another, they will be synchronized.
How to link contacts to Gmail?
How to Sync Contacts on Android with Gmail Account
- Make sure you have Gmail installed on your device.
- Open the app drawer and go to Settings, then go to Accounts & Sync.
- Enable your account and sync service.
- Select your Gmail account in your email accounts settings.
- Make sure you have enabled the "Sync contacts" option.
1 Feb. 2021
Moving contacts using a vcf file
The first way to copy the entire contents of the address book of your Windows Phone smartphone is to export the data to a special vcf file, transfer it to the Android phone and import it there through standard tools. Thus, by the way, contacts are often transferred from Android to Android, and in general, saving the subscriber directory in the vCard text format (vcf extension) makes it possible to view and edit it on any device, for example, on a regular computer or laptop. True, this need does not arise so often.
To import/export contacts in Windows Phone, there is a standard Data Transfer .
As a rule, it is installed on your smartphone by default and does not require downloading. If for some reason the application is not on your phone, you can find and install it absolutely free through the official Microsoft store.
We launch the program and immediately select the “Export to SD card” item.
After indexing, the application will offer to save three types of data to removable media - Contacts, Messages and MMS. Check the Contacts box only and press the Start button.
After a few seconds, a message will appear indicating that the content was successfully exported from the phone to the SD card. The path where you can find the created VCF file will be indicated here (we got D:/backup/Data/20180109154016/Contact).
Now there are at least two options for transferring a file to an Android device - either remove the memory card and insert it into a new smartphone, or transfer the file from one phone to another via Bluetooth. We chose the second method, the implementation of which requires the presence of any file manager on the smartphone. In our case, we will use the Metro File Manager .
After launching it, go to the SD card section, and then to the /backup/Data/20180109154016/ folder. Here, check the Contact.vcf file, and then click Share – Bluetooth.
Next, simply select the destination phone from the list and confirm acceptance of the file on it.
Of course, Bluetooth must be turned on on both smartphones. If data is transferred between phones for the first time, you must first pair the devices with confirmation of the digital code.
If for some reason you were unable to set up a Bluetooth connection, a computer will help you transfer the vcf file from one mobile phone to another, which will be used as an intermediate link. First, connect the original phone (with Windows Background) to the PC and copy the contacts to any location on the hard drive. Then we connect the second phone and download the previously saved file to it.
Now that the vCard file is on the target smartphone, you need to import contacts. In older versions of Android (4.4.2), go to “Contacts” and select “Import/export” from the menu.
Then, on the “Copy from” page, set the switch to the “Device memory” position, and on the “Copy to” page, select “Phone”.
Click the “Next” button and the device itself will find the vcf file, after which the data is automatically imported into the address book.
On modern smartphones with Android 7.0, everything is done in approximately the same way. Select “Import/export”, and then “Import from drive”.
The following is where to save your contacts.
Another way to add contacts from a vcf file to your address book is to simply try to open it. The phone itself will offer to import data.
Transfer directly via Bluetooth
The latest versions of Android allow you to transfer contacts from devices running Windows Phone directly via Bluetooth. To do this, go to “Import/Export” and select Import from another phone – Supports Bluetooth.
Then click Next, read the short instructions and Next again. In the list of available devices, select the one from which you want to transfer contacts.
Then we confirm the import from vCard and in the “Import contacts to” window click “Phone”.
Subscriber data will be transferred from Windows Phone to Android.
Question No. 3. How to create a new contact?
To do this, you need to follow several steps.
- Action 1.
Go to “Contacts” from the main menu. - Action 2.
Click on the “Add” button there, which is shown as a plus (highlighted in red in the photo below).
- Action 3.
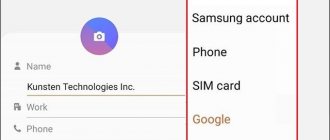
Select which account we want to save the new contact to. A list of all connected accounts will be offered. - Action 4.
Enter the information and click the “Save” button (how it looks is shown in the figure).
After this, you can click on the icon for editing the created number in the phone book (it looks like it is shown in the figure) and edit it in the same window.
On Windows Phones, you can add two phone numbers, email addresses, and other contact information. To do this, in the window shown in the figure, you simply need to touch the corresponding field again.
Cloud contact transfer
Since all modern smartphones are designed to constantly interact with cloud services, it would be strange to refuse their capabilities. If you used a phone with Windows Phone, then you simply have to have a Microsoft account. And your contacts are synchronized with the Outlook.com email service. If you are going to use an Android smartphone, then be prepared that it will lose most of its functionality without Google online services.
This leads to two simplest synchronization methods:
Via Outlook
The entire phone book on your Windows smartphone is synchronized with your Outlook.com account by default. To transfer data to an Android smartphone:
This method is convenient because Outlook also makes your mail, calendar, and files on OneDrive accessible. However, as a phone book, Outlook is frankly weak. There is not even the ability to send SMS. Therefore, this method is only suitable for those who communicate mostly by email.
Via Gmail
There are several ways to import your phone book into your Google Account. But their essence is the same: to link Microsoft and Google accounts with constant synchronization. This can be done using your phone:
This method is good when you don’t yet have an Android smartphone at hand. But there is a way to link contacts when you don't have either phone handy! For example, your Windows smartphone is out of order (or you have already sold it), but the courier has not yet delivered your Android device to you. The main thing is to remember your Microsoft account access information.
Local transfer of contacts from Windows Phone to Android
Until recently, this was unthinkable: the file system of Windows Phone was as closed as that of iOS, and it was also not amenable to jailbreak. Luckily, on Windows phones with an SD card, you can now export your contact database without resorting to cloud sharing.
The vast majority of applications for backing up contacts in Windows Phone bear the same name - Contacts Backup (and where are the administration looking?) For us, the most interesting is the application developed by Amaze Pictures Inc. It allows you to save backups in .VCF files even on smartphones that do not have a memory card.
You can download the application at https://www.windowsphone.com/ru-ru/store/app/contacts-backup/8fc95611-fb8a-4483-9277-864fed3fcb5e.
For full operation, it is necessary that the Windows Phone smartphone and the computer be on the same wireless network. After the application creates a copy of the phone book, it will prompt you to type the IP address into the browser line, through which you will download the ZIP archive to your computer. If you wish, you can include photographs corresponding to subscribers in the archive.
Unzip the file and copy the .VCF file it contains to your Android smartphone to import its contents into your phone book there.
If it is important for you that a copy of your contacts does not end up on the Internet, then this application is the best choice. Other similar Windows Phone apps use cloud copying to OneDrive.
In any case, copying contacts from Windows to Android will no longer be a problem for you.
Transferring contacts from Windows Phone to Android can be done through the internal capabilities of the phones, as well as using Microsoft and Google services. If previously Windows phones were closed to connecting third-party applications, now you can set up synchronization and send contacts to the cloud. Transfer is possible via a wireless network, via a USB port, or through special utilities.
The search for a way to transfer data is related to a feature of Windows Backgrounds. They do not save contacts to the SIM card, so if you simply move it to a new phone, there will be no numbers in the phone book. In addition, many users have a much larger contact list than the SIM card can hold.
Choose one of the methods that seems most convenient and start exporting numbers.
How to transfer contacts to a SIM card in Windows 10 Mobile on Lumiya phones
Let's return to the main question: how to save contacts to a SIM card in a Lumiya phone
630, 520, 535, 625, 720 or any other Windows Phone smartphone. I searched for a solution for a long time and eventually found the Memiana program in the Windows Store. It was installed on the smartphone, but I couldn’t register with it - the error “An error occurred while connecting to the server” kept popping up.
Others that would allow you to move contacts
I couldn't find the SIM card. There are various solutions with which you can backup contacts to the cloud and services. But the same functions are provided by the Windows Live web interface, so why install unnecessary programs, especially since many of them are paid.
Still, there is one useful program in the Windows Store, it’s called contacts+message backup
. The application is developed by Microsoft and allows you to backup SMS messages and contacts to a flash drive. This is convenient if, for example, there is no access to the network and you cannot restore your phone book from the cloud. Messages are saved in XML format, and contacts are saved in VCF.
Having made a backup using this program, you can then insert the USB flash drive into another device and restore the backup from the Backup+restore folder.
By the way, there is one point - the application does not appear in the list of other programs, but becomes an item in the additional settings: “Options” → “Add-ons” (see photo).
Download:
Windows Live is the control center for your account. Here, in addition to other functions, you can manage all contacts, create them, export and import.
Now select those contacts that you would like to export.
To import (restore), click the appropriate button and select the desired service or file.
As you can see, the lack of the function of copying contacts from a phone to a SIM card is compensated by a convenient web interface. There you can restore contacts both from a file and from services, including from Google, which is convenient if you are transferring your phone book, for example, from a smartphone to Android.
How to fix error 0x80073cf9 in Windows 10 Mobile
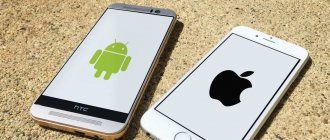
Each smartphone has its own software. It is used to control the device. Today, Android and Windows Phone operating systems are popular in the world. In addition, some people prefer to work with exclusive software like iOS.
Nevertheless, the first two systems win the hearts of buyers most often. Many people are changing the usual “Android” to “Windows Background”. Switching from one phone to another in this case will not cause a lot of trouble. But exactly until the question of copying the phone book arises. Next, we will look at how you can transfer contacts from Android. What does every modern person need to know about this procedure?
Using cloud storage
All modern phones work with cloud data storage. This is the easiest way to transfer your data to any new smartphone. Windows Phone users always have a Microsoft account. This means that the contacts on your phone are synchronized in the Outlook.com service.
Most owners of smartphones running Android OS have a Google account—without it, the operation of the gadget is accompanied by a lot of restrictions.
These services will help you transfer data between different operating systems.
Using Microsoft Services
To copy contacts from Outlook.com to Android:
- Download and install Microsoft Outlook.
- Open and log in.
- When the app asks for access to your personal data, click Allow.
- In the program, click on the menu button in the upper left corner.
- Select the "People" section.
Now Outlook can be used as your main phone book. To make a call, simply click on the selected person in the list.
In addition to contacts, the program provides access to email, calendar and files stored in the OneDrive cloud. The only negative is that you cannot send SMS through it.
Using Google services
Through your Windows phone, you can set up constant synchronization between your Microsoft and Google profiles. Here's what you need for this:
- Open the “Settings” section on your Windows smartphone.
- Next, click “Mail + Accounts”.
- Click on the “Add service” line.
- A pop-up list will appear. Find Google in it and click on it.
- Click Connect.
- Enter your Google account username and password. If it doesn't exist, create it here.
- A window will open asking for access permission. Click "Accept".
- Synchronization will begin.
When you launch a new Android, log into your Google account. Contacts will be downloaded automatically. This method is convenient when you don’t yet have a new phone at hand (you haven’t bought it or the courier has not yet delivered it), but you need to sell your old Windows Phone now. We synchronize contacts with your Google account and download them to your smartphone at any other time.
If Windows Background is broken and it is no longer possible to transfer data from it in this way, another method is used:
- Open your Google account in a browser on your computer (or create a new one).
- Go to "Settings".
- Click on “Accounts and Import”.
- Click on "Import mail and contacts".
- Enter your email address on Outlook.com.
When setting up Android for the first time, sign in to the Google account you used to import from Outlook. Contacts will automatically be transferred to the phone book of your Android smartphone.
Via Outlook
A wide range of possibilities is provided by synchronizing gadgets with cloud services.
Owners of devices with Windows Phone OS have their own account with Microsoft, without which it would be impossible to fully use all the functions of the device. In this case, synchronization of all data from the contact book is carried out with Outlook virtual mail.
If you go to the Outlook.com portal, you can transfer your saved contacts to any other location, including on Android.
Approximate sequence of actions:
- On the mail service portal, log into your account linked to your old device, specifying your login and password.
- In the program window, click on the logo with squares in the top left corner and select “People” from the drop-down list.
- Click the “Manage” button and check the box next to “Export to Outlook.com or other services.”
- A system request appears about the possibility of saving data in the vcf file format; you must confirm it with the “Save” button.
- Once the saving process is complete, click “Open Folder” to find out the location of the desired contact file. Owners of devices with Android OS have their own account to correctly use their smartphone on the Google service. The mail service is located on the website mail.google.com.
- Log in to the Gmail mail portal using your Android user account.
- Click on the red Gmail inscription and select “Contacts” from the drop-down list.
- On the page that opens, click the “Advanced” button and the “Import” column.
- A window will appear with import options, select the “CSV or vCard file” option.
- On the new page, click the “Browse” button and go to the folder where the vcf file was downloaded from Outlook to specify the path.
- Select the desired file using the “Open” option and click on the “Import” button. The synchronization process will start.
Now you can log in using your Google account on Android - as soon as the synchronization is completed, all contacts will be in the phone book.
A significant advantage of this method is the ability to transfer contacts even if the Windows Background device is broken. The main thing is to remember the correct password and login for your Microsoft account.
Via SD card
To transfer contacts from Windows Phone to Android, use the standard Data Transfer feature. If it is not installed on your smartphone, you can download it from the official Microsoft website.
Next steps are as follows:
- Open the program.
- Click on the menu item “Export to SD card”.
- The system will ask what types of data you want to save to the memory card.
- Among the answer options, select Contacts - put a tick on this item.
- Click on Start.
The process will take about a minute. After this, a message will appear indicating that the export of contacts is complete. The path where you can find the VCF file saved on the card is always indicated there.
Now all that remains is to remove the SD card from the old Windows phone and insert it into the new Android. Find the file in the specified path and click on it - the system will offer to export contacts to the phone book.
Import contacts from SIM card to Android
Rice. 10. Menu in the phone book
Now let's look at how to transfer contacts from a SIM card to Android. This is done just as easily, go to the phone book, click on the menu (three dots on the right), then select “Import/export”
The next step is to choose where to download contacts from; in our case, select “Import from SIM card”
Rice. 11. Import numbers from SIM
This way, the information of each contact will be copied to the phone.
For information: The phone may ask where to save the numbers, to the device or to a Google account (If a Google account is connected).
We described a slightly different method in the article on transferring contacts. To do this, you also need to select “Contacts” on Android and use the same “Import/Export” menu to transfer information from the SIM card to the phone.
Transfer directly via Bluetooth
Modern Android devices can receive contacts from Windows via Bluetooth.
To do this, do the following:
- Find the “Import/Export” section in the settings.
- Select "Import from another phone."
- Next, “Supports Bluetooth.”
- Click Next.
- Read the instructions on the screen, then click “Next” again.
- A list of available devices will open. Select the one from which you want to transfer contacts.
- Confirm importing the file.
- In the “Import contacts to” window, click on the “Phone” option.
That's all. Phone numbers will be sent from Windows Background to Android.
Moving contacts using a vcf file
This method involves the use of a special program. Here's what you need to do to do this:
- Download the Contacts Backup application from the official Microsoft website.
- Connect your PC and smartphone to the same wireless network.
- Create a backup copy of your phone book through the application.
- The program will prompt you to enter the IP address in the browser line. It will download a ZIP archive with contacts to your computer.
- Unpack it. It will contain a file in vcf format.
- Send it to Android via Bluetooth or wired USB connection.
Now you need to install it on your Android smartphone. The algorithm is as follows:
- Go to Contacts.
- In the menu, click on Import/Export.
- In the “Copy from...” window, select “Device memory” (“Import from storage” for new Android operating systems above version 7).
- And in the “Copy to” window, click “Phone”.
Now the smartphone itself will find the required file and copy the data from it to the phone book.
Another way is to find the .vcf file in Explorer and try to open it. The system will offer to import data into the contact book.
How to transfer via PC
In addition to the wireless connection, you can use a USB cable to transfer contacts. To do this, you will again need to create a file with the .vcf extension. Follow the instructions:
- Select the contacts you want to transfer - all or several.
- Click the “Import/Export” button, then vCard.
- Connect Windows Phone to PC via USB port.
- A window will open on the computer screen to manage files in the smartphone’s memory.
- Open the Contacts folder.
- Copy the vcf file from it.
- Disconnect the Windows background from the PC.
- Connect Android in its place.
- Transfer the copied file to your smartphone's memory.
- Disconnect it from the USB cable.
Now all that remains is to go to contacts and select “Import/Export” from the menu. Next, select the option “Device memory” or “Import from storage” - different versions of Android have a slightly different interface. On the "Copy to..." page, select "Device".
So, the main way to transfer numbers from a phone book is to create a file with the vcf extension. This can be done through the built-in functions of your smartphone. Next, select the option where it is more convenient to send this file - to a memory card, to a computer, or directly to Android via Bluetooth. The process shouldn't cause much difficulty. If the chosen method fails, try another. For data security, download applications only from Google Play or the official Microsoft store.
Android smartphones are very popular. By owning such a device, you will be able to enjoy greater freedom than owners of phones running Windows Phone, for example. Although Windows Phone OS is beautiful and stable, it is quite hidden.
But before you use your new smartphone, you need to do a few important things. The first task will be to transfer the phone book to an Android device, but how can you transfer contacts from Windows Background to Android quickly and comfortably?
The good thing is that you don't have to do this manually. With the advent of new technologies, it has become possible to transfer contacts in just a few clicks without losing data or any additional knowledge. Moreover, there are many ways to do this.
How to transfer contacts from Windows Background to Android using the Cloud
All devices created in the modern world are made with the expectation that they will interact with cloud storage, and it would be foolish to refuse such a free and convenient function.
All Windows Phone users already have an account registered with Microsoft. While all contacts must be synchronized with Outlook mail services. Android has a similar setup, so if you're going to use it, be prepared to lose a lot of functionality unless you sign up with Google.
Transfer via Outlook
Windows Phone Book automatically synchronizes with Outlook.com services. Let's look below at how you can transfer contacts to Android.
For this:
- Using Google Play, you need to get the Microsoft Outlook application;
- Next, you need to enter your Microsoft account information;
- Give permission to the application to access your data;
- After turning on the application, you need to click on the “People” item located in the upper left corner;
- You can use the entry in Outlook as primary , to do this, click on the number and the call will begin.
But do not forget that Outlook is quite weak as an application , so it is better to opt for familiar options. This method is suitable only for those users who communicate a lot using email services.
Using Gmail (1 way)
There are several options for copying a phone book to Google. But their main essence is to connect Google and Microsoft accounts through synchronization that works continuously. This is done using a smartphone.
For this:
- On Windows Phone, find Settings ;
- There, click on “Mail and Accounts” ;
- Next – “Add a service” , then click on the “Google” ;
- In the window that opens, select “Connect” .
After which the application will ask you to enter the name and password for your existing Google account. If there is none, you can create it right there. Next, a window will open called “Windows is requesting...” , in which a list of rights will be indicated. Here you need to click the “Accept” .
Now synchronization in auto mode will begin. You can click on the account name and make sure there is a checkmark in the section called Contacts. If you want, you can synchronize not only numbers, but also other important data.
When you start Android for the first time, enter the Google account information described above. Only then will the contact database be downloaded to your smartphone.
Using Gmail (2nd method)
This method is perfect if you don’t yet have an Android smartphone. There is also a method that allows you to synchronize contacts even when you do not have any device on your hands.
For example, Windows Phone is broken, but the Android phone has not yet arrived to you. The most important thing here is not to forget your Microsoft account information.
We do the following:
- Open or register a mailbox in Gmail ;
- Go to the “ Settings ” section;
- Click “ Accounts and Import ”;
- In the next line we indicate “ Import mail and contacts ”;
- Specify the mailbox address on Outlook.com ;
- Try to follow the import instructions.
When you set up Android for the first time, enter your Google account information imported from Microsoft. After this, the contacts are automatically imported into the phone book.
Transfer contacts from Windows Phone to Android locally
Not so long ago, the Windows Phone file system was as secretive as iOS on the iPhone. Today, fortunately, phones have an SD card from which you can export a database of numbers without even accessing cloud storage.
There are also a huge number of applications that allow you to do this, for example, Contacts Backup . One of the very interesting applications is the one that was created by the developers of Amaze Pictures Inc. This program makes it possible to save files on smartphones in .VCF format even without a memory card .
After creating the phone book, the tool will display a message where to dial the IP address from which you can download the zip archive to your PC. The file needs to be downloaded and unpacked onto your Android smartphone. Next, import the content into your phone book.
Question 2: How to transfer contacts to Windows Phone
There are several options - take it from your accounts (, Skype, etc.), from the cloud or from your old phone.
Let's start with the simplest thing - how to transfer records from your previous phone. This is done very simply:
Step 1. On your old phone, you need to copy all numbers to the SIM card. For example, if your old phone has Android, you need to go to “Contacts”, press the “Menu” key, select “Import/export contacts”, then “Export to SIM card” (highlighted in the photo below by arrow No. 1), select them (arrow No. 2) and click “Finish” (arrow No. 3).
Process of exporting data to SIM card on Android
In other operating systems, the process is almost the same, only the names of the menu items may differ.
- Step 2. Insert the card into the new phone.
- Step 3. On a new phone with Windows Phone, you need to go to “Contacts” and click on the “Advanced” button (looks like an ellipsis, in the picture below it is highlighted with arrows), then “Settings”, and then click on “import contacts from SIM card” "
The process of importing contacts from a SIM card
If the numbers are in the cloud, for example, Outlook.com, or you want to transfer them from social networks, then you need to set up your account.
To do this, perform the following steps:
- Let's go to settings.
- Select the item “Mail + accounts”.
- Click “Add service” (this button is shown in Figure a).
Accounts window and window for adding an account in Windows Phone
- We select Outlook, Facebook, Google, Yahoo or another service we are interested in (Figure 5 b shows the account selection window, an entry in Google is selected there, you can select any other).
- Enter your username and password for your account and log in.
- It is done! After this, all possible data from the connected accounts will be transferred to the phone.
Sync multiple email addresses (Gmail and Outlook)
To enable this procedure, configure the import of messages into Google. With it, you can receive all mail from different accounts and services. To receive new emails, you just need to set up automatic forwarding.
To do this you need:
- Open Google mail, preferably on your computer. Forwarding is included only at this post office.
- Enter “Settings”, find there the item we need “Forwarding” - “Add address” - “Continue” - “Ok”.
- Follow the link sent and confirm that you want to save copies of letters.
If necessary, this option can be easily disabled. Copies usually arrive immediately, but sometimes there may be delays.
Frequently asked questions/answers
It is quite possible, but for more information, check out our article. Yes, but your default should still be primarily Gmail if you want to take full advantage of all Google features. To do this, use the advice given in the second Gmail method. Using this method, you can transfer not only contacts, but also all necessary messages. And for moving photos there is a special adapted application of the same name. The answer has already been described above.
As you can see, it is quite easy to transfer contacts from Windows Phone to Android. The only requirement is either cloud storage or an SD card. Don’t forget to synchronize on time, save contacts on any device - and at any time the necessary numbers will be at hand. Good luck!
Sources used:
- https://mobile-on.ru/perenos-kontaktov-s-windows-phone-na-android-6-sposobov/
- https://viarum.ru/perenos-kontaktov-s-wp-na-android/
- https://andevice.ru/perenos-kontaktov-s-windows-phone-na-android/
- https://tarifkin.ru/mobilnye-os/perenos-kontaktov-s-windows-phone-na-android
- https://gurudroid.net/kak-perenesti-kontakty-s-vindovs-fon-na-android.html
SHARE Facebook
- tweet
Previous articleHow to flash a phone or tablet using Flashtool? Instructions, recommendations
Next articleClock on the Android home screen - how to set it correctly
How to sync contacts on your phone with Google?
Backup and sync device contacts
- On your Android phone or tablet, open the Settings app.
- Tap Google Settings for Google apps. Google contacts synchronization. Also sync your device contacts. Automatic backup and synchronization of device contacts.
- Enable automatic backup and synchronization of your device contacts.
- Select the account where you want to save your contacts.