Method 1: Built-in tools
The most convenient way to solve our problem is to use the contact book built into the phone's firmware. There are many variations of these, it is impossible to list them all, so we will focus on the version that is present in the current, “pure” Android.
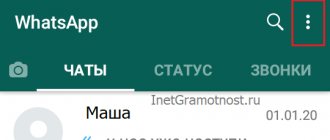
- Open the application menu and select "Contacts" there.
- Click on the three bars at the top left and tap on “Settings”.
- Use the Contact Filter option, which you set to All Contacts.
- Return to the address book window. Scroll through the list, select with a long tap the positions you want to erase, then find the button with the trash can icon on the toolbar at the top and click on it.
Confirm your intention.
If, after deleting, contacts appear again after some time, the reason may lie in synchronization. Therefore, to fix the problem, this option needs to be disabled - we have already described how this is done in a separate article.
Read more: Disable data synchronization on Android
How to delete contacts from both your Android phone and your accounts at the same time
This method of deleting contacts is suitable only for those who want to delete them both from the phone and from the accounts that are synchronized with the phone.
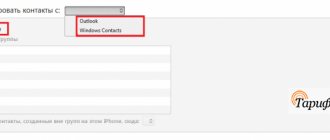
On your computer, sign in to your Gmail account. Then click on the Google Apps icon in the upper right corner of the screen, and click on the Contacts icon in the small window that appears.
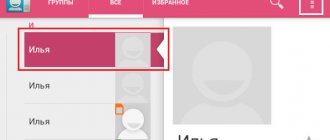
On the next screen, hover your mouse over the contact, a checkbox will appear, check it. Selected:1 will appear at the top. There will be a checkbox nearby. When you hover over it, the message Select all will pop up. Check the box to select all contacts in your Gmail account.
Click on the menu in the form of three dots in the upper right corner of the screen and, in the drop-down window, select the Delete option.
Once you have deleted all contacts from your Gmail account, your Android phone will also automatically delete all contacts on the device once it syncs.
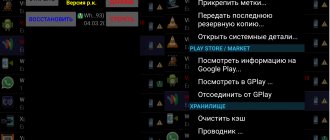
In case you do not want to wait for the next synchronization, click Settings - Accounts - Google. On the next screen, tap on the three-dot menu and tap on the Synchronize now option that appears.
Note: This method deletes all contacts permanently, without the possibility of recovery.
Method 2: Simple Contacts
You can also delete unnecessary entries in your contact book using third-party tools - for example, Simple Contacts.
- Open the application and give it permission to access your subscriber book.
- After loading the list, filter the entries for your own convenience - click on the button marked in the image and select the appropriate criterion.
- Next, select the required positions with a long tap, click on the three dots at the top right and select “Delete”.
Done – contacts will be deleted.
Simple Contacts is a good alternative to the built-in solution, but the free version displays ads.
Why contacts are not deleted from my Android phone
Synchronizing contacts with What's App servers
There are 2 reasons for this:
- Enabled automatic synchronization of contacts with Google servers, What's App, Telegram or After it, usually deleted entries are returned.
- The contact is associated with some messenger or other application, which is why the “contact is read-only” error appears.
In the first case, the problem can be solved in 2 ways: disable synchronization of contacts with Google and messenger servers or clear the list of contacts from your Google account, and then synchronize them with the device.
In the second case, the problem is also solved in 2 ways:
- Change display settings in the phone book so that identical entries from different applications do not confuse the user.
- Separate contacts and delete unnecessary ones.
Changing Display Settings
This feature does not delete contacts, but hides “duplicates” from different applications. The procedure differs on phones from different manufacturers due to differences in the interface, but the principle is the same. For example, on Asus Zenfone 4 (A450CG) with Android 4.5 and ZenUI v3.0 shell, this is done like this:
- Open "Contacts".
- Click on “Contact Filter”. On other phones, this item can be found in the application settings under the name “Display”.
- Mark the source of the displayed contacts (SIM, phone memory, Google accounts, What's App, etc.).
Contact separation
The procedure is as follows:
- Follow step #1 from the previous method.
- Find the desired entry, hold it with your finger and select “Edit” in the menu that opens.
- Click "Split".
- Delete unnecessary entries in the standard way.
This option is only available on Android 8.0 and 9.0. To delete on versions 7.0 and older, you will need a third-party Easy contacts delete utility. It is used extremely simply: click on the desired contacts and click on the button with a cross at the bottom of the screen.
To summarize, we can say that you can delete problematic entries in the phone book in a few clicks, without resorting to third-party applications.
Method 3: True Phone
The popular True Phone application combines both a dialer and its own version of the address book, which allows you to permanently delete corresponding entries.
- Set up the program and give it the necessary permissions to operate.
- Go to the “Contacts” tab, then call up its menu by clicking on the three dots and select “Delete contacts”.
- Mark unnecessary items by checking the boxes, then tap “Delete”, and in the warning window – “Yes”.
This application is a convenient and free tool.
Disable account synchronization
The question of how to delete contacts from Android is directly related to device synchronization. If you really need to clear your phone book or erase certain information from it, you need to enable synchronization with your Google account on your smartphone. Otherwise, all unnecessary information will be saved in your account and will again appear in the gadget’s memory. Therefore, disabling account synchronization is not recommended when working with the phone book.
However, if you need to deactivate a large number of phone numbers at once, you can use disabling synchronization.
- Go to settings.
- Open the "Accounts" section.
- Go to the Google section.
- Deactivate synchronization.
Removing duplicate contacts
Things are a little different if you need to delete not single contacts, but duplicate ones - for example, those that are simultaneously present in the phone memory and on the SIM card. Of course, the methods described above are also suitable for takes, but there are alternatives that make this operation easier and more convenient. One of the most popular solutions is called Duplicate Contacts Fixer.
- Launch the program, in the start window click “Continue with ads”.
Issue permits as well.
- The solution in question makes a backup copy of the entire subscriber book - if you need it, click “Yes”, otherwise click “No”.
- Select a contact category and click on it, and then “Find duplicates”.
- The application will spend some time searching for duplicates - when they are found, click “Delete duplicates”, then “Proceed” and “Yes”.
This software has only one drawback - a large number of displayed advertisements.
We are glad that we were able to help you solve the problem. In addition to this article, there are 12,444 more instructions on the site. Add the Lumpics.ru website to your bookmarks (CTRL+D) and we will definitely be useful to you. Thank the author and share the article on social networks.
Describe what didn't work for you. Our specialists will try to answer as quickly as possible.