Despite the fact that now almost everyone communicates via instant messengers and social networks, SMS messages still remain relevant. For example, they are often used to confirm payments, log into accounts and register on various sites. But how to set up SMS on Android so that everything works correctly? The question is quite interesting, because in most cases, apart from installing a SIM card, no additional actions are required. But sometimes you still have to manually change and set specific parameters. We will talk about this further.
Sunday, October 7, 2012
SMS messages in Android. Import/Export/Refurbishment
Recently there was a need to recover a couple of deleted SMS messages on Android. Perhaps my experience will be useful.
First, let's figure out how to get undeleted data:
Where are they
The SMS message database is located at:
/data/data/.com.android.providers.telephony/databases/mmssms.db
(root required for access )
How to get it
This is a sqlite database in which information about all SMS messages is actually stored (time, sender, text, chaining, etc.).
Moreover, popular GUI interfaces (SQLite Database Browser and sqliteman) for working with sqlite refused to open this database due to a very new version. All that remains is to use the sqlite console or take a ready-made wrapper designed specifically for exporting SMS from mmssms.db -
yaffs extractor, mmssms.db & contacts2.db converter.
This set of applications allows you to convert our database into xml format compatible with the SMS Backup & Restore program.
How to put it back into your phone
In the future, we can view the contents of xml in any text editor or import it back into the phone using SMS Backup & Restore: Put xml in
/sdcard/SMSBackupRestore
, run Restore, select our xml.
And now the actual restoration
As in most databases, when deleting data in sqlite, data is not physically erased, but is only marked as deleted. Deletion from the database occurs not when messages are deleted by the user, but when new messages are written.
If, after deleting the messages that need to be restored, there were no new messages, then we do a normal database export and get everything we need.
If there were new messages, then it was a matter of luck: Deleted messages were marked as free and new data could overwrite the old ones. In my case, after one message received, the deleted data was not deleted and was perfectly visible in the HEX editor. I couldn't find any ready-made recovery software.
How to use the mmssms.db file
After finding this file, a reasonable question arises: what to do with it next? There are several options:
- Delete. The simplest and most obvious option, which in some cases may be useful. The point of this operation is that after a reboot, the message database on the device will be updated. First, it allows you to delete all messages at once. Secondly, it can help get rid of an error in the system in which a notification constantly appears on the message icon when there are no new messages.
In this case, you not only copy the file (first line), but also change the owner (second) and set the appropriate rights (third).
Now you know where SMS messages are stored on Android.
How to protect yourself from lost messages
To do this, first of all, you need to be more careful and check the contents of the message before deleting.
You can also make backup copies of your data in advance so that in such situations you can easily restore lost information. After reading this article, be sure to make a backup using the application: SMS BackUp
Now, if you delete important messages, just open this program and click on “Restore”
Save your messages to cloud storage. Dropbox, Yandex Disk, Google Disck
In order to eliminate the possibility of data loss, the developers have released the SMS Backup & Restore application. Among its features:
- Schedule function;
- no advertising;
- ability to transfer messages to an SD card.
How to use the application?
Install the application on your phone.
1. Open it → click on “Get Started”. 2. Select the Settings tab. 3. In this window there are the following items: “Usual backup location” (choice of where all your information will be stored); “Backup settings” (files that need to be backed up are indicated); “Scheduled backup settings” (copying will be performed at the time you specify); System settings (language, theme, etc.) You customize them for yourself
To archive: 1. You need to select the desired section in the menu.
2. Specify the name of the copy and its location (the place where you want to save it) → Then click on the “Backup” button.
3. We are waiting
To restore data: 1. Select “Recover” in the menu.
2. Specify where to save the copy.
3. Click “OK” to complete our operation.
Ready! Now your messages are completely safe!
How to find messages in Android
To access the necessary files, follow these steps:
- Get Andro "superuser" rights > 360 root
- Install a program that allows you to open SQLite database files (for example, sqlite database browser).
- Using the program, go to the following directory: /data/com.andro >
SQlite database browser - Find the mmssms.db file. Dialogs are stored in this file in Android.
Message Backup Procedure
So, to save the necessary SMS messages on Android, download and open the SMS Backup+ application (the program interface is not fully translated into Russian). Click Save
and select a backup location.
Click OK
to confirm your choice and provide a name for your backup.
Check the box if you also want to save the MMS
.
Select the backup type (backup all or part of your files). Also choose whether you want to back up your data to your smartphone or to online storage. Click OK
to confirm all actions.
Now you can easily save all SMS and MMS and no longer risk losing important data.
If messages do not arrive from all numbers
3.1. Reboot your device
Turn your device off and on. Try receiving SMS.
If SMS are received, everything is fine with the device. If you are not receiving SMS messages, move on to the next recommendation.
3.2. Turn off Do Not Disturb mode
To enable alarm and notification, disable this mode.
Try receiving SMS.
If SMS are received, everything is fine with the device. If the mode is not enabled or SMS do not arrive, proceed to the next recommendation.
3.3. Test your device in safe mode
Downloaded applications may affect the operation of the device, including blocking SMS. To check whether downloaded apps are affecting SMS, boot your device into Safe Mode. In this mode, all downloaded applications are disabled (do not work).
Try receiving SMS.
If you receive SMS messages in safe mode, reboot your device. Then delete the downloaded apps one by one until you start receiving SMS. It's best to start with the apps you've downloaded recently.
If you are not receiving SMS messages in Safe Mode, move on to the next recommendation.
How to set up an SMS center on Android?
It turned out that people often encounter incorrect SMS center settings - in this case, they cannot send and receive messages. But solving the problem that has arisen is quite easy, and the first thing you need to do is get an SMS center number from your mobile operator (it can be located on the official website). And then we perform the steps from the step-by-step guide and save the changes:
- Open the application through which all phone calls are made.
- Enter the USSD request *#*#4636#*#* and press the call button.
- Go to the “Phone Information” or “Device Information” section.
- Scroll to the end of the page, paying attention to the “SMSC” item. It is in the available line that you need to insert the previously received number for the SMS center.
- All that remains is to click on the “Update” button and close the calling application.
So, we found out how to set up SMS messages and SMS center on Android. In general, after installing the SIM card, all the necessary options are activated automatically. But in isolated cases this does not happen - and then you have to manually change each parameter. Do you have any additional questions? Then feel free to ask them in the comments under our article!
How to set up MMS through your MTS personal account
As a rule, there are several ways to configure them. You choose which one is most convenient for you.
The most convenient is: it is very simple, fast and accessible to any Internet user. Your personal account allows you to manage any functions provided by your mobile operator and order personal settings for mobile Internet and MMS.
You can call the short number 0876.
It is possible to send text SMS to number 1234 (free). Your phone will receive a response with the necessary settings; all you have to do is save them in your phone. If you send an empty message, settings for the Internet and MMS will be sent. (You can clarify your request). If the word WAP is written in the sent message, then the response message that arrives on your mobile phone will contain settings for WAP-GPRS only. In addition to all of the above, there is the ability to send separate requests for MMS, Internet, CSD, inclusive.
The last way is to visit one of the nearest MTS offices, and with the help of employees it is easy and simple to set up all the necessary and desired functions. You will definitely need any document that will confirm your identity (driver's license, passport).
As you have probably already seen, the setup is very easy, there are several ways to do it. All you have to do is choose only the most important and convenient method for you.
How to send MMS to MTS from a phone
You can send a message using standard phone functions. To do this, the user must go to the “ Messages”
" and select the item "
Create new MMS
". You can attach the necessary files to the message you create.
Important! The size of the sent message is limited to 300 KB. This must be taken into account even though phones support file scaling
The recipient's number must be specified strictly starting from +7. After pressing the send button, the phone will connect to the server and send the message in a few seconds. Sending time depends significantly on the speed of your Internet connection.
Recovering SMS using PC
There are a lot of software for PC to recover SMS. Before you start, you must enable USB debugging.
For this:
- Open Settings
- “About phone” item
- Click on the “build number” section many times to become a developer and gain access to additional features.
- Now go to the new settings section “For Developers”, it will become available after the operation above.
- Turn on the check box
- And enable the “USB Debugging” section
Now we do the following:
Download the Dr. application to your PC. Fone for Android
Open the program and connect the phone to the PC
Select the “Messaging” section and click “Next”
We wait
Android Data Recovery
The application has gained a huge reputation and a large number of positive reviews thanks to its rich functionality and simple interface, which is very easy to understand.
The recovery process is very similar to the previous utility:
- Download the application on PC
- Connecting a smartphone via cable
- We are waiting for the recovery process to complete
- About the necessary messages
- Click on “Recover”
- Reboot the phone
MobiKin Doctor
Now, let's look at an application that works with devices without root rights.
We transfer our device to developer mode. How to do this is described just above. Takes about 2 minutes.
- Enable USB debugging
- Download the MobiKin Doctor application from the developers’ website
- Next you need to register or, for the trial period, skip it and click “next”
- Launch the program
- Select the checkbox that needs to be restored
· We choose what needs to be resuscitated first, in our case, these are messages.
· Select the checkbox for the messages you want to recover
· Now lost messages will be recovered on PC. Yes, exactly on PC, so you will need to look for them there
IMPORTANT: The application supports about 2000 smartphones, but some may have problems, you can check with the developer himself
Also, there are other recovery applications. We will not describe them, since they all work on the same principle!
1. GT Recovery for Windows
2. Coolmuster Android SMS+Contacts Recovery
3. MiniTool Mobile Recovery
4. Undeleter (this application stands out from others. The program works with all types of data; before restoring a message, you can view it in a special window. The application works not only with memory cards, but also with internal memory. You can recover information not only on phone memory but also to cloud storage from Google, Dropbox. Full functionality of the application is paid)
5. EaseUS MobiSaver for Android
Configuration messages
Previously, on old phones, about 10 years ago, in order to access the Internet or receive mms, you had to receive a configuration message from the operator and set the settings. Now these SMS arrive automatically and are immediately installed on your phone. And no one even suspects where to find these settings, and that they are even registered somewhere.
When you change operator, when you insert a new SIM card into your phone, configuration messages may not arrive. And if you can’t reach the operator, you will have to configure Internet access and receive mms messages manually.
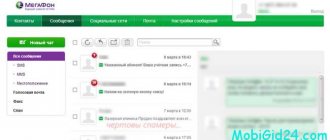
Let’s go to Configuration messages (additional settings in the “Messages” application). All messages with Internet access settings from your mobile operators are stored here.
For example, let's take the Internet settings - open the first message.
Internet access point for Tele2
For mms messages, the following settings:
Settings for receiving mms
These were the settings that needed to be entered into the phone every time for the Internet to work. This process is now automated.
Quick Alerts
When there is an incoming call, in addition to the option to answer it, there is a function to quickly send a notification to the caller. It contains several text templates. The user chooses one of them at his own discretion. You can change the phrases for answering a call and add your own text. To do this you should:
In the window that opens, you need to select any answer option and change it by entering new text and clicking the “Ok” button.