How to turn on the Internet on Samsung: connection, settings and Wi-Fi
Hi all!
Today I will tell you how to enable and configure mobile Internet on a Samsung phone. To do this, you must have a SIM card inserted in your smartphone and pay for any of the tariffs that have Internet access. After this, in 99% of cases you don’t need to configure anything, just swipe your finger from top to bottom, opening the “Blind” menu, click on the “Mobile data” (“Data transfer”) item. To check your connection, go to the Samsung Internet browser and enter any query in the search bar. If after this there is still no Internet, we’ll try to configure it manually. Also, do not forget that you can access the Internet using Wi-Fi - I will talk about this at the very end of this article.
We look at the Wi-Fi password on a phone without ROOT rights
An important condition: the phone must be connected to a Wi-Fi network, the password for which we need to find out.
- Open any browser on your phone and go to the address in the address bar 192.168.0.1, or 192.168.1.1. These are the addresses most often used. But depending on the router and settings, the address may be different. See the address on the sticker on the bottom of the router. It could be like tplinkwifi.net. More detailed information is in this article. For example, I have a router from TP-Link (instructions: how to enter the settings of a TP-Link router).
- Most likely you will be asked to enter your administrator login and password. You must have this data. This login and password have nothing to do with the Wi-Fi network. Factory settings (if you haven’t changed them) should be listed at the bottom of the router (usually admin and admin).
- The router's web interface will open. Since it is different for everyone (on different routers), we need to find the section with Wi-Fi settings. Usually it is called that, or also “Wireless network”, “Wireless mode”, “Wireless”. Well, there you can already find the wireless network password settings so you can view it from your phone.
- We find the password and use it to connect other devices. It is usually indicated in the field “Wireless Network Password”, “Wireless Key”, “Wireless Password”, “PSK Password”, “PSK Key”. If necessary, you can change the password there.
If you have any difficulties logging into the settings, or finding your password in the web interface, then you can describe the problem in detail in the comments, and I will try to suggest a solution.
Method 1: Setup via SMS
- In order not to enter the settings manually, and also not to look for where this can be done on the phone, you should call your operator’s hotline and ask to send a sheet with the settings via SMS message. In the upper left corner you will see an envelope with a gear like this.
- Open the message through the “Blind” menu. Or you can find it in the SMS section in the main menu.
- Open the configuration message.
- Now let's set the settings.
- You may be asked to enter a 4-digit PIN code, try entering one of the values: 1234, 0000, 1111, 2222, 3333, 4444. If the code does not work, then call the operator again and ask what PIN they set.
- After this, you will see a message that the installation is complete. Again, open the same “Blind” menu and turn on the mobile Internet.
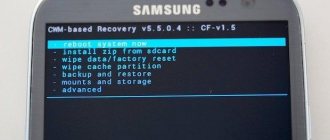
- But it’s too early to rejoice; you should restart your smartphone. To do this, find the side button and hold it down for a few seconds. After that, select the “Reboot” option.
Method 2: Manual setup
- On the main desktop, go to the "Menu" section.
- Find and click on the gear icon.
- Go to the “Connections” section of all wireless communications. Not all firmwares have this item, if you cannot find it, then skip this step and move on to the next one.
- Next you need to find the section that is associated with “Mobile networks”. It may be hidden, so you will need to click on the “More” button.
- Go to the “Access Points” subsection.
- Now you need to enter the settings manually depending on your operator.
NOTE! You can see the settings below. Everything that is not specified is left with default values and not filled in.
ATTENTION! A dash (-) or dash sign indicates that you do not need to enter anything in this line and just leave the default value.
| Operator | Tele 2 | Beeline | MTS | Megaphone | Yota |
| Name | tele 2 internet | beeline internet | mts | megafon | yota |
| Access point | tele2.ru | internet.beeline.ru | mts | internet | yota |
| Username | — | beeline | mts | gdata | — |
| Password | — | — | mts | gdata | — |
| Authentication type | — | POP | POP (PAP or CHAP) | — | — |
| APN type | default,supl | default | default | default | default,supl |
| MCC | — | — | 257 | 255 | 250 |
| MNC | — | — | 02 | 02 | 11 |
- Click on the three dots in the upper right corner of the screen and select the “Save” button from the drop-down menu.
- Now, just like at the very beginning, you need to turn on the Internet menu and be sure to restart your smartphone - hold down the main side button and restart the system.
Advanced settings
If you need to connect WiFi on your tablet or smartphone through a proxy server, you should use the following instructions:
- Go to the Settings application.
- Activate Wi-Fi.
- Click on the network name and hold your finger for a while.
- Tap on “Edit”.
- Next to additional options, click the down arrow.
- Next to “Proxies”, select the down arrow again. Then - “Configure manually” and “Auto-detection of proxy server”.
- Set up a proxy if necessary.
- Select "Save". These data must be entered separately for each case.
You can change advanced Wi-Fi settings. To do this you need the following actions:
- Enter the Settings app.
- Activate Wi-Fi.
- Click on “Advanced” and “Advanced settings”. The list of available options may differ depending on the device model and operating system version.
- By installing digital certificates, you can identify your device to access VPN, Wi-Fi and other functions.
- Setting Wi-Fi Direct allows you to connect directly to other devices that also use this feature.
- The WPS button enables secure wireless adjustments.
- The WPS Pin Entry option allows you to enter a personal identification number to protect Wi-Fi.
- The Network Notifications feature lets you receive alerts when your device detects available over-the-air communication options.
- The Wi-Fi On Sleep button allows you to configure signal processing for a smartphone in sleep mode.
- The “Signal range” option allows you to expand operating frequencies.
Please keep in mind that the operating system may differ on different models. The above instructions are intended for gadgets running Android 7.0 and higher. On other versions, the setup process may be slightly different, but in most cases the difference is minor.
After purchasing a smartphone, users have a reasonable desire to access the Internet from their mobile device using a wireless network connection. However, it is not always possible to realize this desire the first time. To avoid problems connecting to the Internet, you need to know how to set up Wi-Fi on your phone.
All the steps described below are equally suitable for phones and tablets running Android OS.
Before you start setting up Wi-Fi on your phone, you need to turn on the adapter. This can be done using a widget displayed on the screen or in the standard system menu of the phone (tablet). On the widget, to enable the adapter, just click on the corresponding icon:
If the widget is not on the screen, use the menu of your mobile device:
The adapter is turned on - the device will automatically search for available Wi-Fi points.
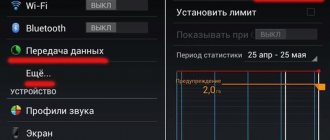
Please note: with Wi-Fi always on, the battery will drain faster than with the adapter turned off.
In addition, if you do not turn off Wi-Fi, then when moving around the city your phone will “catch” all available wireless networks and issue notifications about the possibility of connecting to them.
Method 3: Wi-Fi connection
If you want to organize a Wi-Fi network at home, in a country house or in an apartment, then you need to take several steps - they are all described in detail here. If you are connecting to an existing Wi-Fi network, then you need to do the following:
- Open the "Menu", go to "Settings" and go to the wireless network section. Next, enable this module.
- In some firmware, this subsection is located in the “Connections” item.
- As soon as the module is active, you will see all nearby wireless networks, select any and connect. When connecting, you will need to enter a password.
- You don’t need to constantly enter a password, and it’s now easier to turn on Wi-Fi through the same “Blind” menu. We simply turn on the module, and the smartphone will automatically connect to the network.
Source
Connection setup
Immediately after turning on the adapter, a list of all available points should appear on your phone. You need to select your network and, if necessary, enter a password (if you set it when setting up the router). Usually, nothing else is required to set up the Internet on Android. But it happens that it is not possible to connect automatically - in this case, you need to configure the connection.
First of all, you need to pay attention to the second section. If the router distributing Wi-Fi does not have the automatic detection of network parameters (DHCP) function activated, then you need to select “Custom” in the “IP Settings” section and manually specify all the necessary data (IP address, gateway, DNS).
You can check with your network administrator or your ISP if you are trying to connect to a personal hotspot. After saving the configuration, try connecting the tablet to the Internet again.
Make sure the Wi-Fi icon in the status bar is blue and not blue. The more points are colored blue, the stronger the signal and the more stable the Internet connection.
Some people think that Wi-Fi means free internet, but this is not entirely true. It is, of course, free, but it requires an access point.
Typically, this service is provided by cafes and supermarkets, and you can also install a router at home or via a computer if it is equipped with a Wi-Fi module.
Wi-Fi option is available on many phone models. Let's take a closer look at the features of connection and use on some of them.
Wi-Fi setup menu
- Open the “Settings” application and go to the “Connections” tab.
- Select "Wi-Fi". We don’t activate it, but rather select it.
- In the menu that opens, click “Advanced” at the top right.
- The “Network Management” menu allows you to change some settings of already connected Wi-Fi networks. To do this, select a saved network, click “Forget” to delete it from memory, or deactivate “Connect automatically” so that the smartphone does not connect to it.
- The “WPS button” and “Enter WPS PIN code” menus are needed to connect your smartphone to a router that supports the WPS function.
*Some settings menus are only active when Wi-Fi is active (turned on).
Incorrect operation of Wi-Fi and DNS server
There are cases when incorrect operation of a Wi-Fi wireless network depends on the DNS server. For example, if you go to the Play Market and pictures do not load, games and applications do not download.
Typically modems are configured in such a way that they receive automatic DNS servers from the company's providers. It happens that servers do not work entirely correctly or are configured incorrectly. A universal way is to enter the public DNS server from Google:
- go to your phone settings
- Wi-Fi networks
- hold your connection
- in the window, select “change” or “Statistical IP” (for different phone models)
- enter DNS: 1 8.8.8.8
- enter DNS2: 8.8.4.4
Save and check application downloads.
Once you are connected to the Wi-Fi network, check your Internet access. Open your browser and use it!
Wireless Internet is now incredibly accessible, so the question of how to set up WiFi on your phone is becoming more and more relevant. Sometimes it’s enough to move the slider in the phone menu and the Internet works, but there are times when more thorough debugging is required.
If your smartphone turns off Wi-Fi when it goes into sleep mode
It happens that you are downloading a large file or downloading an application via a Wi-Fi network, and as soon as the smartphone screen goes dark, the download stops.
- Go to the “Advanced” menu.
- Find the item “Wi-Fi in sleep mode”.
- Select "Always".
*The “While charging” option will allow the smartphone to remain connected to Wi-Fi in sleep mode only if it is charging.
*The “Never” setting prevents the smartphone from connecting to a Wi-Fi network in sleep mode.
Source
What to do if you can't connect to a Wi-Fi network
- Check that the entered password, case and language are correct.
- If the password is correct, but nothing happens during the connection process, reboot the device - turn it off and then on.
- If there is no Wi-Fi point in the list, check the functionality of the equipment, as well as compatibility and supported standards.
- Make sure that the settings show both 2.4 and 5 GHz network bands.
- Also, if the signal is weak, the corresponding access point is hidden. To display networks with a weak signal, you need to enable the corresponding option in the Wi-Fi settings menu.
If you still have questions, then in the block below “User Comments” you can leave a comment to the author or share your experience. We will try to answer.
How to set up WiFi on Android?
We must immediately stipulate that the question of how to set up an access point on an Android phone will be discussed in detail below. Now we are talking about connecting to an existing wireless network in order to gain access to the Internet.
To connect to a wireless network, you need to know its name and password. In most cases, the user only needs a few taps on the smartphone screen:
- In the “Network and Internet” menu, open “WiFi”.
- Move the slider to the “Enabled” position if it has not already been done.
- Select the desired name from the list and tap on it.
- In the window that opens, you must enter a password. This is done once, then the smartphone remembers the password.
In this situation, two problems are possible: the desired network is not visible in the list and there is no connection due to DHCP settings. Both problems can be solved if you manually configure Wi-Fi on your Android phone. To do this you will need:
- Scroll through the list of available connections to the end and find the “+Add” button.
- Enter a name and click “Advanced”.
- If DHCP is configured on the router (all devices automatically receive an IP address), then in the “IP Settings” section leave the value DHCP.
- If the router is not configured or does not support such a function, then you must select “Custom” and manually enter the IP address, gateway, and the addresses of both DNS servers.
This completes setting up WiFi on an Android phone; these instructions are also suitable for Android tablets.
If you have done everything according to the instructions, but the Internet on your phone still does not work, do not panic! The solution is closer than it seems. Just use our article at the link above!
Set up a Wi-Fi network via your phone
What are the differences between 3G and 4G networks: features, advantages and disadvantages
In general, the following methods are considered: “WiFi: how to connect it on your phone.” It's time to talk about the capabilities of smartphones. In addition to simply using the Internet from the device, you can go into the router settings, change the necessary parameters and even disconnect the router. This is very convenient when another device does not have access to the settings, or you have just connected the router to the network.
Connecting to the router from a smartphone
The procedure for connecting to the router from a phone is no different if it was done from a computer or laptop.
You must be connected to the desired wireless network and also know the permanent IP address: 192.169.0.1 or 192.168.1.1. Now, in order to connect your mobile phone to the connected network, you need to go to any browser, for example, standard Chrome, and enter one of the addresses in the line. If it is correct, an authorization window will appear. The entered login and password give full access to the Internet.
Change network password
The first thing you can do when you go to settings from your phone is change the Wi-Fi password. To do this, find the “Wireless Network” section, then “Security Settings”. Security Key is the required section. Enter your personal password of at least eight characters and save the settings:
Now no one other than the “owner” of the network will be able to connect to the Internet without knowing the new authorization code.
How to set up an access point on Android?
It’s one thing to connect to existing WiFi from your phone, and another to distribute the Internet yourself. It should be noted that only mobile Internet can be distributed from a smartphone.
Due to the fact that phones only use one WiFi module, it can either only receive or only distribute traffic.
Before you enable the “Hotspot” mode, you need to make sure that “Mobile data transfer” is turned on on your phone and “Airplane mode” is turned off.
To do this you will need:
- Open Settings and make sure Airplane Mode is turned off.
- Scroll up the menu and select Data Transfer.
- For each SIM card, mobile Internet is turned on separately using the sliders.
After this, you can enable the access point:
- In the “Network and Internet” menu, tap “Access point and modem mode”.
- Slide the Mobile Hotspot slider to the On position, and then select Mobile Hotspot Settings.
- In the new menu, select “Settings” again.
- Set a name, password, and select a security level. Click "Save".
This is how you can set up WiFi on a Samsung, Xiaomi, HTC, Meizu or any other phone with the Android operating system.
By the way! After you manage to cope with the system settings, we recommend that you familiarize yourself with one interesting service: WiFi Calling. It can help you save significantly on conversations with family and friends.
How to set up WiFi on iPhone?
The general connection principles for iPhones and Android phones are almost the same. To connect to the wireless Internet using an Apple smartphone, you will need:
- Select the desired network.
- Enter your password.
There are also two types of problems on iPhones: the network is not visible (hidden) and the connection does not work due to the lack of automatic settings. However, these problems are solved in different sections of the menu.
To connect to a hidden network, you will need:
- In the “WiFi” menu, in the list of available connections, find and click the “Other” button.
- Enter the name of the network and the type of security that is configured in the router. If a window with a password appears, enter it (some security types have a password for connection, some do not).
If the Internet does not work due to a lack of automatic settings (DHCP is not configured or missing), then you will need to configure it manually:
- Find the one you need in the list of WiFi connections and click on “i”.
- Select the DHCP tab.
- Enter the IP phone and router, subnet mask and DNS server address.
Using these instructions, you can debug the configuration of both iPhone and iPad.
Basic settings
- Open the Settings app on your device.
- On the Wi-Fi button, move the lever to the “On” position.
- Select any connection from the list of available wireless connections. If the network is secure and a password is required for access, a corresponding request will appear when connecting.
- After a successful connection, the “Connection established” status will appear. After this, the network will be saved and the device will automatically find it once within the access zone.
Most connections are included in the list automatically. You can add a connection that is not listed, does not display its name (SSID), or is outside the access area. If the desired network is not in the list, but is nearby, you need to open “Advanced” -> “Update”. To add a new connection, you need to:
- Activate the Wi-Fi button.
- Make sure that the air connection is turned on.
- Select “Add” at the bottom of the list. On Android 6.0 and older operating systems, you first need to click "More" and "Add Network".
- Enter the SSID and other security information if required.
- Click on “Save”.
If you do not want the device to automatically connect to the saved zone, you can delete it. For this:
- Open the “Settings” application on your gadget.
- Activate the wireless connection. Make sure it is turned on.
- Select a saved network. On Android 6.0 and older operating systems, first click on “Advanced” and “Saved”.
- Then tap on “Delete”.
To view saved WiFi information on your phone or change its settings, you need to:
- Open the Settings application.
- Switch to active Wi-Fi mode.
- Now it's time to connect to a specific network. To view information about her, you need to tap on her name. Here you can see the connection status, signal quality, communication speed, frequency and security information.
- To change the settings, you need to click on the connection name and hold your finger for a while. Here you can change it or delete it.
Possible problems and their solutions
“I can’t set up Wi-Fi on my phone,” “connection error,” “nothing can be configured”—readers come to us with these and many other questions. Typically, these problems are not difficult to deal with.
- Connection errors most often occur when the password or network name is entered incorrectly. It’s worth double-checking the spelling, and you can also try changing the WiFi password.
- Another category of difficulties arises when a user tries to connect to a public network in cafes, parks, shopping centers, etc. The law requires mandatory identification and there are problems with this: SMS confirmation does not arrive, one-time password is not accepted, etc. There is only one solution - repeat attempts until you succeed in connecting.
- Well, the last common difficulty is that the user does not know the manual parameters (DNS, gateway, etc.) that are needed. You can contact your provider's technical support - specialists will tell you how to set up your phone. But this solution is only for the home Internet, since in public and corporate networks all information is kept by the administrator - and you need to contact him.
As you can see from the instructions, debugging the WiFi Internet configuration on your phone is not too difficult; sometimes manual debugging may be required, but this task is quite doable.