The developers of Apple technology intended that an iPhone account would be created when the gadget was activated. However, when setting up a smartphone for the first time, users often skip this step for one reason - the device requires plastic card data . Russian users, accustomed to suspecting fraud in everything, are delaying the creation of an Apple ID , trying to find a way to do without a card.
There are several options for registering an iPhone “account” - among them there is one in which you do not need to enter your credit card information.
Why do you need an iPhone account?
Without an Apple ID, the user will not be able to:
- Download applications from the AppStore (neither paid nor free).
- Buy music and videos from the iTunes Store.
- Synchronize your Apple device with iCloud .
- Find your lost gadget using Find My iPhone
Full use of an iPhone without an Apple ID is out of the question. The legendary versatility of this smartphone is due to the huge amount of diverse software available in the AppStore. An iPhone without apps is just a stylish and well-built gadget, but by no a multitool that can cope with any task.
How to create a new account through iTunes?
If you don't have iTunes , you should start by downloading the latest version of this program from the official Apple website. Once you download and install the media harvester, proceed as follows:
Step 1 . Open iTunes and click on the “Account” tab in the horizontal menu at the top.
Step 2 . Select "Login...".
Step 3 . In the window that appears, click “Create a new Apple ID.”
Step 4 . the iTunes Store welcome page - here you need to click on the blue “Continue” button.
Step 5 . At this point, you need to read the document called “Apple Media Services Terms and Conditions” and check the “I have read...” checkbox.
If you do not confirm that you have read it, registration will not be completed.
If you are unable to read Apple's statement immediately, you should use the "Print Version" link. An HTML document will appear in your browser, which you should print so you can read it whenever you have some free time.
Once you confirm that you have read the terms and conditions, click “Accept.”
Step 6 . Fill out the form - you must enter the following data:
- E-mail address. It is important that the address is valid and that you have access to it. If desired, you can specify an additional postal address.
- Date of Birth. By date, you must be over 21 years old - otherwise you will not be able to purchase content and software in the AppStore and iTunes Store.
- Created password. The password requirements for an Apple account are very strict: it must contain numbers, lowercase and uppercase letters. Plus, one character cannot be repeated three times in a row.
The user will also have to answer three questions - for example, what was the name of his childhood best friend. This measure is necessary to ensure account security.
Step 7. Unsubscribe if you do not want to receive information about Apple company products and movie and music releases to your mailbox. To do this, you need to uncheck the boxes next to the “Recommendations and information...” fields.
Then click Continue.
Step 8 . Select a payment method for purchases and enter the required details. Please note that entering your credit card details into iTunes does not in any way pose a threat to your well-being . Money will be written off only if you purchase content or software and only with your consent.
If you have chosen a plastic card as a payment method, you will have to enter its number, expiration date, and CVC2 - the security code on the back. If you prefer the “Mobile phone” option, just indicate your cell number and confirm it via SMS.
Step 9 . Fill in the fields in the “Billing address” block. You must specify:
- Last name and first name.
- City code and name.
- Street of residence and zip code.
- Contact phone number.
- Form of address (“Mr.” or “Ms.”).
Once you fill out the required fields, click Create Apple ID. You will see a window directing you to your email.
Step 10 . In your mailbox you will find the following letter:
You should click “Verify Address”, after which you can assume that the Apple ID has been successfully generated.
How to create an Apple ID without a PC?
You can create an Apple account without a computer, but in this case you need the device to be connected to 3G or Wi-Fi. Once you have access to the Internet, proceed as follows:
Step 1 . In the “Settings” of your iPhone, find the “iTunes Store, App Store” section and go to it.
Step 2 . Click on the “Create a new Apple ID” button.
Step 3 . On the next screen you will see a list of countries - Russia is selected by default. Without changing anything, click Next.
Step 4 . You should review the document called the Apple Media Services Terms and Conditions. The document is quite capacious - on an iPhone it turns out to be 29 pages of small print; that is why most users neglect to read it.
One way or another, you will have to confirm that you have read the “Terms” and agree to the terms. To do this, click “Accept” in the lower right corner and then click on the button of the same name in the window that appears.
If you want to read the terms, but not from the phone screen, but from paper, use the “Send by e-mail” link. You can print the document from your email.
Step 5 . Fill in the form. You will have to enter the same data as when registering an account in iTunes - e-mail, password, date of birth, questions and answers necessary for security.
If you don't want to subscribe to news about Apple services, apps, or content, switch the sliders below to inactive.
Then click Next.
Step 6 . Select a payment method and enter payment details. The same information is required as when registering through iTunes .
After you have provided the required information, click “Next”.
Step 7 . Go to the email you specified when registering your Apple ID and click “Verify Address.”
Creating an Apple ID in the device's Settings and registering through iTunes are similar procedures: in both cases the same information is required.
You can also access the Apple account creation service through the App Store. Go to the app store and scroll to the bottom of the home page. Click on “Login”.
Then click Create Apple ID.
Next, you need to act in exactly the same way as when creating an “account” through “Settings”.
Resetting a password from a trusted device
This option is suitable for a user who has chosen two-factor authentication in iCloud. To recover or reset your Apple ID password, you just need to take any paired iPhone or iPad or access the capabilities of a computer running MacOS - no additional equipment is needed, nor is there any need to connect the device to iTunes.
An owner who has forgotten his Apple ID password can reset it from a trusted device as follows:
- From the main screen, go to the “Settings” of the device.
- Scrolling down the page, select the “Basic” section - or (in earlier versions) immediately go to “Passwords and Accounts”.
- In the section that opens, go to the iCloud subsection, then select the “Change password” option and follow further instructions from the system.
Tip: as in the previous example, the password may have been saved in the device memory. Then all the user needs to do is click on the “Passwords and Software Sites” button in the same subsection.
On a desktop computer running MacOS, an iPhone owner who has forgotten his Apple ID password can recover data by going to the iCloud section in System Preferences, then to the Account subsection, and then selecting Security and the Reset option. password". To confirm the operation, another code is used - the one that the user enters every time he unlocks the PC.
How to create an account on iPhone without a credit card?
at least one way to create an Apple ID without a credit card. If you don't want to share your payment details with Apple, do the following:
Step 1 . Go to iTunes and select “Applications” from the drop-down menu.
Step 2 . Find a free application (any) on the main page and click on its icon.
Step 3 . Once the app description opens, click Download.
Step 4 . In the window that appears, click on the “Create a new Apple ID” button - this will start the procedure for creating an account.
Continue registration as usual until you decide on a payment method.
Step 7 . On the “Specify payment method” page, instead of a bank card, select the “No” option.
With this choice, you will be spared the need to enter payment details. However, you will still have to fill out numerous fields in the “Billing Address” block.
Recovering iCloud password via email
The easiest way to recover your iCloud password is to send a reset code by email. This is done like this:
- We connect the iPhone to the Internet.
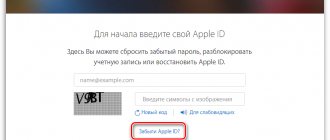
- Go to the iCloud settings menu. You must click on “Forgot your password?”.
Enter Apple >
The required code will be sent not only to the main email, but also to the backup email if you have added it. If you don't receive the message, open your Spam folder. To be sure, you can add it to your address book by email. The password will be reset after clicking on the link from the message. You'll be prompted to enter a new security key for iCloud.


