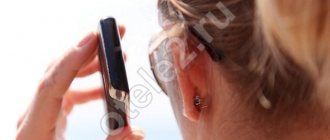
Regardless of which smartphone or tablet running Android is used, as a rule, in addition to the built-in internal memory, it also uses an SD card. When some files are deleted from it, they are not completely deleted. Instead, the freed space simply becomes available for writing other data, while the deleted files remain untouched until they are overwritten by new ones. Therefore, as long as the photos were not completely overwritten after deletion, they can be easily restored!
What is needed to carry out the procedure?
To restore, you need to use special utilities. Many programs in this category are paid, and in order to restore something with their help, you will first have to pay. However, it is not necessary to pay in all cases, since most of these applications have a trial period during which you can use all its features for free.
This guide will cover several of the most effective recovery utilities. If you wish, you can find many other photo recovery apps for Android.
Services for returning photos
RS Photo Recovery - Using effective detection parameters, the application allows you to recover data lost after formatting or wiping certain drives. It is important to note that the system can restore full images even after physical damage to the media and transfer them to new storage.
PhotoRec is a program with a key purpose in returning user files that have been lost from memory, while many of the most popular image formats are available, which include JPEG, as well as MP3 audio components or archived documents.
Recuva - despite the free distribution of the application, there is also a paid variation, and this implies the distribution of an effective solution for recreating information that could have been lost as a result of system errors or manual elimination. The program was developed by Piriform Limited in Britain, so we should also highlight another popular program - CCleaner, which is used to rid the computer of unnecessary data.
Recovery using a computer
This procedure can be carried out using special PC software. In this case, your mobile device is connected via a USB cable.
A prerequisite is that USB debugging mode must always be activated.
Recuva program
The big advantage of this software is that it does not require Root rights on your phone or tablet to use.
- First of all, download the program from this link and install it like any other. On the official website you will see that there are both paid and free versions. Free is enough for us.
- After installation, launch it, and then connect your device to the computer in removable storage mode.
- In the welcome window of the Recuva wizard, click the “Next” button.
- Now we select the type of files we need to recover. Accordingly, these are “Pictures”. Click “Next” again to move on to the next step.
- We select the second item called “On the memory card”, since we connected the gadget to the PC as a drive.
- At the last stage of setup, it is recommended to check the box next to the “Enable in-depth analysis” option and click the “Start” button.
- After some time, you will see a list of photos on the screen. Just select the ones you need and click “Restore”.
7-Data Android Recovery Program
- First, download the program from the developer’s website and install it.
- After installation, you must perform the same steps to activate the debug mode as in the case of Recuva.
- After that, connect the device to the computer and click “Next” in the program.
- In the window that appears, you must select the type of drive to restore. You can specify both internal memory and a memory card.
- After that, click “Next” and the scanning process will start.
- When the scan is completed, the program will produce a report with photos that can be recovered.
- Select the ones you need and specify the location to save them on Android.
Android Data Recovery Program
Another utility for recovering photos and other data.
- First of all, you need to download the installation package from the official website of the developer. The program is paid, however, there is also a trial, free version for both Windows and Mac.
- After downloading and installing, you need to configure the device. Go to “Settings”, select “About phone”, then “Version information”.
- In the menu that opens, you need to click on “Build number” exactly 7 times. After this manipulation, a new section “For Developers” will appear in the menu (it is worth noting that on some devices and versions of Android this section is already initially available and no manipulations are required).
- Now connect your Android device to your PC and put it into debugging mode by selecting “USB Debugging”.
- Now, in the running utility on your computer, click “Next”.
- In the window that appears, you must specify the type of information to be restored. In order to restore photos, you need to check the box next to the “Gallery” item.
- Next, in the window that opens, select “Scan for deleted files”.
- The scanning process will begin. After it is completed, a window will appear in which the found files for recovery will be displayed.
- Select photos to recover and use the “Recover” button.
PhotoRec
Despite the name, this program copes not only with photo recovery, but also with the “resurrection” of files of other formats . It uses completely different operating algorithms than other utilities, and the results can be called quite decent. Initially, the program was presented only in a command line interface, but with the advent of a regular graphical interface, the popularity of the utility increased.
This program does not use file system analysis , which allows us to talk about a lot of features of the program. It can recover files of about 225 different formats, and is capable of saving some data that other programs, due to different algorithms, simply do not see. Even completely deleting the file system cannot worsen the result, but the utility does not distinguish “garbage” well from important data, so among all that it will restore, you will still need to find what is really necessary. If the file was fragmented, then this program will be powerless. Thus, the program is used in cases where the file system is deleted or damaged, and at least something needs to be restored.
Restore directly to your mobile device
You can try to get your photos back after deletion directly on your phone or tablet using special applications. Nowadays there are quite a lot of them, and new ones are always appearing.
We will look at two representatives - Undeleter and DiskDigger Photo Recovery. They require Root rights, but the second application can be “deceived”, which will be discussed below.
Undeleter app
The user is required to complete the following steps:
- Install Undeleter from the Play Store using this link and launch it.
- After reading the introduction, you must move on by clicking the appropriate button.
- As mentioned above, the application requires open root rights. It is at this stage that a check will occur to see if there are so-called “superuser rights”.
- If everything is fine, click the “Next” button and get to the window for selecting files to restore. We are interested in the “Images” section, in which image formats are selected, for example, JPG, PNG, GIF and others. In general, it all depends on the specific situation.
- After selecting the formats, click “SCAN” at the bottom of the screen and after a while all the photos found by the program will appear. While watching, you can save any of them to the device’s memory or cloud storage, which is quite convenient.
DiskDigger Photo Recovery App
Another functional application that can be used on any Android device. It seems to require Root, but lends itself to a kind of “cheating” if Root is not open on your phone. Therefore, there are two ways of development of events.
Users with “superuser” rights can immediately skip the first step described below and proceed directly to the recovery procedure, while those who do not have them are first forced to download and install additional software.
- We launch the Play Market application store and look for software called “Superuser” in it. Install it in the standard way and launch it. No further actions are required from you.
- Let's start solving the main problem. In the same Play Market we look for and install DiskDigger Photo Recovery.
- After launching the utility, click the blue button with the text “Start a simple image search.”
- In the list that appears, we find the necessary photos and save them to the device’s memory.
- In the upper right corner of the screen, you can click on the “gear” to open an additional settings menu. It has the ability to switch the display of search results to “List” or “Grid”. You can also change the size of the thumbnails here.
Undeleter
This is a program for recovering deleted files in the internal memory of Android and on the SD card. It works with all types of data, including allowing you to return accidentally deleted photos and/or videos to their original state.
To fully work with the utility, you must install root rights on the device (full access rights to the file system). Without this, recovery from internal memory will be very limited. At the same time, using Undeleter, you can search for data on an SD card without providing root rights.
The program is free if you watch ads. To disable advertising and be able to work in the background, you will need a key; you can buy it through Google Play.
Program functions
- Scanning the internal memory of the device and external storage media for deleted and damaged photos.
- Preview.
- Creating backup copies of returned photos to Dropbox and Google Drive, synchronizing with existing accounts of the specified cloud storages.
- Complete deletion of photos and/or videos without the possibility of recovery.
| Advantages | Flaws |
|
|
conclusions
You can find a lot of other programs on the Internet with similar functions. At first glance, many utilities are similar, but they are better used to solve different problems. So, for example, if important photos are lost, then it is better to use a specialized tool for image recovery - PhotoDOCTOR, since with it the chances of returning photos are higher. If you often lose other data formats, then you might want to consider not Recuva and PhotoRec, but for the most advanced users and system administrators, R-studio is better suited.
Possible problems
During the steps you may encounter several problems:
- An unknown vhdtool appeared in the folder, and raw took up 0 kilobytes of space. Download netcat for 64-bit OS. It is named nc64.exe.
- When entering ADB utility commands, an error appears in the console. Make sure that ADB drivers are installed.
- The phone is not detected or the raw file is not created. Check if USB debugging mode is enabled and if the correct path for busybox is set.
Return photos/videos via Google Photos app
Another way to get back deleted media files is through Photos . It is present in every version of Android, look among the applications.
The program must have been previously configured: authorization was passed, access to the camera and memory was allowed. If you have not used this application before or even heard of it, then the likelihood that Google Photos uploaded photos/videos to its cloud is minimal. Nevertheless, we try. An application may have different interfaces, so I will show two examples:
Example 1.
Open the Google application - “Photos”.
- In the bottom menu, select the “Albums” tab.
- Open the desired folder and see if the lost photos are present.
- If missing, go back to the Albums page, click on the application menu in the upper left corner, select Trash.
Example 2
Launch Google Photos, select Library in the bottom tab, click on the Trash button.
In the interface that opens, you will see the deleted videos and photos. Google Photos stores deleted files for 60 days , after which they are automatically deleted.