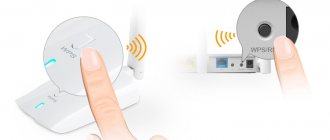
More and more people are using a wireless connection to access the Internet. It involves several options: mobile Internet, when the connection is made via a USB modem and receives the Internet from a satellite, as well as wired Internet, which is distributed to clients via Wi-Fi wireless technology. Sometimes these methods are combined and a USB modem is connected to a router or Internet center to create a better and more reliable network. This material will tell you how to connect a zyxel keenetic 4g iii router, setting up a Yota USB modem to interact with this router.
Model overview
Models of the Keenetic series appeared on the world market in 2010. Their manufacturer is Zyxel. After a short time, the manufactured products earned enormous popularity among users of 4G Wi-Fi routers. This is due to the fact that consumers are attracted by the optimal price-quality ratio. The 4G Keenetic router is provided with a wide range of functions.
The Keenetic model is designed and manufactured to meet the needs of a wide range of users.
- The torrent client cannot be configured.
- Does not support DLNA server.
- The printer cannot be connected. Only 3/4G modems are connected via the USB input.
- Updates via USB are not performed.
If the user needs individual settings, you need to take a closer look at other Keenetic router models.
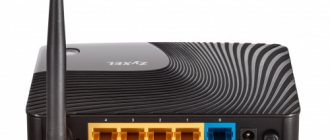
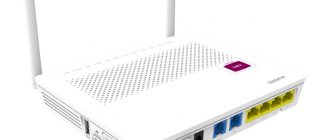
Appearance
The 4G model is a compact device in a rectangular plastic case. Dimensions 140x110x30 mm. The front upper part is decorated with an inscription with the name of the manufacturing company Zyxel. A sticker with the main characteristics of the Wi-Fi router is located on the bottom of the device. Here are the following:
- MAC address;
- password;
- model name Keenetic;
- country of origin.
On the top front of the Keenetic there is a large WPS button in the lower right corner. There are operation indicators on the front of the router case. When you turn off or change 4G settings, the “lights” come on, blink or go out.
The bottom panel of the router is equipped with feet with a rubber base for firm installation on a horizontal surface and eliminates the possibility of slipping. It is possible to install 4G on the wall through plastic holes.
There are inputs on the back panel of the Keenetic router. Through them, the device connects to the Internet or local networks. Depending on the version of the router, the number of ports changes:
- Version “A” has one WAN and four LAN ports.
- In version “B” there is one LAN and WAN port.
Other versions/revisions of the Keenetic router also have a USB 2.0 port on the rear panel. Early models of the 4G router were noted for their left-hand orientation. In the new model there are holes for ventilation. Additionally, the structure is equipped with two antennas. Each of the 5 dBi antennas, due to their power, provides a large radius of distribution of the Ethernet connection from the router.
To reboot the 4G device, there is a Reset button recessed into the case on the reverse side. Nearby there is an input for connecting the unit responsible for power supply.
Connecting Keenetic and preparing for work
Before using a Wi-Fi router, you need to prepare it for use. To do this, you need to perform a number of actions:
- First of all, you need to choose a location. The 4G router requires installation near an outlet, and also in a place where the device cannot be damaged by careless movement. It is advisable to choose an acceptable height for easy adjustment if necessary.
- Connect the plug to the outlet. The 4G router is connected via a power supply.
- Connect the Keenetic router with a cable for an Internet connection.
As soon as Keenetic is connected to power, a Wi-Fi access point appears, displayed on devices with wireless network scanning enabled. The router itself has standard DNS connection settings, factory settings for gateways and ports. Experts recommend doing the initial setup of Keenetic.
Internet center ZyXEL MAX-206M2 with WiMAX support in the Yota network
Fast mobile Internet has become one of the most discussed topics today, not only in technical publications. The successful launch of the Yota network, presented today in three cities, shows high interest from consumers. Unfortunately, the evolutionary development of classic GSM cellular networks in our country is hampered by many factors, and despite the availability of mobile terminals with 3G support on sale, the user can really only count on not very fast EDGE. Skylink compares favorably with them, which, thanks to CDMA/EV-DO Rev. technology. A can provide channel speeds of 3100/1800 kbit/sec (reception/transmission).
But it is still far from Yota’s mobile WiMAX, which allows you to download data at real speeds of about 4–8 Mbit/s without traffic restrictions. This kind of performance opens up new possibilities for mobile users, the most frequently mentioned of which is watching online video. In addition, the presence of a “thick” channel can be useful when connecting small offices to the network. In the latter case, instead of USB modems that require a computer and special software to operate in router mode, it is more convenient to use ready-made routers with WiMAX support. The device discussed in this article from one of the leaders in the telecommunications equipment market is just such a model.
Delivery set and appearance
ZyXEL MAX-206M2 is supplied in a cardboard box measuring 30x32x19 cm. It is decorated in the white and blue color scheme familiar to this manufacturer. The test was a pre-sale sample, so detailed specifications and diagrams are only in English. The delivery set is familiar - a device, a power supply (12V, 2A), a patch cord, a brief installation description and a CD with the full version of the user manual.
At first glance, the device resembles an electric kettle with a pair of handles - glossy black plastic and the original shape contribute to this. In reality, the “handles” are antennas and the overall relatively large size of the router (fits 17x17x12 cm) is due to the desire to conveniently position the antennas for effective signal reception. The actual electronic filling is located at the bottom of the device. The front panel has several indicators - WiMAX network connection status, signal strength, two VoIP account status indicators, two LAN connection indicators and a power indicator. Connections are made from the reverse side. There you can find two RJ45 ports for connecting to a local network or PC, two ports for regular analog phones, two connectors for external antennas, a reset button and a connector for the power supply.
So for a small office with a couple of workstations, you won’t need anything else other than the MAX-206M2. And the presence of connectors for external antennas will allow you to receive reliable radio signal reception anywhere in the coverage area.
Installation and capabilities
Installation and connection do not cause problems - just connect the power supply and network cable. The router is autonomous, so there are no special requirements for the computer. Moreover, standard protocols are used, so through the MAX-206M2 you can connect not only personal computers, but also game consoles, IP phones, network media players and any other equipment.
However, for initial setup you will need to use a device with a Web browser. By default, the router has a programmed network address of 192.168.1.1 and an activated DHCP server, so clients will automatically receive their network addresses. In most cases, the device is ready to work out of the box, but if necessary, you can program additional parameters, such as VoIP accounts, through the Web interface.
Yota network settings are also already set in the device. The user will only need to register the router in his personal account on the provider’s website.
Let's take a closer look at the settings options and the corresponding functionality. In general, they differ little from the standard set of entry-level routers. As usual with ZyXEL, the default password is “1234” and it is recommended to change it the first time you log in. Next comes the usual selection from the “assistant” mode and “advanced options”. The first allows you to quickly set up Internet access and VoIP accounts. The second one is certainly more interesting.
On the first page (“Main”) you can familiarize yourself with the main parameters of the router - firmware version, operating time, active time of the WiMAX link, names and status of SIP accounts. There are also links to other menu items with brief explanations of their functionality. Please note that there is currently no Russian version of the interface and we are considering an English version.
The second page (“Setup”) is used to configure the device’s IP address, view the list of DHCP clients and set the built-in clock (of course there is synchronization via the Internet).
“Advanced,” as the name suggests, contains advanced settings combined into several groups. The first is the parameters of the local network segment. Here you can enable the DHCP server, set static assignments for clients, add a couple of aliases for the router’s own address, specify up to eight entries in the routing table, and select parameters for the RIP and multicast protocols.
The WAN port configuration refers to the built-in WiMAX modem. In fact, the user does not need to change anything here - all the settings are already specified for the Yota network and changing them incorrectly can lead to disconnection. The exceptions are setting an IP address (if you are assigned a static one), programming a backup channel (the IP address of the second router on the local network) and selecting DNS servers.
Separate settings are dedicated to the technology for organizing virtual connections built into the router. In this case, we are talking about support for VPLS/MPLS using VLAN tags, which allow you to organize virtual channels for connecting to the Internet for different users or groups. Support from the provider is also required.
The main modern technology for providing Internet access to several devices through one channel is NAT (Network Address Translation). By default, it is included in the MAX-206M2. However, there are possibilities to disable it (this requires certain agreements with the provider and obtaining official addresses for systems on the local network). If you need to “forward” ports (for example, to organize a Web server), then you can use eleven entries for this. Note that you can broadcast a range of ports, but you cannot set different external and internal ones. There are also twelve entries for "switching" ports and ALG support for SIP, FTP and H.323 protocols.
There were also standard parameters - system name, administrator password, update firmware, save/restore/reset configuration and reboot. Additionally, there is a built-in DDNS client.
The next page is settings for integrated SIP adapters. Let us remind you that there can be two SIP accounts, depending on the number of hardware ports on the router. For each of them there are both regular settings - server name, user name/password, and advanced ones, where you can select codecs or special network parameters. If other network equipment supports QoS and VLAN, then the router can be configured to use these technologies. There are also minimal call management capabilities - an indication of which lines the call is received on and which accounts can be used for outgoing calls. There are also such functions as quick call numbers (this is where you can use subscriber IP addresses to work without server participation), conditional and unconditional call redirection. Overall, the VoIP client is quite functional and convenient.
The fifth page is named somewhat unexpectedly - “Tools”. But there are no “tools” (for example ping) here. Rather, its content could be called “Advanced”. In particular, you can see lists of certificates (most of them are required to register a device on the WiMAX network), settings for the built-in firewall and content filter. For large networks, the ability to remotely manage the device may be useful - you can allow access from the WAN side to the Web interface or via FTP, telnet and TR-069 protocols.
Device logs are also presented in this group. They are quite detailed, and you can use email or a syslog server to report events to the administrator. The only remark concerns the lack of authentication on the SMTP server. Today, few people use an “open” server, and installing an additional server for intranet forwarding is not always convenient.
If you trust the systems on the local network, you can enable support for the UPnP protocol, using which programs can automatically “open” ports and Firewalls for their work. Although this simplifies the network configuration, in our opinion it is inconvenient due to its lack of control.
Well, the last page - “Status” - provides in one place comprehensive information about the current status of the router. In particular, you can see all addresses, link states, VoIP status, processor load and RAM usage.
Individual links open packet statistics, a table of DHCP clients, and information about WiMax (frequency table).
Testing
Conducting a serious study of the speed of wireless equipment is quite difficult - the situation on the air changes too often to make objective conclusions. In general, at a high signal level, WiMAX performance was no worse than that of the Samsung SWC-U200 USB modem, and using the router indoors clearly showed its advantage in sensitivity. During tests at home, the router was installed on the windowsill. This made it possible to obtain speeds of about 6 Mbit/s and 2 Mbit/s for reception and transmission, respectively. The router was able to cope with a high load in the form of a pair of actively working torrent clients (although Yota now usually issues “gray” (non-routable) addresses, which somewhat reduces the capabilities of such programs).
There were no problems with the operation of telephones through the SIPNET provider. Even with a heavily used channel for downloading data, the sound was clear and the connection was stable. Skype also worked successfully over WiMAX, including video broadcasting.
In total, the router worked for almost a month providing connectivity to the home network. It was not possible to notice any fundamental differences from a regular ADSL channel during operation. Despite the relative novelty of both the WiMAX technology and the device itself, there were no complaints about the reliability and quality of communication regarding them during the entire testing period.
conclusions
The considered WiMAX router from ZyXEL is a complete solution for implementing Internet access through the fourth generation network provider Yota. The presence of two network ports and built-in VoIP clients allows you to reduce the number of active equipment on the network when connecting small and home offices.
The MAX-206M2 is made with high quality and implements all the basic functionality typical for the class of devices under consideration. We especially note the ease of installation and configuration. If we are talking only about access to the Internet, then the router works right out of the box and you don’t need to configure anything in it.
The router will be useful for connecting to the Internet in the absence of conventional wired options, including in large industrial premises, recreation areas, cottage villages or even in transport. The high-speed characteristics of the network will allow 5–20 users to work comfortably on the Internet at the same time.
It is expected that this solution will be sold complete with a contract for 8,000 rubles in November.
How to configure the ZyXEL Keenetic 4G router for Yota: step-by-step setting of parameters for the provider
After clicking on the “Web Configurator” tab, the router prompts you to change the Internet center administrator password. After recording, confirming and applying it, the authorization tab will open, where you need to enter the user name - admin and a new created administrator password - into the field. Clicking “Login” takes you to the main page of the system monitor.
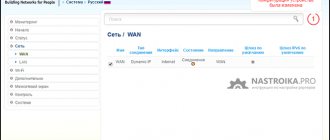
The tabs at the top of the page refer to the currently clicked icon in the lower field of the interface. The “System” tab of the main page displays information about the current Internet connection, information about the system and the availability of updates, the status of the Wi-Fi access point, the connection of the USB modem and its name, the status of the LAN and WAN network connectors.
When you click on the “Internet” icon (globe), tabs such as the connection protocol will become available. You must choose the one specified in the contract. After clicking on the desired tab, a window will open asking you to “Add a connection.” Clicking on it takes you to the connection settings page. It must indicate all the contract data, if the operator has provided it. The Internet access protocol l2tp is used by Beeline. Rostelecom and Megafon use different connection types in different regions.
After clicking on the “Apply” stencil, the Internet will become available. You can verify this by the indicator on the front panel of the router. When the provider cable is disconnected from the WAN connector, the indicator will go out. The connection will disappear on the “System” and “Internet” pages. When connecting the modem to the USB connector of the ZyXEL Keenetic 4G III, setting up the Yota USB modem is not required. The router will detect it and the mobile Internet will automatically connect. Information about this will appear on the router interface pages. The indicator will light up again.
The router supports the Internet with more than 70 modems. For many of them (including Yota) there are universal firmwares.
By default, Wi-Fi is configured on the router. The network name and access password are indicated on the device label. To manually configure, you need to click on the wireless network icon in the web interface and select the “Access Point” tab. In it you can change the existing name of the network and come up with an individual password that you need to remember. The remaining security protection settings can be left unchanged. The entered data should be saved by clicking on the “Apply” stencil. The front panel indicator will show the status of the wireless network.
Wi-Fi setup
The protocol is configured - let's move on to setting parameters for the wireless network:
- We launch the central section with ladders. We activate the access point, write the name “Wi-Fi”.
- Specify WPA2 PSK protection. Just below, immediately enter the security key (password). We advise you to write it down separately in a notebook or on a piece of paper.
- We set the channel width to 20 MHz. Other parameters can be left as default. Let's save.
Provide your Wi-Fi password
Setting parameters for providers
Let's look at connecting and setting up the Zyxel Keenetic 4G router for each of the popular providers. In each specific case, this process is slightly different.
Rostelecom
For the Rostelecom network we will need to establish a PPPoE connection.
This is done as follows:
- go to the “Internet” and “Connection” menu;
- We find the field “Setting IP parameters” and the item “Without address”;
- if the agreement with the provider contains a list of IP addresses of DNS servers, then fill in the appropriate fields, otherwise, if the servers are dynamic, leave this field empty;
- also, if the service provider uses filtering by MAC address, find the field “Use MAC address” and then “From computer”;
- in the window that appears, indicate the address of the computer on the local network from which you plan to connect to the Internet;
- Click “Apply” to save the changes made.
Now you need to configure authorization parameters:
- open the “Internet” menu, then “Authorization”;
- if the provider uses the 802.1x protocol (you can check this information in the technical support service), check the box next to the corresponding option;
- after that we indicate the authentication method via login and password;
- in the “Access Protocol” column set “PPPoE”;
- The columns “Service name” and “Hub name” can be left empty, if the provider has provided this information - fill it out as desired;
- enter the username and password assigned by your service provider;
- click “Apply”.
Beeline
To configure the Internet center to work with the Beeline network, we will need to understand the L2TP connection type.
To configure its parameters, do the following:
- go to the “Internet”, “Connection” menu;
- in the “Configuring IP parameters” column, set manual or automatic;
- when using filtering by MAC addresses, go to the “Use MAC address” column;
- select “From a computer” and the current IP (by selecting the option “The entered address can be entered manually”);
- click “Apply”.
Let's move on to the authorization settings:
- go to “Internet” and “Authorization”;
- if the Internet operator uses the 802.1x protocol, then check this option and indicate the type of authorization with the need to enter a login and password;
- opposite “Internet Access Protocol” – “L2TP”;
- as the server address we indicate the IP address or L2TP domain name;
- enter the login and password chosen when concluding an agreement with the service provider;
- Click “Apply” and save the changes made.
Megaphone
If you use the services of the Megafon network, the connection will look like this:
- open the “Internet” menu and then “Authorization”;
- indicate automatic or manual acquisition of an IP address;
- in the “Use MAC address” column, click “From a computer” and select your address on the local network;
- save the settings by clicking “Apply”.
Let's start setting up the authorization process:
- open the “Internet” menu and select the appropriate item;
- we set the use of the 802.1x protocol if your provider uses it (you can find out this information from the documentation or from technical support);
- type of authorization using login and password;
- specify the current IP address or PPTP domain name as the server address;
- enter your login information (username and password) and save the changes.
How to set up a Zyxel Keenetic 4g router for Yota
This router model is a certified participant in the Yota Ready program, which means that to get started you just need to connect the modem to the router. So:
- connect a modem to automatically connect to the 4G Internet;
- launch the browser and copy “192.168.1.1” into the address bar;
- We indicate the username and password, after which we get to the main menu and get to work.
How to set up a router
Review of the router from Zyxel model Keenetic start
The model of this keenetic router is a certified participant in a special program from Yota - Yota Ready. This means that all you need to do to set it up is connect it to your modem. For this:
- Connect the modem so that it automatically connects to the 4G Internet;
- Launch any browser and enter the IP address 192.168.1.1 in its search bar and press “Enter”;
- Go to the settings web interface and enter your username and password to log in (by default they are admin and admin).
Quick connection setup
After going to the specified address, the Zyxel Keenetic web interface will appear in front of you. All we see is a welcome message and two buttons for choosing a setup method. If you are using a wired connection, the setup algorithm is as follows:
- "Next" button;
- Enter geodata (country and region), Next;
- We look for our provider in the list, select it, click Next;
- In the appropriate fields, indicate the authorization data (they are in your agreement with the Internet provider), and confirm the entered information.
This essentially completes the quick setup. The router has established a connection, and the next step is to update the software version.
Attention! Don't underestimate the importance of installing new firmware. Firstly, it can increase your connection speed. Secondly, you will not encounter errors and shortcomings of older versions
Thirdly, you definitely won’t have a conflict between the drivers of your computer/laptop network card and the router software
Secondly, you will not encounter errors and shortcomings of older versions. Thirdly, you definitely won’t have a conflict between the drivers of your computer/laptop network card and the router software.
In fact, you will not be given a choice: you need to update anyway. So we confirm the offer, wait until the files are downloaded and unpacked. The router reboots. After the update, Zyxel will offer you to connect to the new Yandex service “Yandex.DNS”. It is designed to protect your devices from malicious sites and code. More information about it can be found on the official Internet resource. But this item is not mandatory, so it’s up to you whether to connect or not.
Next, Keenetic will notify you that the setup was successful. You will see connection data and two buttons to choose from: go to the Internet or open the web configurator.
We always recommend choosing the second option when setting up for the first time, since for the security of your access point you need to change the standard password (admin). This will be prompted immediately after clicking the web configurator button: enter the new network key twice and save.
What changes when you connect to the Internet via a 4G modem?
In fact, Zyxel Keenetic quick setup becomes even faster. You will only need to insert the modem, click “Next” a couple of times and update the firmware. Options for selecting a region and provider will automatically disappear. The connection ends with an offer from the Yandex service. Everything else is standard.
Setting up a wireless network
Debugging a wireless network comes down to setting a complex password. Additionally, you can change some other parameters:
- Expand the central section in a row of icons below. Let’s get straight to the desired “Access Point” block.
- If the bird is not next to the first item, click on it to activate “Wi-Fi”.
- Next, write a name for your Wi-Fi (this is not necessary, but if you don’t like the standard one, you have the right to do so - give a more interesting and unique name). The only condition for creation is to use only English letters. You can also take numbers, dashes and underscores.
- We remove the bird from “Hide network”.
- To protect the router, install the most reliable type - WPA2PSK. Immediately below there is a field for the key (password). We use English letters (both small and large), numbers.
- Next, we set the country, the combined standard (where all the values are - b, g and n), the automatic channel and the required power. If your room area is large, set it to 100%.
- To save, click on “Apply”. If desired, you can also enable the WPS option.
How to connect a 3G-4G modem to the Zyxel Keenetic Giga II wifi router via USB?
When choosing equipment to connect a 3G/4G USB modem to the router, I chose the Zyxel Keenetic Giga II model. This device is not cheap, but I can safely recommend it as a reliable and practical universal device that supports most modem models, as well as flash drives and printers. The price is steep, but it is completely worth it.
To accompany it, I used an LTE modem from Yota. This combination of devices allowed me to create a fairly stable high-speed network on a standard dacha plot of 12 acres without the use of additional amplifying antennas.
Since all the main models of modems, as well as settings for connecting to the networks of various 3G-4G mobile Internet providers, are already built into the firmware of the Zyxel Keenetic router, we will not need to manually enter any data when setting up the Yota modem. Everything is very simple
- turn on the Zyxel wifi router,
- insert the 3G-4G modem into the USB port
This is where our actions end - without additional configurations, it connects to the Internet and starts distributing WiFi.
You can check this by logging into the admin panel of the Zyxel Keenetic router. To do this, you don’t even have to connect to it via cable - you can use your phone, tablet or laptop via WiFi.
The default network name and password for connecting to it are on a sticker on the Zyxel router case.
And to get to the administrator section, just type in the browser the address 192.168.1.1 and the password “1234” (if you have a router of a different company or model, then this data may differ). The solution to all login problems is also available on our blog.
Here we go to the “Internet” section from the bottom menu, the “3G/4G” tab. The list of active connections will include a USB LTE modem.
Click on it - a new window will open with complete information about our connection
All that remains is to set up a wireless network for wifi distribution, that is, change the SSID and password for connection in the corresponding section of the router menu and use 4G Internet at the dacha.
Preparing to connect
It is worth saying that for lovers of wireless mobile Internet, the ZyXEL Keenetic 4G III router is a real assistant. Not only can it reboot the modem via the connection cable, but also restore communication channels without human intervention. This is useful if the device is used remotely: at the dacha, in a country house, and so on.
Important! The new generation of the router has an even stronger USB port that can work with modems that consume a lot of electricity and active extension cords of 15 meters or more.
The USB connector of this router is capable of interacting with more than seventy models of popular mobile modems. It is not without its drawbacks: you cannot connect network printers and hard drives to it, as was done with older generations of devices.
Preparing to connect the device begins with unpacking it. First of all, you need to open the box and remove all components of the device. Among them, the USB extension cable (a cable that connects one side to the router and the other to the modem) stands out. It is able to increase the data transfer speed and adjust the location of the modem. The latter, for example, can be secured near a window, since one of the ends of the cable has a special Velcro for such surfaces.
Important! These actions will allow you to get the maximum available Internet connection speed. In this case, the Internet station itself will not move.
Subtleties of working with the IPv6 protocol
When using the new IPv6 protocol, you must:
- make sure the protocol is supported by the provider;
- update the router firmware to the latest version by downloading it from the official website;
- Check the activity of the “IPv6” tab in the “System Monitor” subsection.
Now you can get started.
- Launch the Command Line.
- Run the command: telnet 192.168.1.1 to establish a connection with Keenetic.
- Enter the following commands into the command line in the given sequence to distribute IPv6 to all clients (you can copy one line at a time and execute it with the “Enter” button):
- Interface;
- ipv6 address auto;
- interface ipv6 prefix auto;
- interface ipv6cp;
- ipv6 subnet Default bind Home;
- number 0;
- slaac;
- exit set net.ipv6.conf.all.forwarding 1;
- ipv6cp;
- ipv6 address auto;
- ipv6 prefix auto;
- ipv6 name-servers auto; ipv6 subnet Default bind Home;
- number 0; mode slaac;
- system config-save.
Why the router does not see the Yota 4G USB modem
USB modems from iota are completely different. Although the router supports a very large number of modems, you should check this list on the official website of the manufacturer ZyXEL (https://help.keenetic.com/hc/ru/articles/214471025). If a 4G Internet modem is on the list, then there should be no problems with compatibility, since the router itself synchronizes with the portable devices that it supports. If the modem is in the list, but there is no connection, then you need to update the router firmware to the latest. Most often, the pre-installed version of the software in the router is very different from what the manufacturers are currently releasing.
Firmware update
When configuring manually, you will have to automatically update the firmware of the router or Internet center. To do this, there are two ways: semi-automatic and manual.
The first involves the following actions:
- Select the “System” item from the menu;
- Find “Update”;
- If the files are on your personal computer, then select them;
- If not, then click “Update”;
- Wait for the router to reconnect (The device may turn off and on).
For this method to work, you must have an Internet connection.
The second manual option involves:
- View the firmware in the configurator;
- Go to the official ZyXEL website via a PC that is connected to the network;
- Search for your firmware version;
- Download the required file and unpack the archive to any location;
- Go to the web configurator (System - Update tab);
- Select the downloaded file and click the “Replace” button.
After these steps, the router will update and reboot. All that remains is to check its basic settings and functionality.
A short description of Zyxel Keenetic Omni: external and internal characteristics, price
Although the router only supports one 2.4 GHz band, it can still be called a modern device. Its main feature is the USB connector located on the side. You can connect anything to it: even a 4G modem, even a hard drive (it can be used as a network storage device, for example, download torrents directly to it), or even a printer.
USB output can be used for printer, hard drive and modem
In appearance, the router is similar to all others from the Zyxel Keenetic line: black body color, glossy surface, round “Wi-Fi” button for connecting devices to the network via WPS (hardware connection without entering a password). There are 9 status LEDs on the front side panel (power, local outputs, Wi-Fi, Internet connection and USB connector).
The Omni model has 9 indicators that show the status of certain buttons and outputs
On the back, everything is as usual: the FN and “Reset” buttons, located vertically to each other; 4 local yellow outputs; 1 blue socket for the ISP cord and a large power button along with a connector for the power adapter. The adapter comes in the box, as does the Ethernet cord that will connect the computer and the router.
On the back there are 4 connectors for local connection and 1 for the provider cable
On Yandex.Market the cost of the Omni model is 2,500 rubles.
Table: technical features of the Omni model
| Parameter | Meaning |
| Wireless Wi-Fi network | IEEE 802.11 b/g/n |
| Data transfer rate | up to 300 Mbit/s |
| Frequency range | 2.4 GHz |
| Network protection | WEP/WPA-PSK/WPA2-PSK, MAC address access control |
| CPU | MIPS(R) 24KEc 580 MHz MediaTek MT7620N with network hardware accelerator |
| Memory | DDR SDRAM 64 MB |
| Antennas | 2 external Wi-Fi antennas (3 dBi, non-removable) |
| Protocols | IPoE/PPPoE/PPTP/L2TP/802.1X |
| 1 USB connector | 2.0 type A |
Features and Specifications
The Zyxel Keenetic Lite 3 router boasts stable operation, despite the fact that the equipment is quite modest when compared with other Zyxel Keenetic Internet centers. Support for working simultaneously with several providers is available, high connection speed is provided for a budget model, and there are built-in firewalls to protect against intruders and viruses.
The settings interface looks a little outdated, but it is easy to master even for an inexperienced PC user.
Technical characteristics of Zixel Kinetic Light 3:
- The Internet modem is supported via a USB modem of 3G, LTE, 4G standards;
- Wi-Fi standard 802.11n with a frequency of 2.4 GHz (5 GHz support is not available);
- 2 external non-removable antennas with a gain of 3 dBi;
- 4 LAN interfaces and one USB for connecting a modem or flash drive;
- The Wi-Fi data transfer speed declared by the manufacturer is 300 Mbit/s;
- Data transfer speed through physical ports – up to 100 Mbit/s;
- DHCP, IGMP, Dynamic DNS protocols are supported;
- There is support for firewalls;
- You can block requests by MAC and IP addresses;
- Creation of VPN connections is available.
The router comes standard: power supply, connection cables, instructions for use and other documentation from the manufacturer and store.
The following connectors are present on the back of the router:
- 4 LAN ports;
- 1 Ethernet connector for wired connection to the network;
- 1 power connector.
Additionally, there is also a mode switch, power and reset buttons. The latter is recessed into the body to avoid accidental pressing. The USB connector is located on the side.
There are 7 LED indicators on the front:
- Power indicator;
- Four LAN connection indicators;
- Wi-Fi connection indicator;
- WAN connection indicator.
On the top cover of the case there is a button with which you can turn off Wi-Fi.
Range 8
Price 9
Reliability 6
Additional options 6
Convenience and ease of setup 8
Total 7.4
Subtleties of 4G connection
Problems when connecting portable modems and setting up the Internet on them can be associated with three reasons:
- Incorrect configuration of the modem (SIM card) itself;
- Malfunction of the USB connection (“flash drive” into which the SIM card is inserted);
- Problems with modem and router compatibility;
In order to eliminate the first two reasons, you need to do the following:
- Activate the SIM card and insert it into the device (connect);
- Conduct preliminary network setup on your computer according to the provider’s instructions (that is, insert the modem directly into the USB port and set up the connection);
- If everything is done correctly and the Internet is available, take out the modem and insert it into the router;
Now there is only one possible cause of failures - device incompatibility. That is, the router simply does not see the connected modem and therefore cannot access the Network.
There are three ways to check if this is true:
- On the main panel of the web interface, at the top left there is a table with data about the current connection. If nothing is listed there, then the tandem is either not configured or does not work at all;
- The last menu item at the top is USB: contains information about devices connected through the port of the same name. It should appear in the table in the middle after going to the section (manufacturer, model, description);
- Internet menu item at the bottom: after going to it, open the 3G/4G section from the menu at the top. The table on the page that opens should also display the connected device.
If for some reason your modem is not in the tables, try, first, to reset the settings to factory settings by holding the Reset button on the back of the case. Secondly, update the firmware: support for your device may have been introduced in later software versions. If neither of these helps, contact your provider's technical department for help, as most likely this is a technical problem rather than a software one.
Setting up 3G/4G Internet via a modem from a mobile phone on a Keenetic router
Any owner of the modern generation of Keenetic routers has at least heard about the mobile application for a smartphone. I described its installation in detail in a separate article, you can read it if you haven’t used it yet. With its help, you can also set up an Internet connection via a 3G/4G network.
So, we launch the application and select the name of our Keenetic router, which is a controller, that is, the main device in the local network - I currently have it “Viva”
We get to the settings panel, but we need to go even deeper. Therefore, at the very bottom, click on the model name again.
Next, click on “Internet”
Here, as you guessed, are the settings for connecting to your provider. There are several options here. Currently the “Provider (IEoP)” is active, that is, cable Internet. In order to designate a 3G/4G mobile operator as the main source of communication, look for the name of your USB modem. For me it’s “Huawei Mobile Broadband” - go into it
Here in the settings you need to activate the “Enable” switch and click on the “Set as primary” button so that the Internet comes through a 3G - 4G modem, which is connected to the USB port of the Keenetic router
Additionally, here you can set a schedule for the Internet via a modem.
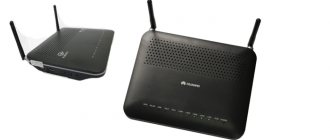
Review of router models
If you plan to use the mobile Internet on several devices simultaneously, you will need a router that supports 4G LTE. Yota offers several models of such devices to choose from. The router can be purchased immediately with a SIM card. There is no need to configure the connection; the device is already ready for use.
Mobile router Yota Many Wi-Fi 4G LTE
This is a pocket router weighing only 90 grams. It is convenient to use while traveling. A 2100 mAh battery charge is enough to provide battery life for 6 hours. And in standby mode, the device remains operational for 60 hours.
A special feature of this model is the presence of an E-ink display (electronic ink technology), which displays information about the status of the device.
IEEE 802.11b/g/n wireless standard is supported. In addition, the router can be connected to the USB port of a computer. The device is controlled via a web interface.
There are no connectors for connecting external antennas.
The router uses a micro-SIM card. Works only with Yota cards, other telecom operators are not supported.
Yota Ready 4G router
In fact, this is a combination of the well-known Keenetic 4G router and the Yota USB modem. Accordingly, in addition to mobile Internet, you can use a traditional Ethernet connection using a cable.
The Keenetic router supports a large number of USB modem models. In the case of the Yota modem, there is no need to configure the connection. Simply plug the device into a USB port.
This solution allows you to deploy a full-fledged home network. The router allows you to connect four computers via cable, as well as distribute the Internet via Wi-Fi at speeds of up to 300 Mbit/sec.
Internet center Yota 2
This is a stationary router for connecting to the Internet in 4G networks. The device is powered from the mains and does not have its own battery. However, it is possible to connect an external 3000 mAh battery. In case of a power outage, this will allow you to work autonomously for about three hours.
The router is equipped with four gigabit network ports. In addition to the mobile network, you can use regular wired Internet. There are also two RJ11 telephone connectors for voice telephony.
The device operates in two bands – 2.4 and 5 GHz. Up to 32 devices can be connected to each network via Wi-Fi. Data transfer speed is 300 Mbit/s. Built-in antennas provide coverage within a radius of 50 meters. There are connectors for connecting external antennas.
The router is produced for Yota by ZTE. The device is locked to a SIM card of a mobile operator and will not work with cards from other providers.
Connecting the Yota modem to the Keenetic Internet center
Connecting and setting up the ZyXEL Keenetic router model Lite II
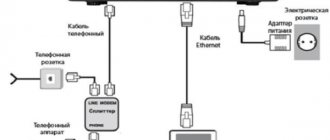
After analyzing all the components, the question arises: how to connect the yota modem to the zyxel keenetic 4g router. The device should be connected to the mains via a power supply. To do this, connect the appropriate unit to the router, and its plug is inserted into a regular home power outlet. After this, press the power button located near the power connector. Next, on the side there is a USB connector for connecting an active type extension cable or a portable mobile modem. If a person uses wired Internet, then the Internet provider cable must be inserted into the extreme port called “WAN” (it is marked in blue). As soon as the corresponding LEDs on the display panel light up, you can proceed to software configuration via the browser web interface.
Automatic setup
Automatic configuration of the Zyxel Keenetic Omni router is performed using a step-by-step wizard that will help you create a connection and check its serviceability.
Instructions:
- Click "Quick Setup".
- Select a language and click “Start quick setup”.
- Read the agreement and accept it.
- Create a new password to protect the web configurator from strangers.
- Select the connection method – “Ethernet” or “USB modem”.
- By default, Keenetic Omni works as a router. If you need other modes, in the window for selecting a connection method, click “Additional modes”. Here you can configure the router to work as an adapter, amplifier (repeater) or access point.
- Indicate which ones are needed or “Internet and IP TV”.
- Enter VLAN numbers if your vendor provides them. Otherwise, skip the step.
- Select MAC address. If the provider does not register them, set them to “Default”. Otherwise, click “Change” and enter the registered address.
- Select IP setting. If the IP address is dynamic, specify “Automatic”.
- If the IP is permanent (static), set to “Manual” and enter the IP, subnet mask, gateway address and DNS server.
- Specify the type of network connection. It is in the service provider's contract. This can be “PPPoE”, “PPTP”, “L2TP”, “802.1x Authorization”. If this option is not specified, click “No Password”.
- For PPPoE, enter the username and password.
- PPTP requires an IP address or VPN server name.
- L2TP connection requires knowledge of the VPN server address or IP.
- When selecting “802.1x Authorization”, specify the name, password and authorization method.
After entering the data, the router will establish a connection and search for and install updates. During this time, it is forbidden to turn off or restart the device - this may lead to its breakdown. The router will indicate that the operation is complete. Click "Continue".
In the next window, install protection against cyber threats. These are Internet filters Yandex.DNS, SkyDNS or AdGuard DNS.
The login and password for the automatically created wireless network will appear in a new window. Click “Finish setup”.
A web interface will open in which you can perform additional manual installation of the necessary parameters.
Pre-setting
For the network to work correctly, you need to install automatic updating and obtaining IP addresses and DNS. To do this you should:
- Go to Control Panel and find the “Network and Sharing Center” section there. The same can be done in the Start menu;
- In the window, select the “Change adapter settings” link on the left;
- A list of all networks will be displayed, among which you need to select the active one and right-click on it, selecting “Properties”;
- In the list, select IPv4—Internet Protocol version 4 and click on it;
- There will be several settings in the window: you need to check the boxes next to “Obtain an IP address and DNS automatically.”
Important! After this, click the “Ok” button and restart the computer. This will set the settings to the desired parameters, and the router will receive data automatically.
Configuration
Configuring the Zyxel Keenetic 4G 3 router to suit your needs and connecting it is carried out in two ways:
- through the “Configuration Wizard” (automatic);
- via the web interface (manual).
Automatic
For novice users, a semi-automatic mode is provided, which allows you to configure the Kinetic 4G router in a step-by-step mode, just by answering the wizard’s questions.
- To open the page where the Zyxel Keenetic 4G is configured, launch the Internet browser.
- In its address bar we write 192.168.1.1 or my.keenetic.net (look for information on the sticker on the bottom of the case).
- Enter your login information, usually “admin” in both fields.
- We immediately enter new data to protect the router configurator. The password here can be removed completely.
- Click on the button to launch the configuration wizard.
- Click on the button with the same name again.
- After identifying the modem, click “Next”. If it was not found, disconnect and connect the device again, make sure that drivers for it are available on your computer.
- Afterwards, you will be able to update the firmware for the device by downloading the current version from the Internet.
- We indicate the country of residence.
- We select a city to search for providers who work there.
- We indicate the Internet service provider, and if it is not in the list, try to find it or leave a checkbox next to the “My provider is not in this list” option.
- If necessary, you can enable “Safe Internet with Yandex.DNS” by checking the box next to the option.
- We go online by clicking on the button of the same name.
Then the browser will automatically launch with the equipment manufacturer’s page. If there are no problems with the connection, a green indicator with a planet icon will light up on the router. Now you can disconnect the network cable if it does not connect your computer to the wireless Internet.
Manually
Here you need to know a number of parameters in order to specify the correct settings for each of the providers. There are no difficulties here, just a couple of features.
Dom.ru and Rostelecom
When concluding a contract with this service provider, we perform the following steps after pairing the modem with the router, and the latter with the PC.
- We go to the web interface, as shown earlier, and click “Internet”.
- In the “PPPoE/VPN” tab, click on the button to add a new connection.
- In the “Protocol Type” drop-down list, select “PPPoE”, just below we enter the authorization information specified in the contract, and apply the changes made.
Beeline
This Internet provider uses a different protocol, so the setup is slightly different.
- We create a new connection, as in the previous case.
- In the text form “Type (protocol)” write “L2TP”, enter the server address as “tp.internet.beeline.ru” and registration data for identification with the service provider.
- Apply the settings.
NetByNet and Megafon
Providers require registration with a MAC address. For NetByNet:
- Create a new connection and select “IPoE” in connection types.
- In the first line “Use connector” we indicate the interface number “0” WAN.
- In the MAC address line, specify the value “Default”.
Watch the video review of the Zyxel Keenetic 4G 2nd generation router here:
Setting up a Keenetic Giga router
To access the web configurator of the Keenetic Giga KN-1010 WiFi router, use its local IP address - 192.168.1.1, or a symbolic address - my.keenetic.net.
To enter the settings of the Kinetic Giga KN-1010 router, use the admin and the factory password - 1234 . If you have problems with access, read the instructions on what to do if the router does not allow you to configure the settings.
After logging in, users will immediately be taken to the start page:
At the bottom of the page there will be a menu from which you can get to all the main sections of the Keenetic Giga KN-1010 Internet center settings.