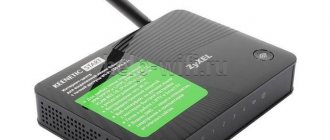
ZyXEL products are known primarily to IT specialists, since they specialize in server equipment. This company also has consumer devices: in particular, it was Zixel that first came to the tech market of the post-Soviet space with Dial-Up modems. The current range of this manufacturer also includes advanced wireless routers, such as the Keenetic series. The device from this line, called Lite 3, is the latest version of the budget ZyXEL Internet centers - below we will tell you how to prepare it for use and configure it.
Primary preparation stage
The first steps to take are to prepare it for work. The procedure is simple and is as follows:
- Selecting a location for installing the router. At the same time, try to keep the device away from sources of interference such as, for example, Bluetooth gadgets or radio peripherals, as well as metal barriers, which can significantly degrade the signal.
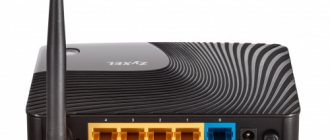
- Connecting the provider cable to the router and connecting the device to the computer using a patch cord. On the back of the case there is a block with connectors - the Internet provider cable should be connected to the WAN connector, and both ends of the patch cord should be inserted into the LAN connectors of the router and computer. All connectors are labeled and color coded, so there should be no problems with connection.
- The final stage of pre-configuration is preparing the computer. Open the properties of the TCP/IPv4 protocol and make sure that the network card receives all addresses automatically.
Connect the router to the power supply and start configuring.
Classic firmware
If the mode does not turn on, then you need to find the “NetFriend” button. It can be on the main page or in the “Internet” section (planet icon at the very bottom).
- Choose a language.
- The MAC address is usually not assigned, but it is better to look and clarify in the contract. Select the desired item and click “Next”.
- Setting the IP address "Automatic". If the contract contains a specified IP and DNS server, then we indicate manual configuration.
- Now you need to select the connection type as “PPPoE” (this is the one that is most often used). Next, enter your login and password from the sheet.
- In the next step, this notification will appear, select “OK” to install the firmware update.
- We are waiting for the update to install.
- The system has been updated - hurray!
- Do not apply the Internet filter settings from Yandex.DNS yet.
WiFi
- We have set up the Internet, all that remains is to configure WiFi - so we select “Web Configurator”.
- Click on the ladder icon at the very bottom. We come up with and enter any “Network name (SSID)”. Just below, select “Network protection” as “WPS2-PSK” and below enter the password for our Wi-Fi. Be sure to click “Apply”.
IP TV
- To set up IPTV Rostelecom, you need to check that a certain function is enabled on the router in the update. Go to “Settings” – “Update”. Next, click on “Show components”.
- Make sure that the “IGMP/PPPoE proxy service” checkbox is enabled.
- If you have a set-top box, then you need to go to the “Internet” menu and click on “Broadband connection”.
- We insert the set-top box into a free port and indicate here which one. Check in the contract whether there is a “VLAN number” setting - if there is, then check the box as in the picture above and indicate the number. Finally, click "Apply".
Setting options for ZyXEL Keenetic Lite 3
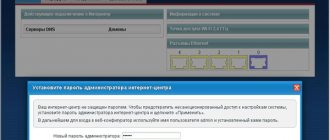
The router in question is configured through a web application, which for this manufacturer is a miniature OS. To access it you will need to use a browser: open it, enter the address 192.168.1.1 or my.keenetic.net and press Enter. In the authorization data entry window, write the name admin and password 1234. It would be a good idea to look at the bottom of the device - there is a sticker there with the exact data on the transition to the configurator interface.
The actual setup can be done in two different ways: using the quick configuration utility or setting the parameters yourself. Each method has its advantages, so let's look at both.
Quick setup
When you connect the router to your computer for the first time, the system will prompt you to use quick setup or go straight to the web configurator. Choose the first one. If the provider cable is not connected to the device, you will see the following message: It also appears if there is a problem with the provider cable or router connector. If this notification does not appear, the procedure will go like this:
Connection
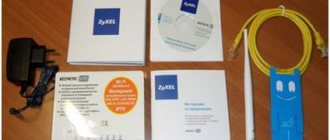
First, we need to connect to the router's network. This can be done in two ways: via cable and using Wi-Fi. I almost forgot, of course you need to plug it into the outlet. To do this, take the power supply from the box and connect it to the appropriate input.
To connect to the Internet, we insert the cable into the blue port - on older devices, it also usually stands out from the rest, so you won’t get confused. The remaining ports are local and are intended for connecting computers, TVs, printers, cameras and other devices. I will connect to port 1 for setup.
If you don't have a computer or laptop, you can use your phone or tablet. After turning on the Wi-Fi network should already be working. The standard network name and password are located on the label under the device.
NOTE! A tip is to reset the router to factory configuration if you received it from someone and it is not new. To do this, find the “Reset” or “Reset” button and press it with something thin for 10 seconds.
Blog about modems, routers and gpon ont terminals.
Connecting and installing digital interactive television IPTV on routers of the Zyxel Keenetic II family - Keenetic II, Keenetic Giga II, Keenetic Ultra and the new Keenetic Omni, Keenetic Viva and Keenetic Extra products is the same. The only difference is between Keenetic Start and Keenetic Lite II, but I already wrote about that here. The point of the action is that one LAN port, into which the TV set-top box is connected, is logically connected to the Internet port (WAN). There are 2 configuration options, which directly depend on how Multicast traffic is delivered to the subscriber, and accordingly whether the IPTV-vlan tag should be removed or not:
New firmware
After logging into the Web interface, you should be greeted with “Quick Setup.” If this does not happen, then find the “Start quick setup” menu item.
- Select the first item “Ethernet”.
- Next, you need to select “Internet” and “IP-TV” if you have a set-top box. If you specified the “IPTV” setting, then you will need to further connect the set-top box to the port and specify this port here. You may also need to enter additional data - see the settings sheet from Rostelecom.
- At the “MAC address” selection step, select “Default”.
- Select “Automatic” IP setting.
- Connection type as "PPPoE". All you have to do is enter the login and password from the contract.
- It is better to configure the Internet filter in the future, but not here. Select “No protection”.
WiFi
- At the end, the Wi-Fi network name and password will be displayed. To change the Wi-Fi password and name, in the main menu go to “Home Network” - “Wireless Wi-Fi Network”. Specify the name and key. Here you can also specify the network schedule.
Features and Specifications
The RT5350 SoC, which is the computing center here, is familiar to many specialists from a galaxy of other routers (mainly from China) equipped with the same or similar characteristics. In theory, thanks to this, Keenetic Start should have support for OpenWRT firmware, but in practice the chip has been modified and free software cannot be installed instead of the native one from Zyxel. Fortunately, the firmware here, as always, is good and functional.
RAM is traditionally in excess - 32 megabytes, permanent memory - 4, without doubling, which means it is impossible to quickly backup and roll back to the latest stable software version.
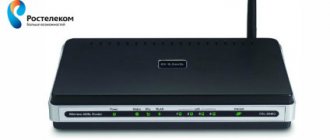
Kinetic Start has only one antenna, the signal power is only 2 dBi, but, as users note, this is quite enough for a small room or apartment with thin brick walls. There are 5 ports, all 100 Mbit/s, there is one WAN and 4 LAN connectors.
Wi-Fi operates in the 2.4 GHz band, the maximum wireless local network speed is 150 Mbit/s. Speeds over the IPoE/PPPoE and L2TP/PPTP protocols are lower - 90 and 60 Mbit/s, respectively
Indicators and connectors
On the back wall there is a completely standard set of connectors and buttons. From left to right here are:
- factory reset button.
- 5 already mentioned network ports.
- power connector.
- on/off button.
On the front are indicators of various device states. The first, Power, shows the power status. Those marked with numbers from 0 to 5 indicate the occupancy of the LAN and WAN ports. The Wi-Fi symbol indicator indicates the presence of a wireless connection. The last globe icon is responsible for demonstrating the Internet connection.