Author of the article
Sergey Sakadynsky
He worked in the field of IT consulting, was engaged in the creation and administration of Internet resources. 10 years of experience in designing and maintaining computer networks.
Ask a Question
Three generations of home Wi-Fi routers have been released under the Zyxel Keenetic brand. In 2021, the Zyxel prefix disappeared and Keenetic became an independent brand. But thousands of older routers are still doing the job. Below we will talk about how to set up a Zyxel Keenetic Wi-Fi router with firmware 2.11 and previous versions.
Features of routers
Zyxel Keenetic routers have a simple and laconic design; visually all models are similar to each other. The difference is in the number of antennas, ports and buttons. For example, some devices have a button for switching operating modes. Top models may have two USB connectors, while budget models may have none.
Keenetic stands out among its competitors due to its software - a full-fledged operating system that turns the router into a universal Internet center. All models use the same software and are configured in exactly the same way. The latest version for Zyxel Keenetic is NDMS OS 2.11. We will talk about the setup using its example.
Problems and their solutions
In most cases, setting up ZyXel Keenetic routers occurs without any problems, and if they arise, then most often the user himself is to blame.
Let's look at the most common difficulties and ways to solve them:
- The device interface does not load. In this case, the reason may be that the address was entered incorrectly. This information can be clarified by examining the router label.
- There is no access to the Internet after all the necessary actions have been completed. Here you will need to check how correctly the parameters specified in the contract have been entered and, if necessary, enter them again.
- A connection to the Internet cannot be established if all actions are performed correctly. The reason may be software glitches, which can be resolved by resetting the device to factory settings.
Sometimes the problem is outdated firmware. To update it, you will need to do the following:
- Connect to the Internet.
- Download the current firmware version from a trusted resource.
- Go to the router interface.
- Visit the systems and configurations section.
- In the appropriate sub-item, select the new firmware file and confirm the replacement.
- Wait for the updated version to download, reboot the router.
- Check the installation of the new firmware in the versions section under the code “NDMS” and begin setting up the router.
If none of the above methods for solving the problem helped resolve it, it is better to stop experimenting and seek professional help. Perhaps the reason is due to malfunctions or serious software failures of the router. Failure may also be caused by problems on the part of the provider.
Installation and preparation
If your Zyxel Keenetic has already been used before, reset its settings to factory settings before turning it on for the first time. Connect the power adapter and plug it into a power outlet. Connect the Internet cable to the blue WAN port on the rear panel. There is a power button there. Click it. At least two indicators should light up on the front panel - power and Internet connection.
To configure, you need to connect the Zyxel Keenetic router to the computer using the cable that comes in the kit. In the PC network card settings o.
Connect a cable from the card connector to any LAN port on the router. Now you can start setting up your Internet connection.
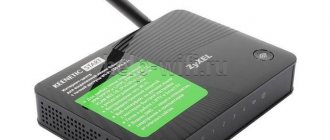
Description of Zyxel Keenetic Start II: case, price, equipment
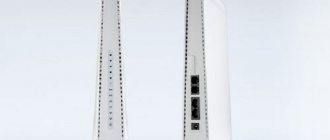
The router stands out from other models from the Zyxel Keenetic family. It is smaller in size. There are only 3 indicators in front:
- power (the router is currently working or not);
- Internet (is there a connection with the provider);
- Wi-Fi (is the hotspot enabled).
At the top there is a proprietary round key for activating Wi-Fi and connecting via WPS.
There are only 3 indicators on the front panel
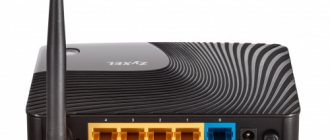
There are two ports on the back: local (the router is not designed to actively work with a home network) and for the provider’s cable. On the right is an internal button for resetting the current user settings to the original ones and a connector for the power adapter.
You can only connect one device to the router via wired connection
The scope of delivery is minimal: there is no network cable for local connection. The cost of the model is about 1500 rubles.
Table: technical features of Start II
| CPU | MT7628N 575 MHz |
| RAM | 64 MB DDR2 |
| Flash memory | 8 MB |
| Wi-Fi class | N300 |
| Antennas | 5 dBi |
| Ethernet ports | 2 x 100 Mbit/s |
| Wi-Fi/WPS button | There is |
| Access point, amplifier, adapter modes | There is |
Connection
Your router can connect to the Internet in different ways.
Wired
Cable connection (Ethernet) is the most common. The provider runs a wire into the apartment. You connect it to the WAN interface and configure it according to the instructions. There are different types of connections, and we will look at them in detail below.
USB modem
Where there is no wired Internet, you can use the mobile network. If, of course, your router model has a USB port. To do this, you will need to purchase a USB modem and an operator SIM card. Insert the modem into the connector. You don’t need to configure anything else: the Internet connects automatically.
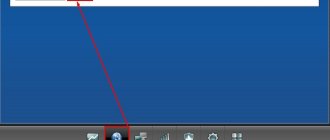
To check your connection, log into the web interface, open the “Internet” page (globe icon at the bottom) and go to the 3G/4G tab. Your mobile network connection will be displayed here. If you click on it, a window with additional information will open.
Be sure to read the list of supported modems on the Keenetic website in advance. If you purchase a device that is not there, it is not a fact that the Internet will work. In this case, you can try updating the firmware, but this does not always help.
WiFi
This method is rarely used. Perhaps your provider provides Internet access via Wi-Fi. Or you agreed with your neighbor to share the Internet through his wireless network.
This mode of operation is called “Bridge”. Do not confuse it with a repeater (repeater). In this case, the router transfers the Internet from the external network to its own.
To set up your connection, click on the Globe icon and select the Wi-Fi tab. Here, check the box next to “Enable Wi-Fi client”. Then click the "Browse networks" button and select the one you are going to connect to. And enter the network key. If the router you are connected to automatically distributes IP addresses, the corresponding data will be pulled up on its own. Otherwise, uncheck “Obtain an address via DHCP” and enter the IP yourself.
all-lab.ru
The Zyxel company never tires of delighting us with more and more routers (routers) of the ZyXEL Keenetic series. And, despite the variety of models presented, the various technical features and characteristics, as well as the software part of all devices, are almost identical, and the settings are made in the same way. And in this faq we will deal with setting up and updating the software of the ZyXEL Keenetic series routers. If you are wondering whether this article is for you, then here is a complete list of router models for which the presented settings are suitable: Show →
- ZyXEL Keenetic Lite;
- ZyXEL Keenetic Lite II;
- ZyXEL Keenetic Start;
- ZyXEL Keenetic;
- ZyXEL Keenetic II;
- ZyXEL Keenetic 4G;
- ZyXEL Keenetic 4G II;
- ZyXEL Keenetic Omni;
- ZyXEL Keenetic Giga;
- ZyXEL Keenetic Giga II;
- ZyXEL Keenetic Ultra.
All routers on the list run the NDMS V2 firmware, which is why the settings are made identically. And if suddenly your model is not on the list (this is possible if the router appeared after the article was written), then look at your model on the website zyxel.ru, in the “Support” section, check what firmware your router uses.
First connection of Zyxel Keenetic
To start working with the Zyxel Keenetic series router, just power up the router and connect to it for initial setup. Let's see how to do this. Show→
After connecting the power, Zyxel Keenetic will immediately start turning on, this takes about 1 minute. If it suddenly doesn’t turn on, look - maybe your model has a power button (it’s located on the back, next to the power socket).
After turning on, we can connect to the router to perform the initial setup; this can be done in two ways:
- over a wireless Wi-Fi network. After turning on, the router immediately creates a Wi-Fi network, the network name and password for connection are written on a sticker on the bottom of the router;
- via Ethernet (using a wire). Everything is simple here - just connect the router and the network card of your computer with a twisted pair cable (included in the kit). It doesn’t matter which connector you connect the cable to the router - now all Zyxel Keenetic models come with NDMS V2 firmware (the connector operating mode is LAN/WAN is determined automatically). If you suspect that your router has an old firmware version when you first connect, connect the twisted pair cable to the yellow socket.
If you just need to create a network between several devices, then no configuration is required - just connect all devices to Zyxel Keenetic and they will “see” each other.
Basic setup of Zyxel Keenetic
Internet connection: Show→
It all depends on the provider: unfortunately, there are no universal instructions. If no configuration is required, or you already have a configured router or modem, and you want to connect Zyxel Keenetic to it, then simply connect the devices with twisted pair cable, then turn on Zyxel Keenetic. The router itself will understand what is required of it. If configuration is required, check the settings with your provider and proceed to “First login to the WEB interface (Quick setup)”.
First login to the WEB interface (Quick setup): Show→
If setting up is required to access the Internet, and we know its parameters, then let's see where and how to specify them.
First of all, connect the twisted pair cable (network cable) of your provider to the router, and the router to the computer (see “First connection of Zyxel Keenetic”).
Go to https://192.168.1.1 (this is the address of the Zyxel Keenetic WEB interface), the quick setup page should open:
Quick setup
I recommend choosing “Quick Setup”. The Quick Setup Wizard includes:
- specifying the MAC address;
- IP protocol parameters;
- setting up VPN(L2TP), VPN(PPTP), PPPoE or 802.1x
- updating Zyxel Keenetic components.
These settings are sufficient for the vast majority of providers that provide access to the Internet via Ethernet. Just follow the customizer's instructions, read the tips, and everything will work out, there's nothing complicated about it.
If your router is already configured, but you want to reconfigure it using the quick setup wizard, then go to https://192.168.1.1/RU/nf.html (you will be asked for a password and login for access, by default: login - “admin ", password - "1234"). The following page will open:
Rerunning the Quick Setup Wizard
If reconfiguration is necessary, select “Quick setup”.
Or you can simply reset the router to factory settings; to do this, press the recessed “RESET” button for 15 seconds.
Setting up Wi-Fi on Zyxel Keenetic
Of course, the default Wi-Fi settings are good, and no one except you is likely to connect to your Wi-Fi. But it’s probably not very convenient to look at the password on a sticker on the router every time... and I’d like to set my own network name. Let's see what wireless network settings are available on Zyxel Keenetic.
Wi-Fi settings are available on the WEB interface of the router, which in turn is available at https://192.168.1.1, there at the bottom we select “Wi-Fi network” (icon with signal strength), or you can immediately open the Wi-Fi settings via the link https://192.168.1.1/RU/ap.html.
Access Point tab: Show→
Access point
Let's see what settings are available to us on the “Access Point” tab:
- “Enable access point” – checkbox to enable/disable Wi-Fi network.
- “Network name (SSID)” - you can set the network name (what your Wi-Fi network will be called).
- “Hide SSID” - you can hide the name of the network, then it will not be visible in the list of available networks (but devices on which this Wi-Fi network was saved, and the automatic connection option was enabled, will still connect to the wireless network automatically) .
- “Network protection” - here you can select the type of password encryption for connecting to the Wi-Fi network. If you do not have antediluvian computers with WinXP SP2, then choose “WPA2-PSK”. If you have legacy devices, you can select “WPA-PSK + WPA2-PSK”. If you want an open network, then select “No”.
- “Network key” is a password that must be entered to connect to a Wi-Fi network; for WPA2 it must be at least 8 characters (Latin letters and numbers). Keys 1-4 are used for WEP encryption, but it is used extremely rarely.
- “Standard” is a communication standard; for a successful connection, your network card must comply with the selected standard. I recommend choosing “802.11bgn”, all devices should work with it.
- “Channel” is the frequency at which the wireless network will be broadcast; select “Auto” - then the router itself will determine the least noisy frequency and will work on it.
- “Signal strength” - signal strength, for an average apartment 25% will be enough; If the signal is weak in some places, you can increase it.
After all the necessary settings have been specified, do not forget to click “Apply”. If you were connected to the router via Wi-Fi, then after changing most of the available settings you will disconnect from the network and you will need to select the network again and connect to it.
When changing the password, you should also change the network name (otherwise, to connect, you may need to manually delete the old saved network on the device from which you are connecting).
Guest Network tab: Show→
Guest network
The essence of a guest network is that devices connected to it have access to the Internet through your router, but do not have access to your home network (the parameters of which are set on the “Access Point” tab). After enabling the guest network, you will see a new network in the list of available networks, which will be completely independent from your home network.
All settings are almost identical to the settings in the “Access Point” tab, so there is no point in describing them. But you should pay attention to the “IP Settings for Guest Access”. In general, everything should be left as it is, but just in case, the “DHCP address pool size” is equal to the maximum possible number of devices connected to the guest network.
Access List tab: Show→
Access list
This tab provides the ability to control access to the network created by the router using MAC addresses (MAC address is a unique identifier of a network device). The function is very convenient if you have a fixed number of devices connected to your router, and you do not plan to connect more to the router. Then you can add their MAC addresses to the white list, and only they will be able to connect to the router.
The following blocking modes are possible:
- “Do not block” - entered MAC addresses are not taken into account;
- “White list” - only those devices whose MAC addresses are on the list will be able to connect to the router’s network;
- “Black list” - only those devices whose MAC addresses are on the list will not be able to connect to the router’s network.
To add a new MAC address to the list, click “Add address”, indicate the MAC address in the window that appears and click “Save”.
The MAC address of the device can be viewed if it is connected to Zyxel Keenetic, in the “Home Network” section (icon with two miniature monitors at the bottom left) or at the link https://192.168.1.1/RU/hosts.html.
Connecting the Yota USB modem to Zyxel Keenetic
All Keenetic series routers (except Lite/Lite II, Start routers) can be connected to a USB modem (3G/4G) to access the Internet; this feature is widely used. Let's see how to connect the Yota Modem to Zyxel Keenetic. Show →
In fact, everything is very simple - turn off the router, connect the Yota Modem to the USB connector, turn on the router. Everything should work (the modem should be detected by the router).
You can check whether the modem is detected or not on the main page of the router’s WEB interface - information about the new connection should appear there.
Yota modem connected to the router
If the modem is not detected, try resetting it to factory settings (press and hold the “RESET” button on the device body for 15 seconds). If it doesn’t help, make sure that the router software version is up to date and update if necessary.
Saving and restoring Zyxel Keenetic settings
It is often necessary for one reason or another to save the current router configuration (for example, to transfer to a similar device or to restore the configuration after a firmware update). On Zyxel Keenetic routers, of course, the ability to save and restore settings is provided.
Saving Zyxel Keenetic settings: Show→
1) Open the “System” section of the router’s WEB interface, the “Files” tab (the page is also available via a direct link - https://192.168.1.1/RU/files.html).
2) Click on the “startup-config” file.
Files
In the dialog box that appears, select “Save”. A file will be downloaded to the computer - this is the Zyxel Keenetic configuration file.
Restoring Zyxel Keenetic settings: Show→
1) Just like when saving settings, go to the WEB interface in the “System” section, “Files” tab (the page is also available via a direct link - https://192.168.1.1/RU/files.html).
2) Click on “startup-config” and in the dialog box that appears, click “Select file”, select the previously saved “startup-config” file from the computer. Then click “Replace”.
Select “Replace”
3) In theory, the router should reboot itself with the new settings, but in practice for some reason this does not always happen (perhaps it depends on the model/firmware version). Therefore, go to the “Reboot” tab and click “Reboot”.
The router will reboot and start working with the settings from the file.
Zyxel Keenetic firmware update
Let's look at how to update the Zyxel Keenetic firmware. There is one peculiarity here: a number of models were previously produced with firmware fundamentally different from NDMS V2, but in new models it was abandoned.
The old firmware looks something like this:
Old firmware
If you have an old version, I recommend updating, because... it is less functional and stable. All settings given in the article are for the NDMS V2 firmware.
The new (current) firmware (NDMS V2) looks something like this:
Firmware NDMS V2
Updating Zyxel Keenetic with an old firmware version: Show→
There are several nuances that should be taken into account - when updating, all settings will be lost - you cannot transfer them to the new version (you will have to configure them again). Rolling back is quite difficult.
Let's get started (a connection to the Internet must be configured on the router):
1) Download the current firmware version for your router model from the website zyxel.ru. Extract the *.bin file from the archive.
2) Go to the WEB interface of the router (https://192.168.1.1), go to the “System” section, select “Firmware” there.
Firmware installation
3) Click “Browse” and select the previously downloaded *.bin firmware file, click update.
4) Wait for the process to complete, this may take up to 3 minutes. The router will reboot during the update process.
Updating Zyxel Keenetic with a new firmware version (NDMS V2): Show→
1) Open the WEB interface of the router (https://192.168.1.1).
2) On the “System Monitor” page we find the “System Information” block and there we look for the “Updates” line. If a newer version of the firmware is available (than the current one), then opposite the “Updates” line there will be a link “Available”.
Update available
3) Click on “Available”. The “Components” tab section will open (in the “System” section), where we will be asked to install updates. Click “Ok” and wait until the update is downloaded and installed.
Click “Ok”
This method has one drawback - an Internet connection must be configured. But it may turn out that the firmware needs to be updated, but the connection to the Internet is not configured on the router. Therefore, there is the following option to perform the update under these conditions:
1) Download the current firmware version for your router model from the website zyxel.ru. Extract the *.bin file from the archive.
2) Open the “System” section of the router’s WEB interface, the “Files” tab (the page is also available via a direct link - https://192.168.1.1/RU/files.html).
3) Click on the “firmware” file, and in the dialog box that opens, first select “Select file” - select the *.bin firmware file, then click “Replace”.
4) Wait for the installation to complete.
We will definitely talk about more complex settings in future articles. If you are interested in a specific topic, or have questions, write in the comments.
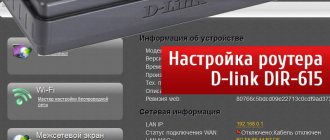
Login to the Web interface
You can enter the router settings from any web browser. There is a sticker on the bottom side of the device indicating the address and, on some models, the username and password for logging in.
Connect to your router. In the address bar of your browser, type my.keenetic.net or the default IP address of the Zyxel Keenetic router 192.168.1.1. If this is your first time signing in, the Quick Setup Wizard will launch. Standard login is admin, password is 1234/admin.
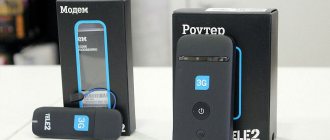
Setting up a 4G USB modem on the Keenetic Viva router
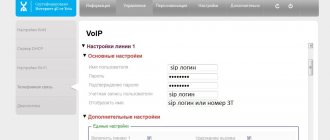
Time flies, new models appear. And now the hour has come when we need to supplement this article with a new experience of connecting a 4G modem to a Zyxel router. Here I will be setting up Keenetic Viva from the new white line. And the universal USB modem Huawei E8372 will act as an Internet source. It is today that you can often see it on the windows of domestic mobile operators - Megafon, MTS, Beeline, Tele 2 and Rostelecom.
My sample arrived already reflashed and ready for use with any providers. Therefore, I easily insert a Tele2 SIM card into it and connect it to the USB connector of the Keenetic Viva router.
Next, through the browser, I go to the router settings and open the “3G/4G modem” section. Here you need to first activate the Internet mode via a modem.
What is your opinion: is WiFi harmful?
Yes
22.94%
No
77.06%
Voted: 33419
Next, select the connection priority. That is, whether the 4G-LTE signal will be the main source or backup. If the main channel from the cable provider is unavailable (for example, they forgot to pay the subscription fee), then the mobile Internet will turn on.
Another useful setting is to set a schedule for the 4G modem.
Either it will work constantly, or on certain days and hours.
To save changes, click on the corresponding button at the bottom of the page.
Quick setup
To configure the Zixel router, select “Quick setup” in the window that opens.
The program will first ask what to do with the MAC address: leave it as is, clone it, or enter it manually.
If the Internet has already been connected to the PC and is bound to the network card address, select “MAC address of this computer.” Otherwise, follow the instructions given to you by your provider.
Next, you will need to enter the parameters that are usually specified in the connection agreement: IP address settings, login and password (if any), connection type and, possibly, additional data. You can get this information from your provider's support service.
At the final stage, the setup wizard will check for updates on the Internet and offer to install them. It's impossible to be there. Therefore, agree, wait until the process completes and the router reboots. Now, when you log in to 192.168.1.1, you will be taken to the main page of the web interface. All parameters can be changed manually. But if you want to run the wizard again to reconfigure the router, click on the globe icon and click the NetFriend button.
Port forwarding
This procedure is needed if you want to remotely access any device on your home network, for example, a home IP camera. Let's look at forwarding using its example for Start II:
- Go to the “Security” section, select “Network Address Translation (NAT)”. Add an address translation rule.
- To add a rule, let's imagine that we have an IP camera connected to a router. Let its IP address be 192.168.1.50, and the local port be 80 (in most cases, the port of IP cameras is 80, although there are exceptions).
- We see the “Configuring address translation rule” window. Its fields must be filled in as follows:
- “Interface” - Broadband connection (ISP);
- “Packets to address” and “Mask” - leave empty;
- "Protocol" - TCP;
- “TCP/UDP ports”—one port;
- in the field below - indicate the external port to which we will access from the Internet. Since the IP camera has an IP address of 192.168.1.50, it is most convenient to remember, for example, take port 10050. The port must be selected greater than 5000 so that there is no overlap with ports used by standard services and protocols;
- “Redirect to address” - specify the local IP address of the camera, i.e. 192.168.1.50;
- “New destination port number” is the local port of the IP camera. By default this is port 80.
You can configure forwarding in the “Address translation rules” window
- Reboot the router (optional) and check the configured port forwarding to the IP camera from the Internet through a browser. To do this, enter https://:10050 in your browser. Your browser should display your IP camera.
Manual setting
When you first start, you can immediately select manual configuration by clicking on the “Web Configurator” button. Subsequently, any changes are made through the web interface.
Below are instructions for correctly manually setting up your Internet connection, wireless network and other settings.
Dynamic IP
Most providers use this method. There is no need to configure anything. By default, a connection has already been created on the router. If your provider does not use MAC address binding, the Internet will work immediately after connecting the cable and turning on the router to the network.
If the MAC needs to be edited, click the “Globe” icon. The Connections tab will open. There will be only one connection here - Broadband Connection. Click on it to edit. In the window that appears, find the “MAC address” item and select “Take from your PC” from the drop-down list. Or use the "Enter manually" option if necessary.
Save the changes by clicking the "Apply" button. The setup is complete.
Static IP
Some local providers still provide clients with static addresses that must be entered manually. There is nothing complicated in this procedure. You just need to edit the Broadband Connection.
On the “Internet” page, go to the IPoE tab and open the connection settings. Change “Configuring IP parameters” to manual and enter the numbers given to you by your provider in the appropriate fields.
Click on the “Apply” button and you can use the Internet.
PPPoE (Rostelecom)
Rostelecom and some other providers use a PPPoE connection. To configure it, on the “Internet” page, go to the PPPoE/VPN tab and click the “Add connection” button.
In the window that opens, select the PPPoE protocol and enter the data provided by the provider. For Rostelecom, it is enough to indicate your login and password. But if you have some exotic provider, you may need other data. For example, manually specify the IP address.
Don't forget to save your settings.
L2TP (Beeline)
L2TP and PPTP connections are configured on the same tab. You will need the VPN server address, username and password.
Click “Add connection”, select the one you need from the drop-down list and enter the data provided by the provider in the appropriate fields.
After this, save the settings.
Local network and DHCP server for Start II
All home network settings are located in the section with an icon in the form of two computers:
- Let's describe the main block “IP Parameters”. In the first part, you can set a different IP for the router. If we have changed anything, click on “Apply”.
- In the second part “DHCP Server” we highlight the line “Enabled” with a bird.
- We determine the starting address in the address pool and indicate the number of available local IP addresses for gadgets connected to Wi-Fi. Take the maximum number of devices that can be on the network at the same time, but with a reserve.
- Define primary and secondary DNS if necessary. Don't forget to save your settings.
The DHCP server must be enabled if you are using Start II as your main router
Wi-Fi setup
On Keenetic routers, the Wi-Fi network usually already works. Connection parameters are indicated on the sticker at the bottom. But if you want to change the basic settings, you can do this at any time through the web interface.
To set up Wi-Fi on the Zyxel Keenetic, click on the wireless network signal icon at the bottom of the screen. In the window that opens, you can change the network name (SSID) and password, signal strength, and turn Wi-Fi on or off.
If you do not want your network to be visible to outsiders, check the “Hide SSID” checkbox. Now, to connect to the router via Wi-Fi, you will need to select a connection to a hidden network on your computer and specify the SSID manually.
WPA2-PSK security protocol is the best. There is no need to change it. It is also better to leave the remaining settings unchanged.
Additionally, you can configure the wireless network schedule. For example, on weekdays when you are at work, the broadcast will turn off at 8 am and turn on at 6 pm. And on weekends, Wi-Fi will be active around the clock.
If you have a dual-band router, then on the wireless network settings page there will be a “5 GHz access point” tab. The setup is done in the same way.
In addition, you can configure a guest network with your own parameters in the same way.
How to connect your computer to the router before setting up
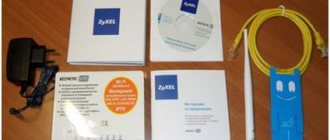
The connection is as simple as possible (we will use the wireless option, since the kit does not include a wire to connect the PC to the router):
- We insert the provider cable into the blue port.
- We connect it to the mains using the power adapter from the box.
- We go to Wi-Fi devices on the computer through the list of available networks in the panel on the bottom right.
- We find the login information on the sticker on the back panel.
The label contains the login information for the router's Wi-Fi network.
IPTV
The IPTV viewing function is available on Keenetic routers starting with firmware version NDMS v2.06. However, the necessary software components are not always preinstalled by default.
In order for IPTV to work correctly on the device, the IGMP/PPPoE proxy service must be available. If it is not there, go to the “System” page (gear icon) and open the “Components” tab.
Click the “Show components” button and check the box next to the one you need. Click “Install” and wait for the process to complete.
Now go into your home network settings (the image of the monitors in the panel below) and open the IGMP proxy tab. Usually it is enough to check the box next to “Enable IGMP proxy”.
Some providers may require you to specify a network port for your set-top box. To do this, open the “Internet” – “Connections” tab and select Broadband Connection. In the settings, specify the network port to which the set-top box will be connected.
Reviews
What buyers from different countries say about the device:
- “Great router. I took it as a replacement to work with two providers. I struggled with setting it up and forgot about it for almost a year. And he doesn’t remind me of himself yet.”
- “I was disappointed by the lack of custom firmware. At first. Then it became clear that they were simply not needed. All settings are at hand and obvious. After updating the firmware, I became a wild beast that controls the Internet throughout the house.”
- “There were doubts whether it would work. To my surprise, it did a great job and covers 60 m2 of apartment. We managed to free up space on the table and remove the repeater.”
- “Does not read flash drives formatted for EXT2 and EXT3. Otherwise I didn’t notice any problems.”
Podgornov Ilya Vladimirovich All articles on our site are audited by a technical consultant. If you have any questions, you can always ask them on his page.
Repeater mode
This mode is used to expand wireless network coverage. One router is the main one, and the second one operates in repeater mode, relaying its signal.
Some Keenetic models have a mode switch on the body. In this case, you can turn the router into a repeater with one click. If there is no switch, then mode changes occur through the web interface.
On the System page, open the Modes tab. You need to select “Booster – Wi-Fi zone extension”.
After clicking the “Apply” button, the router will reboot. Now you need to press the WPS buttons on it and the main router and wait for the connection to be established. Or manually connect to the main network.
How to configure Zyxel Keenetic Start II in repeater mode
Start II perfectly copes with the repeater function - it expands the network of the main router. Setting up repeater mode is very simple:
- Open the section for the system, and in it go to the tab with the available modes.
- Highlight the amplifier status and apply the setting.
Select the third mode in the list
- The router will reboot in the new selected mode. All that remains is to connect it to the main device. To do this, click on the round button on top of Start II, and then on the same one, but on the main router, it can be on the back (if the company is not Zyxel Keenetic). The devices will establish communication with each other, the network will be expanded.
Using the WPS buttons, configure the connection between the main router and the repeater
Firmware update
When setting up an Internet connection, the router will be updated to the latest firmware version. In the future, this can be done at any time.
The most convenient way is automatic. The main page of the web interface contains information about available updates. If you see an active link here, click on it.
Here, click the "Update" button and wait until the new software is downloaded and installed.
In some cases, you have to perform the update manually. To do this, you need to find the firmware file for your device in the Download Center on the Keenetic website. Be sure to check the data on the label: not only the model, but also the revision must match.
Unzip the file to a folder on your computer. In the router’s web interface, on the “System” page, select the “Files” tab and click on the firmware file in the list.
A window will appear in which you need to click on the “Select file” button, select the new firmware through the overview and click on the “Replace” button.
After the process is completed, the router will reboot.
Setting up 3G/4G Internet
The presence of sockets for USB connections and the corresponding software allows Keenetic DSL to access the Internet using mobile USB modems. However, the router is not compatible with all modems. A complete and regularly updated list of supported USB modems is presented on the official Zyxel website. After making sure that your model is listed, you can start connecting. All supported USB modems work with Keenetic DSL on a Plug'n'Play principle, that is, they do not require any configuration:
- Connect the USB modem with the SIM card inserted into the corresponding port on the rear panel.
- Make sure the globe-shaped network indicator lights up. Some USB modems require about 30 seconds to connect.
- Check the connection using any device connected to the router. The type of connection (wired or wireless) is not important.
You can view the connection status on the main page of the web interface in the “Internet” block. There you will see the speed of data reception and transmission, the modem model, its operating mode and the version of the software installed on the USB device.
Here you can see the operator name, speed and other connection data
Change Password
If you want to change the access password to the settings panel, open the “Users” tab on the “System” page. Here you will see the admin account. It cannot be deleted. You also cannot change your name to something else.
To change the password, click on the account, in the window that opens, set a new password and save the settings.
To create a strong combination, use our password generator. Generated passwords are displayed only on your computer or phone, are not stored anywhere and are reset as soon as you leave the page.
Your generated passwords:
Administrative panel password
It is necessary to set a password for the Web configurator, where you are now, so that no one can change the settings or break them. To do this, click on the gear. Next, select “Users”. If there is already an administrator account (admin), then simply click on it or create a new one. Enter your password and click "Save."
Saving and resetting settings
For Keenetic routers, it is possible to save settings to a file. This function will be useful if you want to restore the Internet center after a failure.
Open the Files tab on the System page. We are interested in firmware and startup-config. The first is the operating system itself, and the second is your settings for the Zyxel Keenetic router.
To download a file to your computer, click on it and in the window that appears, click the “Save” button.
A factory reset will be required if you have forgotten the password to log into the web interface or in the event of a software failure. To do this, there is a button on the back panel of the router, recessed into the case. You need to press it with a thin object, for example, a paper clip. Hold the button for 10 seconds. The device lights should blink. Then the router will reboot. The settings will return to factory settings. Now you can run the Quick Setup Wizard or restore settings from a backup file.
How to return the router to default (factory) settings
From the web panel, select the System tab. In the settings, click on the button at the bottom “Restore factory settings”. The router will reboot with the initial parameters.
In the settings, select the option "Return to factory settings"
If you do not have access to the web panel, use the miniature Reset button on the back of the Start II case. Take a thin object that will fit into the hole on the back of the router (it could be a match, a needle, a pin). We hold down the button and wait for all the indicators to light up. Release the button, the reset is completed.