Rostelecom is one of the largest providers in Russia, providing a variety of services: Internet, interactive television, telephone communications and others.
Most devices on the market can work on its network. Some of them are offered by the company to subscribers upon connection.
One of them is D-Link DSL-2640U. Let's consider what kind of device this is and how to configure it for the correct operation of all services.
Firmware versions
Users may encounter two types of interface of the DSL-2640U router from Rostelecom, slightly different from each other. They depend on the firmware version. It is very easy to distinguish between old and new firmware:
- Old software version. The interface is designed in white and blue.
- New firmware version. Interface colors: dark gray and black.
Using a router on a home or office network
In order to use the Internet or connect to the enterprise local network using the DSL-2640U modem, you can use:
Rice. 6. Network cable and extension cable for a wired connection between the modem and the computer.
- A wireless network, the advantage of which is the mobility of the device connected to the router and the ability to gain access to the Internet from both a smartphone and a tablet (which cannot be connected using a cable).
The disadvantage of wireless communication is the relatively short distance between the connected computer and the modem. You can increase it by creating additional access points.
This router model does not provide installation of additional antennas to enhance the signal.
To connect a computer or other device to the network, you need to find a wireless connection with the name you selected during setup, select it and enter the specified password.
In the future, all these actions will be performed automatically.
At the same time, you can use wireless access even if you have a desktop PC by installing a special Wi-Fi module.
This may reduce the signal quality, but will allow you to do without unnecessary wires. And the speed of such access will be no less than 150 Mbit/s.
Rice. 7. Wi-Fi modules for connecting computers to the network.
Login to the router settings management interface
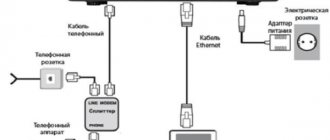
Before you start setting up the DSL-2640U router from Rostelecom, you need to take it out of the box, connect it to the telephone line, computer and outlet.
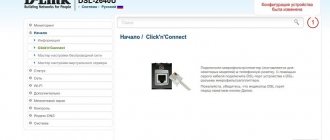
Once the physical installation is complete, you can begin configuring the device. All configurations are performed through the router management web interface. To access the settings, you must perform the following steps in sequence:
- Launch any browser (Google Chrom, Opera, IE, etc.).
- Type 192.168.1.1 in the address bar.
- Press Enter.
- When prompted to enter your username and password, enter “admin” without quotes in both fields. This is the data that is used for authorization.
Technical characteristics of D-Link DSL 2640U of different revisions
The D-Link DSL 2640U modem router has been in production for almost six years. During this time, several revisions of this device were developed, which, despite the same name, differ significantly technically.
Table: comparison of modems of different revisions
| Model name | DSL-2640U/RA/U1A | DSL-2640U/RB/U1A | DSL-2640U/B1A/T3A | DSL-2640U/BB/C4C |
| Description | Wireless N 150 ADSL2+ Modem Router | Wireless N 150 ADSL2+ Modem Router | Wireless N 150 ADSL2+ Modem Router | ADSL2/2+ Router (Annex B) |
| Version | ||||
| H/W | U1 | U1 | T3 | C4 |
| F/W | 2.0.20 | 2.0.3 | 1.0.7 | 1.0.2 |
| Hardware | ||||
| External antenna type | 2dbi x 1 | 2dbi x 1 | 2dbi x 1 | 2dbi x 1 |
| Network adapter (power supply) | 12V/0.5A | 12V/0.5A | 12V/0.5A | 12V/0.5A |
| Green Ethernet | Yes | Yes | Yes | No |
| Configuration utilities | ||||
| Click 'n' Connect | Yes | Yes | Yes | Yes |
| Quick wireless network setup | Yes | Yes | Yes | Yes |
| Virtual Server Setup Wizard | Yes | Yes | Yes | Yes |
| IPTV Setup Wizard | No | No | No | No |
| Interfaces | ||||
| Wireless WIFI (a/b/g/n) | IEEE 802.11b/g/n, 2.4Ghz | IEEE 802.11b/g/n, 2.4Ghz | IEEE 802.11b/g/n, 2.4Ghz | IEEE 802.11b/g/n, 2.4Ghz |
| ADSL | 1 RJ-11 port | 1 RJ-11 port | 1 RJ-11 port | 1 RJ-11 port |
| LAN | 4 x 10/100BASE-TX | 4 x 10/100BASE-TX | 4 x 10/100BASE-TX | 4 x 10/100BASE-TX |
| USB | No | |||
| ADSL Standards | ||||
| ADSL | Multi-mode, ANSI T1.413 Issue 2, ITU-T G.992.1 (G.dmt) Annex A, ITU-T G.992.2 (G.lite) Annex A, ITU-T G.994.1 (G.hs) | ANSI T1.413–1998 Issue 2; ITU-T G.992.1 (G.dmt) Annex B, ITU-T G.992.2 (G.lite) Annex B. | Multi-mode, ANSI T1.413 Issue 2, ITU-T G.992.1 (G.dmt) Annex A, ITU-T G.992.2 (G.lite) Annex A, ITU-T G.994.1 (G.hs) | ANSI T1.413–1998 Issue 2; ITU-T G.992.1 (G.dmt) Annex B, ITU-T G.992.2 (G.lite) Annex B. |
| ADSL2 | ITU-T G.992.3 (G.dmt.bis) Annex A/L/M, ITU-T G.992.4 (G.lite.bis) Annex A | ITU-T G.992.3 Annex B. | ITU-T G.992.3 (G.dmt.bis) Annex A/L/M, ITU-T G.992.4 (G.lite.bis) Annex A | ITU-T G.992.3 Annex B. |
| ADSL2+ | ITU-T G.992.5 Annex A/L/M | ITU-T G.992.5 Annex B | ITU-T G.992.5 Annex A/L/M | ITU-T G.992.5 Annex B |
| Internet connection types (IPv4) | ||||
| ADSL | Yes | |||
| Static IP | Yes | Yes | Yes | Yes |
| Dynamic IP (DHCP) | Yes | Yes | Yes | Yes |
| PPPoE | Yes | Yes | Yes | Yes |
| PPPoA | Yes | Yes | Yes | Yes |
| IpoA | Yes | Yes | Yes | Yes |
| Bridge | Yes | Yes | Yes | Yes |
| Ethernet (local area network) | ||||
| Static IP | Yes | Yes | Yes | Yes |
| Dynamic IP (DHCP) | Yes | Yes | Yes | Yes |
| PPPoE | Yes | Yes | Yes | Yes |
| WAN Static Route | Yes | Yes | Yes | Yes |
| LAN Static Route | No | No | No | No |
| Dynamic Route | Yes | Yes | Yes | Yes |
| NAT | Yes | Yes | Yes | Yes |
| Disable NAT | Yes | Yes | Yes | Yes |
| Port forwarding | No | No | Yes | Yes |
| Virtual servers | Yes | Yes | Yes | Yes |
| Application Rules | No | No | No | No |
| Managed Application Gateway (ALG) | SIP/RTSP | SIP/RTSP | SIP | No |
| DMZ | Yes | Yes | Yes | Yes |
| Firewall Features | ||||
| Filtering by MAC address | Yes | Yes | Yes | Yes |
| Filtering by IP address | Yes | Yes | Yes | Yes |
| PPTP Pass-through | Yes | Yes | Yes | Yes |
| IPSec Pass-through | No | No | No | No |
| L2TP Pass-through | No | No | No | No |
| PPPoE Pass-through | Yes | Yes | Yes | Yes |
| Keyword Filtering (URL-filtering) | Yes | Yes | Yes | Yes |
| SPI | Yes | Yes | Yes | Yes |
| DoS Protection | Yes | Yes | Yes | Yes |
| Graphic Authentication | No | No | No | No |
| Wireless Security | ||||
| WPS (Wi-Fi Protect Setup) | yes(PIN/Button) | yes (PIN/Button) | yes (PIN/Button) | yes (PIN/Button) |
| WEP | Yes | Yes | Yes | Yes |
| WPA-PSK (Personal) | Yes | Yes | Yes | Yes |
| WPA-EAP (Enterprise) | No | No | No | No |
| WPA2-PSK (Personal) | Yes | Yes | Yes | Yes |
| WPA2-EAP (Enterprise) | No | No | No | No |
| Guest Zone | No | No | Yes | No |
| Wi-Fi Invite | No | No | No | No |
| Modem management | ||||
| Web-base User Interface | http | http | http | http |
| Web UI Browser Support | IE/Firefox/Safari/Google/Opera | IE/Firefox/Safari/Google/Opera | IE/Firefox/Safari/Google/Opera | IE/Firefox/Safari/Google/Opera |
| Firmware upgrade | Yes | Yes | Yes | Yes |
| Firmware online check | Yes | Yes | No | No |
| Remote FW update | Yes | Yes | No | No |
| Config. Backup+ Restore | Yes | Yes | Yes | Yes |
| Remote Management | Yes | Yes | Yes | Yes |
| Time Setting / (D-Link NTP) | Yes | Yes | Yes | Yes |
| DDNS Client / D-Link DDNS | Yes | Yes | Yes | Yes |
| Scheduling | No | No | No | No |
| SNMP | No | No | No | No |
| Support Page Redirect Link | No | No | No | No |
| Telnet | Yes | Yes | Yes | |
| Networking capabilities | ||||
| DHCP Sever | Yes | Yes | Yes | Yes |
| DHCP Relay | Yes | Yes | Yes | Yes |
| DNS Relay | Yes | |||
| IGMP snooping | Yes | Yes | Yes | Yes |
| IGMP Proxy | Yes | Yes | Yes | Yes |
| UPnP | Yes | Yes | Yes | Yes |
| Grouping Interfaces | Yes | Yes | Yes | Yes |
| yesLAN priority (802.1p) | Yes | Yes | Yes | No |
| TR-069 | Yes | No | No | No |
| Flow control | No | No | No | No |
| Syslog and Monitoring | ||||
| Internal journal | Yes | Yes | Yes | Yes |
| External magazine | Yes | Yes | ||
| Email Notifications | No | No | No | No |
| System log | Yes | Yes | Yes | Yes |
| The event log | Yes | Yes | Yes | Yes |
| Testing cable connections | No | No | No | No |
| Theoretical speed (performance) | ||||
| IpoE download/upload mbps | 20,3/0,785 | 19,1/0,785 | 19,6/0,904 | 18,3/0,893 |
| IpoA download/upload mbps | 18,6/0,782 | 18,2/0,756 | 18,9/0,905 | 18,0/0,893 |
| PPPoE download/upload mbps | 19,7/0,893 | 18,1/0,743 | 19,4/0,903 | 18,6/0,885 |
| PPPoA download/upload mbps | 19,5/0,887 | 19,4/0,748 | 19,2/0,903 | 18,5/0,881 |
| Ethernet | ||||
| IpoE download/upload mbps | 93,1/93,9 | 92,1/91,4 | 92,9/94,2 | 92,6/93,2 |
| PPPoE download/upload mbps | 91,3/91,9 | 91,3/91,9 | 90,6/92,3 | 91,4/92,0 |
| Bandwidth Control | Yes | Yes | Yes | Yes |
| Maximum Bandwidth Control | No | No | No | No |
| Auto Uplink Bandwidth Measure | No | No | No | No |
| QoS Engine | No | No | No | No |
| Wireless QoS (WMM) | No | No | No | No |
| WISH | No | No | No | No |
| Print server | No | No | No | No |
| Samba | No | No | No | No |
| FTP server | No | No | No | No |
| DLNA | No | No | No | No |
Internet setup
Rostelecom uses PPPoE in most places to connect to the Internet, so we will consider configuration based on it. In the old and new firmware versions, the settings items are located slightly differently, so we will provide a description for each option separately.
Old firmware
In the main menu, sequentially select the items “Network”, “Connections” and click on the add button. On the screen that appears, set the following parameters:
- "Connection type". Here you need to select the PPPoE mode. This will allow the D-link DSL-2640U to operate in router mode.
- VPI and VCI. These options vary in each region. You can clarify them in technical support using a toll-free number or by finding the corresponding table on the Internet.
- We enter a username and password for access. You can find out this data from the documents that were received upon connection. Important! The password must be confirmed in the next field.
- Service name. At this point, enter a name for the connection that will allow you to identify it, for example, “Internet”.
- Extra options. For normal operation, you must enable the checkboxes next to the “Keep Alive” and “IGMP” items.
If the line leaves much to be desired and frequent connection breaks are possible, then it is better to indicate the actions to take if an authorization attempt is unsuccessful. In the “LCP failures” field we indicate the value 2, and in the “LCP interval” - 15. This will allow the device to first try to establish a connection twice, and then pause for 15 seconds.
New firmware
The sequence of actions in the new firmware is somewhat different. After logging into the management interface, the user sees several buttons and information about the device and ADSL operation status on the main page.
The first thing you need to do to set up the Internet is to switch to advanced management mode. The button for this is located at the very bottom of the screen.
In the “Network” section, select “WAN”. A window with available connections will open. If it is not empty, then before setting it up you need to delete all connections; to do this, click on them successively with the mouse and select “Delete” in the lower right corner of the screen.
Click the “Create” button in the WAN interfaces and begin configuration.
In the window that appears, you must specify standard parameters, namely:
- Connection type - PPPoE. This is what Rostelecom uses for all subscribers connected via ADSL technology.
- “Interface” - DSL (new). Otherwise, it will not be possible to specify the VPI and VCI settings.
- VPI and VCI. These two parameters can be found in technical support.
At this point, the Internet settings are completed and if you do not need to connect a set-top box for IP TV, you can save the settings and reboot the DSL-2640U. To do this, at the top right of the D-link logo, find the “System” menu and select the desired action.
Model overview
The 2640U router is used only for ADSL connections.
There are four variations of this model available for purchase. Outwardly they are indistinguishable, the difference lies only in the options for hardware revisions. The DSL connection method is already outdated, but still relevant for remote villages.
It also has a wireless network connection feature. That is, it is used as a Wi-Fi device. The characteristics of the d-link 2640u dsl router are identical to other models from the xDSL segment.
The 2640U router interface does not contain USB connectors, which means there is no way to connect a 3G/4G modem to it or flash the firmware via a flash drive. It also does not support creating a VPN server, or using it as a torrent or DLNA server. It is not possible to make an individual configuration or change the assignment of buttons on the equipment.
Appearance
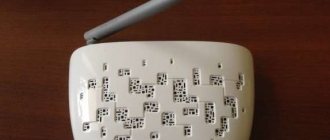
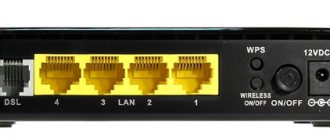
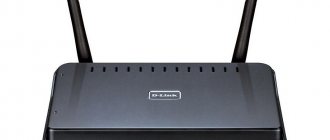
The d-link 2640u DSL wi-fi modem is a black box with rounded edges. On the front side there are light indicators with a signature that indicate the operation of the current connection. The power jack and ports are on the back along with the single antenna.
The design is the same as most routers from the manufacturer.
The DSL equipment comes with all the necessary cables for installing a network device. Basic documentation and a configuration assistant are included on the included CD.
Connection and preparation for work
Before setting up the d-link 2640u router, you need to connect it to the electrical network. To do this, use the power adapter included in the kit. Insert the telephone cable connector into a special device - a splitter. It will allow you to divide the signal coming from the wire into two: the first is responsible for the telephone, and the second is for providing access to the Internet. The last step is to connect the 2640u network cable to the network port on the computer.
Setting up a router to connect an IPTV set-top box
IPTV is actively promoted by Rostelecom under the name “Interactive Television”. Often subscribers can use this service for several months as a gift when connecting to the Internet. To configure the service on the DSL-2640U router from D-link, you will need to complete two steps:
- Creating connections. There may be one or two of them for IPTV operation, depending on the region.
- Grouping of ports.
Old firmware
Again in the main menu, select the “Connections” sub-item in the “Network” section. Set the “Connection type” switch to the Bridge position and set the VPI/VCI pair. If two sets of parameters are possible, then repeat the procedure again.
After creating a connection, you need to perform port grouping. To do this, go to the “Advanced” section of the main menu and select the “Interface Grouping” item. On the page that appears, select the appropriate button at the very bottom to add a group. Fill in the “Name” field with any name, for example “TV”.
And we move from the left column to the right two bridge connections and ports for the set-top box (usually one, for example, LAN2).
New firmware
The actions that owners of the D-link DSL-2640U router with the new firmware need to perform are similar, but the menu is slightly different, so here is their order:
- Go to “Advanced Settings” and go to the “WAN” item in the “Network” section.
- Click “Add”.
- Set the “Connection type” switch to the “Bridge” position, and in the “Interface” drop-down menu select the “DSL (new)” value.
- Specify VPI and VCI, and then save the connection
- If necessary, create a second connection of the “Bridge” type for the second VPI/VCI pair.
- On the “Advanced Settings” page, in the “Advanced” section, click on the “Interface Grouping” item.
- Click the “Add group” button.
- Specify any name for the new group and check the boxes for the required ports, for example, LAN 4 and one or two Bridge connections.
- Click the “Apply” button.
Reviews
Xamsin writes that he liked the model. User-friendly interface, easy setup. I bought it to replace a burned out Zyxel. The user uses it as an access point throughout the apartment.
Folker claims that the 2640u dsl Wi-Fi home router is easy to set up and use. He himself lives in a village where only an ADSL line is available. According to him, this router keeps the signal stable.
For the Romanyakyura buyer, the D-Link 2640U DSL router has become the best option for creating a wireless network at home. The signal is stable and clear.
Podgornov Ilya Vladimirovich All articles on our site are audited by a technical consultant. If you have any questions, you can always ask them on his page.
Setting up wireless Internet access
Devices that access the Internet via Wi-Fi can be found in every home today. To provide them with wireless access to the network via D-link DSL-2640U, you need to make some settings.
Old firmware
First you need to set the name of the network. This is done on a special page, which can be accessed by sequentially selecting the “Wi-Fi” and “Basic settings” items in the main menu. The only thing that needs to be specified on this page is the name of the network. You need to enter it in the appropriate field, which is called “SSID”. After entering the data, you should save using the special button below.
It is important not only to create a Wi-Fi network, but also to make it secure enough so that personal data is not at risk. This can be done by setting a key or password for it.
This operation is performed on a special “Security Settings” page, which can be accessed through the “Wi-Fi” section in the main menu.
The network authentication type on this page must be specified as “WPA2-PSK”. You must enter the key in the appropriate field; it will serve as a password for the connection. After this, you need to click the “Change” button at the bottom of the page.
New firmware
The actions in the new and old firmware are similar, but slightly different. Let us describe the procedure for setting up Wi-Fi on the D-link DSL-2640U in the gray interface:
- On the main page of the “Advanced Settings” section, make sure that the Wi-Fi switch is in the “On” position.
- Select “Basic settings” in the Wi-Fi section.
- Enter the network name in the “SSID” field.
- Apply settings using the corresponding button.
- The access point should not be left unprotected. You must definitely return to the “Advanced Settings” section and go to “Security Settings”. The most suitable type of network authentication on the page that opens will be “WPA2-PSK”. Be sure to enter the key to access the network in the next field.
This completes the router setup. All that remains is to save all the settings and restart the device. After that, you can enjoy working online.
Setting up routers is quick and usually does not cause any difficulties for users. If errors occur, it is recommended to check all entered parameters again and, if necessary, contact technical support by phone (a list of numbers is here).
Did you like the article? Share with friends:
Conclusion
How to connect and configure a D-Link Dir model 615 router
Dsl Wi-Fi router d-link 2640u is a model that supports outdated ADSL technology. It is suitable for work mainly in remote settlements of the country, where, apart from the telephone line, there are no other alternatives to wired Internet.
For setting up a D-Link in a private home, the DSL 2640u is perfect. Nice and clear interface, minimum operations. Configuration is completed in 4 minutes.
pros
The 2640u network device belongs to the line of budget DSL routers, that is, its price is reasonable.
It is possible to use it in other modes besides the router. Great alternative as an access point
Minuses
The equipment uses xDSL connection technology, which is rarely used today. For its operation on modern protocols, firmware for third-party modes is often required. However, this results in the equipment not working.

