Smart devices help make life easier and create more comfortable living conditions. The development of such smart systems began with Huawei, but in Russia there are analogues of such devices. Let's tell you what a Smart Home camera from Rostelecom is. How to use this device, and how you can order a service from the company.
What is a “Smart Home” from Rostelecom: description of capabilities
Smart module technology is based on the ability to carry out direct or software control through wired or wireless signals coming from sensors. A whole set of Rostelecom sensors has been developed, which is not limited to the basic set. The system is designed in such a way that additional sensors and smart control sensors can be connected to it. It has a number of interesting features:
- Video recording and archiving for 30 days.
- Continuous surveillance of the territory.
- Possibility to look after children or animals left at home.
- Automatic connection of various devices.
- Control through the functionality of a mobile application on a smartphone, etc.
Note! The Smart Home system from Rostelecom can recognize signals coming from sensors in automatic mode.
When you purchase a basic Rostelecom kit, you will not see a video camera in it. This device must be purchased separately. But there is another opportunity to install video surveillance in your home.
Complete set of the “Smart Home” system
Currently, Rostelecom offers three sets of equipment for purchase:
Base
Includes a controller, motion sensors and a system for tracking the opening of doors and windows.
Advanced
The kit includes: controller, opening and motion sensors, smoke and leakage sensors.
Control
Contains basic devices (no smoke or leak detectors), plus a smart plug and light bulb.
Description of sensors
To understand how each device works, you need to read a brief description of each sensor:
Controller
The main mechanism that controls all devices connected to it. It also transmits data.
Opening
If windows or doors are open, it will transmit a message to your smartphone.
Leak, smoke, gas
Detects the first signs of a leak or fire through changes in temperature and smoke level in the apartment.
Movement
Turns on if there is any movement in an empty room.
Smart light bulb and socket
Allows you to control equipment remotely via a mobile phone.
Note!
The cost of connecting to the information service via SMS is 60 rubles per month.
You can purchase equipment on the official Rostelecom website, at the company’s sales offices or in digital electronics stores Svyaznoy, M.Video, Yulmart.
How to order and connect a Smart Home camera from Rostelecom: instructions
You can order any of the company’s services on the official website. This also applies to connecting a camera with a cloud video surveillance service. To order a camera and install it, do the following:
- Enter the company address www.rt.ru in your browser.
- There is a menu at the top, point to the “Smart Home” tab and select from the list.
- Check out the rates. Select one of those offered by clicking on the “Buy” button.
- Fill out the form that opens and send the application to Rostelecom.
- Wait for a call from the company, the manager will clarify the details of the order and discuss a convenient time for specialists to come to you.
All initial setup, as well as installation of equipment, is carried out by RTK specialists. You can also contact them to add output from the camera to your gadget. However, you can do this yourself, for this:
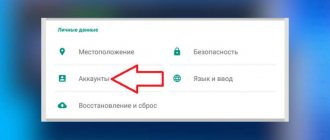
- Go to the My Rostelecom mobile application and log in.
- Select your “Smart Home” personal account.
- Click on the “Add device” button.
- Connect the video camera to a power outlet.
- In the application, select the “Blinking Red” item and tap on it.
- Enter the name of your Wi-Fi network and its password, click “Continue”.
- Click on the "QR code" button. Place the smartphone screen in front of the camera at a distance of 20 cm, and hold it there until a sound signal appears.
- Click on “Code recognized”.
- Enter the desired settings on the smartphone screen and save them.
Connection
Now let's figure out how to connect the camera.
Instructions:
- Select the required hardware from the list of devices.
- Confirm the device connection method (via WI-FI or cable).
Wired connection:
- Unpack the device and activate the power following the instructions included in the package.
- If the video camera is connected using a PoE injector, you must select a cable no more than 90 m long.
- Click on the button called “Continue”.
- Next you need to enter the serial number of the device.
- Click on the “Continue” button again.
Wireless connection:
- Repeat the steps described in the first step of the previous method. Wait for the device to emit a special signal. It informs you that the camera is ready to read the QR code.
- Click on the “Continue” button.
- Select the desired Wi-Fi network. Next you need to enter a password.
- Click on the "Continue" button.
- Confirm your willingness to show the QR code. To do this, click the appropriate button.
- Show the code to the device. Wait until your camcorder recognizes the code.
- Then click on the “Code recognized” button.
Registration in your personal account
The owner of the “smart system” must register on the company’s official website (or in the application on a smartphone).
What information needs to be filled in:
- FULL NAME;
- Phone number;
- Email address;
- Region;
- Password.
Managing the created account is available in the two ways mentioned above. The company's mobile application can be downloaded absolutely free.
Additional features
Some users find it insufficient to have a high-quality video monitoring system at a remote location. In this case, they connect a paid and very popular service today called “SOS”. Its cost is 599 rubles/month. What this represents is a call to a rapid response team.
If an intruder enters the protected area, a motion sensor functions. As soon as the user receives the corresponding notification, he can click this button and confirm the departure of the group. The client's signal is sent to the security company's control panel. After receiving the signal, the company’s specialists respond to the call and stop the attacker.
Where to buy the Smart Home system
The product you are interested in can be purchased at partner stores or on the official Rostelecom website. Some buyers make their choice in favor of becoming Rostelecom clients. In this case, the company offers them a number of attractive advantages. However, this is not a mandatory condition. You do not have to become a client of the company if you do not have such a desire.
The most pleasant bonus for a Rostelecom client is the opportunity to purchase equipment in installments. In stores and on the company’s website, you can also buy additional compatible equipment for video surveillance indoors and outdoors.
How to use the Rostelecom Smart Home camera: useful tips
When purchasing ready-made kits, you will not find cameras in them. But if you purchase it separately, it will be successfully adapted to the entire system. However, you can simply order a video surveillance service from Rostelecom and pay a monthly subscription fee. The installation and connection of the system will be carried out by the company’s specialists.
To use the device, just connect via the Internet to a PC or mobile device. All videos will be displayed on the screen of the equipment used. The service will also be available to manage settings and view the archive. That is, the video is available in real time and also as archived data.
Cost of equipment
The cost of the Smart Home kit may vary slightly depending on the subscriber’s region of residence. Current prices can be found on the company’s website at the link: https://rt.ru/smart_house/tariff
On average, you will have to pay for devices:
| Package name | One-time fee (RUB) | Purchase in installments for 2 years (RUB) |
| Base | 11 590 | 600 rub/month, first payment 1300 |
| Advanced | 16 990 | 900 rub./month, first payment 1300 |
In addition to the kit, you can purchase sensors using the “Management” program:
| Sensor name | Cost, rub.) |
| Movements | 2 990 |
| Gaza | 3 490 |
| Opening windows and doors | 2 890 |
| Leaks | 3 490 |
| Smoke | 3 490 |
| Smart plug | 2 390 |
| Smart light bulb | 2 890 |
To install and properly connect the Smart Home kit, you must use the instructions that come with each kit. If you can’t do the work yourself, you can turn to specialists for help. To do this, you need to call the number and inform the operator of your desire.
Important! The service is provided for a fee; the cost is communicated to the client personally when submitting an application.
How to connect a Rostelecom CCTV camera yourself
Purchasing smart home equipment from RTK is available on the official website, in service sales centers, as well as in partner stores - Svyaznoy, M.Video, Yulmart. Moreover, when purchasing a ready-made kit, you will not find a video camera in it; it is purchased separately and then connected to a previously installed circuit.
Any additional devices for the Smart Home can be purchased additionally, and then added to the user’s personal account, where all settings can be made. First you need to register in the system, to do this do the following:
- Follow the link https://lk.smarthome.rt.ru/login.
- Click “Registration” in the form that opens and fill out all the fields.
- You will need to indicate the device installation address, email, phone number, full name, and come up with a login password.
- If you already have an ELC on the site, log into it using your login/password.
To manage equipment, you need to add it to your profile. To do this, use the “My Devices” tab. Enter sensor data into the proposed fields and wait for the connection process.
Note! Adding any additional equipment to the Rostelecom Smart Home is carried out in your personal account in the “My Devices” section.
Adding a CCTV camera is also easy. They can be connected via cable or Wi-Fi, and are also connected to a smart home through the application installed on the “Rostelecom Video Surveillance and Smart Home” smartphone. To do this, follow these steps:
- Open the "My Devices" section.
- Click on the "+" icon to add a video camera.
- When connecting the camera via an Ethernet cable, enter its serial number. You will find it on the device packaging.
- When activated via Wi-Fi, you must provide a login and password to access the Internet. After that, bring the camera to the monitor so that the QR code is read.
Unlinking cameras from Rostelecom (DS-I120, DS-I122)
As you know, the Rostelecom , among other things, also provides a cloud video surveillance service. HikVision/HiWatch/EZVIZ IP video cameras with special firmware are used as a video source. EZVIZ are also purely cloud cameras, without a local web interface, so it’s only a matter of taste whose cloud to use.
As for HikVision/Hiwatch , by uploading original firmware to them, you can turn these cameras into full-fledged ones - with a local web interface and the ability to connect to video surveillance servers or recorders. The ability to work via the cloud will also appear.
Recently, Rostelecom has changed the firmware of the cameras, so now it’s not so easy to untie them - we’re working on it, but for now we’ll talk about cameras from early batches.
There are several ways to unlink. First I will give the simplest and most stupid one.
Method number 0 (for the lazy and unpretentious)
As a perfectionist, I would not recommend this option to anyone, but it has its place. One of the customers used this method to untie some of his cameras until he learned other methods. After I learned it, I offered to redo it, but the customer refused. Apparently, following the principle: “If it works, don’t touch it .
So, the way is to simply reset the administrator password. You won't be able to work with the camera via the web interface, but you can use it with a video surveillance system or recorder.
Password reset
Resetting the password is done by returning the camera to factory settings, that is, according to the latest fashion, to an inactive state. The algorithm is as follows:
- 1. Turn off the power;
- 2. Press and hold the RESET ;
- 3. Apply power to the camera while continuing to hold the button pressed for another 10-15 seconds .
- 4. Release the button.
Camera in inactive state with default address
After resetting to factory settings, the camera status in SADP should become Inactive . If it’s still Active , it means it didn’t work, try again.
Another option is to reset via SADP and support. But, if there is a RESET , why do this?
You can activate the camera right there - in SADP , by setting a complex password. Through SADP you can also change network settings. But here there is one very important point - you cannot release the camera to the Internet ! That is, if the network has DHCP , we don’t use it. The address is set only statically, and the gateway is not specified. Otherwise, having gained access to the global network, the camera will find the Rostelecom server and return to the state it was in before the manipulation. If you don't connect to the Internet, it will work. It may not have ONVIF , so it will only be able to work via RTSP , but this is even better.
The downside (and a perfectionist's nightmare) of this method is that, almost always, there remains an OSD - a line indicating the date and time, and neither the date nor the time corresponds to the current ones. There is no way to disable OSD , nor adjust it, nor adjust its size and location in the frame, since there is no web interface.
At first, I didn’t even think about this way of writing, since it’s not even a way, but some kind of nonsense, but the method works! Maybe someone will use it due to reluctance or lack of opportunity to use other, more progressive methods.
Preparing for firmware
Now about more progressive methods. There are two of them - without additional equipment and with it. Both of these methods require preparation.
The difficulty is that the camera memory is laid out differently and the original firmware does not fit there. Need to cut. The most obvious solution is to remove WebComponents - these are the same ActiveX installed in IE, without which it is impossible to view images and fully configure the camera in the web interface. They are downloaded and installed only once, and if they are already on a specific PC, they are no longer needed.
Tools
- HikTools - a utility for disassembling and assembling firmware;
- NewTuxBoxFlashTools - a utility for editing CRAMFS ;
- HikVision TFTP Server - a utility for restoring firmware for HikVision/HiWatch cameras;
- SADP is a utility for searching, activating and configuring network parameters of HikVision / HiWatch .
Useful links:
- DS-114_I120_I122_I126_I128_I220_5.4.81_190111_nowebcmpnts.zip - firmware with removed WebComponents.exe ;
- DS-I120_I122_I114_I114W_I126_I128_I220_I223_N201_N211_N241_N241W_N291W_5.4.3_180306_nowebcmpnts.zip - firmware with removed WebComponents.exe and with support for the domestic TRASSIR Cloud . I used to work at Hik-Connect too, but now I don’t. Read more in the article HiWatch/Hikvision cameras in the TRASSIR Cloud;
- WebComponents.exe - actually, the components to be removed.
Below is an algorithm for obtaining firmware suitable for flashing - such a pun... If you are not interested or lazy, then you can skip and download the finished one from the link above.
Firmware preparation algorithm
- Download the archive with the original firmware from the HikVision FTP server. Let's unpack. We are interested in the digicap.dav .
- Copy the file to the HikTools and run the cmd_split.cmd . dav appears in the folder , which contains the contents of the firmware.
- Launch the NewTuxBoxFlashTools app.img file in it from the dav . The interface is in German, but it’s easy to understand where everything is by looking at the icons. WebComponents.exe file in the contents of the image and delete it, saving the changes. When saving, it will swear - this is normal. Before deleting, you can extract this file from the image if you don’t want to download it.
- cmd_create.cmd file and get new firmware - a file named dav.dav .
- Delete the old digicap.dav and rename the dav.dav to digicap.dav . We received smaller firmware.
The preparations are complete. Now there are two ways to flash the firmware.
Method No. 1
The simplest and most affordable method of flashing firmware, which does not require additional equipment. There is no need to go into the hardware - everything is done using standard tools. HikVision/HiWatch cameras have a firmware recovery mechanism in case of critical failures. Each time, when launched, the camera receives a fixed address 192.168.1.64 or 192.0.0.64 (in older versions) and, within a few seconds, looks for TFTP server at 192.168.1.128 or 192.0.0.128 , respectively. Having found it, downloads the firmware and flashes it.
- We set the computer’s network card with the address 192.168.1.128/255.255.255.0 and an additional address 192.0.0.128/255.255.255.0 so as not to check which batch the camera is from and to do everything in one try.
- Copy the cut firmware to the TFTP and start the server.
- Connect the camera to the network and turn on the power. We monitor the TFTP server log. As soon as it says that the firmware has been downloaded, you need to close it. Otherwise, the camera will flash, reboot, and start searching for the TFT P server when loading. It will find it, download the firmware, flash it, reboot, and so on in a circle.
- We control the launch of the camera into working condition via SADP . If it appears in the list, it means it has loaded. The camera is stitched.
- Now you need to reset your password by returning to factory settings. The algorithm is described above.
TFTP operation
The Resend required line appears 1-3 times. If more, then most likely there is something wrong with the network and there is a high probability of unsuccessful firmware.
Video version of method No. 1
Unlinking HiWatch cameras from Rostelecom (DS-I120, DS-I122)
Method No. 2
This method requires disassembling the camera and having a USB-UART adapter. Discussed in detail in the article Unlinking the DS-2CD-VC1W camera from Rostelecom.
If you do everything right, but something doesn’t work out, you can contact me - in the comments or in messenger. I can just help with advice, and if you really don’t want to deal with the untying yourself, then you can give me money and I’ll do it. Option two:
1. I can connect remotely and from time to time give commands in the messenger when I need to do something with my hands directly with the camera. This option takes longer and does not always lead to success.
2. Send the camera to me by Russian Post or transport company, for example SDEK . This takes longer and is more expensive, since it requires time and financial costs for shipping, but the result is guaranteed.
I prefer to communicate through instant messengers and on a first-name basis.
Useful articles
How to configure the network address?
How to set up Hik-Connect?
How to display an image from an IP camera on a TV?
HiWatch/Hikvision cameras in TRASSIR Cloud