An increasing number of people today are striving to improve the comfort and safety of their lives with the help of smart devices. At the same time, the latest technologies make it possible to connect them into a single system of settings and control using a special module. Let's take a closer look at what a smart home from Rostelecom is, how it works and what interesting features it has.
- Features of the smart home system from Rostelecom
- What the system can do
- What sensors exist for this brand?
- How to log into your personal account
- Basic criteria for choosing the necessary kit for your home
- Examples of scenarios for apartments and private houses
- Synchronization with other devices
- Smartphone as control of the entire system
- Instructions for adding new gadgets and sensors
- Alternatives in Today's Market
- Feedback from smart home users from Rostelecom
Login
Rostelecom developers have created a separate personal account for subscribers of the system in question. It allows you to adjust your devices, set operating scenarios for them, edit user profiles, and so on.
How to register in LC “Smart Home”
The first step is to create a profile, if this has not been done previously. It is recommended to perform the following steps sequentially:
- Follow the link: https://lk.smarthome.rt.ru/ .
- Fill in the following fields:
- first and last name;
- City of residence;
- E-mail address or contact SIM card;
- password twice.
- Now you need to confirm the entered phone or email. To do this, enter the six-digit code received in an automatic message from your provider.
- Enter your full name again in different fields and click “Further“.
- Enter your E-mail or contact phone number depending on what was specified in the first steps. Then click “ to get the code“.
- Enter the four-digit confirmation code that came with the letter from Rostelecom.
- The next step is to give your smart home a name. In the future, you will be able to edit it at any time in your personal account settings.
If everything is done correctly, you will be taken to the main page of your personal account for the service in question. Now you can add and configure your devices.
How to log into your personal account
If your profile is already registered, all you have to do is log in. A simple algorithm is provided for this:
- Go to the web address: https://lk.smarthome.rt.ru/ .
- Select the authorization method: by phone, login or email.
- Enter your login information and use the “ menuTo come in“.
Application area
Cloud video surveillance from Rostelecom has found application in various areas - from the simplest “video baby monitor” to large security and surveillance complexes at enterprises. It may be useful for:
- at home or cottage, monitoring children, housekeepers, elderly people, and simply as an element of a security system;
- in warehouses and stores - to monitor the work of warehouse personnel, track the presence/absence of goods, monitor the performance of sellers and other employees of their duties;
- obtaining information by the employer about the employment of its employees;
- control over the activities of inspection bodies, and so on.
Home screen
Immediately after registration and authorization, each user is taken to the home screen of the Smart Home system from Rostelecom. Here you can work with widgets, track the latest events and go to other modules of your personal account.
Widgets are divided into two categories: gadgets and scripts. In the first case, you will see detailed information about the device you are using, including its current status. The second category allows you to create your own scripts for controlling gadgets.
How to add a widget to your home screen
If you want to add a widget, it is recommended to follow the following algorithm:
- Click “Add widget“ as shown in the screenshot below.
- Select the widget category and the appropriate items. If the list is empty, you must first connect devices or create scenarios.
- Click “Add” and save the result.
House
The first thing you need to do is profile your home to open access to controllers and other gadgets. The following information about your smart home is entered into the system:
- Name;
- other;
- tethered gadgets;
- customized modes;
- connection to residential premises.
How to edit a housing card
The first step is to go to the house profile. To do this, click on the icon as shown in the image.
You can change the name, upload an image, and provide the full address. It is also necessary to connect a controller in order to subsequently control devices using modern Rostelecom sensors.
It is important to note that before connecting the controller, you will only be able to link video cameras to your personal account.
Home modes
The next feature is home modes. By default there are several modes:
- indoor user;
- the subscriber is not indoors;
- long departure.
You can either edit classic modes from Rostelecom or add your own. They allow you to control the scripts that devices will execute under certain circumstances.
For example, you can set up lights and sockets to automatically turn off when you change the mode to “I’m not at home.”
Creating a Mode
If you decide to create your own script rules to make your smart home settings more individual, it is recommended to adhere to the following algorithm:
- Open your house card and use the “ Add mode ” menu in the “ Manage modes ” module.
- Now select the name of the future mode and click “Ready“.
- The created mode will appear in the “ Mode Management ” module. Now you can add classic or custom scripts to it.
How to switch mode
Switching between existing smart home modes occurs using the menu in the upper right corner of your personal account, as shown in the image below.
Viewing and editing modes
The available modes are managed in the smart home profile management menu. The “Mode Management” module reflects all standard and user-created rules. The one that is currently active is marked in purple. The rest appear as shaded grays.
You can change the names of items by clicking on their name once. To proceed to editing the scenarios included in the selected mode, you need to click on their number under the name, as shown in the screenshot.
After this, a list of scenarios included in the selected mode will appear.
Room management
Another smart home control module in your personal account is the section with rooms. Each room in your home is individually linked to the system so that devices can determine their location and scenarios to operate correctly.
The “Room Management” block can be found in the same home card settings by using the “ My Smart Home ” link in the upper right corner of the screen.
Some rooms are created automatically immediately after the user registers in the system. These are the bathroom, bedroom and kitchen. You can change icons for each room, link devices to it, and also add your own items. To do this, use the “ Add room ” menu, as shown in the screenshot.
Devices
Now let’s look at the “Devices” section, which performs the most important function of the personal account of a smart home from Rostelecom. Each gadget comes with a card that displays the following information:
- type of gadget;
- status;
- binding to the room;
- battery charge level;
- control. For example, the level of illumination from a light bulb.
My devices
go to the “ My Devices ” section using the corresponding link in the left navigation menu of the site.
In this section you can view all the equipment connected to your system: controllers, video cameras, Z-Wave, and so on.
How to add a device
- Follow the web link: https://lk.smarthome.rt.ru/devices .
- Use the “menu”Add device“.
- It is important to note that the first step is to connect the controller. Without it, Z-Wave devices will not work. If you do not do this, you will only be able to connect video cameras.
- Select your device type and follow further instructions.
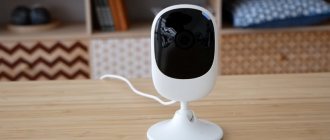
How to connect the camera
- Select the “ Video Camera ” item in the instructions from the “ How to add a device ” subsection.
- Now specify the device connection method: wireless or via Ethernet cable.
- Further instructions depend on the selected method: Wireless connection: Unpack the camera and connect it as described in the user manual.
- Wait for a beep indicating that the camera is ready to scan.
- Click “Continue” in your personal account and specify the wireless network to which the gadget is connected.
- Click “Get QR code” and scan it from your video camera.
- All that remains is to click “Code recognized” and see the connected device in the corresponding section.
- Connect the gadget following the instructions included with the gadget. It is important to note that for video cameras with a PoE injector, the wire length should not exceed 90 meters.
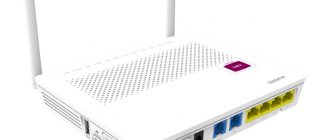
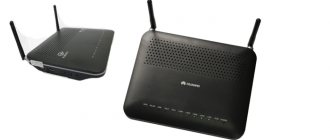
How to connect the controller
As mentioned earlier, without a controller you can only connect the camera. If you are interested in a Z-Wave technology device, you will have to connect it following the following instructions:
- First, unpack the controller and connect power to it. To do this, it is recommended to use the instructions.
- Go to the “ My devices ” section and click “ Add device ”.
- Select “Connect a Z-Wave device“.
- First the system will try to find the controller. If it is not there, it will prompt you to connect. Click “ Connect controller“.
- Connect the controller to the router and use the link “Continue“.
- Now you need to enter the MAC address of the device. You can find it on a sticker on the back of the controller. The combination has the format AA-AA-AA-AA-AA-AA.
- All that remains is to click “ Connect ”. If everything is done correctly, you will be able to connect Z-Wave gadgets.
Z-Wave devices
Z-Wave is a modern protocol for smart devices used by PJSC Rostelecom. These include the following types:
- smart plug. Able to control the supply of electricity and control its consumption;
- smart light bulb. Allows you to control the brightness and color of lighting;
- opening sensor. Records the opening and closing of doors and windows;
- Motion Sensor. Determines the movement of objects in the visibility area;
- leakage sensor. Controls humidity levels;
- smoke detector. Detects smoke, turns on the siren and sends a notification to the user's phone.
Sensors can be paired with other smart devices to automate their operation. For example, you can link an opening sensor and a light bulb. Every time someone opens the door in the room, the light will come on. You can come up with many such scenarios.
How to connect a Z-Wave device
- Select “ Connect a Z-Wave device ” in the “ Add device ” menu of the “ My devices ” section.
- Specify type.
- Prepare your device by following the on-screen instructions. It is individual for each device.
- Use the link “Start adding“.
- If everything is done correctly, the system will automatically connect the smart home and the specified device. Now you can edit his card.
Device card
As mentioned earlier, each device has its own card. It displays the following information:
- brief information;
- information received from sensors;
- control buttons;
- sensor statistics and update time;
- latest events;
- current scenarios where this gadget is used;
- manufacturer;
- model;
- serial number.
The following items are configurable:
- device activation (working or disabled);
- the room to which it is attached;
- his name.
Video camera card
A separate card is used for video cameras. It displays the image from the camera in the form of a convenient player. The following functions are available in it:
- rewind and forward;
- pause and resume playback;
- transition between live broadcast and recordings saved in the archive;
- screenshot;
- recording a fragment and its subsequent saving;
- turning on a siren or strobe light, if supported by your model.
You can hover over any button to find out what it does. If necessary, you can share the link to the broadcast so that the image from your camera is available to other people. The web address itself is configured according to the following parameters:
- “life period” of the link. After it expires, it will stop working for everyone;
- enable or disable broadcasting. The link will continue to work, but the broadcast can be paused. Visitors will see a corresponding notification about this;
- update link.
You can also customize the device itself. To do this, click on the gear icon in the upper right corner and select “Edit Camera”. The following information and options are displayed here:
- specifications;
- binding to a room in a smart home;
- camera name (can be edited);
- tariff plan;
- enable or disable live streaming;
- turning the microphone on or off;
- interface settings;
- operating mode;
- stream width and shooting quality;
- rotate (if supported);
- Software Update.
Address of the offices of PJSC Rostelecom
The company operates about several hundred offices, which are located in all regions of the Russian Federation. It is recommended to use Rostelecom services to find the nearest representative office.
- The cell indicates the desired address and city;
- In the left column, select the office;
- The location is determined by the map.
Events
“Events” is the next section of the personal account of a smart home from Rostelecom. The following information is displayed here:
- events that occurred over the past 24 hours;
- calendar and time;
- filters for convenient event search.
Events are divided into the following categories:
- All;
- system: authorization in the system;
- any transformations in lists of devices, sensors, scripts, and so on;
- change in the user card;
- controller firmware;
- editing house, device, user cards;
- disabling the controller;
Scenarios
Scenarios are a set of conditions and actions for automatic operation. The subscriber configures the conditions under which gadgets will perform certain actions. For example, turning on a light bulb when you open a door.
Some scripts are launched manually through the application or personal account. And some will work automatically. All this is installed in module cards. You can also set up activation using voice control.
How to create a script
It is recommended to follow the following algorithm to add your own script:
- Go to “ My Scripts ” using the left navigation menu.
- First, the type of script launch is indicated: manual (including voice) or automatic (if certain conditions are met).
- The next step is to select the launch conditions. These may be the following options:
- the exact time when the script will run;
- smart home mode;
- receiving information from devices.
- Now the actions that will be performed under these conditions are set:
- sending a letter by email;
- sending SMS;
- push notification on your phone;
- changing the smart home mode;
- action of the connected device.
- All that remains is to come up with a name for the script and save the changes. Now you can link it to other smart home modules.
Scenario Card
Each scenario has a card with details. Their full list:
- switching operating mode (enable or disable scenario);
- start type: automatic or manual;
- a set of conditions for script activation;
- algorithm of its operation;
- date of creation;
- date of last activation.
Users
You can create multiple users for a smart home. For each, a card and a general category are created:
- House owner. This profile is created when registering in your personal account;
- user with full rights. All functions are available to him, except for managing other users, as well as the balance;
- user with limited rights. Configures the individual privileges available to this profile.
Profile card
You can go to the active profile card by clicking on the icon in the upper right corner of the screen. The following information is displayed and edited here:
- FULL NAME;
- connection region;
- E-mail address;
- phone number;
- agreements.
How to create and edit a profile
- Follow the link: https://lk.smarthome.rt.ru/profile?section=user_management .
- Click “Add user“.
- Please provide your email address or contact number for your new profile. Then click “ to get the code” to confirm.
- Enter the verification code and click “Continue“.
- Now enter your full name.
- Create a password and repeat it.
- At the next stage, accesses for the new user are established:
- a smart home that he can control;
- rights of use: full or limited.
- Use the “menu”Add user“ to complete the procedure.
On this page you can also configure existing users: add new ones, delete them, or change access rights.
How to try without buying. Demo mode
Of course, before purchasing, you would like to personally try the capabilities of the video surveillance service. Rostelecom took care of this. The demo mode of the service is available to absolutely all users. I liked the service - great, the client is completely confident in setting up a video camera and starting to watch what is happening online.
To watch a demo version of the video camera, go to the website https://camera.rt.ru/main and familiarize yourself with all the capabilities of the service.
A video camera is convenient, comfortable and safe. Now you don’t need to worry about your child, elderly relatives or the safety of your property. Each user will be able to monitor what is happening at home in their absence, and built-in sensors will send notifications of unexpected events.
Balance and services
The next section is “Balance and Services”. Here you can:
- monitor the status of your personal account;
- replenish it;
- check connected services and their subscription fees;
- manage them;
- link a bank card for automatic payment;
- buy and activate a promotional code.
Balance replenishment and transaction history
- Click “Update“ to get up-to-date information about your balance.
- If you press “Pay“, the system will prompt you to enter your card details and confirm it in order to make a one-time payment. However, you can link it right away so you don’t have to fill out the fields every time. Go to the “ tab Card management“.
- Use the “ Link a new card ” menu.
- Enter the following information:
- card number;
- the holder's name as printed on the plastic carrier;
- validity;
- security code.
- Click “ Bind ”.
If everything is done correctly, the card will be linked. Now you can top up your personal account balance in a few clicks. It is important to note that no more than 3 bank accounts can be linked to one smart home personal account.
Financial block
If you do not replenish your balance on time, a financial block will be placed on your account. It limits most smart home capabilities until you pay for the services.
The following functions are not available during financial blocking:
- archive of recordings from video cameras;
- management of additional options;
- improving broadcast quality above 1 Mbit per second;
- event notifications;
- adding and removing devices;
- long viewing of recordings from video cameras.
If you use a camera that is part of Rostelecom’s preferential program, then the restrictions described above will not apply to it.
Purchasing and activating a promotional code
Smart home developers have implemented a system of promotional codes that allow you to get a discount. You can purchase a discount as a gift or for yourself. It is recommended to adhere to the following algorithm:
- Go to the “ Balance and Services ” section from the left navigation menu.
- Use the link “Activate or buy“as shown in the image.
- If you already have a bonus combination, enter it and click on the corresponding icon to apply the discount. To purchase, click “ I don't have a promo code - buy“.
- When choosing the second option, you need to specify the following promotional code parameters:
- device type;
- discount period;
- additional parameters depending on the previous paragraphs.
How to enable SMS notifications
- Go to the “ Balance and Services ” page.
- Click “To plug” opposite the “SMS notifications” option.
- Specify the phone number to which notifications will be sent.
- Verify it using the code.
It is worth noting that the service is free.
SOS button
The SOS button is an additional option from Rostelecom. It allows you to call a security company to your home. After connecting the service, the button will appear both in your personal account and in the mobile application.
It is important to note that the button cannot be undone. Therefore, the rapid response team will still arrive and can collect a fine under the terms of the agreement with the security company.
The cost of the option is 299 rubles per month. To connect it, it is recommended to follow the following algorithm:
- Go to the Personal Account section “ Balance and Services ”.
- Click “ Connect ” next to the service in question.
- Fill in the form:
- the exact address where the button is used;
- Full name and passport details of the subscriber;
- Contact details;
- trusted persons.
- Upload your passport photo. You will need the main page and a spread with registration.
- Wait for the application to be reviewed by company employees. If everything is filled out correctly, you will be sent a file with the contract. You need to print and sign it, and then upload a photo of the signed document to the server.
The service will start working the next day after signing the contract and paying for the service.
Payment for the “SOS Button” option
The payment procedure for the function in question depends on whether you are a Rostelecom subscriber. If this is the case, then the money will be debited automatically from the subscriber’s personal account.
If you do not use other Rostelecom services and set up a smart home yourself, then you will have to pay for the service manually through the “Balance and Services” section. However, automatic payment will avoid this.
How much does it cost to connect?
Expert opinion
Yakovlev Alexey Sergeevich
Electrician with 20 years of experience and extensive experience
Not only Rostelecom clients can activate the service. The connection is available to everyone. For our subscribers, installment plans for 2 years are possible. Other individuals will have to pay the entire amount for the equipment at once. But they will use the service for free for a year.
After two years (after payment in installments) or a year (with a one-time payment), servicing the controller will cost customers 350 rubles per month. The number of devices connected to the controller is unlimited.
You can add the following to the kits:
- any number of opening, motion, smoke and leak sensors;
- video camera;
- audio speaker with voice assistant “Marusya”.
You can purchase equipment and connect to the service on the website rt.ru, Rostelecom customer service offices or by calling the hotline.
Settings
Next up is the “Settings” section. It is divided into several subcategories:
- notifications;
- safety;
- device updates.
Let's consider each of them separately.
Notifications
Here you can set up notifications for different users, emails and phones. The type of alerts itself is also regulated.
Safety
All active connections to your personal account and information about them are displayed here:
- browser;
- authorization date;
- Email;
- IP address.
Any session can be ended remotely.
Device update
The system automatically checks all devices for new software. If you wish, you can go here and update your gadget to get new features.
Advantages of Rostelecom over competitors
Let's consider several facts that make the video surveillance service from Rostelecom PJSC a higher priority than that of competitors.
- You can watch live broadcasts from your cameras in a single system on one screen;
- If desired, the subscriber can make the recording from the camera public. This is especially true for businesses that want to be more transparent with their customers;
- If necessary, you can enable the analytics option. Artificial intelligence will collect all the necessary information and send it to your email.
Other services
From any screen of your personal account you can go to other Rostelecom services. To do this, click on the icon next to your profile in the upper right corner, as shown in the image, and then select the appropriate module. The following options are available:
- personal account of a Rostelecom subscriber (Internet, television, telephony);
- interactive television Wink;
- Rostelecom Lyceum service;
- “Bonus” program;
- “My rights and benefits” program.
Where to buy video surveillance
You can purchase video surveillance equipment either in a specialized store or online in an online store. In the second case, the budget option for purchasing products on the Aliexpress website deserves special attention. For some products there is an option for shipment from a warehouse in the Russian Federation; they can be received as quickly as possible; to do this, when ordering, select “Delivery from the Russian Federation”:
| Outdoor video surveillance system 4K Ultra HD 8MP POE NVR | Outdoor video surveillance system 4K Ultra HD 8MP POE | Techage CCTV System 8 Channel 5MP HD POE NVR Face Recognition |
| Solar Panel CCTV Camera Support 4G SIM Card 1080P HD | INQMEGA Wireless Home IP Camera | Tuya PTZ CCTV camera with E27 base, Wi-Fi |
Smart home “OnLime”
In Moscow, Rostelecom operates under the OnLime brand. Therefore, for residents of the capital, a different procedure for registering in the Smart Home system from the Internet provider in question is provided.
Registration
- Follow the normal registration procedure described at the beginning of the article. However, at the stage of selecting a region, you must specify “ Moscow” and check the box “Link “Smart Home” to the “OnLime” profile“.
- Now enter the personal account number of the OnLime subscriber.
- Enter the confirmation code sent to the linked number.
The further registration procedure does not differ from the standard one.
Otherwise, the Smart Home LC works for residents of the capital in the same way as for other regions.
FAQ
If you still have additional questions, the answers can be found in this section:
What is a smart home?
This is a system that allows you to automate many home processes, making life much easier. It uses a controller and gadgets with artificial intelligence: sensors, light bulbs, sockets, and so on.
Is there an application for the Rostelecom smart home?
The developers have created a free program for owners of smartphones based on Andoid and iOS. You can download it from the official content stores:
- App Store: https://apps.apple.com/ru/app/id1205946608 ;
- Google Play Market: https://play.google.com/store/apps/details?id=ru.rt.smarthome .
The application is supported by the latest versions of iOS and Android (above 5.0). The developers promise to implement optimization for tablets soon.
In what ways can you control a smart home?
- Personal account on the official website.
- Mobile app.
- In the future, the developers will add: a separate application for tablets;
- Wink TV set-top box program.
Why do notifications arrive late?
For its part, the Rostelecom system sends alerts immediately after the event. The delay may be the responsibility of the mobile operator or Google services when it comes to push notifications. This may also be due to a weak Internet signal on your device.
How safe are the sensors?
The Z-Wave protocol used is as safe as possible for the human body. Even regular phones emit more radiation than smart home gadgets.
Manufacturers also took care of protection from intruders. If an unknown person tries to access the sensor, you will immediately know about it. However, it is still recommended to place them in hard-to-reach places.