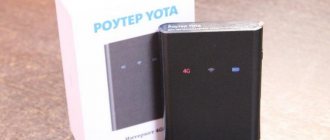
I have been working with Qtech products for quite some time. There are aggregation and access level switches and terminal equipment, including subscriber WiFi routers. the universal wireless router QBR-2041WW under the Rostelecom brand before, but with a different model index - RT-A1W4L1USBn. These are, in fact, completely identical models - the same hardware, characteristics and software. The hardware - a rather outdated Ralink RT63365E processor with 32 MB of RAM on board - is frankly weak, although it can handle 100-megabit tariffs with effort. The main advantage of the model is its versatility. That is, it can be used on ADSL telephone lines, as an Ethernet router and paired with 3G/4G modems. True, I couldn’t find a list of supported “whistles” anywhere.
There are On/Off, WiFi and WPS buttons on the case. The Reset button is located on the bottom of the router case.
When operating under light load, the Qtech QBR-2041WW no longer heats up slightly and its cooling is not very good. Therefore, if you plan to load it properly, place the device in a well-ventilated place. There are still few statistics on the quality of work and hardware problems of the equipment, since the model has just appeared in our branch. There were complaints about the predecessor. One of the most notable cases was severe overheating, which caused the wireless network module to turn off.
How to connect and configure the QBR-2041WW router for FTTB
For initial configuration, it is recommended to connect the router to the network card of the computer via a LAN cable. The IP address of the Rostelecom QBR-2041WW router on the local network is 192.168.1.1, login admin and password admin.
After the first authorization in the web interface, you will need to change the default password to your own:
- How to configure a Rostelecom modem? Setting up a Rostelecom ADSL modem: step-by-step instructions
After that, click on the “Save” button. You will no longer be able to log into the web interface using the default password “admin”.
The next step is to choose how to configure the device. If you only have an Internet connection without IPTV, then you can use the Setup Wizard - it is very simple and understandable, and therefore we will not dwell on it. Click on the “Exit” button and get to the status page of the Web interface. To set up a connection with Rostelecom, select the “Interface Settings” -> “Internet” section:
Here we set the following: Transmission mode - Ethernet . The service number is 1. Make sure that its “Enable” status is selected. The IP address version is IPv4 . If your branch already uses the sixth version of the protocol, then leave the value “IPv4/IPv6”. In the “Connection mode” list, you must select the protocol that is used in your branch. For Rostelecom this is usually either Dynamic IP or PPPoE . In the first case, you don’t need to do anything additional, but in the second, you need to write down below, in the “PPPoE” section, the username and password for the connection that you were given on the card when concluding the contract. We don’t touch anything else and click on the “Save” button.
WiFi setup
To set up Wi-Fi on the QBR-2041WW, select the menu section “Interface Settings” -> “Wireless Network”:
Make sure that the “Access point” - “Enable” checkbox is checked. In the “Channel” list, select the values “Russia” and “Auto”. It is usually better to leave the module operating mode as universal - 802.11b/g/n. If all home devices are modern, then you can choose the option - 802.11n. Next, in the “Service Number” list, select one. Below, in the SSID , you need to come up with and indicate the name of your WiFi network on qbr-2041ww. The authentication type should be WPA2-PSK with AES . In the “Pre-Shared Key” field, we come up with and enter a password for Wi-Fi, which will be requested when clients connect. It is better to make it no shorter than 8 characters, using numbers and letters of the Latin alphabet. Click on the “Save” button.
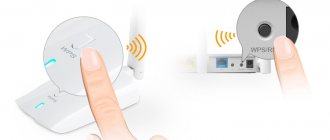
Note: Very often Rostelecom “likes” to use guest networks on subscriber devices (they can be seen in the list of available networks). If you don’t want to give freebies to everyone, you need to select everything in turn except the first one in the “SSID Service Number” list and disable it. Also, I would strongly recommend not using the WPS function due to its weak resistance to hacking.
- ADSL modem in WI FI router mode - user instructions
Setting up digital television Rostelecom
Then go to the section “Interface Settings” -> “Internet”:
Setting up player VLC for IP TV on a computer
To directly watch digital IP TV on a computer without a set-top box, you need VLC player. The process of setting up VLC player will be presented below in a clear manner.
In the player settings: “Tools-Settings-All-Stream Output-Output Modules”, the interface number is entered in the specified field.
Next, a playlist with a list of channels is downloaded, which is launched using player.
Rostelecom qbr 2041ww router: description of indicators
The qbr 2041ww indicator panel is located on the front side of the modem. Here:
1 – Indicator that the modem is connected to the power supply (should light green). The red color of the indicator indicates a software failure - you need to update the qbr 2041ww firmware or contact the Rostelecom service center.
2 – Indicator of connection to the provider’s network.
If the red light is on on the qbr 2041ww router, then an authorization error has occurred on the network. In other words, the Internet is not supplied to the router, and you need to call the provider’s technical support service.
- 3 – ADSL connection indicator.
- 4 – Ethernet connection indicator.
- 5 – Wi-Fi connection indicator.
- 6, 7 – USB connection indicators;
- 8, 9, 10, 11 – LAN connection indicators.
How to connect a qbr 2041ww router?
Connect the power adapter with a plug into the round socket provided for it on the back panel of the modem. Plug the adapter into an electrical outlet. Turn on the button on the rear panel, and the power indicator on the front of the modem [1] will light up.
In order to connect the qbr 2041ww router to a telephone line, you need an adapter - a splitter. It is supplied with the device.
The splitter divides the signals that come to your apartment via the telephone wire into telephone and computer signals. It looks like a small box with one socket at the end and two sockets on the opposite side of the device.
Unplug your phone from the telephone socket. Connect one of the telephone network wires that came with the device into the telephone socket, and the other into the single socket of the splitter on the input side (line).
Insert the telephone wire into the telephone output socket of the splitter (phone). Check that the phone should work.
The second output of the splitter (DSL) is intended for the modem. Connect one contact of the wire with the telephone plug into the splitter, and the other into the LINE socket on the back panel of your device. If the connection is correct, the indicator on the front panel should light up indicating the presence of an ADSL connection [3].
If the indicator does not start to light, check whether the splitter outputs are reversed. If you still make a mistake when connecting, move the wires to the correct sockets.
What types of Internet connections are there?
Rostelecom - review
The type of connection you use determines which router for Rostelecom you need to purchase. Therefore, it is imperative to familiarize yourself with this information.
The company provides three types of network connections.
ADSL – connection via telephone line. This is an outdated technology that is used either out of habit or due to the lack of technical ability to use something else. The peculiarity is that the Internet is only possible if a telephone line is connected to the house. Network speed is slow. It works on one of two connection standards: annex A or annex B. We will not consider the features of the technology in detail. Simply, if you use ADSL, then try to find out from your provider which annex is your standard. When purchasing a modem, make sure it supports this standard.
ETTH is the most popular type of Internet connection from Rostelecom. Using an optical cable, it is possible to achieve very high traffic exchange speeds - up to 1 Gbit/s.
The technology is also convenient because you have virtually no restrictions on the choice of router model. Initially, it was assumed that using ETTH technology the cable would be pulled directly to the subscriber’s computer. But today this is not very convenient. Most users would like to connect not only one computer to the network, but also all their other electronic devices, including tablets, TVs and smartphones.
The technology allows you to create a home network using almost any router that has four ports. A cable from the provider is connected to the WAN socket. And a cable is inserted into the LAN ports to a computer, TV, printer and other devices.
Gpon is the most modern and promising type of communication. If this is what you are offered, take it! But for this type of connection you won’t be able to buy the device yourself. After all, to access the Internet, an optical terminal is used, which is stitched directly under Rostelecom. Therefore, when you connect to this technology, you will receive the required router by default.
To understand the differences between the last two technologies, watch the video carefully:
Setting up the qbr 2041ww router
To configure the modem, you need to connect it to a desktop computer or laptop (hereinafter referred to as PC) using the Ethernet cable that came with your equipment. The computer wire plug (RJ-45) must be connected to the computer’s network card, and its other end must be inserted into any of the four sockets labeled LAN1, LAN2, LAN3 and LAN4.
The corresponding indicator on the front panel will light up. If this does not happen, you need to configure your network card.
Setting up ADSL connection qbr 2041ww
Open any Internet browser available on your PC and write in the address bar: “https://192.168.1.1”. Press enter.
A dialog box will appear in which you need to specify: login – “admin” and password – “admin”.
— In the “Transmission modes” box, select “ADSL”.
— Set the “Status” checkbox to the “Enable” position.
The values of the remaining windows are set by the provider. If you are not provided with this data, then call the service provider’s customer service and ask how to fill out the fields.
Change only those fields that were reported to you by the help desk.
When filling out the data, go down to the “Connection” checkbox and set it to the “Always on” position.
— “Default route” — “Yes”
— “NAT” — “Enable”
— “IGMP Prpxy” — “Disable”
Be sure to click “Save” at the end of the page.
Setting up wifi on the qbr 2041ww router
Select the “Wireless Network” submenu at the top of the “Interface Settings” menu.
Below are the values of the fields and checkboxes that need to be changed:
- - “Access point” - “Enable”.
- — “SSID” – Here, come up with and write the name of your Wi-Fi point, which you will see in the list of wireless device networks. Replace the value that is there.
- — “Authentication type” — “WPA2PSK”.
- — “Encryption” — “TKP+AES”.
- — “Pre-Shared key” — Here enter your network password of at least eight characters.
Be sure to set a unique wifi password on qbr 2041ww so that the megabytes of Internet you paid for will go to you, and not to neighbors or random passers-by. Be sure to click “Save” at the end of the page.
Rostelecom qbr 2041ww router: setting up iptv
To configure ip-tv in the “Interface setup” - “Internet” section, you must set the following parameters:
D Link Dir 615, Dir 300, DSL 2640u, DSL 2500u
Here the default login and password are “admin”. Further:
- for modem Dir 615 you must specify the service name “Internet”, LCP interval 15, and dips 2;
- for Dir 300, instead of Internet, you need to select Ports and set the value to 2 and 3 (these values may be different, depending on which ports are used);
- for DSL 2640u and DSL 2500u you need to click on “Click'n'Connect”.
Everything is ready, you can start working. All similar models from the same lines are configured in the same way.