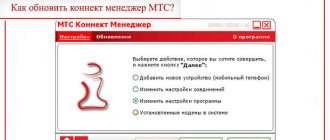
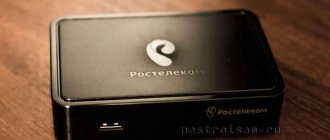
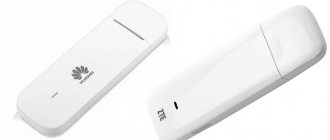
Users of 4G modems may experience an unpleasant situation when, when changing location, the device stops working stably or does not receive communication at all due to the poor coverage area of a particular operator, which follows the conclusion that it is necessary to change the service provider, but the native firmware of the modem is tailored only for work unilaterally with Megafon, Beeline, Tele-2, MTS, which means that we can either buy a universal modem that works with all SIM cards at a price of 2800 rubles, or strain a couple of brains and flash it ourselves, which is what we will do today .
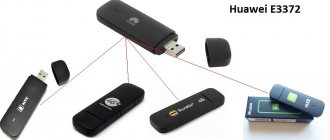
Types of modem Huawei E3372
We will flash and unlock for all operators the most popular modem from Huawei - E3372, which was purchased en masse by Internet communication providers, decorated with our own logo and sewn in individual hardware firmware, which is why one device can be labeled for different models, namely:
- Megafon - M150-2
- MTS - 827F or 829F
- Tele 2 - E3372h-153
- Beeline - E3372 or E3370
Differences in native firmware
There are two types of native Huawei firmware - E3372 and depending on your operator they may differ by:
- E3372h
- E3372s
To understand what firmware you have, you need to look at the serial number of the modem “S\N” , serial numbers 3372h should start with G4P , and 3372s with L8F .
Both versions are sewn differently and with specific firmware, which will be available in the archive for download.
Attention
If you flash the modem with the wrong firmware, you will end up with a damaged, non-working device, so be extremely careful and follow the instructions completely.
Using third party services
Let's consider whether it is possible to insert a MegaFon SIM card into an MTS modem and how to make the transmitting device work with SIM cards from other operators. In most situations, a locked modem needs to be reflashed. This can be done using special services on the Internet.
The service you choose may request the following data:
- Digital device model. It may be indicated on the front cover or in technical documents.
- IMEI code of this model.
After entering all the necessary information, the desired combination should appear on the screen, which will unlink all restrictions from the modem. Then you need to open the Megafon Internet program, enter the code that the program selected and you can use a SIM card from any operator.
Internet programs do an excellent job of the task and select the necessary codes, but almost always their services are paid. There is also a high probability of running into malware hiding under the guise of an unlocker, so before using an online service you need to carefully study the reviews of its users on third-party resources.
What are we going to flash with?
There are two firmware platforms Stick and Hilink . The former interact with the modem through a special software client, for example Megafon Internet or MTS Connect Manager. The main disadvantage of Stick firmware is the speed limit of 20-30 MB/s, and the client itself is often slow, either the modem does not see it, or the Internet will fall off at the wrong moment. If you plan to connect a usb modem to the router, then stick is not the best option, since the router may not recognize the modem, which will ultimately lead to endless dancing with a tambourine in search of a solution.
The latter make a kind of router out of a modem, which is accessed via a web interface (device IP address). Hilink has no speed restrictions and easily synchronizes with any router; for example, even an unupdated Zyxel router immediately recognizes the modem out of the box. Hilink has more flexible settings and is more reliable than stick, so the conclusion is obvious.
Contact the operator
Why is modem unlocking done at all? Some of them allow you to get really high speed Internet access, but are locked to a specific operator that does not sell these devices. Advanced users can only do the unlocking. Moreover, there is nothing complicated here.
To begin with, you can try to slow down your operator. Contact your nearest office and find out if it is possible to hand over the equipment for unlocking. If such a service is available, sign the appropriate papers and leave a contact phone number. There is one difficulty in this scheme - the level of technical knowledge of consultants is quite low, and their interest in providing exclusively paid services does not allow them to count on a positive result. Therefore, we will continue to rely only on our own strength.
Flashing and Unblocking!
1. Disable all antiviruses, connect the usb modem to the computer and install the native client application, along with it the native drivers will be installed, this is necessary for the computer to recognize the modem. (If drivers and software are already installed, skip this step).
I will flash the M150-2 megaphone modem with e3372h firmware, if your modem is different, just follow my instructions and do everything by analogy.
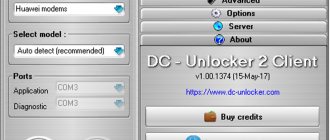
2. Download and unpack the archive with the necessary files (I indicated the link above). First of all, we are interested in the DC Unlocker program - a terminal program, with its help we will find out all the necessary information on our modem using AT commands.
We launch the program (the USB modem must be connected), click on the “Magnifying Glass” icon to identify the modem. The terminal should provide the following required information.
It is necessary to record the following data, which will be useful to us in the future: Firmware version and IMEI.
By the way, by the firmware version we determine which firmware platform is currently installed. If in the first value there is a unit after the two, then it is a stick, but rather than after the two there is a 2 - Hilink.
Next, let's once again make sure 100% what firmware is installed in our modem, to do this, in the empty unlocker field, enter the AT command: AT^FHVER and press enter.
As you can see, my firmware is e3372h.
2.1. Lucky ones. After identifying the modem through dc unlocker, we might have some lucky ones who can unlock the modem for all SIM cards at once using the at command. I’ll explain what the point is, the fact is that E3372h or E3372s modems with an old firmware version below 2_.200, starting with the following numbers 2_.180 , have support for at commands by default.
In order to unlock the modem, you just need to enter the following command into dc unlocker: at^nvwrex=8268,0,12,1,0,0,0,2,0,0,0,a,0,0,0 and press enter. If the terminal displays OK, then the modem is unlocked.
If the firmware version is 2_.200.07 and higher, then we will have to flash the modem in any case, since our firmware does not support AT unlock commands, my modem fits this description, so we move on.
3. During the firmware installation, the program may request a password; to calculate it, you must use the application from the Huaweicalc archive. Enter the IMEI of the modem, click “Calc” and save the Flash code - it is the password.
4. Before flashing, you need to remove all operator software under the patch. Control Panel → Uninstall Programs → uninstall all operator software under frequent → restart the computer, this is extremely IMPORTANT! AFTER BOOTING YOUR COMPUTER, DISABLE ALL ANTI-VIRUSES AGAIN!
5. Disable the modem; there are three drivers in the archive with the files. We install them one by one. THE MODEM MUST BE DISCONNECTED! After installing the drivers, connect the modem.
6. I remind you that at the moment I am flashing a modem - e3372h, for e3372s the description will be given below, but you can view the flashing principle; it will not differ much from yours.
Now we need to understand which files are suitable for sewing a particular firmware version. We turn again to the firmware version of the usb modem and compare it with the following description.
If the firmware version in the modem is lower than 2_.200.15.__.__, or ends in .00 or .143: -Flash “E3372h-153_Update_22.323.01.00.143_M_AT_05.10”. -Then we sew “Update_WEBUI_17.100.13.01.03_HILINK_Mod1.10”.
Who has firmware higher than version 2_.200.15.__.__: First, check this list and, if necessary, flash the “transitional” firmware: -If the modem has firmware 22.315.01.01.161 or 22.317.01.00.161, flash “E3372h- 153_Update_21.180.01.00.00_M_01.10_for_.161.rar" -If the modem has firmware 22.317.01.00.778, flash "E3372h-153_Update_21.180.01.00.00_M_01.10_for_.778.rar" -If in the mod We have firmware 22.3xx.xx .xx.715, flash “E3372h-153_Update_21.180.01.00.00_M_01.10_for_.715.rar”
If you have flashed the transition firmware, then next we sew this “E3372h-153_Update_22.323.01.00.143_M_AT_05.10”. Well, at the end we sew the web interface itself “Update_WEBUI_17.100.13.01.03_HILINK_Mod1.10”.
In my case, the modem firmware version 21.200.07.01.209 is lower than 2_.200.15.__.__, which means I’m sewing according to the instructions from the first rectangle.
I find the required firmware, unpack it and install it. After updating the firmware, new drivers will be automatically installed and the computer will detect the new device.
7. The next step is to flash the Web interface of my Hilink modem with firmware, you will also find it in the archive.
We open and install WEBUI, after which we enter the IP address 192.168.8.1 in the search bar of the browser and get into the modem management interface. Now all we have to do is unlock the modem for all operators.
Error 10: Port not found.
When flashing the web interface, there are rare cases where the “Port not found” error appears, which is why the web interface cannot be installed. As a rule, this is treated as follows: Open Dc Unlocker with administrator rights, click on the “Magnifying glass” icon when the modem is detected repeat the firmware.
8. Open DC Unlocker, press the magnifying glass, as soon as the modem is identified, enter the AT command: at^nvwrex=8268,0,12,1,0,0,0,2,0,0,0,a,0,0,0 press enter. OK - the modem is unlocked.
When you subsequently identify the modem in DC Unlocker, a message will appear with the line: SIM Lock status - unlocked, this means that our modem works with all SIM cards.
If there is no unlock code request
Sometimes a Megafon modem cannot be unlocked because the application that controls the device does not request an unlock code. In this case, you will need the Huawei modem terminal console utility. To work, you need to connect the device, having previously installed the drivers for it (if they are not installed).
We launch the application, select the “HUAWEI Mobile Connect - 3G PC UI Interface” option, then click “Connect”, then at the bottom of the utility window in the input field we write the service command “AT” in Latin letters.
If successful, the following will be displayed in the console window:
Now it is possible to control the device using special service commands. There are a lot of them, but to successfully unlock you only need three:
- AT^CARDLOCK="nck code" - used for unlocking;
- AT^CARDUNLOCK="nck md5 hash" - updates the number of unlock attempts to 10;
- AT^CARDLOCK? — displays status data (lock/unlock, number of remaining unlock attempts).
To check the status, enter the appropriate command in the input field below: “AT^CARDLOCK?”
The main console window displays the following output (underlined in red):
This program response means:
- The first parameter can have a value of 1 or 2. If 1, the modem is locked, 2 – unlocked (in our case, blocked).
- The second parameter displays the number of remaining unlock attempts (in our case, 10).
Characteristics:
- Battery 1780 mAh;
- support for distribution to up to 10 users;
- the ability to use microSD cards up to 32 GB;
- TFT-LCD display;
- interfaces for SIM card, microDS, micro USB, Wi-Fi;
- 130 grams;
- 100 Mbps over LTE 4G.
Interestingly, information will be transmitted and received slowest using EDGE/GPRS technology (no higher than 236.8 Kbps). As for the main communication capabilities, these are: GSM, TDD, WCDMA, EDGE, FDD, GPRS.
The MR100 3 device is equipped with special connectors for antennas. The developers thought of this option in order to be able to strengthen the signal in case of weak reception.
Another interesting feature is that the router can be used as a charger for Bluetooth headsets, mp3 players, and smartphones.
With occasional surfing, the router can work for about five hours. These indicators will be enough to create an Internet zone at a party, meeting with friends or at any event.
Contents: battery, device, instructions and cable for synchronization and charging.
Users love the look of this model. The router fully satisfies mobility requirements and fits in a shirt or trouser pocket. We also note that the Megafon MR100 3 router will not become a heavy burden for a handbag.
Transferring the device to factory mode
The device can be switched to the above mode in two ways:
- Run the SCSI.exe utility from the ZTE_MF_drv.zip archive
- Using the request url:
- In “My Computer”, remove the CD-ROM that appears with the 4G+ icon on a green background (right mouse button - remove)
- Open the browser and go to its address bar (the response should be {"result":"FACTORY:ok"})
https://192.168.0.1/goform/goform_process?goformId=MODE_SWITCH&switchCmd=FACTORY
Using specialized forums
To find unlock codes, many subscribers use specialized forums where they can find all the information they need. There is also a specialized thread where the subscriber can order an unlock code.
To receive it you need to specify the details of your modem:
- IMEI model.
- The version of the existing firmware.
- USB device model.
The user can receive a special combination for free, the waiting time is from 10 minutes to several hours. After entering the received code, restrictions on the SIM card will be removed and you will be able to use the services of other operators.
Firmware
Firmware updating for the Megafon MR100 3 router is performed in the “Update” interface tab. Everything is extremely simple - the device independently determines whether new software currently exists. If a more recent version is available, the system will send a special notification and install everything automatically. Of course, experts recommend not to interfere where they are not asked if the device meets your requirements. In other words, you should not improve or modify anything without a specific need.
Flashing
So, make a full dump of the flash drive before proceeding (or make sure you already have one). The contents of EFS are not affected during this procedure, but I strongly recommend making a QCN backup of NVRAM if you have not already done so. Before starting the procedure, the device must be in normal operating mode: the RNDIS adapter is available, the device IP address is 192.168.0.1. Next - point by point:
- Download (archive with materials)[https://yadi.sk/d/2oK0JV9HuXuzq] and unpack it. For uniformity and ease of discussion, I suggest everyone unpack it into the C:1 folder.
- Run the fwfbflash.cmd script from C:1. A command will be sent to the device to switch the song to one that contains the ADB adapter. Script execution pauses while waiting for any key to be pressed. Before you press it, you need to make sure (by launching the remote control) that the ADB adapter driver has been installed correctly. If you have never worked with ZTE devices via ADB before and have not installed the driver, then you need to do it now. For semi-automatic installation, you can use the AdbDriverInstaller.exe utility from the archive.
- Press any key in the window with the running script. A command will be sent to the device to switch to fastboot mode and wait, as before, to press a key. You need to make sure that the ADB adapter driver is installed correctly after switching. If the driver is not installed correctly, you must manually select the ADB driver for the unidentified device.
- After everything is in order with the driver in fastboot mode, press any key. The actual flashing of the required partitions will begin. Once the process is complete, the script will stop again and wait for a key press. At this moment, you can scroll up the console (command line) window in which you ran the script and see if there are any error messages there? If there is, then it is better not to press the key yet, but to report this error here. Because after pressing, the device will be completely rebooted with the new firmware, and if something went wrong during the firmware process, then problems of varying degrees of complexity are possible. And until the device is rebooted and is in fastboot mode, you can do something - repeat the partition recording, for example.
- Press the key. The device will reboot and will begin loading with the new firmware. If the download is successful and the face is available, then you need to reset the settings. Additionally, to completely change the firmware, you need to replace the old config file in EFS with the one in the archive. This is done by deleting the old file and writing a new one - nothing else. The device, of course, will work with the old config_om.
Source
Full dump
The proposed “preparatory part” of the procedure (it is used, for example, when unlocking) is slightly modified compared to the options described earlier. The purpose of the changes is maximum simplification, reducing the number of actions to a minimum, independence from the initial state of the device and from such parameters as the interface IP address that change from one firmware version to another. I think that later it will become our main one.
So, the complete procedure for obtaining a raw dump of the entire contents of the device's flash memory is:
- Download the archive ZTE_MF_drv.zip, unpack its contents into the folder (to be specific) C:\1.
- Run setup.exe from the unpacked archive. This is a driver installer. We install it like a regular program.
- Launch the SCSI.exe utility from the unpacked archive. The device switches to factory mode . In this mode, the composition of its USB devices is represented by 3 COM ports. Drivers are automatically installed for these ports. Upon completion of the installation process, look in the remote control for the port number called “ZTE Diagnostics Interface” (this is X in COMX). To control, you can look at the identifiers of this port in “Properties”: it should have PID_0016 and MI_00.
- Download the archive qtools_win.zip. Unpack it into the same folder - C:/1.
- We run the script (batch file) rawdump9x25.cmd from the unpacked archive. The script requests the diagnostic port number (Diag port #: ). Enter the X number obtained in step 3 (see above) and press Enter. A command is executed to switch the device to download mode. For the (single) download mode COM port, a driver is automatically installed, the port receives the same name as before - “ZTE Diagnostics Interface”, but it is assigned a different number Y - it is displayed in the remote control as COMY. Identifier for control: PID_0076 (this is no longer a composite USB device, but a separate port).
- Next, the script will ask for the download mode port number (Download mode port #:). Enter the Y number obtained in the previous step and press Enter. A series of procedures are launched, the result of which is to read the contents of the device’s flash drive into a dump file called rawdump.bin. The reading process for the MF910 (and other devices with a 512 MB flash drive) takes about 20 minutes. Upon completion of dump recording, the device reboots and returns to factory mode.
- If we do not plan to carry out any other actions with the device in factory mode , then we run the script MF_bckfrmfactory.cmd. The device reboots, and after reboot it operates normally with the RNDIS adapter available. Additionally, it will now enter this mode immediately after turning on, without the need to “eject” the CD-ROM in Explorer or other actions that have the same meaning.
PS Source code rawdump9x25.cmd:
set /p dgpnum=”Diag port #: » qcommand -p%dgpnum% -e -c “c 3a” set /p dlpnum=»Download mode port #: » qdload -p%dlpnum% -k3 -s -i qrflash -p%dlpnum% -x -b0 -l0 -o rawdump.bin qcommand -p%dlpnum% -c “c 0b”
Source

