Home / Phones / Android / Setting up Android
Back
Published: 11/27/2021
Reading time: 20 min
This article tells you how to quickly make a full backup of Android on various devices (microSD memory card, computer hard drive or cloud) and then restore all of them.
This article is suitable for phones and tablets of all Android device manufacturers: Samsung, LG, Sony, Huawei, Xiaomi, HTC, ZTE, Fly, Alcatel and others. We are not responsible for your actions.
- Ways to create backups for Android
- Creating a backup using built-in Android capabilities
- Creating a system backup via Recovery
- Using Super Backup
- Using ADB Run
- MyPhoneExplorer utility
- Android backup company for Samsung tablets and smartphones
Ways to create backups for Android
A full backup on Android can prevent the loss of important data for the user in the event of hardware and software failures, a virus attack, or failure of the gadget. It is recommended to use backup on all mobile devices.
At the moment, for owners of tablets and smartphones on Android, there are many opportunities to save personal information during failures and other unforeseen situations. Android has certain tools for system backup.
You can back up information stored on Android using:
- Recovery environments.
- Built-in Android backup service.
- Additional software installed on a tablet (smartphone) or PC.
Considering what backup is, it should be noted that performing an Android backup implies activating root access. If you do not have superuser rights, you can only save personal information (music, photos, contacts, SMS, etc.) and settings of some programs.
Types of damage
The design and operating principle determine the type of damage that a microSD card can receive during operation. They are conventionally divided into 3 groups:
- Mechanical. The most undesirable option. Cracks, chips, losses, melting, oxidation cause irreparable damage not only to the shell, but also to the microcircuit. Restoring the card and data in this case is not possible. But if the damage is minor, then there is a chance.
- Problems with sectors (English: Bad Sectors). Such damage can occur if the drive is used incorrectly. For example, during an emergency extraction. Another common reason is chip wear. Controllers have a limit on write cycles; exceeding them leads to card failure. Ignoring compatibility requirements can also damage the SD.
- Software. This is usually understood as a failure of the MFT (Master File Table), that is, the database. Damage may occur during interference when reading information, under the influence of malware.
Creating a backup using built-in Android capabilities
All devices that run on the Android system have the ability to connect to Google and use many of the advantages of this service for free (writing personal data to a cloud drive, synchronizing with a PC, etc.). Android backup service is one of the most useful Google tools; with its help, you can create a backup and automatically back up information from your gadget to virtual storage.
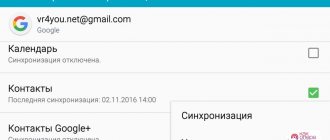
Before creating an Android backup using the Android backup service, you need to create a Google account and assign your device to it. This is done this way:
- Go to the “Accounts” menu in the device settings.
- Let's see if there is a connection to Google. If it is missing, click “Add account”.
- Then we select the Google service and connect to our own Gmail.
Increase
After connecting Google, we backup the system:
- Go to the account properties and mark the applications that need to be backed up.
- We tap on the button that opens a list with additional actions, after which we start synchronization.
- We configure the Android backup service to automatically create restore points at certain time intervals. It is necessary to highlight the item marked in the screenshot below.
Increase
Increase
To return data to Android using the Android backup service, you just need to re-link to your Google account, go to the “Restore and reset” menu, and then activate the recovery procedure.
Symptoms of a microSD malfunction
The data on the card is always displayed on the screen of the device (computer, phone, camera, etc.). Therefore, it is easy to understand that there are some problems with the drive. Sometimes problems occur in the system; just in case, you should restart the device. If this does not help, you should figure out what exactly is happening with microSD:
- How to recover data on a memory card
- Files are written to the card but cannot be read.
- All data is displayed with a size of zero.
- It is impossible to overwrite or format the card, while the files on it open without problems.
- The card is not readable, the device does not respond to the flash drive.
- The reading speed drops to 100 kB/s and below, the process freezes.
- The card does not allow you to write or copy information, giving a reading error.
- The computer does not detect the card - “unknown device”.
- The PC sees the microSD, but does not open it, offering to format it first.
- Saved files are played with errors/artifacts or cannot be opened at all.
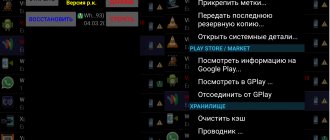
Creating a system backup via Recovery
Each Android gadget has a built-in Recovery environment. This standard program has several limited capabilities that do not allow you to make a full backup of the firmware. Because of this, many owners of tablets and smartphones install a custom version of it instead of the usual Recovery.
An Android backup is performed via Recover using the following instructions:
- Turn off the gadget completely.
- We go to the recovery area by holding down the desired combination of mechanical keys. The combinations differ for different device manufacturers. For example, on Lenovo you need to press the power key and the middle of the sound control button, for Nexus - hold down Power + Volume Down.
- A window will appear where you need to select “backup and restore”.
- To start the backup, click “backup”.
Increase
It will take some time to create a copy of the firmware. During a backup, you cannot perform any actions with the gadget (for example, remove/install a memory card) so as not to affect the final result.
To restore the system from a previously created backup, you need to select the “restore” line in the “backup and restore” menu. When the device reboots, all user data along with the firmware will return to its place.
Check and repair using CHKDSK
If the microSD memory card stops working, you can check it through the Windows console utility - CHKDSK (chek disk). It is designed to scan drives to detect problems, fix errors, and restore files. The process starts in several steps:
- Press Win+R.
- In the window that appears, enter the letters cmd (command line).
- At the cursor location, type the command chkdsk D: /f /r. Where D is the name of the card (can be E, F, depending on how the PC calls it), /f is the function for checking and troubleshooting, /r is the search and recovery of bad sectors.
The CHKDSK utility allows you to recover data by correcting errors on the disk.
Check and restore via “Properties” microSD. Checking and correcting the section can take quite a long time, up to 30 minutes. It is not recommended to interrupt the process, remove the card, or work in other programs. At the end, a window will appear with a report of what was done and how. After restarting the card, its functionality should return.
There is an alternative method that uses a GUI without the CHKDSK command line. Through Explorer, go to “This PC” and right-click on the required section with the card name. The device window will appear.
In the Service tab, the system will offer to check the disk for errors. Press the button and wait for the result. At the end, a window will appear with a report and a list of further actions. During the scan, it is not recommended to turn off the computer or put it into standby mode.
Attention! The user performs all actions with the memory card at his own peril and risk. If important data is stored on microSD and you are not sure of the correctness of the chosen methods, it is better to contact a specialist.
Using Super Backup
Some users believe that Google's servers are not secure enough, and a backup made on Android could end up with other people. Previously, there was an item in the “Recovery and Reset” menu that allowed you to copy all information to a memory card. In modern versions of Android, this function has been removed due to security. If you still want to backup to microSD, then use the Super Backup application:
- Launch and install Super Backup programs.
- During the first launch, you need to configure automatic backup on a schedule. If you need to do this, then click the corresponding button, and if not, then click “Not now”.
- In any case, you need to configure the method for creating a backup copy. Therefore, you need to go to “Settings”. In the main window of the utility, you need to click on the vertical ellipsis, which is located in the upper right corner.
- A menu will open where you need to select the “Settings” section.
- In this section, select the “Save path” item.
- Now we put a dot next to “External save card”, and then indicate the appropriate folder using the “View” button. When the folder selection process is completed, click “OK”.
- Now you need to return to the main window of the utility and select a backup of the necessary information. The user is asked to save bookmarks in the Internet browser, call log, calendar, contacts, SMS and applications. This is done by clicking on the “Save” button.
- If you need to use the saved data, then do the same, just click on the “Restore” button.
Increase
Increase
Increase
Increase
Increase
Increase
Increase
Super Backup can send backups to the cloud. In this case, it is not the developers’ server that is used, but the reliable Google Drive. This method will be convenient for those who need to quickly transfer phone book contacts and other information from one gadget to another.
Using ADB Run
To create a backup and send it to your computer, you can use the ADB Run utility. To successfully use this software, you must have drivers installed on your computer for the model of the gadget you are using.
- Download and install ADB Run.
- We activate USB debugging on your tablet or smartphone. You need to go to “Settings” and select the “For Developers” section.
- Next to the line “USB storage”, activate the checkbox. If there is a need, then we activate the section itself at the very top.
- We connect the device to the computer, launch ADB Run (find the adb_run.bat file in the folder with the installed utility or click on the icon on the desktop).
- The utility does not have an interface; it has a console view. Therefore, you need to indicate commands in numbers. For our case, you will need to enter 12 - this command corresponds to backup. You must confirm your actions by pressing the “Enter” button.
- Then enter 1 and press Enter again.
- What exactly do you need to copy to your computer? Enter the number 1 if you need to reserve only basic data. If applications and personal data are required, then enter 2, and 3 - when you want to add the contents of the memory card to the backup. Press "Enter".
- We are waiting for the completion of the operation.
Increase
Increase
Increase
Increase
Increase
Increase
To restore a backup, you need to select “Adb Restore”. Then click “Recover Data” on your Android device.
Is it possible to recover a formatted SD card?
Obviously, you will lose all files on the SD card after formatting. However, this does not mean that the data is completely erased. Formatting an SD card removes the existing file entries and then makes them inaccessible, but the data is still on the device. This way, you can recover data from a formatted SD card before you overwrite it, that is, replace the data with new ones.
Important The faster you perform an SD card recovery, the higher the likelihood that you will be able to get your files back. Once the SD card data is overwritten, you will lose the chance to recover files from the formatted SD card. Therefore, stop using the SD card immediately and restore your formatted device as soon as possible.
MyPhoneExplorer utility
This utility backs up the Android system to a computer. The sequence of actions is as follows:
- Download and install the utility on your PC.
- We activate USB debugging on the gadget. To do this, go to the “For Developers” menu and select the appropriate item.
- Now launch MyPhoneExplorer and connect the device to the PC.
- Go to the “File” section, where we select the type of switching, as in the screenshot below.
- To create a backup, open the “Miscellaneous” section and click “Create”.
- Select the location where the copy will be stored.
- We note what needs to be saved, and then we start the backup process.
Increase
Increase
Increase
If you need to restore Android using the created backup, then select the “Restore” function in the “Miscellaneous” menu.
What exactly is meant by backup?
The words “system backup” mean its complete or partial copying. And not necessarily on a PC - you can also use a cloud service. If you make a partial backup, the following sections of the system are often copied:
- Contact book;
- Call log;
- SMS messages;
- Calendar;
- List of installed applications.
At the same time, you can exclude some sections from this list. For example, if you never use the “Calendar”, then it would be logical to remove it in order to speed up the backup.
If you are planning to make a full backup of Android, then in the future you will be able to restore the entire system, and not the individual components that make up it. This is most relevant for those cases if you regularly experiment with your device by installing third-party firmware on it.
Android backup company for Samsung tablets and smartphones
To create backups, the manufacturer created the Samsung Kies program. To work with it we perform the following steps:
- Launch Samsung Kies.
- Enable USB debugging on Android.
- Using a cable, we connect the tablet or smartphone to the PC.
- We wait until the program determines the gadget model.
- Go to the “Backup/Restore” menu.
- We indicate the necessary items and click on “backup”.
Increase
Increase
Increase
To restore, you need to go to the “Recover Data” section. Then select the folder with the previously created copy and mark the items necessary for restoration. Then click “Recovery”.