Today, few people can do without access to the Internet. This applies not only to children, but also to adults. In addition, sometimes the work process is inextricably linked with the Internet connection. The provider offers to rent or fully purchase equipment that allows you to solve this problem. But it is worth noting that they are most often intended exclusively for working with a specific provider. If you log in permanently, you will switch to the proprietary interface. A similar situation is demonstrated by the Rostelecom h118n router. No one will be able to buy it with factory firmware. Some users, during operation, have found ways to bypass the blocking of the provider. At the same time, each subscriber must decide for himself whether he needs it. After all, it is not uncommon for fully functional equipment to become unsuitable for subsequent use.
Setting up the ZTE ZXHN h218N router on Rostelecom
A little over a year ago, I reviewed the ZTE h208N universal router, which could work on both FTTB and ADSL lines.
As time has shown, it turned out to be a quite worthy device: compact, fast (it held up to 100 megabits perfectly), with a good wireless network coverage area and quite reliable (minimal percentage of defects). About six months later, for some reason, the developers removed the device’s versatility, limiting its capabilities to a regular ADSL modem in the new firmware. Accordingly, all the poor souls who used it on FTTB and updated the software to this version on their own account had to look for the previous one and rollback.
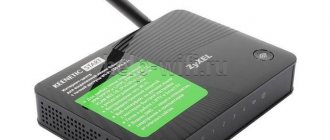
And after some time, another model of the Rostelecom branded router appeared - ZTE ZXHN h218N - this is a purely Ethernet router. That is, now the “area of responsibility” is clearly divided - 108th is used for ADSL, and 118th is used for Ethernet.
Externally, these two devices differ only in the WAN port and the color of the RTK logo. Otherwise they are completely identical.
As soon as it appears in the connector entering the apartment, click the “Continue” button. If the router sees the connected cable, the picture will change:
At this stage, you need to change the default password for authorization on the device from “admin” to any other, preferably more complex one.
And then you need to choose the method by which you will configure the device. In most cases, it is better and faster to do this with the help of a special wizard. Let's take a look at this method.
How to set up ZTE h218N for Internet and digital TV
First step . select your Rostelecom branch and the service you have connected to:
I will consider the most common case - the Internet and interactive television IPTV. Click the “Continue” button.
Second step. Here you need to specify your login and password for authorization via the PPPoE protocol. They are usually issued to the user upon concluding a contract at the sales office of the telecom operator.
If your branch uses the “Dynamic IP” connection type, then this stage simply will not happen.
Third step. At this stage, you need to check the box for the LAN port in which the Set-Top-Box TV set-top box will be connected.
If in your branch IPTV multicast is delivered to the subscriber’s equipment in tagged form, then you must also indicate the virtual network identifier in the “VLAN Number” field. In this case, the VLAN ID used must be clarified with technical support.
Fourth step. Setting up WiFi on ZTE h218N:
In the “Wireless network name” field, enter the so-called SSID - that is, the name of your Wi-Fi network, which will be displayed when searching on connected devices. In the “Wireless Network Password” field, you need to enter the WiFi password, which you must enter to connect. Click on the “Continue” button.
At the last stage, we check the entered data again and click on the “Save settings” button.
The Rostelecom h218N router has been successfully configured. We check the operation of services.
Did it help? Recommend to your friends!
Changing LAN IP Address on ZTE
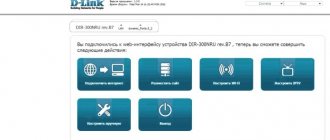
If you followed our navigation guide above, you should see this screen.
zte password
We start this guide on the home page of the ZTE router. Want to change your IP address? You've come to the right place. We'll show you how:
Start by clicking Quick Settings on the left side of the page. Then click on LAN and DHCP Server just below that.
Setting up the ZTE ZXHN h218N router on Rostelecom:
I tried - I made the network open, reset it to factory settings, configured it manually and by a wizard - it was useless. I took another router (Zyxel Keenetic Omni II), made the same settings on it and the problem disappeared... The conclusions flow like a song...
I’ve been suffering for a week, trying to configure the router for beeline! It says error bras 679. help, if this is possible!
For a Beeline you need a connection type - dynamic IP and that’s it.
There is nowhere to enter tp.internet.beeline.ru. or I don’t see) you can do it on the shelves)
You no longer need to enter the server address. Since last year, almost throughout the entire coverage area, Beeline has switched to a connection type - Dynamic IP without an L2TP connection.
Thank you all, I finally got over it)) now the problem is that the router distributes Wi-Fi and the speed is high, but in reality there is no Internet
Hello, how to connect a USB modem and distribute it through a zte router from Rostelecom?
Unfortunately, I do not have a list of supported modem models.
Source
Setting up a router from Rostelecom ZTE ZXHN h218N to another provider.
I came across a copy of a tightly locked router from Rostelecom (surprisingly, under the contract you gradually buy it back, and then you are left with this piece of hardware) - ZTE ZXHN h218N with hardware version HW: 2.3 and Rostelecom firmware V2.1.3_ROSCNT4. Because attempts to search for firmware for any provider (or from the manufacturer) were unsuccessful, it was decided to try to configure it as is, and it worked, however!
When I tried to get into the web muzzle and configure something manually, it categorically did not work, showing either “Automatic configuration” when the cable was connected, or “Connect the cable to the WAN port” when it was disconnected. I decided to stick a regular cable from the second laptop there so that it would sense the link, but there seemed to be nothing to tune in there, and lo and behold! The “Configure manually” button has appeared. These routers are interesting because it periodically knocks silently on the telecom and any employee can tinker with it remotely. This thing is called the CWMP protocol and is described in TR-069. So, it turns out that it comes with an additional cool backdoor: in the web interface using the superadmin login and password [email protected] , it allows you to configure everything that is required without fuss.
Administration => TR-069 => Disable by unchecking and save.
Network => WAN => WAN Connection => Connection name => select existing connections from the list and delete them. By selecting Create WAN Connection, we create our own from the provider.
There in the settings there is an Application item, in which you can enable the Samba server for a USB flash drive, and raise FTP and do all sorts of other things. It works with a 16 GB flash drive, tested. 3G, 4G modems - have not tested.
Well, you'll figure it out further. It runs on the micro SoC Realtek RTL8676S, about which it was not possible to get much information. A little guts of the ZTE h218N in conclusion.
Router board On the h218N board you can see the UART contacts RX, TX, GND, 3.3V Case of the ZTE h218N router from Rostelecom Case of the ZTE h218N router from Rostelecom Power supply of the ZTE h218N router Board of the router on the reverse side of ZTE h218N Board of the ZTE h218N router. Contacts for connecting through the port to the terminal.
Source
How to enter the modem menu
Login can only be done after connecting the Internet service provider cable to the WAN port (RJ-45) on the back panel of the ZTE ZXHN h218N Rostelecom router. One of the 4 ports of the LAN router (RJ-45) is connected by an Ethernet line to the network card connector of the computer (PC) or laptop used for configuration. You must first set the device to automatically obtain addresses on the Internet Protocol version 4 page.
According to the information on the sticker, you can see that the device’s IP address is 192.168.0.1 and by default its authorization data is used: username is admin, password is admin. The network address is entered into the address bar of the web browser used on the PC, and information about the login and password is necessary to fill in the fields of the window that opens.
The router program requires that the provider's cable be connected to the WAN connector, and the first login page will remind you of this if the necessary condition is violated. If the router detects an Internet connection, the page will look different. It will prompt you to select a time zone and the need to change the factory password with the corresponding information fields.
After completing the safety requirements, you must click on the “Continue” stencil and go to the next page. On it you need to select the proposed setup method: “Start the wizard”, “Configure the device manually”.
How to make the menu complete
The Rostelecom router is configured after selecting manual settings. To enter the menu, you need to enter the user name - admin - and the created individual password. When you click on the “Login” tab, you go to the start page of the router interface with general information about the device. The “Network” item on the left side opens the possibility of selecting the type of WAN connection.
When setting up, the data provided by the provider when concluding an agreement with him is used: the type of Internet connection (PPPoE), the number of the enabled VLAN (fiber optic) and its priority, username and password. The connection you create must be "Always On". The entered data is saved when you execute the "Edit" command at the bottom of the page.
To use the TV viewing function, you need to re-open the list of possible WAN connections and select IPTV from it. In the connection type line you need to use “Bridge” and then execute the “Create” command. After this, you need to go to the “Port binding” item in the WAN section of the main menu.
It performs software assignment of connectors LAN1-LAN4. For PPPoE, ports LAN1-LAN3 are selected by default. Computers will be connected to them. For IPTV you need to assign LAN4. It will come with a set-top box that will use it via an Ethernet cable line. After checking the selected boxes, click the “Save settings and confirm” button.
Appearance
One of the advantages of the model is the design. It looks impressive compared to other similar devices. The case includes truly non-standard solutions. Outwardly, it resembles a pillow fixed on a stand. Moreover, its installation is carried out vertically, which can be called a positive point, since all ventilation channels are constantly open.
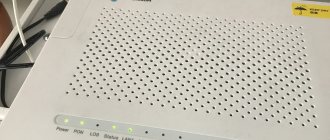
The classic design is a white plastic case, which contains 9 indicators, next to which additional symbols for each are located.
Under the bottom of the stand there is the firmware version, IP addresses, password, manufacturer, as well as all possible other information. Most often they are used subsequently to make settings.
Setting up Wi-Fi on the ZTE h218N Ethernet router
Router manufacturer ZTE provides its products with a configured Wi-Fi wireless connection. Information about the network name and access password can be found on the label on the router case. But the connection setup can be done manually. To do this, in the VLAN (Wireless Network) section of the menu, select “Setting up Wi-Fi networks”.
On its page you can change the factory values to your own. After selecting the “Security” item, you can change the authentication type and encryption algorithm. Finally, click the save button (“Apply”).
Popular settings
You can use automatic configuration of the Rostelecom router after the proposed change of the factory password. If you then click on the “Start the wizard” stencil, then in the next step you need to select and indicate the region, branch and service of Rostelecom. After continuing the setup, you need to fill in the login and password fields issued by the provider when concluding the contract. If the branch uses Dynamic IP, this data will not be needed.
When connecting a set-top box, it must be assigned a LAN4 port. After continuing, the wizard will prompt you to change your authorization data. You can do this and continue. The next page prompts you to enter the settings with the new Wi-Fi network values, administrator name and password, and click the “Save settings” button.
technical support
Email address of the company's customer support in Russia: [email protected]
Call center phone number 24/7
The number looks like this
Source
Manufacturer
The Rostelecom h118n router is manufactured by the Chinese company ZTE, which is known and distributed throughout Russia. At the same time, you should pay attention to the fact that providers put their own logo instead of the actual one, which makes it somewhat difficult to recognize the actual manufacturer. Company icons may appear on the device itself. In any case, information on the manufacturer can tell even superficially about the quality of the device.
ZTE was founded in 1985. Today they produce not only routers, but also mobile devices and tablets. It is under the leadership of the state, which has a controlling stake. If we consider budget models, then the Chinese manufacturer will be the rightful leader. But the price really matches the quality.
HOME RU
The problem with this device is that it contains firmware from the provider itself. But it is so limited in functionality that even modem routers from Beeline and MTS can easily compete with it. Next I will tell you what can be done with this device. I’ll also tell you about the setup a little lower, although there’s nothing special to configure there.
What to do?
And now the problem I encountered. If in older versions, which have firmware up to 2.1, it is still possible to somehow reflash the device to the original version, then with new ones (2.3 and higher) it is impossible to reflash the router. The provider made sure that their routers could only work on their network.
If you don’t believe me and want to waste your nerves, energy and time, then here is a link to a well-known portal where all possible flashing methods are presented. But I will warn you that by flashing a router version 2.3 or higher, you will most likely turn it into a brick. So you have three options:
- To enjoy a router from this company - in general, for an ordinary user it should be enough to simply change the Wi-Fi name and password (nothing else can be done in the settings).
- Return it (if you just purchased it) - in theory, you can do this within 14 days from the date of purchase (Article 18 of the Consumer Rights Protection Law). If Dom.ru refuses to return the router, then write a statement to Rospotrebnadzor addressed to the General Director.
- If you have had your router for a long time, or you inherited it, then you can do two things. The first is to try to reflash it, if you don’t mind it. In the settings, look at the firmware version, if it has a number up to 2.1, then it’s quite possible to reflash it - go to the forum that I indicated earlier. The second is that you simply throw it away and buy a new one. You can see our selection here.
If you manage to unlock the ZTE Internet center, then write your method in the comments for others. I just changed it to another router.
Connection
Let's get acquainted with the ports and the rear view of the device, and of course, connect it:
- WAN - here we connect the cable from the provider.
- LAN1-4 - local ports. I will be using a laptop to set up, so I will connect here.
- Wi-Fi - turn on and off the Wi-Fi network.
- WPS - a button for quickly connecting without a password via a wireless network.
- ON/OFF—turns the device on and off.
- PWR input - connect the power supply from the box here.
- Reset - button to reset to factory settings.
There should also be a USB port on the side for connecting external media. You can connect to the network in two ways:
- Via cable like me, connecting to one of the LAN ports.
- Over Wi-Fi - the network name (SSID) and password (WPA Key) are located at the bottom of the device on a special piece of paper.
After connecting, enter into the address bar of the browser:
Setting up the router
After logging into the ZTE ZXHN h218N Web interface, you will see two welcome pages where you will be notified that the device is being configured independently. After this, you need to go to the ya.ru website and you will be redirected to the registration page, where you will need to enter the client agreement number, login, password, city, new Wi-Fi network name and password. At the very end, click “Submit”.
After this, you will be taken to a menu in which you can’t configure anything special. To change the wireless network settings, click on the “Change settings” link.
A new window will pop up where you can change your login and password - for Dom.ru, authorization in the provider’s network. It is better to set the WiFi network mode and channel to “Auto” mode. To change the Wi-Fi network password, change the line “Wi-Fi network key”.
You can also update the firmware by clicking on the link to the left - this can be done manually. By the way, this is exactly how flashing is done, but only on older versions. On the new ones, the provider removed all features.
Creating an Internet connection
ZTE routers for wired and wireless connections are managed using a special interface, which you can connect to by entering an address like 192.168.1.1 in your browser (you can check this value in the router’s data sheet).
If the device is already connected to the PC, after entering these numbers, a setup window appears on the screen where you need to:
- Enter the user login and password. By default, the word admin is entered instead of each of them (if desired, they can be replaced with any others);
- After filling out the fields, click on Login;
- In the window that opens, select the Network section;
- Open the WLAN tab one by one (sometimes you can select it immediately from the list, without going to the Network tab), and then Basic;
- Select the WirelessRFMode column;
- Change status from Disabled to Enabled;
- Click the Submit button to enable wireless data distribution.
- for example, in the Multi-SSID section you can make the network both open and closed;
- the connection name is changed in the SSIDName column;
- the maximum number of simultaneously connected devices is set in the MaximumClients item (most models support up to 32 connections simultaneously);
- in the EnableSSID item, the network can be turned on or off;
- The HideSSID section allows you to hide your wireless network.
Important: Most often, when connecting by cable, the network is detected automatically. If this does not happen, you may have to update or install the network card drivers. And then set up a new connection.
Now that Wi-Fi is turned on, you can set up the connection itself.
In the WAN Connection menu, PVC0 is selected in the Connection Name line, and Route is set in the Type line.
After this, you need to choose to enter the connection name and password (for a PPPoE connection), which will be used to log into the network.
The ADSL network is configured in approximately the same way, although the transition is to a different tab.
Rice. 7. Router connection process.
If the connection is made using a 3G/4G connection, the setup is carried out through another tab - 3G WAN Connection.
Here you select only the access point name APN (you can find it on the provider’s website or check with the company’s technical support).
The rest of the settings are usually installed automatically.
You should know: Depending on the router model, the names of the tabs may differ. For example, the access point name sometimes needs to be entered on a separate APN Settings tab. At the same time, all user actions will be approximately the same.
Additional sections
In addition to setting up a network connection, the user of a ZTE router has the ability to change other parameters:
Rice. 8. Setting up router protection.
If in the settings menu there is a Security section, where you can select the WPAPassphrase encryption key with a length of 8 to 32 characters.
As well as the Authentication encryption type and the appropriate information transmission security algorithm WPAEncryptionAlgorithm.
When setting a password, you should follow a number of rules.
First of all, choose a combination consisting of at least 8 characters, including both lowercase and uppercase letters, as well as numbers.
In addition, it is not advisable to use user names and dates of birth as passwords.
Rostelecom
Let's connect it. We look at the ports on the back.
- PWR - connect to the mains.
- LAN4-1 - local ports for connecting computers, laptops, TVs, printers, etc.
- DSL/WAN - we connect the wire from the provider.
There are three more buttons:
- Reset - if you received this device from an acquaintance, friend, or someone previously used it, then reset it to the factory configuration by holding the button for 10 seconds. In this case, the router must be turned on.
- WPS - connection via WPS.
- WiFi - you can quickly turn off or turn on the wireless Wi-Fi network.
For settings, you can use a direct cable connection to one of the LAN ports. Or you can connect to a wireless network. The name and password are located on the label in the “Wi-Fi Access” section (SSID name and SSID password).
Open the browser and enter one of two addresses in the address bar:
- 192.168.0.1
- https://rt
If you are asked to enter a login and password, then enter only the value “admin” in the user name field. If the data is not suitable, reset the device to factory settings using the “Reset” button.
Quick setup
- We select the region, branch, and type of services: Internet and TV.
- From the sheet with the contract, enter the login and password.
- Connect a set-top box to one of the local IP-TV ports and specify this port.
- You can enable or disable the wireless network, change its name and password.
Manual Internet setup
Go to “Network” - “WAN (Internet)” - “WAN (Connection)”. In the top line, select “Create WAN connection”. We write the name below. In the “New VPI/VCI” line, enter two numbers separated by a slash - they can also be viewed in the contract or settings sheet. They may vary depending on the region and city.
In the “ppp” section, enter the username and password from the agreement.
Manual IPTV setup
In the same tab where you created the Internet, again select creating a new WAN connection and specify VPI and VCI. In the “Type” line you need to indicate “Bridge type connection”. Click “Create”.
Go to “Port binding” and for “IPTV” indicate the port to which you connected the set-top box.
For an Internet connection, you need to specify all other ports.
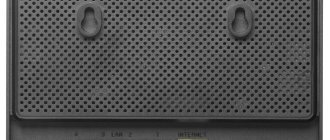
Connectors
These components of the device can be considered important. The very first one presented is WAN. Its purpose is to connect a cable for the Internet. In addition, there are also LAN ports. They are used to create a local connection. A good feature is the presence of a USB port used to connect the device to a computer or laptop. The inscription PWR indicates a round socket for the power supply.
If necessary, return to factory settings using the Reset button. To press it, a needle or, for example, a paper clip is usually used. Reboot will be carried out by pressing continuously for three seconds. It should be released after all the indicators on the device go out and then light up again.