Home / Lifehacks / iOS / How to transfer contacts from iPhone to Android: 5 simple instructions
AndroidiOSLifehacks
November 20, 2021
When changing phone models, you have to transfer a lot of personal data and information to the new device.
Most often, various operating systems have methods and special programs for transferring contacts and other content.
But how to transfer contacts from iPhone to Android if these operating systems are completely different?
Using Gmail
This is the easiest and fastest method, but for it you need to have a Gmail account, which most users of licensed operating systems have.
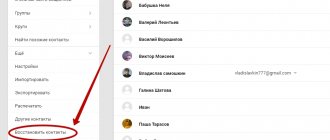
You will need to synchronize your contacts on your iPhone with this mail, and then transfer them from there to your new phone.
This is done as follows:
- Open the settings section on your iPhone and find the Mail . Tap on it, and in the window that opens, click on Accounts, then Add an account.
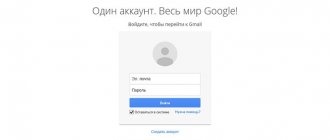
- A list of services will open from which you can add an account - select Google. Find the Account section. entries in the window that opens - tap on it. An authorization form will open in your Google mailbox - enter its name and password.
Now importing contacts from your phone to mail starts automatically.
You don't have to force it or do anything during the copying process - just wait a few minutes or seconds for the sync to finish (depending on how many contacts you had).
After it is completed, simply authorize from the new gadget in your Google email and the import of contacts to the new phone will happen automatically.
Rice. 1. Synchronization
Important! To make the import process as fast and simple as possible, it is better not to go through authorization when activating the device with a different Google email address.
First, create an email, then link it to your iPhone, copy your contacts, and only then activate your Android gadget using this address. Thanks to this approach, the import will happen quickly and automatically - there will be no need to force it.
Via SIM card
This is a fairly simple and time-tested option. But, on the other hand, it is also outdated. Losing your SIM card will automatically mean losing your contacts as well. But the method has a right to life, so it can be used if other options are inconvenient.
Keep in mind that the iOS operating system does not allow you to transfer the phone book from the phone memory to the SIM card! Therefore, you will need to download a third-party application - “SIManager”. Open the program and select “Copy to SIM card”. Remove it and insert it into your Android smartphone. On it, go to contact settings - click “Import”. All that remains is to specify the location to save the data. Ready!
Yandex.Moving
The Yandex service has developed a special “Moving” application that will allow you to synchronize two devices with different operating systems with maximum accuracy.
Activate your new smartphone and download the corresponding application on it, also install it on your iPhone.
- Download the application for your iPhone using the link.
- To download for Android, go to https://www.computer-setup.ru/distr/yandex-pereezd-v1.0.apk.
Once the installation process is complete, you can proceed directly to the “moving” process.
To do this, follow the algorithm described below:
- Launch the application on your Apple device - on the first page you will need to enter your username and password for Yandex services - do this.
- Immediately after this, the process of copying contacts from the iPhone’s memory will begin. It will take, depending on the amount of data, from a few seconds to several minutes. Upon completion, you will receive a special pin code (displayed on the main screen) - this is exactly what you need in order to carry out the “move”.
Rice. 2. PIN code
- Launch the app on your new phone. Log in, making sure to use the same data you used to log in on your iPhone.
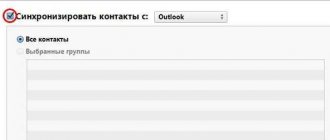
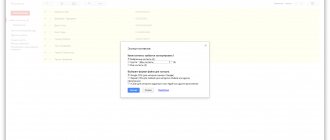
- On the updated page, in the lower right corner, find the settings button and tap on it. It looks like a horizontal row of three dots; after tapping the Settings button, a small drop-down menu will open in which you will need to select the “Settings” item.
Rice. 3. Settings
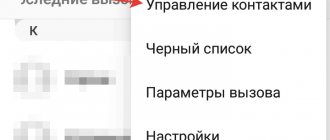
- In the window that opens, scroll down to the item “Moving from phone to phone” - tap on it.
Rice. 4. The right option
- In the new window you will find an input field - enter the PIN code you received when copying data from your iPhone. After entering, click on the “Start Transfer” located below.
Rice. 5. Entering a PIN code
- These actions automatically start the moving process, which is completed after 3-5 minutes.
There are quite a lot of programs of this type, but Yandex.
Moving is the simplest and most convenient for the Russian user, since it is written in Russian, has the simplest and most intuitive interface, works quickly and is distributed free of charge.
Option No. 4
Another quite convenient and simple program is Bump. It will also help you achieve the desired result without unnecessary actions. You need to install this application on both phones and run it with geolocation enabled. Then, on the iPhone, open the phone book and select the numbers to transfer, and determine the device to transfer (second phone). Then click Connect in the dialog box - click and wait for the numbers to appear on the second device. This will happen pretty quickly.
We hope that these proven methods will help you complete the task quickly and without unnecessary problems. Good luck!
Back Next
My Contacts BackUp App
The application is very reminiscent of Yandex.Moving, not only in the principle of its operation, but also in the design of the interface and the design of the main windows.
However, it can work not only with Yandex services, and therefore is very suitable for users who are not registered with them.
You can download the application from the link.
This software is exclusively for iPhone - you do not need to download it to a device with the Android operating system.
After downloading the application to your iPhone, install and run it to create a backup file for storing contacts:
- After launching the application on your iPhone, it will automatically analyze the state of your contact list and write how many there are in total - you will see this number in the start window. After finishing the analysis, click on the BackUp button.
- The application will start the process of creating a backup file for later copying it to Android. You can watch the progression of this process in the line in the central part of the window.
- When it is completed, click the Email button, and then from the list, select the file type that the application will create and which will be forwarded to the specified email address. The simplest and most effective format is vCard.
Rice. 6 Backup
At this stage, the synchronization process is completed - the file will be created and sent to the email address that you specify in the appropriate window.
After that, simply open your email from your new device and open the vCard file that came to your email.
It will start and the contacts will be added to the memory of the Android operating system.
The advantage of this method is that you don’t need to do virtually anything with the new device, it doesn’t affect the operation and settings of your Google account, and you don’t need to download anything twice.
Moreover, you don’t even need to download and move even the contacts file itself to the root folder of your phone’s memory - you just need to open it once, and it will start automatically.
Important ! In order for all the listed positive aspects of this method to take place, it is very important to correctly select the format of the file created by the application. Only the vCard format launches and synchronizes independently.
Another positive side of this approach occurs if you use two devices at the same time.
The operating system allows you to simultaneously run as many files of this type as you like, that is, you can periodically copy and reset contacts from your iPhone in this way.
Each time such a new file is launched, the missing contacts will be “added” to memory.
Option #3
An even simpler way for those who love all sorts of functional applications. You need to go to the App Store and download the My Contacts Backup program, abbreviated as MC Backup. You just need to go into the application, click the Backup button - and the program itself will create a file for you in the required format. You can send it to yourself for soap. Then, from your Android device, you also need to go to your email, download the existing file and import it into the phone book.
iTunes
This method is absolutely indispensable in a situation where, in addition to the photo itself, there is a need to transfer extended contact media data, for example, a photo.
In this case, synchronizing the phone book with the official service from Apple – iTunes – will help.
In order to synchronize data in this way, follow the algorithm:
- Turn on your computer and launch iTunes on it, then connect your phone to the computer, select your device in the program window, when it is detected, and go to Information in the left menu.
Rice. 7 Synchronization
- Find the Contact Synchronization and check the checkbox to the left of it. A drop-down list will open in which you need to specify Google Contacts. But this option will appear in the list only if you have a Google account added to your phone (how to add it is described above).
Rice. 8 Synchronization object
- After this, the system will most likely ask you to re-enter your account credentials from Google services - do this and allow synchronization with Android. After that, once you log into the same account from your new phone, the contacts will be copied.
Restoring a backup
You can restore an iTunes backup on Android using Android ToolKit - Android Backup & Restore. With the program, you can easily download, view and restore your iTunes backup in minutes without overwriting your existing Android data and settings.
Algorithm for completing the task:
- Launch the program, connect the Android phone to the computer and select among the Backup & Restore functions.
- Connect the Android phone to the computer via a USB cable.
- Once the connection is complete, click “Restore” to begin the process.
- On the next screen, select “Restore” in the left column. The program will locate the backup files on the computer, list them one by one, and detect the iTunes backup files.
- Perform data preview and recovery.
- Select one of the files and click “View”.
- The program will read and display all the file details by data type.
- Confirm the Android device for recovery.
- Perform a preview, select all or some of the data and click "Recover" data from the iTunes file.
- Back up data for recovery.
- In the dialog box that appears, select the desired device. Click “Continue” to confirm the restoration.
- The selected data cannot be recovered if the device does not support this data type.
- Confirm recovery on Android: d_win d_mac.
iCloud
If you don’t have a Google account or if it’s not working, you can transfer contacts in a similar way using the iCloud cloud.
In this case, you can also transfer the necessary additional information - a photo, notes for a contact, etc. To synchronize using this method, do the following:
- From your computer, go to www.icloud.com and log in by entering your AppleID and password. Click the Login (check the appropriate checkbox under the login form if you do not want to be automatically logged out of your account after the end of the session).
Rice. 9. Login
- In the left menu on the page that opens, find the section Contacts - All contacts , and click on it. A list of all contacts that have already been copied to the cloud will open. Find the gear icon in the lower left corner of the screen and click on it; in the drop-down menu, click on Export vCard to begin uploading to your computer.
Rice. 10. Export
The service will automatically generate a file that will be saved to your computer. Find this file and transfer it to the memory card or hard drive of your new smartphone. Open (run) it using a file manager.
Important ! For this method to work, you first need to enable synchronization of the contents of your iPhone with the iCloud cloud - to do this, go to the Settings section, find the iCloud section there and move the slider next to Contacts to the active position. The indicator will turn green.
Alternatives
There are a number of other options for transferring all contacts. One of them is manual transfer one number at a time.
It is long and inconvenient, and besides, it is necessary that both phones are activated and in an active state all the time.
In order to transfer contacts from your iPhone one at a time, open the contacts list on your iPhone and select the one you need.
Click on it and in the window that opens, find the item Share contact . Tap on it and select the sending method - respectively, in a message, by email, in messenger or otherwise.
After that, open the contact sent in this way on your Android device and save it.
The advantage of the method is that there is no need to use additional software or a computer.
The disadvantage is that it takes quite a long time.
Rice. 11. Share
How to transfer contacts from iPhone to Android via Google
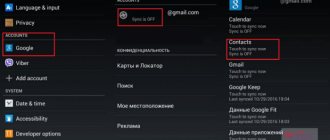
The easiest option is to import information using Google, since it is already built into the Android system and there is no need to download anything. For this method, you only need an account in the Google system, which must be created in advance. Google synchronization will help you complete the transfer.
- To synchronize devices, you will need to go to the settings on your iPhone and find the “Passwords and Accounts” section. If the iOS version is lower than 10.3, then the “Mail” section is used.
- Next, you need to select a Gmail profile and log in.
- All that remains is to activate the desired item, configure the second smartphone, and the information will begin to synchronize.
- To get this data on your Android smartphone, you need to go to the settings, to the “Users and Accounts” section.
- Then log in to the account activated on iOS and also activate the desired item for synchronization.
Previously, we told you how you can record a telephone conversation on your iPhone.
Common problems
A special case is a problem with the vCard file, when contacts are not automatically copied despite the fact that the file starts normally.
In this case, you need to request a forced copy. The situation may arise regardless of how the file got to your phone - via email or from the cloud.
To start the forced import process, first run the downloaded file and then go to the Contacts of your Android device.
In the lower right corner, find the icon with a vertical row of three dots and click on it. A drop-down list will open - in it, go to Import/Export .
Specify the source, that is, the file from which you want to import. Then click Save to phone memory.
Rice. 12. Import
Transferring videos and photos
FoneCope iPhone Data Recovery is the most effective way to recover photos from iPhone. The program cannot be used for free. But you can find a trial version on the FoneCope website to try out its capabilities. It not only retrieves photos from backup, but also selectively restores permanently deleted photos from iCloud.
Sequencing:
- After launching iPhone Data Recovery, select “Recover from iTunes Backup” on the main screen. Then click “Start”, a list of files will open.
- The backup files will appear in the window, you can select the one where the photos are stored.
- Next, “scan” and select the iTunes backup to scan.
- Once scanning is complete, photos will appear on the screen. You can view them.
- There is also a "Show deleted files only" option which can save a lot of time.
- Before clicking "Recover" to begin extraction, make sure the correct image is selected.
- You will then be asked where to send these photos. Just choose any convenient folder.
- The most important thing is that FoneCope iPhone Data Recovery is very easy to use. No special technology is required.
Click Phone-to-Phone Transfer Program
Click Phone-to-Phone Transfer is a data synchronization program that supports users to transfer files directly from one phone to another, from iCloud to phone, back up phone to computer, and also delete old image. There is a trial version that you can try before purchasing a paid version. The sequence of transferring data from iCloud to Android:
- Before transferring from ICloud to Android, install the “Telephone Transfer” program, having first downloaded it from the official website by clicking the “Download” button. The program is clean and safe, without information leakage.
- Double-click the “Phone Transfer” icon and launch it.
- Select the green field and restore from backups. You will be asked to sign in to iCloud. Enter your Apple ID and password.
- Connect your Android phone to Windows via a USB cable.
- When you select "Restore", backups created by other mobile managers such as iTunes, Blackberry, Samsung and Kies are supported.
- After you sign in to iCloud, you can view your iCloud backup files in the left column. Check the box and select the one you want to transfer. Then click “Download”. A notification will show the process. This may take a few minutes.
- When the download progress reaches 100%, Phone Transfer will sort the files into various categories, including contacts, text messages, calendar, call logs, apps, photos, music and videos. Select the desired content and click “Start Copying”.
As phones and other mobile devices become more popular, the amount of data people store on them increases. It is becoming increasingly important to have a good backup strategy for mobile devices, in addition to the one you might use for your laptop or desktop computer.