The question of how to recover deleted files on an Android phone arises in a variety of cases. Perhaps you erased important photos by mistake or in a hurry - and now you would like to get them back. Perhaps photos, videos (or other types of files) have disappeared from memory due to an external storage failure. It is possible that the reason for the deletion was the work of a “cleaner” application. There can be many reasons - and for each of them there is a solution. In this article we will look at the most popular ways to recover data (files, folders) on a smartphone. Didn't work out or don't want to waste time searching? Contact the Good Deeds Service for help!
Types of data recovered
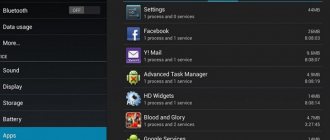
Let’s start our story on how to recover deleted files on your phone by listing the types of files that can be recovered. Theoretically, you can return both photos and videos, as well as archives or text documents - but the chances are greatest for photographs. The reason for this is that deleted pictures stored on the device are automatically sent to the Trash. They are stored in this system directory for several more days (usually 30 days), after which they are completely erased.
In this case, you don’t even have to use special PC programs. To recover a deleted photo:
- Open the “Gallery” system application and, by calling up the pop-up menu, go to the “Trash” section.
- Photos that you accidentally or intentionally deleted earlier may already be deleted forever. You will be presented with a list of files to be restored - select the ones you need and move them to the source directory.
- Do you use the Google Photos app and it's synced with your Google account? Launch the program and go to the “Trash” section - deleted images can be stored here, also for 30 days.
Please note: the last method allows you to recover deleted files on Android only if automatic synchronization is enabled.
Order data recovery service
Useful tips
It is often easier to prevent a problem than to deal with the consequences later. Deleting important information is definitely one of those unpleasant situations that is best avoided. That's why:
- Be sure to back up your data.
- Install an application that plays the role of the Recycle Bin on Android.
Let's take the Dumpster application as an example. After installing it, you specify what types of files are sent to the Trash and how long they will be stored there. If necessary, you do the same as with the Recycle Bin on your computer - empty it or restore accidentally deleted files.
File recovery programs
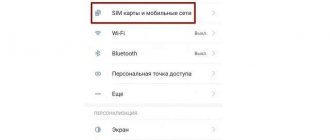
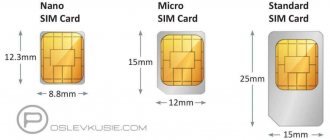
Storing data on an external drive (usually a microSD card) makes it possible to return files without obtaining root access or resorting to complex operating system settings. You will only work with media removed from the smartphone. To increase the efficiency of the process, immediately after detecting data loss, do not write anything to the memory card: each subsequent write reduces the chances of recovery, since old information (accidentally deleted) can be replaced by new one.
Below we will look at two programs that allow you to restore files on your phone via a computer. Before starting work, remove the microSD and connect it to the PC - in a suitable slot or through an adapter-card reader. There is no need to format the media as suggested by the system - this way you will permanently delete the information you are trying to return.
The morning is no wiser than the evening
Remember one simple truth. The Android operating system constantly writes some small files. This happens even when the device is in sleep mode. Therefore, you don’t even have to try to restore data on Android if a month has passed since it was deleted.
What can I say, even a week is a long time. It is possible that during this time the system or you yourself managed to save some new data that overwrote the old ones. Therefore, you need to remember important photographs and documents as quickly as possible. If you want to restore files in the evening, then do not put off this process until the morning, when it will be too late. You should also distinguish between data stored in built-in and external memory. The fact is that the operating system rarely writes system information to the memory card. Therefore, it is easier to recover data from it than from the built-in memory. More precisely, there is a higher probability that you will return the necessary files in full.
R.Saver
How to use the application:
Download the program from the link. The product is distributed free of charge and supports all types of drives and layouts. A nice feature is the completely Russian interface.
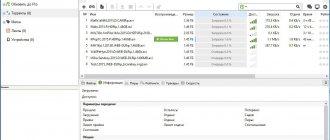
Connect the memory card to the PC and, after detecting it, start scanning. To do this, select the drive and click “Continue”.
It can take a lot of time to restore files after deletion. After scanning is completed, select which of the available data you would like to save (you can “Select All”).
Click “Save As...” and specify to which directory on your hard drive the “saved” photos, videos or documents should be transferred.
Once the data is saved, copy it back to the memory card - or to the phone's internal memory.
Easy way: search for files in Google cloud
The first method of recovering deleted data is suitable for everyone, but it works at random. Try checking Google cloud storage - your data may have been automatically synchronized with them, and a backup copy may have remained in the cloud. Depending on what you are looking for, log in with your Google account username and password to one of the following services:
- mail.google.com - stores copies of your emails (deleted ones may be in the Trash);
- contacts.google.com - stores copies of your contacts from the smartphone’s memory (not from the SIM);
- photos.google.com - stores copies of your photos if you opened them through the Google Photos application;
- play.google.com - stores information about the applications you have installed, as well as music, books, games, movies that you downloaded through Google Play;
- drive.google.com - stores documents and spreadsheets if you opened them with Google Office applications, as well as everything you saved through the Google Drive application.
For the future: To avoid losing your data, get into the habit of archiving it from time to time. To do this, go to takeout.google.com right now, click Create Archive and select what data you want to archive. After completing the procedure, you can download a copy of them from this site and then restore data from it.
You can back up your data at takeout.google.com.
7-Data Recovery Suite
The application is suitable for recovering videos, photos, and other types of information stored on microSD or in the internal memory of a smartphone. The procedure is similar to the one above. There is no need to remember where to find deleted files on Android - download the program, run it and select the item marked in the screenshot.
To enable the program to work with internal memory, enable the “USB Debugging” option. It is located in the “Special Features” section of the smartphone’s system settings. For this section to appear in the general menu, you need to open another one, “About phone”, and tap the “Kernel/Build version” item several times. After that, click “Next” and start scanning.
Basket
Most modern Android smartphones are equipped with a system “Trash”, the functions of which are completely identical to a similar tool on Windows. It's simple: data deleted by the user is first transferred to this section - and only then completely erased from the internal memory.
Important: if this option is activated on your phone, you can get your data back by simply canceling the transfer to the Trash - without the need to download and install special programs for recovering deleted files.
To restore important information in this way, the smartphone owner will need:
- Launch the file manager from the general list of installed applications, with which you can access the internal memory of the phone.
- Typically, the “Cart” section is placed on the main page by developers. Scroll it until the corresponding item is found.
- And finally opening the “Cart”.
- The user will see the recently deleted data.
- To restore them, just long-press the ones you need and call up the drop-down menu at the top right.
- And select the “Restore” option - or one with a similar name.
- After a few seconds, the file manager will notify the owner of the Android phone about the successful completion of the process, and the data will appear in the same directories where it was previously.
Advice: for the future, it is highly recommended to erase potentially important files from the smartphone’s memory, making sure that the “Delete permanently” checkbox is unchecked - otherwise recovery will take much longer.
Connecting a smartphone as flash memory
The method will allow you to return data stored in the gadget’s internal memory. To restore files on your phone, you need to connect it to your PC - like a USB drive. Follow the instructions:
- Using a USB cable (for example, the one included with the charger), connect your smartphone to the port of your computer or laptop.
- Pull down the notification shade. In the list of options you will find a description of the connection method. Tap on the title.
- In the menu that opens, select “USB drive”. It may be called slightly differently - it all depends on the phone model and OS version.
- Using Explorer, look to see if the lost data is located in the internal memory - perhaps the gadget simply does not see it, but the files are stored on the phone, copy them to your hard drive or move them to another directory.
In the same mode, you can start scanning your smartphone with special programs - this usually requires activating USB debugging.
Order data recovery service
How to download photos from Google Photos to the gallery
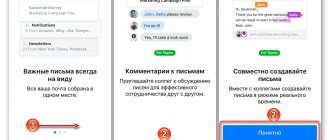
The third way is to download photos from the cloud . Although backup practices are not as common on Android as they are on iOS, Google does have a cloud service for storing photos and videos called Google Photos. It is preinstalled by default on all smartphones running Android, which means it most likely automatically uploads your photos to cloud storage.
- Launch Google Photos on your smartphone;
- Log in with your Google account;
Google Photos stores your photos indefinitely.
- Find the photos you need, if they were saved;
- Select them and download them to your device.
Important clarification: photos that are uploaded to Google Photos are not saved there in their original quality. The service's algorithms compress them a little so that they take up less space. That is, these will still be very high-quality photographs that will be visually indistinguishable from the original, but they will no longer be suitable for processing because they will have a lower resolution. This is done to save space, but if you wish, you can enable uploading of original photos to the cloud.
Mobile applications for data recovery
If you cannot connect your device to your computer, download a mobile program that helps you return files. Most often, such applets do a good job of searching for photos and/or videos. One of the most effective options is DiskDigger. The program is easy to learn, can scan internal and external (connected) memory, and is compatible with almost all phone models and versions of Android. When the scan is completed, select in the new window which images should be recovered - in a few moments they will be in the desired directories.
Please note: the methods listed above will not work if you have flashed the firmware, formatted the memory card, or if the phone has been physically damaged.
Still have questions? Contact the Good Deeds Service - we will conduct a remote consultation and help you return accidentally deleted important files!
Using Wondershare Dr.Fone for Android
Now there are quite a large number of computer programs that, to one degree or another, help restore photos on Android after deletion. One such utility is Wondershare Dr.Fone. Its interface is made in English, but this does not interfere with mastering the program. Its other disadvantage is paid distribution. You can download the free version, but it will only show files that can be recovered, but will not even think about returning them. Be that as it may, it doesn’t hurt to try out the utility. Download and install it, then do the following:
Step 1 . Launch the program. In the pop-up menu that appears, click on the Evaluate button if you do not yet intend to purchase the paid version of the utility.
Step 2 . Connect your smartphone to your computer using a USB cable. It is advisable to use the wire that was included in the kit. But not necessarily. The program should begin recognizing the device.
Step 3 . If the device is recognized, you will be prompted to select the types of files that need to be recovered. Music, pictures, videos, documents, call history, messages and contacts are provided. Once you have decided, click Next.
Step 4 . Leave the checkbox next to Scan for deleted files so that the program does not scan currently existing files. Click Next.
Step 5 . Click the Start button. Please note that the program warns you that the process may take a long time, so the battery level must be at least 20%.
Step 6 . Wait until the scanning and analysis of the device is completed.
Step 7 . The smartphone will prompt you to grant superuser rights to the computer program currently in use. If you do not have SuperSU or another application dedicated to root access installed, then you need to install it.
Step 8 . After granting superuser rights, the program will continue scanning.
Step 9 . After completing this process, you can open the desired tab located on the left side of the window. It will contain files available for recovery.
Step 10 . Select the files you need and click the Recover button.
Step 11 . Buy the program if you haven't already.
Unfortunately, Wondershare Dr.Fone does not work with all smartphones. It should also be noted that the program works on the basis of providing root access - it is provided during scanning and is closed after the necessary files are restored. The trial version will help you understand whether the utility can interact with your device, while the paid version deals with the most important thing - file recovery.
Reasons for data loss
Information from a phone can be lost either due to the fault of the owner or due to circumstances beyond his control. Among the most popular reasons are:
- physical damage to the phone;
- "crooked" update;
- installation of virus software;
- the user accidentally deleted any data;
- loss of a gadget.
Attention! Information from your phone can be restored in any of the listed cases, even when your favorite gadget is simply stolen. But for this, the data needs to be duplicated on some cloud service.
On Windows and macOS
On desktop computers running Windows and macOS, you will need special programs to recover deleted files. The most popular option for Windows is Recuva. But it also has alternatives: DMDE and PhotoRec.
If one program fails, try running a scan with another. It is best to install applications on a different drive than the one on which the deleted files were located, so that it does not accidentally “overwrite” them completely.
Mac owners can use Disk Drill, Prosoft Data Rescue and MiniTool Mac Data Recovery. The first is the most famous and effective, and its free capabilities are quite enough for the average user.
From backup
Make backups regularly, and the problem of accidentally deleted files will disappear for you. The easiest way is to set up file backup to iCloud, Dropbox, Google Drive, OneDrive or other cloud storage. They automatically create a backup version of each file after it is changed and allow you to return a deleted file or restore a damaged one.
If you don’t trust the clouds, enable automatic creation of backups to an external hard drive or NAS using “Backup” in Windows 10 or Time Mashine in macOS.
Find out ✔
- How to make a backup on your computer and smartphone
How to use smartphone apps to recover lost information
How to recover deleted applications on Android
This is a rather complicated way to get back deleted files. To implement this method, the user must have root rights. To get them quickly, you need to download several programs:
- KingRoot;
- KingRoot;
- Towelroot.
Once you have root rights, you will need to download the Undelete application to your smartphone. After launching it, instructions for restoring deleted information will appear on the phone screen.
General view of the Undelete application for recovering lost information