How to take a long screenshot using standard iOS tools
This feature was added in iOS 13, but not all users know about it.
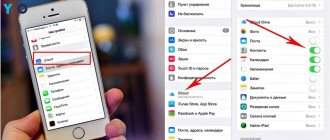
1. Open the desired site in Safari, a long text document or PDF document.
2. Take a screenshot using standard system tools (by holding down the Power and Home keys on an iPhone with Touch ID or Power and Volume+ on an iPhone with Face ID).
3. Click on the screenshot thumbnail in the lower left corner to enter edit mode.
4. Click the Full Page button to take a long screenshot of the entire page or document.
Unfortunately, this way you can get a long screenshot only for websites and documents.
The standard way to take a screenshot on an iPhone
Select the image that you would like to “screen” and simultaneously press the “ Home ” (located in the center below the screen) and “ Power” (located on the top edge of the case) buttons. Then release them immediately.
You will hear a characteristic sound comparable to the shutter release on a camera. The screenshot on the iPhone will be saved in the standard Photos application and you can find it last in the gallery in the queue. Image format – png .
Pay attention to the following aspects:
- Do not hold down the Home and Power buttons, otherwise you risk hard rebooting your smartphone.
- By taking a screenshot this way, you are photographing the entire screen, not just any part of it. If you need to “remove” part of the screen, it is better to use a special utility or built-in photo editor.
The described method of creating screenshots is relevant for all iPhone models, except the very first one, as well as for iPad and iPod.
Software Alternatives
If the universal method seems inconvenient to you or one of the buttons on the device does not work, you can take a screenshot in other ways: using the operating system tool - AssistiveTouch, or third-party applications.
How to take a screenshot using AssistiveTouch
AssistiveTouch is a standard iOS feature designed to control your device using gestures. By default it is inactive.
To enable AssistiveTouch, go to the settings of your iPhone or iPad, open the “General” section and then “Universal Access”. Near the “AssistiveTouch” item (in the “Physiology and Motor Skills” section) o.
When you do this, a floating AssistiveTouch button will appear on the display (you can place it anywhere on the screen and move it freely around it). Tapping this button opens a menu of available actions, including the “Take screenshot” command.
Awesome Screenshot
Awesome Screenshot is a free extension for the Safari mobile web browser. With its help, you can take pictures of the entire page of a website opened in the browser or only its visible part.
After installation, the program icon will not appear on the desktop - it will be hidden in the “Actions” section of the Safari browser. To activate the screenshot function, go to the specified section and move the “Screenshot” slider to the “On” position.
As soon as the photo is ready, it will immediately go to the mini-editor built into the program. With this editor you can crop the edges of the image, mark the desired places with arrows and add text inscriptions to the picture.
Awesome Screenshot is officially supported by devices that run iOS 8: iPhone 4s, iPhone 5, iPhone 5s, iPad, iPad Air and Air2, iPad mini, iPod Touch and others. Support for iOS 9, 10 and earlier versions is not declared by the manufacturer.
Activator from Cydia (for jailbroken iPhones)
Activator is another free app, or rather a tweak for a jailbroken iPhone that allows you to take screenshots without a lock button. Or rather, creating screenshots is not its main function: it simply gives the user the opportunity to assign this action, for example, to the “Home” button. And when “photographing” the screen, press only it. By the way, instead of buttons, it is permissible to assign this operation to a gesture (swiping a finger across the screen, pinching, stretching, etc.) or movement (shaking the phone).
Activator officially supports iOS 9 (iPhone 6s) and earlier system releases. Support for iOS 10 has not yet been announced, but will likely be implemented in the near future.
Where are the screenshots stored?
When a user saves a screenshot, the resulting photo is saved on the smartphone. Therefore, screenshots are available to the user at any time. They can be viewed, edited or forwarded to friends.
To access saved images, you need to select “Photos” in the standard menu, and then go to “Screenshots”. The icon of this application is located on the main screen. If a large number of pictures were taken, then you can easily find the ones you need among them.
To do this you need to open the folder. Which stores images and organizes them by date. Knowing when the corresponding image was created makes it easy to find the one you need. The most recently added photo can be found at the bottom of the list.
This video talks about taking screenshots on iPhone 11 and earlier models
What if you only need to photograph part of the screen?
In such a situation, there is a way out: you can take a screenshot of the entire screen and then crop it using the built-in photo editor. This is done like this:
Step 1. Find the photo you want in the photo gallery. This one is a good example:
Step 2 . Click the "Edit" button in the top right corner.
This will take you to the photo editor mode.
Step 3 . In photo editor mode, select the last tool in the bottom panel. Unfortunately, it will not be possible to illustrate this process - the iPhone will not “screen” the photo editor options.
Step 4 . Crop the image and click “Save” - the corrected image will appear in the gallery. From the original picture, following our example, this is what we got:
Screenshot using third-party programs
How to take a screenshot on iPhone using third-party services? It’s very simple: just select a suitable application in the AppStore, install it on your Apple phablet and use it for your pleasure. iPhone owners themselves highlight 2 advanced software that are worthy of attention. It is worth telling about them in more detail.
Screenshot – Frame Maker
A free application that allows you to take pictures of the entire screen or just the active working window of your smartphone. The finished screenshot is saved in a folder pre-selected for it, and in three formats at once. This variety is convenient, because the screenshot taken can be viewed on other devices.
The main advantages of the program:
- it is possible to activate automatic mode, which takes screenshots every 15 seconds;
- The assortment includes a large number of frames for the finished picture (they can also be used to frame screenshots made through other programs).
Read more information about iPhone in the article: How to create an Apple ID: 3 proven methods
Awesome Screenshot
This free software is an extension of the Safari browser. The program offers many interesting features:
- screenshots of the entire display or a separate, selected area;
- quick processing of the resulting image (applying arrows, replacing colors, “fog” in certain areas of the image, etc.);
- allows you to go back a few steps if something was done wrong while editing.
All pictures received through this program are saved in the “Gallery”.
Important ! With Awesome Screenshot, only screenshots of pages opened through the Safari browser are taken.
If your iPhone doesn't respond to buttons. What to do?
If your iPhone's hardware buttons are malfunctioning for some reason, and you simply don't have the time or money to quickly fix the problem, you can use one of several additional solutions.
- Configure the use of the AssistiveTouch virtual button.
- Use tapping on the back of the smartphone to take a screenshot (for more modern iPhone models).
- Install the additional application Awesome Screenshot.
Awesome Screenshot is an application that allows you to work with the Apple Safari browser; its installation and further use will not require financial investments, it is absolutely free.
To use this option, you will need to download the Awesome Screenshot app through the AppStore and install it.
Then go to the Safari browser, in the “Actions” category, find the Screenshot section and move the checkbox to the active position.
Checking iPhone for originality - three main ways
The Awesome Screenshot application allows you to create “long screenshots”, and also has built-in functionality for editing a screenshot of the screen, allowing you to change the borders of the picture, add simple graphics to it, or add text explanations.
Screenshot on the new iPhone X
The iPhone X (as well as XS and XR) did not receive a Home button, which was previously always located below the device’s screen. In this regard, many key combinations have changed in these models. In particular, the key combination for taking screenshots has also changed.
If you are one of the described iPhone models, then in order to take a screenshot you need to simultaneously press the side button, which is located on the right side of the device, and the volume up button, which is located on the left side of the device. After pressing both buttons, you must immediately release them.
After pressing these keys, a screenshot will be captured and saved to the Photos application.
How to take a screenshot using the Home button on iPhone?
The Home button is located in the middle of the bottom of the screen and is the main button for controlling the smartphone.
In order to use it to take a screenshot of the iPhone screen, you need to:
- Briefly press the “Home” key;
- simultaneously press the on/off button of the mobile device located on the right side or upper edge of the device.
If everything is done correctly, a corresponding click will be heard, simulating a camera shutter release. When the sound is turned off, you can track the completion of the task using the screen - it will turn white for a moment, simulating a camera flash. The resulting thumbnail will be in the lower left part of the screen for 5 seconds.
Double tap function for screenshots
Now a little about an interesting feature of the new iPhone models, which few people know about. Double “tapping” on the back cover of the smartphone can carry out the task of taking a screenshot.
Let's activate this feature ⇒
- Go to “Settings” ⇒ “Universal Access”.
- Select the “Touch” item, the same one that was used when setting up AssistiveTouch.
- At the very bottom we find the line “Touch from behind” and set the “Screenshot” action to double or triple tap (at your discretion) on the back cover of the phone.
- All is ready. The function can be used.
How to share a screenshot with a friend?
In order to send a screenshot of the screen to another user, you need to open the image and click on the “Share” icon located in the upper right corner. The operating system will offer to use installed social networking applications, instant messengers or built-in AirDrop file transfer technology.
The same manipulations will allow you to send the required thumbnail directly from the editing mode.
Please leave your opinions on the current topic of the article. We are extremely grateful to you for your comments, subscriptions, responses, dislikes, likes!
Vitaly Cherkasovaauthor
Take a screenshot of your iPhone or part of an image using ScreenCapture
By downloading the ScreenCapture program, you can get useful functions for creating a quick screenshot of your iPhone or part of any photo open on the device. Also, there are options for cropping, rotating and quickly sending to social network accounts on your smartphone. In some cases, when you need to take a screenshot of some screen elements, using this program will be the most optimal solution. The application works on devices with iOS later than version 7.0 .
- To download this application, you can follow the link:
from iTunes
Taking a Screenshot on iPhone 11, 11 Pro, 11 Pro Max, XS, XS Max, XR and X
Modern frameless iPhones lack a physical Home button, so for the iPhone 11 and other modern models, Apple developers came up with a new key combination. To capture a screenshot, press and immediately release the Lock key and Volume Up button at the same time.
Otherwise, the process of taking a screenshot on frameless iPhones is no different from that on older models. First, a click will sound and the display will turn white for a split second. A thumbnail of the captured screenshot will then appear in the lower left corner. You can edit it immediately or save the image without changes. To view a photo, open the Photos app and go to one of the sections: All Photos or Screenshots.
How to take a screenshot using AssistiveTouch
AssistiveTouch is a special iOS feature that, when activated, will display a touch-sensitive “floating” button on the screen. By pressing this button, a menu will open, consisting of one or more (by default 6, maximum items. You can add different options to the menu: launch Apple Pay, call Siri, adjust the volume, and also capture an image from the screen.
To enable AssistiveTouch, go to Settings, go to the General section and open the Accessibility subsection. Then select "AssistiveTouch" and activate the top toggle switch.
A translucent touch button will immediately appear on the screen. It can be moved to any point on the display bordering the edge of the screen. Clicking on the button will open a menu consisting of 6 items, but by default there will not be a “Screenshot” option among them. To add this item to the menu, open the “Top Level Menu...” and add another slot, or click on the unnecessary option icon and replace it with “Screenshot”.
Now, to take a screenshot, just touch AssistiveTouch and click on the “Screenshot” icon.
Also, if you wish, you can assign the creation of a screenshot to a double tap or long press of AssistiveTouch.
How to edit a screenshot
You can change a screenshot not only before saving, but also after, and there are much more software options for post-production in iOS.
To edit a screenshot, open it in the Photo program and click on the Edit button. You are taken to the built-in editor, with which you can crop and rotate the image, add one of the available filters, and adjust brightness, contrast and other parameters.
And if you want to finish drawing, add text, a magnifying glass or a frame, click on the three dots in the lower right corner and select “Markup”. Another editor will open, in which all the above functions will be available.