What tools are needed for installation?
Before work, prepare the necessary tools and check their availability according to the list:
- Impact drill or hammer drill.
- Screwdrivers and wrenches.
- Pliers.
- Compass (you can download the application to your phone).
- Insulating tape.
- Wiring sealant.
- Open-end wrench 10.
- Knife.
- Ties.
- 13mm head screws, 6 - 8 cm long;
- Metal washers (diameter 30-50 mm).
To secure the structure to a wooden wall, use a plumber's screw (capercaillie). If the base is brick or concrete - anchor bolts 10 by 100 mm.
To connect the dish to the indoor receiver, a cable with a copper core and double braid is used. Its length should not exceed 100 meters. If the size is larger, you will have to install amplifiers.
How to choose a place to install the antenna?
Example of antenna location in a multi-story building
To receive the best quality signal, choose a location for the antenna according to the following criteria:
- Open area without interference. The optimal distance from all buildings is 100 meters. Must be absent: towers, trees with dense crowns, high-rise buildings.
- The highest point available: wall or roof.
- The outer side of the wall. It cannot be installed inside a balcony or attic: the signal will be distorted.
- Heading south. The satellite is located above the equator, so this position provides high-quality broadcasting.
- Protection against drains and heavy snow falling from the roof of the house. It is also worth checking whether eaves and other roof elements are falling.
- The closer the antenna is to the TV, the easier it is to configure it.
Receiver
No matter how good the dish is, you won’t be able to watch satellite TV without a receiver. A digital set-top box is a device that decrypts an encrypted signal. It is thanks to the tuner that sound and image appear on TV. Different countries have adopted their own standards for satellite broadcasting. In the Russian Federation, as in most European countries, the DVB-S standard or its more modern modification DVB-S2 is used.
Today, manufacturers offer a range of receivers. It is impossible to say unequivocally which equipment is the best - it all depends on the requirements of the subscriber and the operating conditions of the tuner. For some, the most budget model will be enough, others will prefer a set-top box that produces UHD images (provided that the TV supports this function).
But there are still basic requirements for the device:
- Clock frequency is not lower than 400 Hz.
- The RAM sampling rate is more than 256 MB.
- Supports HD image quality.
- Possibility of retransmission.
It is better to give preference to devices that support combined settings of several broadcasting standards. For example, cable and satellite television, cable and terrestrial TV, terrestrial and satellite broadcasting.
The Tricolor TV provider has identified a number of receivers that have proven themselves well among users.
GS E502. Device characteristics:
- built-in memory 500 GB, allowing you to record during broadcast;
- connection to a Wi-Fi network, which gives the user the opportunity to watch broadcast channels from any gadget;
- 2 USB ports, HDMI ports and
- two tuners.
The cost of pleasure is from 12,000 to 14,000 rubles.
GS E521. The characteristics are not much different from the previous receiver. The only negative is that there is no internal memory. But the recording problem is solved by connecting an external drive. But the price is two times lower.
GS B522. An excellent option for little money. Description:
- provides Full HD resolution;
- has two tuners;
- supports additional operator services, for example “Tricolor TV Cinemas”;
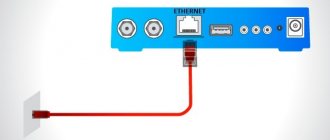
- equipped with HDMI, Ethernet and USB ports.
Price 5000-6000 rubles.
GS B532M. An upgraded version of the set-top box with 8 GB internal memory. The compact black device has the most complete protection against hacking, two tuners, ports for connecting Ethernet, USB, HDMI. It costs the same as the previous model.
How to assemble an antenna?
Be sure to keep nearby the instructions for assembling the satellite dish that comes with the equipment.
The antenna design consists of the following elements:
- Bracket - needed to hold the mirror. With its help, the antenna is attached to a wall, mast or roof.
- The mirror is the plate that is located on the bracket. It collects the received signal in one place.
- The coaxial cable that carries the signal to the receiver.
- The convector is fixed on a special holder. The wire connector should be located at the bottom to prevent water from collecting.
The actual assembly takes a little time:
An example of satellite dish assembly
- Mark the area where the antenna will be mounted.
- Secure the bracket.
- Use a hole in the concrete base to make holes for the anchor bolts.
- Place the converter into the holder and connect the cable using the F-connector:
- Secure the cable to the arc with zip ties or electrical tape.
- Seal the F-connector with two layers of electrical tape and apply one coat of sealant.
- Do not overtighten all the bolts to correct the position of the antenna when adjusting. At the end of installation, you will need to securely fasten the plate so that the position remains the same even during strong winds.
Quick installation and configuration of a satellite dish with your own hands.
Today we will learn how to quickly set up a satellite dish. We will tune it to the EUTELSAT 36A/B 36°E satellite. NTV Plus, Tricolor TV, Lebed are located there. But we are more interested in NTV Plus and Tricolor TV.
For this we need the antenna itself
with fasteners
And tools:
- Several anchors 6 mm in diameter and 6 cm long, or you can take 8 * 8;
- Keys;
- Stationery knife;
- Wire cutters or pliers.
- We will also need a hammer drill to drill holes in the wall.
At home or somewhere convenient, you first need to assemble the antenna, i.e. Immediately fasten the rod that holds the converter, fasten the converter itself, all the fastenings and assemble the stand. We will mount it on the wall.
Before installing the mount on the wall, you need to decide on the place where we will actually mount it. The place should be free, there should be no trees or any additional wires around.
The fastening pipe must be attached to the wall so that it is as vertical as possible; you can measure it by level.
We place the pipe where we need it, use something like a screwdriver or a marker to make marks on the wall in the holes.
Then we remove the pipe and drill holes in the wall.
We install our mount on the wall, putting it on the 3 anchors already inserted in advance.
We carefully secure it all with anchor nuts.
Then we take the antenna in our hands, slightly loosening the mount on it, and put it on the pipe, securing it so that the structure holds well, but can move a little to the right/left.
To configure any satellite, arbitrary, there are a bunch of programs on Android and other platforms, as well as for computers.
For example, you can install the SatFinder program on an Android phone
The program determines our coordinates and shows the satellite settings.
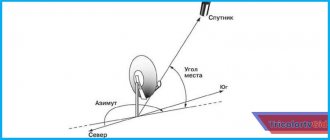
We are interested in the azimuth and elevation lines (elevation is the geographic direction in which the antenna should be turned).
LNB tilt – angle of rotation of the converter, i.e. the angle at which the converter should be rotated as much as possible for better signal reception.
In addition to this, we are interested in another program on Android - Clinomet.
This is a program that allows you to find out the tilt angle of your phone.
There are many more similar programs, not on Android, that allow you to measure the angle of inclination; you can use any available one.
When installing the antenna, you should first look around, perhaps there are clues around - other already installed NTV Plus or Tricolor TV antennas that will help us determine which direction it should be turned.
If there are any, you can approach another antenna that is already installed and configured.
They all have the same design.
The bar that holds the converter should be at the same angle for everyone.
In order to measure what the angle of inclination of this bar should be, we lean the phone against it, having turned on the necessary program in advance, and we see the angle of inclination of 64 degrees.
The next steps are to get your bearings and figure out where the antenna is geographically directed. To do this, you need to approach the antenna from behind, strictly in the center, and look in front of you. It is necessary to find some landmark in the distance, to which we will direct our antenna during installation.
After which we return to our antenna and repeat the procedure, i.e. measure the angle of inclination of the bar. It, as we determined, should be 64 degrees. Then we stand behind our antenna strictly in the center, find our landmark in the distance and point the antenna exactly at it. And here he is:
Then we screw the antenna cable to the converter.
Do not forget that you can only tighten the cable when it is not connected to the receiver or the receiver is turned off. Otherwise, there is a chance that the receiver will burn out.
How to adjust the antenna?
Adjusting the satellite dish is necessary to select the best position in which the maximum number of TV channels will be received.
Antenna adjustment example
For adjustment, the angle of the horizontal plane is calculated - the azimuth and the vertical angle - directly the angle of inclination of the plate.
Table of azimuth and inclination angle for Russian cities:
Carry out work only in good weather!
Snowfall, strong wind or rain will not allow you to properly adjust the signal.
Additional Information
At the end of the presented material, it is worth giving a number of tips that will simplify the installation of the equipment set:
- Do I need a special device to set up satellite dishes? The answer is no, because there is no need for it. The presence of such a device will simplify the process of searching for a satellite signal.
- To configure the equipment, you will need the azimuth and elevation angle where the antenna will be installed.
The installation process of Tricolor TV equipment does not present any difficulties even for people without experience in this matter. You should follow the instructions and prepare in advance for the event.
Installation of a television connector
To connect the TV connector to the converter, repeat the following steps:
- Strip the top layer of the cable. It is enough to process 15 mm.
- Unfold the braid along the wire.
- Turn out the foil that is on top of the cover.
- Remove 1 centimeter of conductor insulation.
- Install the prepared cable into the F-connector.
- Leave the protruding part of the central conductor no more than two millimeters long, and cut off the rest.
- Seal the area to be treated using heat shrink tubing or two layers of electrical tape. Cover it with silicone sealant.
- Secure the cable with plastic ties.
- Connect the other end of the wire to the receiving device.
How to connect the receiver to the TV?
First way:
Using a high frequency antenna cable. Connect to the antenna socket on your TV. After turning on the device, “Boot” and a channel marker will appear.
If, when you click on channel search, information about the absence of a signal appears, this indicates normal operation of the receiver.
Second way:
Using a low frequency cable with a connector. After connecting and turning on the equipment, “Boot” will be displayed on the screen.
Press the "A/B" key on the remote control. The phrase “No Signal” should appear.
How to adjust the signal level after installing the antenna?
To adjust the signal level, simultaneously change the position of the antenna and monitor the signal quality scale on the TV.
For this work, it is better to call another person to help.
- Open the menu and go to the “Antenna installation” section, pin code - “0000”. (or press the “f1” button twice, or “i” for new receivers). One scale in the table is responsible for quality, and the second for signal.
- The antenna adjustment must be continued until both scales are filled to 70% or more.
- Turn the antennas to the east strictly in a horizontal plane. 1 step - 1 centimeter. Fix each position for 3-5 seconds so that the plate has time to catch the signal.
- After setting up, secure all connections tightly to the antenna so that it does not move even in strong winds.
Receiver registration
You can register a new Tricolor subscriber in 3 ways:
- Independently on the official website tricolor.tv.
- Via the hotline with the help of the provider's employees.
- At the place of purchase of receiving equipment or at the company office.
During registration you must provide the following information:
- Personal data (series, passport number and contact information).
- Receiver model (located on the back of the device).
- Unique ID number (written in the subscription agreement and in the receiver menu).
How to set up the receiver?
- Connect the receiver to your TV. The process depends on the device model, so carefully read the instructions that come with the kit.
- Specify the time, language and operator (Tricolor.Center for the European part and Tricolor.Siberia for other regions).
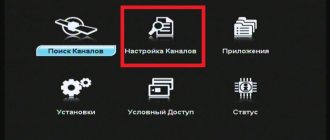
- The set-top box will automatically start searching for channels. When finished, edit the list and save it. If not all sources were found, then perform manual tuning using frequencies.
- Scrambled channels will show "Error 9". To open access to the broadcast, connect the desired tariff.
- If the setup occurred with errors, then reset the receiver to factory settings and start again.
Why Tricolor TV
Using Tricolor satellite equipment, you will have access to over 200 channels, of which up to 30 in HD and 4 channels in 4K Ultra HD. Discover a world of entertainment for yourself and your family today!
And also this:
- Sports channels with live broadcasts of matches, family, adult, children's TV channels, TV series, foreign and domestic cinema, entertaining TV shows and educational programs.
- The ability to watch your favorite channels not only on TV, but also on mobile devices - tablet computers, smartphones, and other gadgets that support high-quality video broadcasting.
- Games on the GS GAMEKIT console with Full HD resolution are maximum fun for both children and adults.
Each client of the Russian operator Tricolor TV has already been able to appreciate all the benefits of installing and connecting a set of equipment for satellite television.
