In the iOS system, you can install a special scan that will protect your device from hacking attempts or unauthorized actions. A special Apple ID verification service will block the user from actions that could damage the device or affect important data.
The developers allow all Apple device users to activate ID verification protection. After activating it, at some points you will have to enter the password for your account. This allows you to protect yourself from a number of suspicious transactions.
Operating principle. Difference in operation of authentication and verification
The activated multi-level authentication function perfectly protects your account from hacking and unauthorized entry by other users.
Only the owner of the ID will be able to log in, because the system will require you to enter two types of data:
- Apple ID password;
- A digital code that will be sent to all trusted devices - it is proof of legal authorization.
Example: You decide to log into your iCloud account from any browser or client program. For this action you need to enter your username and password. After authorization, you will not be able to log into your account - you must additionally enter a code that confirms authorized entry.
The required code is displayed on all gadgets linked to an Apple ID. Enter the numbers into the iCloud authentication window to access your profile.
A visual diagram of how the function works is shown in the figure:
Fig. 2 – operating principle of the option
After the first correct entry of the code, entering numbers will no longer be requested after the next software startup. Re-authentication will only be required in a few cases:
- When resetting;
- When you log in again.
Also, the constant introduction of digital codes is mandatory for functions that have an increased degree of security - changing smartphone settings, deleting system parameters, and others.
Let's summarize
Well, now you know what two-step verification and two-factor authentication are and how to enable and manage these options. In addition, you understand the importance of activating these protection mechanisms. You can read more about two-step verification and two-factor authentication in the Support section of the Apple website.
For Apple technology users, it marked the emergence of another excellent service within iCloud - password synchronization using iCloud Keychain. Apple has done everything possible to make this feature easier to set up and use, but our readers still have a lot of questions about this new product.
What can iCloud Keychain do?
iCloud Keychain offers:
- synchronization of logins, passwords and data from Safari forms
- credit card data synchronization
- Wi-Fi password synchronization
Synchronization works on Macs with OS X 10.9, iPhone, iPod touch and iPad with iOS 7.0.3. When you activate Keychain in iCloud, a single cloud storage is created in which ALL your passwords are collected. All of them are simultaneously available from all your devices connected to the same iCloud account.
Please note that on Macs, iCloud Keychain only works with Safari! For users of Chrome, Firefox or Opera, Apple's new feature will be of little use, because there are no plugins that add support for these browsers and there will not be any. In this case, there are no alternatives to Safari on iOS either.
Initial setup of iCloud Keychain on Mac
Let’s say right away that for residents of Ukraine, Belarus and other CIS countries not listed in this list, activating Keychain Access from a Mac is the only way to properly configure this function.
Open your Mac settings, go to the iCloud remote, turn on the “Keychain” checkbox:
The Mac will prompt you to enable a password request for your user account immediately after waking up from sleep mode or removing the screen lock - of course, for additional security purposes. This suggestion can be ignored.
You will then be asked to create a Keychain PIN. By default, this is a four-digit number that you need to remember and enter when connecting each new device to your Keychain:
But this is not necessary either. Pay attention to the "Advanced" button. It opens several options regarding the PIN code:
The first will allow paranoiacs to set a code of any length using any characters, not just numbers. The second will generate the code automatically. The third will allow you to completely abandon the security code. But how will new devices be confirmed in this case? It's very simple - using your other devices.
Once you create or reject a PIN, setup is complete.
The initial setup of Keychain on iOS is similar - go to the “Settings-iCloud” menu and turn on the “Keychain” checkbox, after which you create a PIN. The problem is that you will be forced to enter a mobile phone number, and only Russia is supported from the CIS countries.
Now let's talk about connecting new devices to iCloud Keychain.
Connecting a new iOS device to iCloud Keychain
Go to the “Settings-iCloud” menu mentioned above and select “Keychain Access”:
Agree to enable the feature:
You will definitely need to enter your iCloud account password:
After this, the Keychain will go into activation standby mode.
As we said, when adding a new device to your iCloud Keychain, you have two alternatives:
- enter PIN code
- confirm connection from another device
On your iOS device, you will see a “Verify with code” button, clicking on which you can enter your PIN and immediately activate the function:
The backup option is confirmation from another device. As soon as you try to enable iCloud Keychain on one of your devices, all other gadgets connected to the same iCloud account and the same Keychain will receive notifications:
But this is not just a notification. By clicking on the banner, you will be taken to iCloud settings, where you will be asked to enter your account password as confirmation of consent to add a new device to your Keychain. After entering the password on any of your other devices, the new gadget is considered finally connected, and password synchronization via iCloud Keychain will begin.
Connecting your new Mac to iCloud Keychain
The process is identical to that described in the previous chapter of the review. You go to OS X settings, iCloud remote and turn on Keychain. Enter your iCloud account password.
Entering the PIN code does not require any special explanation:
If you don't want to enter your PIN, your Mac will remain in activation mode:
It’s quite difficult to miss the notification about the need to confirm a new device - in both OS X and iOS it will be visible:
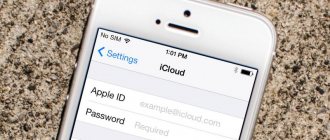
To have access to Apple services, each user must register an account, which is commonly called an Apple ID. Like any other account, this one also consists of a login and password. An email address is used as a login, which users “shine” always and everywhere, so it is not difficult to recognize it. Given the large range of programs for selecting and cracking passwords, it is possible to gain access to Apple ID today. Apple understands this, which is why they offer users the protection that is relevant today - two-step authentication. True, this requires a special code, and many users simply do not know where to enter the Apple ID verification code.
By the way, Apple offers two-step verification for iOS 8 (and earlier) users, and for those luckier (iOS 9 and older), two-step verification. You should still know where to enter the Apple ID verification code, because both methods are similar to each other.
Verification and authentication. What is the difference?
It is important to distinguish between two-step verification
and
two-factor authentication
, since they have similar effects but different meanings.
Examination
was implemented and introduced into Apple gadgets back in 2015. The main purpose of the option is additional control over logging into your Apple ID account. The check is available starting with iOS 9 firmware.
Authentication
- This is an advanced version of the check. Apple has improved the function and introduced new security management systems into it. In particular, working with location. The principle of working with cards is about.
Each person regularly visits the same places, so on the map you can definitely select several points from which you can easily log in.
If the login is made outside these points, a verification code and a warning about the possible actions of an attacker are immediately sent to trusted devices.
As you can see, authentication is indeed a more automated and reliable method of identity control .
The purpose of the verification is to send a code to a trusted gadget, and authentication also analyzes the location of the device and warns the owner of possible danger.
Activating two-step verification
Before activating the option, you must make sure that several conditions are met:
- You have a password set
- You have access to a testing device
- You have a recovery key recorded
If you have lost your password, then to create a new one you will need a recovery key and a device to check. Apple itself cannot reset or change your password.
To use third-party apps in iCloud , such as Mail, Address Book, or Calendar, you'll need passwords.
- Select "Get Started" .
- You will receive a message that activation will take place in three days.
- Click "Done" .
When can I do two-step verification for my Apple ID?
The three-day wait is done so that if someone steals your phone, an attacker decides to do a two-step verification to ensure that you completely lose access to your Apple ID, you will have time to block your device’s SIM card. This way, an attacker will not be able to get to your data.
How to set up two-step verification for Apple ID?
- You will receive an email asking you to activate two-factor verification on your Apple ID so you are aware, especially if you are not the one doing it.
Request to enable Apple ID two-step verification
- In three days, you will receive a message in your email inbox that you can now set up two-factor authentication.
Allowing you to set up Apple ID two-step verification
Feature Requirements
Multi-level authentication is designed for the following gadgets:
- All iPhone and iPad models that run iOS 9 and newer versions of the operating system;
- Computers with OS X El Capitan pre-installed. Since access codes that come to your computer are displayed in iTunes, to display messages correctly, use iTunes version 12.3 and higher;
- iWatch with Watch OS 2 installed;
- Apple TV (tvOS operating system).
Disable authentication
Disabling authentication will prevent you from entering additional access codes. You won't have to confirm your location either. Follow the instructions:
- Using a desktop browser, go to the iCloud.com cloud storage page;
- Log in to the system - enter your username and password;
- Next, enter the access code in the text field that appears , which is shown on other gadgets;
Fig. 4 - entering the verification code
- Press the “Allow” in the window that appears on your mobile device;
- Next, the browser will automatically redirect you to the user page. If the browser is not included in the trusted list, on your mobile gadget, click on “I trust this browser” and click on “Continue” ;
Fig.5 – confirmation of login to account
- After successful login, click on the “Settings” . It is located on the main page of the desktop version of iCloud. Another option for entering settings is to select your username in the upper right corner. Next, in the drop-down list, click on “iCloud Settings” ;
Fig.6 - enabling the settings window
- In the window that appears, click on the “Manage” . It is located next to the account owner's name;
Rice. 7 – advanced profile management
- Next, you will be redirected to the Apple website. In a new window you need to log in by entering your Apple ID username and password;
Fig. 8 – authorization on the official website of the manufacturer
- Go to the account management window and click on the “Security” - “Edit” ;
Fig.9 – changing account configuration
- Find the "Disable Authentication" and select it. Next, confirm the action by entering the password, which will be sent to the trusted device.
Fig. 10 - deactivating the function
The two-step authentication system is designed in such a way as to protect users as much as possible from all possible hacking attempts. That is why, in order to completely disable the option, the developers have provided for the need to answer a block of questions that you specified when registering your Apple ID.
Only after entering the correct answers into the text fields will you be able to deactivate the option.
Fig. 11 – answers to security questions
Confirm disconnection:
Fig. 12 – final confirmation of turning off the option
Trusted devices
A verified device is any of your Apple devices. The only requirement is that all gadgets must be linked to one ID. It is on the basis of this binding that a group of trusted devices is created.
You will not be able to confirm authentication from a device that is not part of your Apple gadgets group.
Only one owner of a smartphone, tablet, or computer can work with two-step authentication.
List of trusted devices
- this is a list of all gadget models to which a digital code will be sent to confirm entry into the Apple ID or program.
You can view this list in the application itself in the Devices tab.
Fig. 13 – viewing the list of trusted devices
Trusted numbers
Trusted numbers are a list of cellular operator numbers to which a digital access code will be sent for authentication. Messages can come not only in text form, but also in the form of a call from an Apple robot.
When you first set up multi-level authentication, you must specify at least one real phone number.
To add a number, you need to enter it in the Apple ID settings field and confirm. As confirmation, enter the code sent to the number in the window that appears.
A SIM card with an associated number must be installed in a trusted device. Otherwise, verification codes will not be received.
Fig. 14 – adding/removing a phone number from a user account
What data do you need to remember?
It is important to remember that two-step authentication is a whole set of actions that are aimed at protecting your data.
For the function to work fully, you will need to remember or write down the following information:
- Account login and password;
- Custom codes for programs are digital access identifiers that you yourself set in your account;
- The main key is a set of letters and numbers that is automatically generated after enabling the option. You will need it if you lose access to all trusted numbers and devices.
Fig. 15 – notification of the received access key
Be sure to screenshot your master key and move it to a folder on your PC or other device. Also, the code can be written down on a flash drive or piece of paper.
Store this data in such a way that no one can find and use the master key.
We also recommend that you update trusted numbers in a timely manner. If you change your SIM card, don't forget to enter the new number into your Apple ID. Otherwise, access to the identifier may be lost.
Monitor the physical security of your devices.
Do not leave your smartphone unattended near strangers and use the fingerprint scanner to restrict unlocking of the gadget.
It is important to protect yourself not only from virtual ID hacking, but also from unauthorized access of other people to your phone/tablet.
Enabling the feature
Activating the feature will only take a few minutes.
As a result, you will receive an additional security factor that will protect data in the device memory, installed programs and in cloud storage.
On iPhone and iPad
Follow the instructions to enable authentication on your iPhone:
1Open your phone settings window;
2Go to the iCloud field;
3Click on the “Password ” item;
Fig. 16 – account settings on iPhone
4Select “Set up 2-factor authentication” ;
5Enter the code that will be sent to your trusted devices and complete the setup. Write the universal key onto physical media.
On Mac OS
On Mac OS, two-step user authentication is only available in El Capitan and newer operating system firmware:
1Go to the system settings window;
2 Click on the iCloud field and start editing account data mode;
3In a new window, click on “Security” . Next, the system will require you to enter the password for the identifier;
Fig. 17 - editing an account using Mac OS
4Click on the “Set up authentication” , which is located at the bottom of the window. Confirm the digital code that will appear on all devices linked to your Apple ID.
Fig. 18 - setting up the function using Mac OS
How to get parameters via SMS text
There are situations when you don’t have a trusted device at hand, and you need to log into your account urgently. In this case, you can request data via message. The “Didn’t receive code” button is selected on the screen. Next, you should press a button that will send the data to a trusted cell phone number. A message with login parameters will be sent to the specified contact. A call can also be made to this number, and the voice assistant will dictate the code characters. All that remains is to enter this data on the device and enter your profile.
Alternative receipt of notifications
You can receive access codes not only from trusted devices , but also from the Find My iPhone service.
You can set this option in the Apple ID settings (Security-Send access codes).
As a result, the verification code will be sent not only to trusted devices, but also to the search service for your iPhone.
Thus, in one window you will be able to monitor login attempts from suspicious locations and view the access code.
This option only works with authentication. It is not possible to work with cards for verification purposes.
Fig. 19 – confirmation of logging in using the Find My iPhone service
Benefits of Multi-Level Authentication
Any Apple ID stores not only information about linked devices, but also credit card data and personal information of users.
Many people store scans of documents and other important information in the cloud, the theft of which can lead to irreversible consequences.
If you want to always be sure that your information is safe, use two-factor authentication. Feature benefits:
- A unified security organization for all Apple gadgets;
- Advanced function control settings;
- Guaranteed protection against all levels and types of hacking.
New bug in iOS: if the system asks for an Apple ID password, the request may be fake
We recommend reading:
Xakep #254. Android: attack and defense
- Contents of the issue
- Subscription to "Hacker"
Developer and creator of fastlane.tools Felix Krause spoke about an unpleasant bug in iOS. Although the feature discovered by the specialist is not an actual vulnerability, he is confident that this problem can cause a lot of harm to users.
In a blog post, the researcher explains that the UIAlertController API allows app developers to create dialog boxes that look like real system password requests from iCloud, iTunes, or GameCenter. It will be almost impossible to notice such a phishing attack, as evidenced by the images below. Phishing password requests are on the right in both cases. It must be admitted that it is hardly possible to recognize a fake.
The researcher claims that attackers are not yet aware of the problem, since no cases of its exploitation have yet been noticed. It is for this reason that Krause decided not to publish the source code that he used to create such believable fakes.
The specialist also talked about how to distinguish a fake password request window from a real one. When users see a request like this, they should click on the Home button. If not only the application, but also the dialog window closes, then you are facing a phishing attack - the real system request should remain on the screen even after pressing Home, since another process is responsible for it. Krause also recommends using two-factor authentication and generally does not advise entering credentials in such pop-up windows; to do this, it is better to go to settings and fill out the required fields there.
Photo: Depositphotos
Disadvantages in the function
Despite all the obvious advantages regarding the security of gadgets, multi-level authentication complicates the life of users - remembering keys, the possibility of losing a number or a trusted device create a number of problems:
- with multi-level authentication . For example, iMobie AnyTrans or the popular PhoneRescue utility;
- Difficulties when logging into iCloud - due to a flaw in the option, users often encounter system errors even after entering the correct access key to the cloud storage;
- Working with a cellular network. If you are in an area with poor coverage, authentication may not work;
- Linking to codes. The verification can only be carried out if you have a second gadget at hand that is linked to the same Apple ID as the first device.
If you don’t currently have a second gadget near you, you can use a permanent key, which is stored in your account settings, but in practice, users very rarely write down or remember it.
What you need to do before buying or selling a used iPhone, iPad or iPod Touch.
Many people encounter problems after purchasing a used iPhone, iPad and iPod due to the fact that the device is tied to the account of the former owner of the device sold to you.
Due to the fact that I get a lot of questions like “I bought a used iPhone, but I can’t delete the former owner’s account to enter my own... help!”, in this article I will tell you how to protect yourself from buying a “brick” that is tied up to someone else’s account (due to which you will not be able to fully use the device).
So, before you say goodbye to your hard-earned money for a used iPhone or iPad, iPod, we need to check the activation lock of the device.
How to reset a forgotten ID password?
If you want to disable authentication, but are still stuck at the password entry stage, you need to reset the password. Follow the instructions:
- In the Apple ID login window, click on the line “Forgot your password” ;
- Next, select the “Reset password” ;
- An active link for setting up a new code word will be sent to the email associated with your account. Check your inbox and follow the link in the email from the sender Apple;
- In the window that appears, enter a new password . To confirm the action, you need to provide a digital authentication password, which will appear on your other Apple devices. After access is restored, disable two-step authentication as described above in the article.
Fig.20 – entering a new ID password
Answers to security questions
If you have successfully completed all the steps to disable authentication, but cannot remember the correct answers to the security questions, follow the instructions:
- Go to the access recovery page at iforgot.apple.com/password/verify/appleid;
- Enter your login - the name of your identifier;
- Click "Continue" ;
- In the new window, select “Reset questions” ;
Fig. 21 – reset security questions of the identifier
- Since your account has two-step verification enabled, you will need to enter a digital code in a new window to confirm the action . You will then be redirected to the page for selecting new questions.
The presence of such a check must be present in the Apple ID and cannot be canceled. In a new window, the system allows the user to select three questions from those proposed from the list. These are standard things, the answer to which only the account owner can know.
The answer must be typed into the text box below each question.
Pay attention to the keyboard layout and case - it is better to write everything in small letters, do not use numbers and special characters.
To disable authentication, you must answer two out of three questions.
Fig. 22 – entering new questions and answers
Recovering your Apple ID password via a Windows computer
There are many ways to recover your password and, depending on your situation, you should choose the best one. The following password recovery methods can be distinguished:
- password reset via two-step recovery;
- by answering security questions;
- using the email address you entered when registering your account.
Recovering your Apple ID password via email on your computer
It is extremely important to maintain access to your email address if you lose your phone. If a fraudster gets it, he will have every chance of finding out your password
Therefore, it is important that the password for your email account is not only different from your password for your Apple account, but also quite complex. To recover your password using email, you need to do the following:
Of course, this is the easiest way to recover your password. But it will be completely impossible if you no longer have access to your mail.
Recovering your password using security questions
When you created your Apple ID account, you were required to answer security questions. These are questions on neutral topics to which you should know the answers. And now with the help of these answers you can recover your password:
- Once again on the account creation and management page, you must click on the “Reset password” line. But this time, choose to restore using the security questions.
- Next, you will need to provide answers. They must completely match those you provided during registration. The very essence of these questions is so that you can easily understand what they are talking about.
- If all answers are given correctly, you will be able to set a new password to replace the forgotten one.
Not everyone succeeds in this recovery method precisely because they do not approach it conscientiously enough during registration. But if you gave intuitive and simple answers to all the questions when creating your account, then restoring it will not be a problem.
In addition, it is worth considering that attackers also sometimes use this method. Usually they will try to find out the answers from you under various pretexts (under the guise of technical support or friends), which means that you should be vigilant and not tell them to anyone.
Two-step confirmation for password recovery
This method is available if you have enabled it in advance in your account settings. You need to do the following:
- On the official website, go to reset your password again and enter your login from your Apple account.
- If two-step verification is available to you, you can select the appropriate option. Then you will need to enter a special recovery key. It was when you activated two-step verification that you were given this key. You should have saved it and used it for recovery now.
- After entering the key correctly, you need to indicate which device should receive the code confirming the password reset.
- You should receive a message with this code. Just enter it in the request and confirm your entry.
- After this, you can enter a new password to replace the old one - you have regained access to your account.
The difficulty with this method is that you must take care of your safety in advance. But hacking using this method is impossible, unless you yourself provide the recovery code to the attacker.
No access to a trusted gadget
If you no longer have access to each of the devices that are included in the "Trusted" , you must use a universal recovery key.
You should have written it down at the stage of enabling two-factor authentication.
The universal key is displayed in your account settings. If you have not logged out of your account, you can view it in the “Settings” - “Security” .
If you managed to log out of your account, Apple support will help you .
Write your appeal with a detailed description of what happened and wait for a response. Link: https://support.apple.com/ru-ru.
Fig. 23 – online user support
Conclusion
I highly recommend using this protection. Regardless of what operating system you have (old or new), use two-step authentication or verification, as this protection negates any efforts of thieves to find out access to your account. Well, if you don’t know where to enter the Apple ID verification code, then there will be no problems with this, because the user interface is so simple that even a child can figure it out.
Two-factor authentication is an additional layer of Apple ID security that ensures only you can access your account, even if someone else knows your password.
The message with the code does not arrive - solution
In most cases, problems with receiving verification codes arise due to isolated failures in the OS. Not receiving a notification with numbers to confirm authentication?
Try sending the code again or restart both devices.
Another case : a message arrived on a trusted device, but it was not displayed in the notification center. Check your inbox, the numbers you need should be there. The sender of the letter is Apple.
As a reset option, you can delete the email chain from Apple and resend the authentication message.
Perhaps the memory allocated for storing one bunch of letters has run out.
The program does not support verification code - what should I do?
Not all programs have a built-in ability to work with verification codes. You can configure this function yourself in your profile.
Log into your account using a browser and set a password for logging into third-party programs yourself.
Costume codes will be known only to you. Use them to log into all services that use your Apple ID profile - iCloud cloud, standard email client, calendar, Notes and other software.
Follow the instructions:
- Sign in to your Apple ID using your browser. Use the address https://appleid.apple.com/#!&page=signin;
- After logging into your account, find the “Security” and click on the “Change” ;
Fig. 24 – ID security settings
- In the new window, click on “Create a password” . Next, select a program or set of applications to which the specified digital code will be applied. Save your settings. Now, when you try to log into the program, you will need to enter the specified numbers.
Resetting AppleID Security Questions
- Log in to appleid.apple.com, and once logged in, go directly to the “Passwords and Security” and click on “Send a security reset by email” .
Resetting Apple ID security settings
- You will receive an email with instructions on how to reset your security settings.
Instructions for resetting Apple ID security settings
- Click the link in the “Performing a reset now” . By the way, it lasts for three hours, so have time to complete the recovery during this time.
- If you have not received such a request and you think that this was done by someone else, go to appleid.apple.com to reset your password.
Resetting your Apple ID password
- Now, after resetting the security questions, select new ones and write answers for them, but do not forget more of them.
Apple ID Security Questions
- Right there, if necessary, you can change your AppleID password. To do this, select “Change password“ .
Change your Apple ID password
- Enter additional email and, if necessary, you can send links to verify your identity or change account information. No other data will be sent to you here.
Backup email Apple ID
- Enter your additional email, indicate your date of birth and click “Save” .
Successfully changing your Apple ID password
Error: “Enable verification will be available later”
If you encounter this system message when trying to activate multi-level authentication, it means that you will not be able to configure the option in the near future.
This only happens in two cases - after you recently changed the password for your Apple ID account or as a result of adding a new security question.
The user cannot change the password and set up verification at the same time, since the Apple system regards these actions as a possible attempt by an attacker to access your account.
The setup error message indicates the date from which you can begin creating multi-level authentication.
A notification of this will be sent to the email associated with the ID.
Fig.25 – error window
Activate "AppleID Two-Step Verification"
- Now go to the “Passwords and Security” tab and answer the verification questions so that you can disable verification if necessary.
Apple ID Password & Security
- Select Continue .
Thanks to two-step verification, your account receives additional protection, which prevents third-party access even if you have a password.
- Select "Get Started" .
Manage Apple ID security settings
If two-factor authentication is enabled, then when performing actions such as changing credentials, logging into iCloud, or paying for an application in iTunes or the App Store from a new device, you will need to verify your identity through a trusted device.
- Enter your AppleID authorization information. A verification code will be sent to one of the devices. Enter it in the special field and confirm that you are included.
- Among other things, a recovery key is provided that you can use so that if you lose your password, you can log back to your account.
- Continue the operation.
Two-Step Apple ID Verification
- If two-step verification is activated, then you can change anything after identification.
- There is no need to write down the questions themselves, since the selection of answers does not work here anyway.
- Only you can reset your password.
- If you lose your password, reset it using the recovery key and the verification gadget.
- Click on "Continue" .
Set up two-step verification for Apple ID