What is the Megafon M150-1 modem
Today the company offers at least three 4G modems. For example, modems such as E392 and M100-1 provide reception speeds of 100 megabits per second, while M150-1 is capable of providing 150 megabits per second.
It is the last modem that we will talk about. It is noteworthy that the price of all three devices is the same regardless of the reception speed.
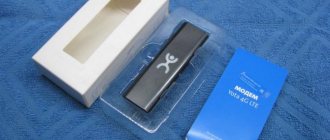
- Modem M150-1 is more compact than others. It is offered in one of two color options – white or black. You can easily find detailed instructions for this device on the operator’s official website.
Thanks to the modem, we can provide ourselves with access to the network where it is convenient for us.
- To start surfing the Internet, we don't even have to configure anything, since all the preliminary settings are already built into the device by default.
- In addition, the very first time you connect the modem, the system itself must install all the necessary software. Well, special glowing indicators will help us track the current operating mode.
- The M150-1 modem was manufactured by Huawei at the request of the operator. It is not yet available in some regions (this is due to the fact that 4G continues to expand, but coverage is not yet available everywhere).
- Users note the excellent speed of the modem and support for memory cards. The device is also offered at a reasonable price.
- The only disadvantage we can note is that even despite its compact size, the modem still remains quite large compared to gadgets commissioned by other operators.
- Among the system requirements, we highlight the presence of a standard USB interface, Windows or Mac OS X, at least 1 gigabyte of RAM and 100 megabytes of free hard disk space, as well as a minimum screen resolution of 800 x 600.
How and where to buy
Megafon SIM card for 4G modem is available to every user! The cards are freely available; you just need to choose the appropriate tariff plan and purchase a plastic carrier. Let's briefly look at the operator's available tariffs?
Your unlimited for 6 months:
- Unlimited traffic;
- Subscription fee for six months – 5,000 rubles.
Your unlimited for 12 months:
- Unlimited traffic;
- The annual subscription fee is 9,000 rubles.
- There is no subscription fee;
- 1 MB of Internet – 2.5 rubles;
- Additional options available: 7 GB/15 GB/30 GB for 500/750/1000 rubles.
You can purchase a Megafon SIM for a modem at the operator’s sales showroom - find a suitable office on the map! Don't forget to take your passport with you and contact a specialist for advice.
There is an alternative option; you can purchase a Megafon SIM card for the modem with delivery:
- Open the official website of the operator and find the desired offer;
- Click on the “Buy SIM” button;
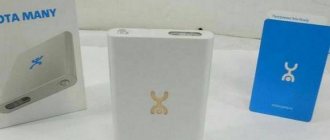
Yota Many
It is very easy to work with this technique:
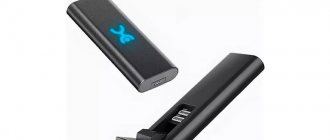
- The battery needs to be fully charged, which will take about a couple of hours. To charge, you need to insert the modem into the USB port of any equipment or simply into the network. This is required before setting up the device.
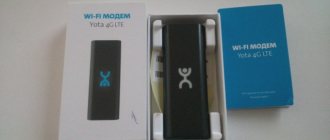
- Next, a connection is made, and an open Wi-Fi network appears, which can be used by subscribers immediately without installing drivers, programs and other settings. For more detailed settings, you need to go to the website of the Yota operator, using the link status.Yota.ru. A window will be displayed in the menu that will offer to encrypt the network. Additionally, you can set other settings.
This is how simply a pocket modem from Yota works.
How to insert a SIM card
After you have managed to remove the product, another question may arise - how to insert a SIM card into the Yota modem in order to use the service again. As in the previous case, you need to act carefully to avoid damaging the card. It is also necessary to install the SIM with a little effort to ensure high-quality contact.
Let's look at how to insert a SIM card into the Yota modem:
- Make sure the SIM is the right size for your existing slot.
- Print the card and find the recess to install it.
- Open the cover and turn the USB plug the right way.
- Install the device. Try to insert the SIM card into the Yota modem all the way, but without excessive force, to ensure quality contact.
As you can see, removing and installing a SIM card into the modem is not difficult. Let us immediately note that models may differ, so you must read the instructions before performing all manipulations. In it, the manufacturer must describe in detail how to remove and insert the SIM card into the Yota router. Most often, the explanation occurs along with pictures, so doing the work yourself is not difficult.
How to connect an Iota modem to a laptop
How to connect a Wi-Fi adapter to a computer - step-by-step instructions
How to connect Iota? The procedure is almost the same for all four types of modem. However, there are a few differences. For example, devices that resemble a USB flash drive can also be connected to a computer; just insert it into a USB port:
- Turn on the device you want to connect to - a personal computer or laptop.
- Insert the modem into any free USB port as a flash drive. A green or blue light should light up on it, which means the device is turned on and ready for use.
- The modem installation window will open. Following the instructions, you need to install the standard drivers for the device specified in its software.
Modem connected to computer
The device is now ready for use. An Internet distribution icon will appear on your personal computer or laptop. The main thing is to remember that the Internet is distributed while the device is in the USB port. As soon as it is removed, the connection is broken.
Note! This type of device is most convenient if there is a need to work or study outside of home. A flash drive modem is convenient to carry with you and use anywhere.
Iota modem that works without connecting to a computer
Other types of devices, Yota Wi-Fi modem or 4G modem, require additional configuration of wireless network parameters and password. To do this you need:
- Go to the official Yota website through any browser.
- If the site does not open without the Internet, then you can enter the modem’s IP address in the search bar. It is indicated on the device under the housing cover or in the attached documents. The connection page will open.
Here the user will see four options for different settings:
- switch mode. Allows you to choose how the device will work: via USB, Wi-Fi distribution or simultaneously in two directions;
- automatic shutdown of devices. Here you can set the period of time after which connected devices (personal computer, laptop, tablet, smartphone) will be turned off if they are inactive. This will help save traffic, especially if you choose a tariff with a monthly limit;
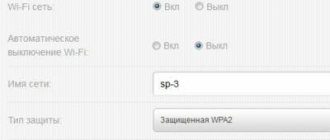
- the name of the device that will be visible when connected. The default is “Yota” or the modem serial number. The user can change it to any other;
- password protection. Here you can set a password for connecting to the network.
After familiarizing yourself with all sections of the settings, you can proceed to setting device parameters for convenient operation. First you need to set a password for the “Iota” Wi-Fi router, 4G: go to the appropriate settings item, set a password or leave the network open, accessible to everyone.
Official website of "Iota"
The next step is to configure the ports, that is, make them open. For modem Yota 4G LTE, as for other devices, the procedure is as follows:
- Enter “10.0.0.1/advanced” into the address bar of any browser.
- Configure the following parameters for ports: external - public, internal - private.
- Select the data transfer protocol: UDP or TCP or UDP, TCP.
- Enter the device's IP address.
Now all the settings are registered, the device is ready to work with a personal computer, laptop or other devices.
Do I need to install drivers and applications or not?
The drivers required for operation are specified in the software of the modem itself. During the installation process, they are automatically installed on a personal computer or laptop, so the user does not have to do anything additional.
Important! If the modem does not offer automatic installation of drivers, you can download them from the Internet by entering the device name. Next, open and follow the installation instructions.
Installing drivers
The installation process is completed by rebooting the modem and computer. Now your Internet connection will be stable and work without interruptions or loss of speed.
If unexpected errors occurred during installation or the Internet did not appear after a reboot, it is recommended to write to technical support using the feedback form on the website or call the hotline. There are cases when the reason lies in the modem itself, then it can be replaced under warranty if the case is covered under warranty.
Connecting a Yota modem to a Wi-Fi router
The modem can be connected to a router, then the Internet will be distributed via a wireless Wi-Fi network. This is much more convenient, since the laptop ports will be free, and the device will not get in the way.
Modem connected to router
To connect the modem to the router you need to:
| Step #1 | Open the router control panel - enter the request “192.168.1.1” in the search bar of your browser. A page will open where you will need to enter device data, login and password. They are indicated under the cover of the device or in its documents. |
| Step #2 | Select the “Network Management” section, and then “Change adapter settings”. Further:
|
| Step #3 | Reboot your device. |
| Step #4 | Go to settings again, open the “Wireless Networks” section, where:
|
| Step #5 | Complete the setup by clicking “Apply”. |
Note! Not all routers are compatible with Yota modems. The best compatibility is with ZyXEL Keenetic 4G III, TP-Link TL-WR1045ND, D-Link DIR-825/ACF.
USB 4G modem
The technology for setting up and connecting the other devices described above is the same.
To configure you need:
- Install equipment into the port.
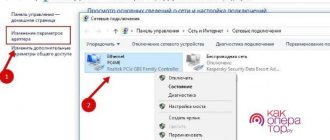
- Go to the Network and Sharing Center, where the new connection should appear.
- Next, you need to open your browser, where you will be automatically directed to the official Yota page. On it, the client needs to fill out a registration form.
- At this point the setup is complete, you can use the Internet.
As for the connection, it starts automatically when the device is inserted into the port. In this case, a small window will appear on the monitor on the right, notifying the user that operation is normal.
In some cases, automatic startup does not work. To do this, you need to connect manually.
- In the “My Computer” folder you need to find the disk image, go to the folder and click on the “Autoinstall” file.
- Then a window will open where you need to select a language and click on the software installation button.
- When the installation is complete, the modem will be detected and ready to use.
Yota modems work with different modern operating systems. If you can’t install and configure the device yourself, you can use the help of a company specialist.
Unlocking the modem
But the most necessary step to continue setting up our provider’s SIM card in “foreign” modems is to support third-party networks. Many mobile operators sell devices that are “locked” to work with only one SIM card.
Unlocking 3G-LTE modems is a rather responsible procedure and requires certain skills.
Example of unlocking Huawei E3272 LTE modem using AT commands:
In addition, the first thing you need to do is find and install the Huawei Modem Terminal program for yota. Connect the modem to the computer but launch the program and select “HUAWEI Mobile Connect - 3G PC UI Interface”. Next, click Connect Commands to unlock the modem from the operator: AT^CARDUNLOCK=”nck md5 hash” — Reset attempts to 10 AT^CARDLOCK=”nck code” — Unlock AT^CARDLOCK? — Check the blocking and the number of attempts in response, the modem will respond: CARDLOCK: A,B,0 A - 2—unlocked, A-1 -locked B -5 (number of remaining unlock attempts. Maximum 10) Configuration using AT commands: AT^ SETPORT=»A1,A2;10,12,16,A1,A2″ — Default configuration AT^SETPORT=»A1,A2;10,12,16,A2″ — Default configuration but you should disable CD AT^SETPORT= "A1,A2;10,12,16" - Default configuration and disable CD + SD AT^SETPORT="A1,A2;10,12" - Default configuration, although you still need to disable NDIS + CD + SD AT^SETPORT =»A1;10,12,13,14,16,A1,A2″ — Includes: all COM ports + NDIS + CD + SD AT^SETPORT=»A1;10,12,13,14″ — Includes: all COM ports, disables: NDIS + CD + SD AT^SETPORT=»A1;10,12,13,14,16″ — Enables: all COM ports + NDIS, disables: CD + SD AT^SETPORT=»A1;10,12 ,13,14,A2″ - Includes: all COM ports + SD, disables: NDIS + CD
Modem firmware
For each device model, you only need to select its alternative firmware, which will allow you to work with any networks, without exception, according to the technical characteristics of the modem.
If we fully describe the firmware procedure for each model, then this is quite a troublesome task. Although we recommend the website 4PDA . Although we remind you that you must go to the page 4pda.ru/forum/ and select the theme of your modem model. After reading and studying it, you will be able to quickly find all the necessary firmware and manuals for unlocking the device.