Multimedia devices MAG 245 and 250 are designed for playing Rostelecom digital television. These models have built-in Wi-Fi modules and several USB connectors, which makes it possible to connect external media and other equipment. In this article you will find information about the set-top box, its indicators and ports, and also learn how to connect, install and configure the parameters of this device.
MAG 245/250 with Rostelecom firmware
As already mentioned, using the MAG 245/250 set-top box, the user gets the opportunity to watch digital television from Rostelecom. All functions of the device are controlled through the screen menu using the remote control. Thanks to the firmware, the player can be adjusted to any provider. Before you start using set-top boxes, you must install and connect the presented devices. Read on to find out how to do this. The set-top box provided by Rostelecom does not require meticulous configuration, since all the basic configurations for IPTV operation are already installed by the provider. The user will only need to connect the necessary cables and install the set-top box.
The main connectors of the set-top box
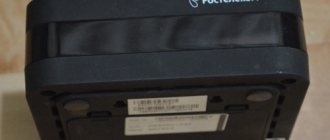
The front panel of the set-top box is equipped with an equipment status indicator, one USB port for connecting devices and an infrared signal receiver for the remote control.
The back panel of the set-top box has more functions than the front. It contains connectors for:
- power supply (12V); composite audio/video (3.5 mm); digital audio/video (HDMI);
- Internet (Ethernet 10/100).
Firmware for TV set-top box MAG 250
TV set-top boxes are one of the few available means of expanding the functionality of outdated and many modern televisions, as well as monitors. One of the most popular such products can be considered the MAG-250 TV Box from the manufacturer Infomir. Let's figure out how to equip the set-top box with a new firmware version and bring a non-working device back to life.
The main function of MAG-250 is to provide the ability to watch IP-TV channels on any TV or monitor with an HDMI interface. Depending on the firmware version, this option and additional functionality can be performed by the set-top box in different ways.
Therefore, below are options for installing both official versions of the software and software shells modified by third-party developers.
All responsibility for the results of manipulations with the TV-Box software lies solely with the user! The resource administration is not responsible for possible negative consequences of following the instructions below.
Features of consoles
Digital television is supplied based on technical solutions from SmartLabs. This is a leading manufacturer of equipment for interactive TV in our country. The consoles have a good reputation. They are bought in many countries around the world under different brands.
Today there are about a dozen models of the Rostelecom set-top box. The company reserves the right to decide what equipment to use in different regions of the country. Usually clients don't have to choose. But that's not scary. No matter where you live, ITV will work consistently. The only condition for this is good bandwidth and a stable Internet connection.
Modern Rostelecom iptv set-top boxes are high-performance devices with which customers have the opportunity to use all the latest developments in the field of interactive TV.
As a rule, the company supplies equipment from the STB Mini series. Four models are current: SML-5010, SML-5050, SML-5041, SML-5010CT.
There are other SmartLabs devices on the market under the Rostelecom brand. They were produced earlier and are still actively used in many Russian homes. In some regions, these slightly outdated but still functional set-top boxes are being delivered to customers. Some of them: SML-482 HD, SML-282 HD Base, SML-292 HD Premium.
Expert opinion
Telekom Telekomych
Telecommunications expert and just a nice guy
It is better to avoid the following models: Infomir MAG-250, Infomir MAG-200, IPTV RT STB HD Standart, IPTV HD 101 (103), Yuxing YX-6916A, Motorolla VIP1003. They are hopelessly outdated. The technical characteristics of the “old guys” are not good enough to “pull” modern content and services.
The main connectors of the set-top box
The front panel of the set-top box is equipped with an equipment status indicator, one USB port for connecting devices and an infrared signal receiver for the remote control.
The back panel of the set-top box has more functions than the front. It contains connectors for:
- power supply (12V);
- composite audio/video (3.5 mm);
- digital audio/video (HDMI);
- Internet (Ethernet 10/100).
Comparison table of technical characteristics for some models
| Model | CPU | RAM | Flash memory | Dimensions, mm | Weight, g. |
| SML-5010 | Broadcom BCM7230 | DDR3 512 MB | 256 MB | 110x107x33 | 130 |
| SML-5050 | Quad-Core ARM Cortex A7 @ 1.5GHz | DDR3 512 MB | NAND 256 MB | 110x107x33 | 130 |
| SML-5041 | 64-bit Quad-core ARM Cortex-A53 with a frequency of 2.0GHz | DDR3 2GB | eMMC 8GB | 110x107x33 | 130 |
| SML-5010CT | Broadcom BCM7230 | DDR3 512 MB | 256 MB | 110x107x33 | 130 |
| SML-482 HD | BCM7230750MHz dual-core | DDR3 512 MB | 256 MB | 100x100x32 | 140 |
| SML-282 HD Base | STi7105 | 256 MB | 128 MB | 150x150x55 | 470 |
| SML-292 HD Premium | STi7105 | 256 MB | 128 MB | 150x150x55 | 470 |
| Infomir MAG-250 | STi7105 | 256 MB | 256 MB | 125x86x28 | 156 |
| IPTV RT STB HD Standard | STi7105 | 256 MB | 256 MB | 125x86x28 | 156 |
| Yuxing YX-6916A | Broadcom BCM7413(800Mhz) | 512 MB DDR | 200x160x38 | ||
| Motorola VIP1003 | STi705 | 256 MB | 64 MB | 160x130x35 | 300 |
Connection instructions MAG 250
The MAG 245/250 device package includes: set-top box, power supply, RCA 3.5 audio/video cable, remote control, two batteries and instructions.
Since Rostelecom has already taken care of setting up the basic parameters of the MAG 245 and 250 set-top boxes, you only need to connect all the necessary cables. To do this, do the following:
- TV set-top box Rostelecom for TV, set-top box firmware
- connect the power supply and Ethernet cable to the corresponding ports on the rear panel of the set-top box;
- Now you need to select the connection method to the TV: HDMI or RCA 3.5.
An HDMI connection is the best choice, as it transmits high-quality 1080p images and also provides clear sound. Connecting via an RCA 3.5 cable is in many ways inferior to HDMI in image and sound quality, so it is only relevant if there is no HDMI cable or the required connector on the equipment. When choosing HDMI, you must purchase a connection cable in advance. If you select RCA 3.5, the required cable is already included in the kit.
For proper and long-term operation of the set-top box, you should follow some recommendations for installing and operating the device. The equipment should not be installed on slippery surfaces or in places where there may be vibration or a risk of falling. After removing the device from the box, do not shake it, as this may adversely affect the operation of the internal components. The device should not be installed on a soft surface (carpet or sofa), as this will prevent ventilation of the equipment and may lead to overheating. Also, do not place the attachment near heating elements. The player should be placed horizontally on a flat, stable surface.
Description of the console
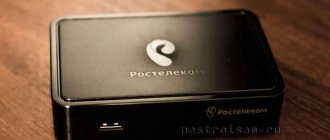
Mag 250 IPTV Settopbox does not differ in appearance from similar devices - a black box with connectors for connecting to a TV located on the back side. USB is available at the front.
The device runs on the Linux 2.6 platform. Video streaming and IPTV connection available.
At the back, the set-top box has connectors: stereo A/V output, S/PDIF audio output, HDMI 1.3 and Ethernet 100 Mbit/s. There is also another USB connector here.
Available audio formats: WAV, MP3, M4A.
Supported audio codecs: MPEG-1, MPEG-2, MP3.
Video formats: MOV, MKV, AVI, MP4, QT.
Supported video codecs: MPEG1/2, H.264, MPEG4, XviD.
Image formats: GIF, JPEG, PNG, BMP.
The package includes an instruction manual, a tulip cable, a unit for connecting to the network, a remote control and batteries for it. You will also need to purchase an HDMI cable if your TV supports such a connection.
Basic Settings
After connecting all the necessary cables and installing the set-top box in the optimal location, you can turn on the device. The first start-up is usually quite long and can take up to 10-15 minutes. This is due to a software firmware update. Rostelecom quite often releases system updates after it has been finalized. Installing these updates when you first start your device will take time. Updates improve the quality of the console and its functionality.
The set-top box will become available for use as soon as the automatic flashing from Rostelecom is completed. One of the list of Rostelecom channels will immediately begin playing on the TV screen. Switching channels is carried out, as usual, using the remote control. In addition to the cable connection, the device has a built-in Wi-Fi module for wireless Internet connection and IPTV. Wi-Fi setup is done through the settings menu. To connect, select your access point and enter the password.
Despite the fact that the main function of the set-top box is to play digital TV, the device also has other useful features. There are functions for recording broadcasts and delaying viewing of programs (up to 48 hours of waiting). In addition, thanks to the firmware from Rostelecom, the system offers a large selection of official films that can be purchased directly or rented. An important function is access to information services, such as weather forecasts, exchange rates, Yandex maps. Another interesting feature is access to social networks, which allows you to view photos, like, and share movies directly on the big TV screen.
- Setting up IPTV Rostelecom for viewing on a computer
The set-top box has two USB connectors, which makes it possible to connect portable media to play movies or other multimedia files. In conclusion, to summarize: the MAG 245/250 device will be a useful acquisition with a wide range of functions, which will give you the opportunity to enjoy using your TV as a multimedia device.
If you still have questions, we recommend watching the following video.
Using the built-in set-top portal
The built-in portal is empty by default: it does not contain any channels. You need to add the channel list there manually. The list of channels should be located either at any address available for downloading on the Internet or on a local network. The channel list URL must point to a file in m3u or m3u8 format. The file must contain links to a list of streams (channels). You can easily download such a ready-made file on the Internet or create it yourself by editing it in Notepad or any other text editor.
You can read about editing the channel list in a separate article. After downloading the list of channels, you can edit it directly in the set-top box using the remote control: move channels, create groups, edit their URL and delete them. When you exit the channel menu with the Exit button, the Set-top box will offer to save the changes.
The convenience of this approach is that you can add any channels to the list of channels, both from your provider and any others - paid and free - found on the Internet. The downside is that the functionality of the set-top box does not support viewing channels from the archive of TV programs - you cannot rewind the broadcast to the desired date and time.
Let me give you an example of this type of use of the console by me. My ISP Smarthome provides access to a list of free channels for viewing through the content provider MOOVI (you must subscribe to view paid channels and get an extended playlist). MOOVI provides its own pre-configured player, the settings of which include a link to the playlist. Of course, channels from this playlist will only be played on the Smarthome network. I download the player from the provider’s link, go to its settings and copy the link to the playlist from there. The list of free channels is presented as an m3u file. The same sheet can be obtained from the player of any other providers:
At the same time, I have a subscription to the paid IPTV service iedem.tv , which provides access to hundreds of channels, including HD in good quality for only $1 per month. This service also provides its own playlist for access to all channels at once. The playlist can either be downloaded or opened in any video player that supports playback of streaming content, for example, the most popular VLC. I download this file too, open both in the Notepad++ editor, edit it line by line, merging the lists and leaving only the channels I need. For each channel, this file contains 3 lines: the group to which the channel belongs (optional line), URL link to the stream and the name of the channel.
The inside of an M3u sheet looks something like this:
#EXTINF:1,Match! TV #EXTINF:1,Match! Arena
#EXTINF:1,Match! Planet
#EXTINF:1,Match! A game
#EXTINF:1,Match! Our sport https://persik.by/stream/3903/293564/10271.m3u8
After editing and merging the lists, I save my file with the m3u extension. Then this file must be placed somewhere on your local network (on a file server in a network folder and given access via a UNC path like \\server\folder\file.m3u), on any web server or on the Internet so that the file is accessible via a link like https://server/path/file.m3u. Then all that’s left to do is add a link to the settings of the internal port of the set-top box so that the channels are loaded into its memory.
There is also an option to simply indicate a direct http link to posting the playlist on the edem.tv servers - in case you only have one playlist and you do not plan to edit it. If you want to use the edem.tv playlist, but edit it online (for example, change the order of channels and their grouping), then you can place it on the free Ottplayer service. This service allows you to place third-party playlists on it and view channels through this service with the ability to access the TV program guide and program archive.
To add a new m3u playlist:
- In the main menu, select IPTV channels, enter the list of portal channels
- Press the Menu button, a menu will appear on the right
- Select “Add IPTV list”
- Using the remote control and on-screen keyboard (language translation - F4), enter the list URL, press OK
- A list of channels will be added to the left. If you already had some channels in the list, then new ones will be added to the end of the list.
- If you want to organize channels into groups, then select the necessary channels with the F2 button, press Menu, select the “Add to group” option.
- Click Exit, save the channel list when exiting.
Blog about modems, routers and gpon ont terminals.
For many users of Rostelecom digital television, it has long been no secret that channels can be watched using a playlist without tariff restrictions. And Rostelecom is in no hurry to close this opportunity. The playlist can be launched on a computer using VLC player, or on Smart TVs using widgets. The playlist can also be launched on several models of Rostelecom TV set-top boxes - MAG-200, MAG-250 and IPTV RT-STB-HD Standart. It is on these set-top boxes that you can download the standard firmware from the manufacturer (Infomir) and use all the advantages of a very good media center with WiFi and DLNA. This instruction will also be very useful for those who, when connecting to digital television from Rostelecom, bought a TV set-top box, and after some time they turned off and now the set-top box lies as a dead weight. Now this situation can be corrected and I will tell you how to flash MAG-250 and its clone copy IPTV RT-STB-HD with Rostelecom on Infomir.
Reflashing the Rostelecom set-top box: losses and gains
Let's try to figure out what the firmware of the Rostelecom set-top box provides and what risks exist when carrying out this procedure. The most popular model of the operator’s set-top boxes is IPTV RT-STB-HD Standart. Technically, it is a complete copy of the MAG-250, developed by the Ukrainian manufacturer Infomir with the functionality reduced by Rostelecom firmware. And in order to return the set-top box to its original capabilities, you need to reflash it to the original MAG-250.
The latest IPTV RT-STB-HD Standart models are produced by Rostelecom with its own remote control, which is unsuitable for controlling the MAG-250 due to the absence of some functional buttons on it.
In this case, you will have to use not only the standard firmware from Infomir, but also a modified one. There is a nuance - from experience it is easier to first install standard firmware, and only then, if necessary, upload a modified one to it.
First, about the losses: when updating the iptv firmware of the Rostelecom set-top box, the operator’s interactive services will become unavailable, since access to them is provided by the original software. This is where the disadvantages probably end.
Among the acquisitions: a home media center with support for WI-FI and DLNA, as well as the ability to watch TV channels from a playlist without operator tariff restrictions.
Digital Living Network Alliance (DLNA) is a standard that allows you to combine various multimedia devices into a single user network.
Firmware for Rostelecom TV set-top box: preparatory procedures
If you have read to this section, the question is: “Is it possible to reflash the Rostelecom set-top box?” not standing in front of you. The procedure is quite simple and usually ends in success. All that remains is to figure out what is needed for this.
So, to flash the Rostelecom TV set-top box, you will need:
- Hardware: PC with cable for connecting the set-top box;
- software: mcast.exe, any dhcp server (one of the most convenient and popular is dualserver), the current version of the official firmware, if necessary, a modified version.
All downloaded software must be placed in one folder created in the root of drive C. For the convenience of further explanation, we will call the folder infomir.
This completes the preliminary stage of flashing the Rostelecom iptv set-top box. Now let's get to the fun part.
What do you need to know before installing the firmware?
First, you will need to determine the version of the installed software, since this will determine which firmware file you download in the future. Therefore, your procedure is as follows:
- Open the settings of the set-top box and find the “Firmware” item.
- Now look at the version. Now we will compare it with the data that is presented and conditionally divided below. This is done for convenience, which you will appreciate later.
So, our three conditional divisions by firmware:
- Your version is 2248.
- Your version is lower than 2248.
- And the last option is 2281.
If with version 2281 everything is extremely clear and understandable (you have the latest version of the operating system installed, and you do not need to reflash anything), then in the other two cases we will tell you in detail what you need to do.
Version 2248
- First of all, download the firmware files (there are only two) to your computer or laptop. Owners of MAG-250 set-top boxes with version 2248 can update their devices to version 2281. Therefore, the files will contain bootstrap_2281 and imageupdate documents
(https://www.lanta-net.ru/files/Bootstrap_250_2281)
(https://www.lanta-net.ru/files/imageupdate_250_2281)
- Now you will need to change the name of the downloaded documentation. Right-click on the file and select “Rename”. We remove all numbers, dashes, underscores and other attributes, leaving only the words bootstrap and imageupdate.
- Now we will need to format the flash drive in FAT format. To do this, in the “My Computer” menu, right-click on our drive and select “Format”. Here, in the tabs, find the FAT32 system type and agree on it (check mark or other marking element).
- Next, go into the flash drive itself and create a new folder, which you must name mag. Strictly this way, nothing else. There is no need to write capital letters, spaces or commas. Because this will affect the firmware process. And since we don’t want any troubles to arise, we strictly follow the instructions. Transfer the firmware files from step two to the created mag250 folder.
- So, the flash drive is ready, and you can connect it to the set-top box. We unplug it from the outlet, then turn it on again and at the same time hold down the menu key on the remote control.
- Now a whole dialog box has opened before your eyes, where you need to select the Upgrade Menu. This can be done by moving the white selection bar using the up and down navigation buttons on the remote control, then pressing the right arrow key. If you don’t have such an item in the menu, then select Upgrade Tools in the same way, and then USB Bootstrap.
- So, all that remains is to wait for the flashing process to complete, as a result of which you will receive a notification on the screen about a successful operation. Next, the device will reboot.
Updating using a USB stick
USB storage requirement
- The USB drive must have a FAT32 file system .
If there are multiple partitions on the USB drive, you must use the first one. - When updating from the Bootloader menu, if your STB has multiple USB connectors, the rear connector is used for updating.
- On the USB drive, in the root directory, create a directory mag -
where - .
Update from the System Settings menu
Http://update.infomir.com/mag//update_list.txt
- When a new version is detected, the STB software is automatically updated.
Setting up auto update
The auto-update mode is configured in the “Settings / Software Update” section of the built-in portal:
Enter ; Select Software Update
;
Software Update
window,
Auto Update
field , select the required mode:
Disabled
—auto update is disabled (default value);
Included
— auto-update is performed when a new software version is detected;
With confirmation
— auto-update in confirmation mode: when a new software version is detected, a warning will be displayed on the screen; the user’s consent (confirmation) is expected to continue the update.
Software Update
window,
Update to beta version
field , select:
ON
—use beta version (test version);
OFF
— do not use beta versions (default).
In the Software Update
, press the
Save
or
OK
on the remote control.
- The stability of the beta version is not guaranteed.
- If the auto-update function is disabled, messages about the availability of a new software version will not be displayed; you can only update the set-top box software manually.
A description for developers is given in the section.
1) Software versions signed with a public key (ID_KEY=STB_PUBLIC)
2) Software versions installed in the set-top box at the manufacturer, as well as software versions provided by the manufacturer for updating/automatic updating from the manufacturer’s servers
1.
First you need to download the required firmware version. For this:
- Go to the website soft.infomir.com.ua
- Select the desired model from the list provided, i.e. MAG250
- In the list of folders that appears, select release/
- Next, select 0.2.18-r22
(the name 0.2.18-r22 is valid as of 03/09/18 - with a subsequent firmware update, this folder may be called differently) - In the download list that appears, select (left-click) the items Bootstrap_250
and
2.
Next, you need to rename the downloaded files. To do this, right-click on the file name and select Rename
. The final file name should look like this: Bootstrap
and
imageupdate
respectively.
3.
We prepare a USB drive for flashing. Format it to FAT32
. Create a folder on the drive. The folder name must match the model of your set-top box. The name is indicated in lowercase Latin letters, without spaces - mag250
Copy both Bootstrap
and imageupdate
.
6.
Disconnect the set-top box from the power, turn it on and hold down the Menu
on the remote control. After which the bootloader menu will appear on the screen.
7.
If the first item in the menu that appears is not TV Sistem
, and Upgrade Menu
— select the
Upgrade Menu
Right
button . Otherwise, move on to the next step.
In the menu that opens, use the Down
select Upgrade Tools
and activate it with the
Right
.
9.
In the menu that opens, activate the USB Bootstrap
Right button
.
If after these steps the set-top box does not boot, or the flashing process was not completed correctly, then disconnect the set-top box from the power supply, turn it on while holding the “menu” button until a blue screen appears and change the Boot Mode value from NAND to NAND2, or vice versa. And repeat the software update process.
After loading the set-top box, you will be taken to the internal portal, you need to go to Settings
and further on System settings
, then to the advanced settings -
Advanced settings
(item with a picture of a screwdriver and wrench) - and in the first field change the language to Russian using the arrows on the remote control. Next, restore all settings as after a normal reset.
For firmware for MAG-250 TV set-top box
, You need to download the latest firmware from the official Infomir website - link. For flashing MAG-250 TV set-top box via USB
You will need a flash drive no larger than 8 GB in size and formatted in the FAT32 file system.
To flash the MAG-250 TV set-top box via Multicast,
you will need a LAN cable to connect the computer and the TV set-top box and a set of programs: DHCP server and mcast.exe.
Alternative firmware for MAG-250 and IPTV RT-STB-HD
Firmware from DNA and Impulse
DNA firmware for MAG-250, Aura HD and IPTV RT-STB-HD Standart turned out to be the only sensible and worthwhile alternative firmware. The rest were minimally modified variations of the regular Infomir firmware.
Update 2021: Since there is no more DNA firmware at the moment, the only worthy alternative is Impulse . You can download it from here - link.
Differences from the official Infomir firmware: - TV program from tv.mail.ru/yandex.ru. — Setting the audio track for each IP-TV stream separately. — Integrated torrent client and samba. — Support for custom menus in the internal portal. — Added support for the Rostelecom remote control. — Added the “Sleep” function (On the Infomir remote control there is a button next to the power supply). — Recording the broadcast to a network drive (NET-USB, connection via the menu in the media browser). — Quick switching between the last 2 channels. — Added autostart of iptv broadcast (TV mode). — Preservation of the screen aspect ratio and the last watched channel when rebooting the set-top box (TV mode). — Package manager (via SSH). — Automatic recovery of set-top box files after firmware update.
Installing Alternative firmware for MAG-250 and IPTV RT-STB-HD
Before flashing the MAG-250 or IPTV RT-STB-HD TV set-top box with alternative firmware, it is first recommended to install the usual software from Infomir. If you try to flash directly from Rostelecom (Smartlabs) to an alternative firmware, problems may arise. Yes, and you can continue to flash it via USB.
Preparing a flash drive for flashing MAG-250 and IPTV RT-STB-HD
The flash drive for firmware should be no more than 8 GB, otherwise difficulties may arise. Format the flash drive to FAT32. Before installing alternative firmware on your TV set-top box, you need to download it and rename the files so that there are two files: Bootstrap and imageupdate. Create the mag250 folder in the root of the flash drive and copy the Bootstrap and imageupdate files there.
Option 1. Firmware for MAG-250 and IPTV RT-STB-HD from the internal portal.
Step 1. Select the Settings section in the menu:
Preparation
Before you begin the software installation process, have all the necessary tools ready. Having everything you need at hand, you can quickly and easily carry out the firmware, as well as correct the situation if any failure occurs during the manipulations.
Necessary
Depending on the chosen method of installing the software and the desired result, the operations may require the following:
- A laptop or PC running Windows of any current version;
- A high-quality patch cord through which the TV Box is connected to the PC network card;
- USB storage device with a capacity not exceeding 4 GB. If such a flash drive is not available, you can take any one - in the description of methods for installing the system in MAG250, which will require this tool, it is described how to prepare it before use.
Types of firmware, download
The popularity of the MAG250 is due to the large number of available firmware for the device. In general, the functionality of different solutions is very similar and therefore the user can choose any version of the system, but shells modified by third-party developers have much more options. The methods for installing official and modified operating systems in MAG250 are completely the same. When downloading packages, you should take into account the fact that in order to fully flash the device firmware, in all cases you will need two files - the “Bootstrap***” loader and the “imageupdate” system image.
Official software from the manufacturer
The examples below use the official version of the shell from Infomir. You can download the latest version of the official firmware from the manufacturer's FTP server.
Download official firmware for MAG 250
Modified software shell
As an alternative solution, the firmware from the Dnkbox team is used, as a modification characterized by the presence of many additional options, as well as the shell that has received the largest number of positive user reviews.
Unlike the official version of the system installed in the set-top box by the manufacturer, the solution from DNA is equipped with the following capabilities:
- TV program from yandex.ru and tv.mail.ru.
- Integrated Torrent and Samba clients.
- Support for user-created menus.
- Automatic start of IP-TV.
- Sleep function.
- Recording the media stream received by the set-top box to a network drive.
- Access to the software part of the device via the SSH protocol.
There are several versions of the shell from DNK, designed for installation in different hardware revisions of the device. You can download one of the solutions from the link below:
- Archive "2142". Designed for devices that have the STI7105-DUD processor installed.
- The files from the “2162” package are used for installation in set-top boxes with an STI7105-BUD processor and AC3 support.
Determining the hardware version of MAG250 is very simple. It is enough to check the presence of an optical connector for audio output on the back panel of the device.
- If the connector is present, it is a set-top box with a BUD processor.
- If missing, the DUD hardware platform.
Determine the revision and download the appropriate package:
Download DNK firmware for MAG 250
To install alternative firmware in the MAG 250, you must first install the official version of the system “cleanly”. Otherwise, errors may occur during operation!
Firmware version lower than 2248
In fact, there is nothing wrong with this, except that you will have to follow the above instructions twice: the first time you will update the device to 2248, and the second time to a more current one. You just need to download additional files from firmware 2248. These will be Bootstrap_250_2248 from the link (https://www.lanta-net.ru/files/Bootstrap_250_2248 and imageupdate_250_2248) from the link (https://www.lanta-net.ru/files/ imageupdate_250_2248). And the process itself is the same, we repeat it again as described above. Therefore, friends, we carefully study the material to avoid trouble.
Firmware for MAG-250 and IPTV RT-STB-HD with Rostelecom on Infomir: 838 comments
Pavel - no, you can’t. They are not interchangeable.
Apparently the freebie is over. There is nothing special to advise here: if you want to watch all channels, go to the official software.
There is an RT-STB-HD set-top box with a remote control from Rostelecom. Please advise the firmware so that this remote control is also supported. Very necessary.
Hello. Tell. Prefix mag250 firmware bottom. The other day all channels stopped showing. Can Rostelecom block the signal? Or maybe it needs to be activated again somehow?
Andrey - what firmware do you have? Is the service officially activated?
MAG250 Micro firmware update
- Before updating the firmware, it is recommended to check the current version. To do this, after loading the portal, you need to press the “SET”
, then select the menu item
“Device info”
.
The current firmware contains an image description
the phrase "A1"
the RootFS version
line contains the value
“0.2.18-r23”
and higher.
In this mode, the set-top box must be connected to the IPTV port (bridge) of the router, because update parameters are obtained from the DHCP server
- The set-top box is disconnected from the network
230V
- Press the “MENU” button on the remote control of the set-top box and hold it.
- Connect power to the console. Something similar will appear in the BIOS. Release the “MENU” button.
- Select the “Upgrade Tools” item and press the “right” button on the remote control.
Select the “DHCP Upgrade” item and press the “right” button on the remote control. The firmware update of the console will begin.
At the end of the update (about 5 minutes), the set-top box should reboot itself and go to the VOKA portal.
In this mode, the set-top box must be connected through the NAT of the router (to any LAN port that is not an IPTV port)
- The set-top box is disconnected from the network
230V Press the “MENU” button on the remote control of the set-top box and hold it.
Connect power to the console. Something similar will appear in the BIOS. Release the “MENU” button. Select the “Upgrade Tools” item and press the “right” button on the remote control.
Select the “MC Upgrade” item and press the “right” button on the remote control. The firmware update of the console will begin.
At the end of the update (about 5 minutes), the set-top box should reboot itself and go to the VOKA portal.
*Additionally, after manually updating the set-top box and loading the VOKA portal, we recommend changing the screen resolution to a comfortable one. To do this, press the “SET”
MAG 245/250 Rostelecom
MAG245 and 250 Micro set-top boxes allow you to access TV and movies through digital television services from Rostelecom. You can interact with all functions of the equipment using the remote control to navigate through the menu screen. The player is customized for each provider using firmware provided by the service provider.
Before you start using set-top boxes, you need to familiarize yourself with how to install and connect the MAG245 Micro and MAG250 Micro models in question.
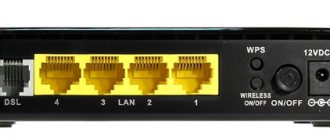
Find out how to set up a D-Link DSL 2760u wireless router for services from Rostelecom.
You can read about how to change the password on the D-Link DIR 620 Wi-Fi router yourself here.
The device provided by Rostelecom does not require complex configuration, since all the main options for working with IPTV from the provider are already built into the software. The user will only have to connect all the necessary cables and follow the installation recommendations.
Connectors and indicators of the set-top box
The front panel of the set-top box has only one port used to connect USB devices. On the right here you can find an indicator that will inform you about the status of the equipment. Not far from it, behind the plastic, there is an infrared signal receiver for the remote control.
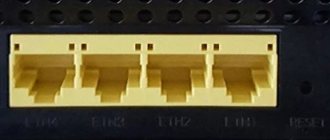
The back panel is more functional. Here are the connectors:
- power supply (12V);
- composite audio/video (3.5 mm);
- digital audio/video (HDMI);
- Internet (Ethernet 10/100).
MAG 250/245 from Rostelecom: connection instructions
To successfully connect MAG 245/250 from Rostelecom, you need to check the package, which must include: instructions; power unit; audio/video cable RCA 3.5; set-top box, remote control, batteries (x2).
Rostelecom, as the official provider of digital television services, has already configured the basic parameters of the MAG 245 and 250 set-top boxes. Therefore, all we have to do is connect the necessary cables. First of all, connect the Ethernet cable and power supply to the appropriate ports.
Next, we will need to choose a connection method to the TV. For this, the following options are provided: HDMI and RCA 3.5.
The first, namely HDMI, will be optimal, as it will be able to provide not only a high-quality picture in 1080p, but also transmit surround sound to the speaker system connected to the TV. Connecting using a composite cable may only become relevant if there is no HDMI cord or digital connector on your video equipment. To use the second option, a special cable is already provided in the kit. The image quality in this case will be 480p.
The manufacturer also recommends paying attention to the conditions required for installing the set-top box. The product should not be placed on slippery surfaces, in places where it may be subject to vibration or falling hazards, or other possible hazards. After removing the console from the package, do not shake it, as this may affect the performance of the internal components. Installing the device on a soft surface, such as a carpet or sofa, may cause the equipment to overheat, as such a covering will prevent proper ventilation. It is also not recommended to place the set-top box on other equipment that will heat up during use.
The IPTV player is designed to be placed horizontally on a flat surface. It is recommended to place the device on a television stand with a shelf height of at least 20 cm, which will ensure proper ventilation of the equipment.
Attention! If the device is damaged due to incorrect operation or incorrect installation, the product warranty becomes invalid. Do not forget to comply with all terms of use of the console.
MAG 250/245: setting basic parameters
Once all the necessary cords have been connected and a suitable place has been found for the set-top box, you can begin turning it on, which will most likely begin with updating the MAG 245/250 firmware from Rostelecom. The first download of the software may take up to 10-15 minutes. This is normal, since the provider quite often releases small system updates, the installation of which will take time upon first launch. The frequency of releases of new firmware for MAG 245/250 from Rostelecom usually depends on the device model used. The updates are designed to improve the quality of operation and functionality of the equipment. Since they are required, you will not be able to download without skipping this process.
After the automatic flashing of MAG 245 or 250 from Rostelecom is completed, the device will become available for use and will immediately begin playing one of the channels, which can be switched using the keys on the remote control, as in the case of classic television.
Find out how to connect and configure D-link DSL 2600u for the Rostelecom network.
You can read about disabling paid subscriptions here.Digital set-top box Motorola VIP1003G: //o-rostelecome.ru/oborudovanie/vip1003g/
If the set-top box is not connected to the Internet using an Ethernet cable, then the equipment has a built-in module for gaining access to IPTV and the Internet wirelessly. You can configure the Wi-Fi adapter in MAG 250 or 245 on firmware from Rostelecom in the settings menu. After selecting your access point, you will need to enter a password. After this, the connection will be established.
The system, in addition to its main function - playing IPTV, boasts a large number of additional services. There is the ability to record TV shows, as well as delayed viewing of programs that will be waiting for you within 48 hours after release. Rostelecom's firmware also offers a wide library of official movies that can be rented or purchased directly on your TV. In the “Services” section, the system provides access to services such as weather forecasts, social networks, exchange rates and Yandex maps, which will allow you to find out up-to-date information on traffic congestion at the current moment. The software has close integration with social networks, allowing you to like, share movies and shows directly on your TV.
The presence of several USB connectors will allow you to connect portable media for playing personal multimedia content.
Attention! The set-top box does not have control buttons on its body, so all operations are performed using a remote control powered by batteries.
The MAG 245 or 250 will be a great purchase to turn your TV into a multimedia device with many capabilities. Thanks to the presence of a Wi-Fi module, the equipment does not require an additional Ethernet line.
Device setup
The setup is as follows:
- Take the remote control from the set-top box, press the “INPUT” button to select the source - HDMI or AV (tulips). If your TV has more than one HDMI connector, you must correctly indicate the number used.
- Once the download is complete, click on the “Setup” button.
- Open the “Settings” tab and click on “System Settings”.
- Go to the “Servers” section, where select “Portals”.
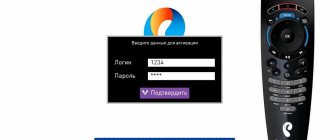
- In the "Portal 1 URL" line, enter the provider's URL. In the “Portal name” column, write the name of the prefix “mag”, click on the “Save” button.
- In the main menu, find the “Device Information” section and go to it. Manually write the MAC address of the device, which is indicated in the documents or at the bottom of the set-top box.
- Open the “Advanced Settings” tab, set the appropriate language and in the “Input Buffer Size” line write 1000.
- Launch the “Video Settings” section, where you change two parameters: “Video output mode” and “Graphics expansion” in accordance with the technical capabilities of the TV.
- Click "OK" button, restart the device.
At this point, the IPTV MAG 250 set-top box, the setup of which has been completed, is ready to receive a television broadcast signal from the provider.