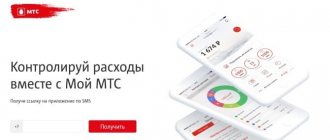
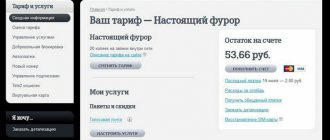
from November 23, 2021 My Tele2 (My Tele2) is a mobile application for smartphones based on Android and iOS, created for subscribers of the mobile operator of the same name. For Tele2 owners, this is a unique opportunity to control their own expenses within cellular communications, top up their balance and use other tools available in the application.
A simple and intuitive interface, a comfortable set of functions and a well-thought-out control system. After completing the first registration, the program remembers information about the user, and there is no need to enter it again to log in.
Here you can enable and disable certain options, control your tariff, track package balances and manage your numbers. This is a convenient version of a personal account in a mobile device, which will allow each user to reduce the cost of mobile communications.
How to login to the application
What to do when logging into the program for the first time:
- After downloading and automatic installation on Google Play, an “Open” button will appear on the application page. Click on it.
- The program will start.
- To log in, you need to log in. To do this, the subscriber enters the phone number into a special window on the screen.
- An SMS with a code is sent to this phone - enter it in the appropriate field. This is necessary for verification so that only the owner of the SIM card can access the data.
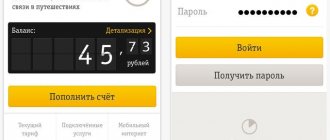
- Next, the main screen of the application opens. The balance is shown here and menu sections for viewing information and control are located.
Authorization is only required when opening the application for the first time. In the future, the subscriber will immediately see the main page. To do this, simply find the “My Tele2” icon on your smartphone screen and click on it.
Interface
Like all mobile applications, LC Tele2 is launched from the main page, which is available to the user after authorization.
From the main page of the application, the user has access to the following sections:
Settings
The section is designated as a regular mobile icon of three stripes. Clicking on it opens a drop-down menu. Here you can find information about your own profile and about the Tele2 application itself.
Tariff setting
In this section, you can customize your package to your own needs, increase the number of gigabytes of Internet traffic, minutes, enable the necessary options, disable previously enabled additional services, and so on.
My services
The section displays a complete list of services that a subscriber can connect to. By tapping on any service, you can see its description, features and cost. You can select any one and click “connect”, everything is the same as in a regular personal account.
Functions
At the very bottom of the main page you can find a list of current functions, which include cashbacks, functions for exchanging limits (for example, minutes of calls for gigabytes of traffic) and the function of connecting to services.
What to do if the application does not install
Take advantage of the tips Google offers. They can help if you can't install the application:
- Connect to the network via Wi-Fi or make sure your mobile internet signal is strong enough for downloading.
- Clear cache, delete Play Store data. For this:
- Open your phone settings.
- Find the All Apps section.
- Select Play Store from the list.
- Click Storage – Clear cache – Erase data.
Now open Google Play again and try to install the application.
- Reboot your device. Sometimes a simple technical glitch occurs and a restart helps resolve the error.
- Check your device memory usage. There may not be enough space for the program. Check the SD card - remove it from the slot and put it back in place.
- Clear cache and temporary data in the “Downloads” and “File Manager” sections, just as described in the case of the Play Market.
- In the “All applications” section of the Play Store, uninstall updates - there is a separate button for this. Then try updating it to the latest version.
Try downloading any other application. If it is installed and the “Open” button appears on the screen, then the problem is not with the phone.
Contact the developers - you can write about your problem in reviews for “My Tele2” on Google Play. You should do the same if you have problems with the downloaded application.
Tele2 personal account in the mobile application
In addition, in the application you can find out about the status of your personal account. The app offers more flexible expense control with many new options. You can view your balance, study all recent payment receipts, or order full details of your personal account, where each transaction, both outgoing and incoming, is indicated. To study the details, you need to go to the “Expenses” section.
You can also:
- Transfer money within the Tele2 network, that is, you can easily top up your friend’s phone from your LSA (personal account) directly from the application on your smartphone;
- Block your SIM card if it is lost (or stolen). This can be done from the tariffs and services section.
Overview of the capabilities of the My Tele2 application
“My Tele2” is a mobile version of your personal account. It contains all the functions and capabilities of the subscriber to independently manage communication services - tariff, options, balance.
What features does the application provide:
- Check the balance and balances of SMS packages, minutes, traffic.
- Exchange gigabytes for minutes.
- Replenish an account.
- Connect/disconnect services.
- Change the tariff or customize it.
- View communication costs, order details.
- Add other numbers to manage in one account.
- Ask questions to a specialist in chat.
Its main advantage is ease of use on a mobile device. The application is always at hand, just take your smartphone and click on the Tele2 icon. The subscriber's profile will immediately open with access to services and account status on the first screen. To log in, you do not need to enter passwords or codes (this is only necessary when opening for the first time).
Downloading and using the application is easy, and the installation process takes no more than 5 minutes. If the subscriber has changed operators, then deleting the program is just as easy - hold your finger on the screen and drag it to the trash. Use only official download catalogs - it's safe.
5/5 — (1 vote)
Author
Vyacheslav
For several years he worked in mobile phone stores of two large operators. I understand tariffs well and see all the pitfalls. I love gadgets, especially Android ones.
Installation
The My Tele2 application is necessary for every subscriber of the operator - it is an easy way to quickly and independently manage all available functions. There is no need to contact support or log into your personal account through the official website. You can simply download the program to your smartphone!
You can install your Tele2 personal account for free - use only the official versions posted in the Google Play Market catalog or on the App Store pages. You can also download the application by clicking on the button that suits you above.
To install the My Tele2 application, you must:
- Open a Play Market or Epstore software store;
- Enter the name in Russian into the search bar;
- Find the desired search result and click on the download button opposite;
- If necessary, enter a passcode or fingerprint/scan your face;
- Wait until the download completes. The progress will be displayed on the screen.
We were able to download the Tele2 application - now just open the program! Let's begin to understand the intricacies of the interface and tell you how work with a mobile personal account is organized.
Let us remind you that the service is available only on tablets and smartphones - on a computer you can use your personal account through a browser.
About the app
This is a replaceable tool, it is a regular application with all the necessary sections and options for managing your tariff for mobile communications and the Internet. The interface of the My Tele2 application is quite simple and intuitive so as not to get confused. That is, if you want to change your tariff plan yourself, you do not need to contact the operator, just go to the tariffs tab and switch in a couple of clicks.
To better understand what the application is, let’s look at it from the inside.
After installing and logging into the program, which we will tell you how to do this a little later, you will be taken to the start page of the application, where information on your tariff will be available to you: balance, tariff name and connected services, etc. All settings and service menu are also available immediately upon logging in from the main page.
Let’s not be unfounded and tell you what you can do from the Tele2 application yourself and what useful functions are available to subscribers.
- Firstly, you will always have access to information on the balance and the deadline for payment for the tariff;
- You will always know how many minutes, SMS and gigabytes of Internet are left unused. If you install the Tele2 application widget on your desktop, then viewing this data will be even more convenient;
- You can change the tariff, connect and disconnect additional services provided by the telecom operator;
- Through the application you can customize your tariff according to the operator’s conditions;
- Exchange the remaining minutes for Internet traffic and share gigabytes using the new Tele2 service;
- If you have a bank card, you can easily top up your balance anywhere with your phone at hand;
- You can forget about constant payment for mobile communications and connect;
- If you run out of funds on time, there is an indispensable “Promised Payment” service that will allow you to always stay in touch;
- For people who control everything, the option to view expense statistics and order details for calls and mobile Internet will be useful;
- When you have several numbers, you can manage them from one application, simply switching to the one you need;
- All information on tariffs and connection conditions is available in the description;
- Who participates in the More program to receive discounts and cashback from Tele2 in the menu section there is a tab where you can find out information on stores and conditions for accruing bonuses;
- If any questions arise, subscribers can contact a company specialist through the application using a convenient online chat or telephone located on the “Help” tab;
- If you want to find the nearest Tele2 sales office, you can do this using the built-in map with marks of the nearest departments by geolocation.
READ > Tele2 TV - watching movies from a mobile application
Creating and deleting shortcuts on the Android desktop
ADW Launcher comes with theme support that changes almost every element of the launcher. Themes are often offered with their own images for most standard and most popular Android programs, as well as wallpapers, widgets, etc. How to add objects to the home screen
ADW Launcher
While Launcher Pro doesn't support themes to customize the launcher's appearance, it does support icon themes, which are limited to changing icons for all known apps.
Go Launcher Ex is a relatively new launcher, but it doesn't lag behind others in terms of power and flexibility. Changing existing icons is easier to do with Go Launcher Ex than with the previous examples. Here's how to do it:
How to add/remove an icon from the Android phone screen
You can remove unnecessary icons from the desktop using the standard removal function: Remove an icon from the desktop
Displaying software icons
This method is relevant in a situation where the user needs to remove or return a program icon in the menu bar. To perform this action, you must install a third-party launcher, for example, Apex Launcher or Nova Launcher.
In the menu that opens, check off the applications that should be removed from the menu, for example, WhatsApp.
"Help" section
If difficult situations or questions arise, those who have downloaded and installed “My Tele2” on a smartphone do not need to visit a communication store or call an operator representative. Just visit the “Help” section of the widget. There is a FAQ on frequently asked questions (Internet settings, exchanging minutes for gigabytes, etc.), as well as a feedback form. Online, a subscriber can ask the Tele2 manager an exciting question. The answer will come in a few minutes. This form of communication with operators is convenient and does not require waiting on the line.
Tele2 widget on the Android screen
This is a free translation from English with some additions and clarifications. Original FAQ on the author's website.
If Widgetsoid does not work, restart your phone (some phones do not start the Widgetsoid service after installation). If something still doesn’t work, try uninstalling, installing Widgetsoid again and rebooting your phone.
Widgets 1x2, 1x3, 1x4 and 1x5 are vertical. Widgets 2x1, 3x1, 4x1 and 5x1 are horizontal.
Just drop Widgetsoid apk into /system/app Via ADB with your phone connected:
Remount /system as read/write adb push Widgetsoid.apk /system/app/Widgetsoid.apk Remount /system as read-only
Or use Root Explorer (or SystemApp Remover) to move Widgetsoid to /system/app and reboot your phone. All widgets may or may not disappear.
If you haven’t found a solution to your problem here, you can write a letter or message on Twitter to the author of the program (in English, or better yet, French).
Post edited by TracerO
— 30.11.12, 23:37
RILL 50,
You make a backup using titanium, and then you pull out the .apk. As an option:)
Post edited by Bulwak
— 12.10.10, 21:48
Version 3.3:
- Added compatibility with ADW icons
- Some interface changes
- Added NCF switch (shortcut to settings)
- Fixed flashlight in Android 4.0 ICS
- Fixed data switching in Android 4.0 ICS
- Fixed battery switch in Android 4.0 ICS
- Fixed Wi-Fi hotspot switch in Android 4.0 ICS
- Added widget background color to notifications
- Bugs fixed
download Widgetsoid2.x version 3.3
Version 3.2.4:
- Added options “Open Wi-Fi/Bluetoth settings when you click on the switch”
- Reduced memory consumption
- New way to switch data transfer - Root switch
- Added a “USB Debugging” switch (only for root, to get it working read the FAQ)
- Added the ability to not display button icons on the widget
- Found errors have been corrected
download Widgetsoid2.x version 3.2.4
Version 3.2.3.1
- Fixed display of alternative icons in notifications
- Fixed data update
download Widgetsoid2.x version 3.2.3.1, download Widgetsoid version 3.2.3.1
Version 3.2.3
- Improved performance
- Added the ability to install other icons (you need to download them from the market, but they are paid)
- Added Tasker switch
- Added plugins for Tasker and Locale
- Added a new indicator under the widget buttons - circle
- Added color filter for contact and program icons
download Widgetsoid2.x version 3.2.3, download Widgetsoid version 3.2.3
"Beep"
An application was created for fans of this service from Tele2. After all, with it you don’t need to remember any USSD commands or study the site; you can change the dial tone right here. The latest tracks or the most popular hits are presented to you. All melodies can be listened to. The most important advantage of “Beep” is the fact that songs can be installed in one click. Among other things, here you can configure the conditions under which melodies will be played.
Keep in mind that if you were not connected to the application before registering, then this will happen automatically, which will also save your time.
The application is available for all mobile phones (Android, iOS, etc.)
Section "Settings"
Tele2 subscribers who have downloaded the widget can customize its operation to suit their comfort requirements, as well as customize the tariff plan to suit their personal needs:
- set the volume of minutes (for example, calls to numbers of other operators);
- select the required amount of gigabytes of Internet;
- set the number of SMS messages, etc.
Those Tele2 subscribers who value their time and are accustomed to keeping their expenses under control are recommended to download the mobile application from the operator. The procedure will take only 5-10 minutes. After installing the product, its functions will be available immediately.
Tele2 widget on the Android screen
Topic rules.
- It is prohibited to post screenshots in BMP format.
- You can post links to decorations only within the 4pda forum. Links to third-party resources are not allowed (with the exception of Google Play)!
- You can only post links to decorations and widgets in this topic. Any requests to search for something, resize, etc. prohibited. There are specialized topics for this.
- The Forum Rules apply in full to this topic. Failure to comply with them is punishable.
General conditions and recommendations:
- Any forum member can post information regarding the content of catalogs. That is, if you notice the absence of any launcher/widget in the catalog, if you want to share your secrets of beautiful design, post such information in your message. Next, it will be transferred to the appropriate directory. Your help and information will definitely be rewarded within the framework of the Forum Rules (+).
- Links to widgets on Google Play are not included in the catalog. Either the widget is already on the forum and you provide a link to it, or we post an arch file.
- If information is repeated, inclusion in catalogs/FAQs may be denied.
- If you have any questions regarding this topic, write to QMS: Fashionon
Changing the native interface for a specific operating system, or for a specific phone brand:
Dear forum users. If any program is missing in this catalog, then feel free to write to Fashionon
and it will be added to the appropriate subdirectory. Such an initiative is welcomed and approved!
Also, this topic requires a curator to replenish the catalogs. Contact me in PM.
Post edited by shuric164
— 16.02.18, 20:18
Post edited by Fashionon
— 19.10.15, 16:40
inoty
- Notification center with status bar from iOS 7
IOS 7 Lockscreen Parallax HD
- Screen locker in the style of IOS 7
iPhone 5S lock theme
- Lock in the style of iOS 7
iPhone Launcher
- Launcher in the style of iOS 7
iPhone Lock Screen
- Screen lock in the style of iPhone (IOS7 )
Post edited by Fashionon
— 19.10.15, 16:40
Metro Notifications
— Pop-up notifications in Metro UI style
Post edited by Fashionon
— 19.10.15, 16:41
Post edited by Fashionon
— 19.10.15, 16:42
Post edited by Fashionon
— 19.10.15, 16:44
ˇ HTC/Sense style launchers
- LP Sense UI
- Launcher Pro home screen modification - SenseLike Home Screen
- Launcher in Sense style - PandaHero
- Launcher that imitates the Sense interface from HTC hero - HeLauncher2
- One of the launcher skins imitates Sense - Xperia S Launcher Sense
- Copy of sense launcher 4.0 and 3.6 - Sense-Like Launcher
- A mod for ADWLauncher that simulates the Sense interface - Facebook Home
- Shell from Facebook and HTC
Post edited by Fashionon
— 19.10.15, 16:45
Post edited by Fashionon
— 19.10.15, 16:45
Post edited by Fashionon
— 19.10.15, 16:45
Post edited by Fashionon
— 19.10.15, 16:46
Post edited by Fashionon
— 19.10.15, 16:46
Post edited by Fashionon
— 19.10.15, 16:46
12. Ubuntu style: Widgets, icons, launchers and other decorations in Ubuntu style
Post edited by Fashionon
— 19.10.15, 16:47
13. Tips and secrets for creating “beauties”; FAQ, manuals and instructions
(Manual from Fashionon)
So, you have decided to create a non-standard, original design on your favorite gadget. Examples of non-standard design:
Here are some tips for creating such a design: Most often, using a graphics program (Photoshop and similar ones), a wallpaper is created (or several wallpapers, depending on the number of desktops), with icons or other decoration elements already superimposed on it. I’ll show you with an example of my work. I use two desktops (screen resolution 720x1280), so I made a wallpaper corresponding in size to exactly two screens (720x2 = width 1440):
Then widgets are placed on the appropriate places (we adjust them in size using the launcher tools: grid size, increasing and decreasing widgets). Then we get the following:
It is important not to forget that if you create wallpaper for two desktops, then there should be exactly two of these same tables. In case of discrepancy, the wallpaper will stretch and it will not be possible to install widgets in the planned places. Using the standard tools of any launcher, you can add and remove desktops, leaving the number you need. If you are not proficient in Photoshop or other graphics programs, please contact the Order Desk
, they will help you. In this case, you need to describe in detail what exactly you want.
— How can I make large tile icons (or just non-standard icons) superimposed on the wallpaper clickable?
Everything is the same as in the example above. We have already created a wallpaper with icons. Now we need to make them clickable:
— How to replace standard icons with your own (including transparent ones)?
Download the archive with icons (or individual icons), unpack them to any place on the memory card/phone memory. Then on the desktop, select the icon that needs to be changed and make a long press on it with your finger. A menu will pop up, where, among other inscriptions, there will be an item CHANGE/REPLACE or something like that. Click on this item and select previously unpacked icons from the desired folder. This method works on 99% of launchers and can only replace icons on desktops. If you are faced with the impossibility of changing icons using this method, ask a question about installing them in the profile topic for your launcher.
— How to set a separate wallpaper on each desktop?
— How to install large icons (in addition to the standard ones and without changing them) on the desktop without the help of graphics programs?
If you are not “friendly” with Photoshop and do not have the opportunity to create wallpaper yourself, but want the design to be non-standard, it is possible to install any graphic objects on the home screen using special tools. programs. At the same time, you can make these graphic objects clickable without using a transparent icon (see above): - Desktop Visualizer
—
HS Image Cut
(Manual from Vadimatorik)
This is what the result will be:
Preface:
Before buying a phone, I was very confused and couldn’t choose what to buy.
And all because an interesting phone caught my eye, namely “Balckberry torch 9810”. I studied it carefully, and, to be honest, I was disappointed. I was very attracted to 2 things about it, namely the interface and the physical keyboard. And if the keyboard did not interest me so much, then the interface captivated me at first glance, the only thing that prevented me from choosing BB (Blackberry, in the future I will call it that.) was “low functionality”. It did not fit my lifestyle in any way, since it is a “business phone”. And this is precisely why the choice fell on the “Highscreen Strike” smartphone, literally at the same price. I used it to do this experiment of “copying the interface”. We'll need it.
- Phone with Android 4.0.4 (It may also work on older versions)
- Nova launcher.
- Icons in BB style.
- Clock widget
- Root (I don’t know exactly whether it’s needed or not, but applications sometimes required it “For the kit”).
How did it all begin?
Once, when I had already lost hope that I could find a normal launcher that would completely emulate a Blackberry, I came across an application that provided such an opportunity, it was called “BlackBerry Torch Screen”, but it had reviews worse than ever.
And I myself, after installing it, was disappointed. This application could do almost nothing. And then I decided that I would create the interface myself. With improvised means. Let's start:
Getting a picture of the background table. My first step was to find a background image. To do this, I pulled out the downloaded APK of the BlackBerry Torch Screen application from the folder with installed programs and threw it onto the memory card. Subsequently, opening it with WinRAR, I was able to get a desktop image from it. Extraction process:
Overlaying the Blackberry interface:
Since none of the launchers have a top panel, you will have to make it yourself. To work with graphics, I decided to choose the program “GIMP 2”, which has long been known to me, and since we will “draw” the top panel, we can immediately draw the bottom dock bar. When applying the "darkening", I decided to use black rectangles with a transparency effect of 45.9%. Menu making process:
