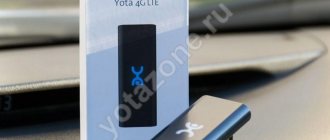
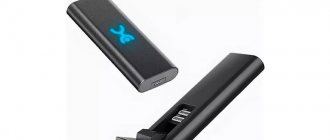
Model range of Tele2 modems
offers customers several modem models:
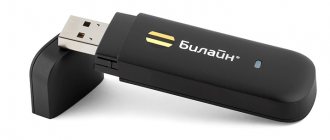
- The device for working with the 3G standard can work with Windows (XP and older), MAC and Linux operating systems. Provides a data reception speed of 21.5 Mbit per second. Can work using GSM and UMTS.
- Modem "Tele2" 4G. The access speed is 100 Mbit per second. Can work on 4G LTE, 3G, GSM, UMTS.
Both types of USB modems provide fast and high-quality Internet. 4G provides more opportunities and better access speeds, but the coverage of this network has a significantly smaller area compared to 3G.
What is a 3G connection from TELE2
High-speed 3G Internet from TELE2 is a compact device for fast access to the network at any time. Mostly in Russia the coverage area is 2 and 3G, but in large cities a faster 4G version is already available.
Equipment set.
- USB gadget manufactured by ZTE Corp.Technology.
- Sim card with connected tariff.
- USB cable.
- Installation drivers.
In the box with the device you will find the modem itself, a cord, a power supply and instructions.
Technical data.
- Works on all operating systems (Linux; Windows 7, 8, 10, XP, Vista; Mac OS).
- Max data transfer speed is 11 Mbit/s.
- Max information reception speed is 21.6 Mbit/s.
- Convenient USB interface.
- Works only with TELE2 cards.
- High-speed network 2G and 3G.
- Battery with a capacity of 1500 Amperes.
IMPORTANT. If there is no 3G connection, the router will operate at speeds of up to 64 Kbps.
How to connect a Tele2 modem to a laptop
Description of mobile Internet from Tele2: 3G and 4G frequencies
To use the Internet from Tele2, you need to connect a modem. The sequence of steps for installing the Tele 2 modem on a laptop looks like this:
- A SIM card is inserted into the slot. This device must be connected to your laptop via USB.
- The operating system will detect the connection of a new device. Next, it will install the new driver.
- A message will appear on the display indicating that the software needs to be installed. You must express your consent. After the installation is complete, you need to launch it and give the command to connect.
Note! After this, access to the World Wide Web will appear.
Advantages and disadvantages
The main advantage of a USB modem is, of course, its mobility. You can take the device with you on trips, especially since Internet services from Tele2 operate throughout the country. Thus, you will never be left without the Internet - the coverage area of this mobile operator allows you to make such statements.
Another plus is speed. The fourth generation network provides excellent data transmission, which is not much different from the speed of regular home Internet.
The disadvantages include cost and traffic limitation. In addition, the signal may be interrupted due to bad weather conditions or equipment failure.
How to connect a Tele2 modem to a computer
Activation and connection of mobile Internet on Tele2
Setting up the Tele2 3G modem is in many ways similar to how it is done for a laptop. You need to connect it to the USB connector. The gadget can be inserted into the port directly or done using an extension cord.
The computer will detect the connection of a new device and install the necessary drivers. After this, the Tele2 Connect program is installed. Once completed, the application must be launched. For the gadget to start working, you need to click on the “Connect” button. After a few seconds, the program will finish and the connection will be established.
Connection problems
Try connecting the device to another free USB slot. Make sure the modem is recognized in the system. Go to “Computer” or Explorer, in the root directory where all hard drives are located there should be a Tele2 modem.
Restart your computer and try to connect your device again. You may have disabled automatic driver installation.
- Right-click on the computer and go to properties.
- Now in the left block go to “Device Manager”.
- In the top panel, click on the magnifying glass and monitor icon to install all the necessary drivers.
- You can see the installed device in “USB Controllers”. Right-click and select “Update Drivers”.
You can try scanning your computer with an antivirus program and disabling all unnecessary programs in the tray. Sometimes a system rollback helps.
Tele2 Internet settings for the modem
Why Tele2 mobile Internet does not work
When setting up, use the Tele2 Connect program. After installation and launch, you need to enter the settings:
- Go to the settings, select the “Tele2” profile, click the “Change” button.
- All checkboxes are removed from the “Connections” tab, leaving only one – in the “Mobile Internet” line.
- On the APN tab indicate the address: internet.tele2.ru.
- Next, confirm the entry and click “Connect”.
After this, the connection with the required parameters will be established.
Tele2 modem configuration
As an example of USB modem settings, we will present standard parameters that are usually set by the device by default without user intervention. However, some of them can be changed at your discretion, which voids the guarantee of proper network operation.
Option 1: Web interface
When using the proprietary Tele2 4G modem, you can control it through the Web interface in an Internet browser, similar to routers. On different versions of the device firmware, the appearance of the control panel may differ, but the parameters are identical in all cases.
- Connect the Tele2 modem to the USB port of your computer and wait for the drivers to install.
Open your browser and enter the reserved IP address in the address bar: 192.168.8.1
If necessary, set the interface language to Russian through the drop-down list in the upper right corner.
On the start page you must specify the PIN code for the SIM card. You can also save it by checking the appropriate box.
- 4G modem from Tele2: is this baby worth buying?
Through the top menu, go to the “Settings” tab and expand the “Dialing” section. During the migration process, you will be required to specify admin as your username and password.
On the “Mobile connection” page you can activate the roaming service.
Select “Manage Profiles” and change the presented parameters to those specified by us. Don't forget to click the "New Profile" button to save your settings.
- Profile name – “Tele2”;
- Username and password – “wap”;
- APN – “internet.tele2.ee”.
In the Network Settings window, fill in the fields as follows:
- Setting up the Internet in a tele2 modem
- The preferred mode is “LTE Only”;
- LTE bands – “All supported”;
- Network search mode – “Auto”.
Click the Apply button to save the new settings.
Note: With proper experience, you can also edit the security settings.
Open the “System” section and select “Restart”. By pressing the button of the same name, restart the modem.
After restarting the modem, you can make a connection, thereby successfully connecting to the Internet. Depending on the settings and capabilities of the device, its characteristics may differ.
Option 2: Tele2 Mobile Partner
Today, this option is the least relevant, since the Tele2 Mobile Partner program is intended exclusively for 3G modems. However, despite this, the software is easy to use and allows you to edit a large number of different network parameters.
Note: The program does not officially support the Russian language.
- After installing and launching Tele2 Mobile Partner, expand the “Tools” list on the top panel and select “Options”.
The “General” tab contains parameters that allow you to control the behavior of the program when you turn on the OS and connect the modem:
- “Launch on OS startup” - the software will launch along with the system;
- “Minimize windows on startup”—the program window will be minimized to tray at startup.
- Connecting and setting up an MTS modem on a laptop: activation procedure
In the next section “Auto connection options” you can check the “Dialup on startup” checkbox. Thanks to this, when a modem is detected, a connection to the Internet will be automatically established.
The "Text Message" page is used to configure alerts and where messages are stored. It is recommended to place a marker next to the “Save in local” item, while other sections can be changed at your discretion.
Switching to the “Profile Management” tab, in the “Profile Name” list, change the active network profile. To create new settings, click the New button.
Here select “Static” mode for “APN”. In the free fields, with the exception of “User name” and “Password”, indicate the following:
- APN – “internet.tele2.ee”;
- Access - “*99#”.
By clicking on the “Advanced” button, you will open additional settings. They should be changed by default as shown in the screenshot. After completing the process, save the settings by clicking the “OK” button. This action must be repeated through the appropriate window. If you create a new profile, before connecting to the Internet, select the network from the “Profile Name” list.
We hope we were able to help you with the configuration of the Tele2 USB modem through the official Mobile Partner program.
Creating a remote telephone connection
In order to provide access to the World Wide Web, it is not necessary to use a Tele2 modem. To do this, you can use your smartphone.
In this case, you need to follow the step-by-step instructions:
- You need to establish a connection between your phone or laptop or desktop computer. This can be done using a USB cable or via Bluetooth.
- Once the connection is established, you need to click the “Start” button on your computer, located in the lower left corner of the screen. In the menu that appears, select the “Control Panel” line.
- At the top of the page that opens there is a “View” drop-down list. It gives you a choice between large and small icons when working with the control panel. It will be convenient to choose display in the form of large icons.
- You need to select the “Devices and Printers” section.
- There is a horizontal menu at the top. You need to click on the “Add device” line. After this, the operating system will begin to search for those devices that were recently connected. This procedure will take a few minutes.
- After completing the search, you will need to select the device that you plan to configure. Then click the “Next” button.
- The Install New Device Wizard will begin. When it finishes, an access code will be generated that you will need to enter on your phone. After this, a message will appear on the computer screen indicating that the device has been successfully added.
- Now you need to install the necessary drivers. This will be done automatically.
Note! Next, you will need to return to the main page of the control panel. Now you need to select the “Phone and modem” section.
Then you will need to do the following:
- A form for entering the city code is displayed. Here you can enter several arbitrary numbers and confirm your entry. Here you can enter the dial-up number for Tele2 Internet.
- Next, a window opens with several tabs. From them you need to select “Modem”.
- Click “Add”. A window for entering parameters opens. From the list provided, select the desired modem and go to its properties, selecting additional parameters.
- Enter the command “AT+CGDCONT=1,”IP,”,”internet.tele2.ru” and confirm the entry.
After the new device has been successfully added, you need to create a connection for it. To do this, go to the section related to networks and connections in the control panel.
On the screen that opens, select the setup of a new connection from the menu. When entering parameters, you choose to set up a new telephone connection.
Having selected the desired modem, enter a line in the window that depends on the phone brand:
- *99**1*1# for Samsung phones.
- *99***1# for phones from Alcatel, Panasonic or Siemens.
- *99# for Nokia, Sony Ericsson, Motorola and others.
Instead of entering a username, leave a blank line. There is no need to specify a password. Write “TELE2 Internet” as the connection name. After entering the data, confirm it by clicking the “Create” button. Now you can access the Internet from your computer using your phone.
Note! This can be done provided that access to the World Wide Web is configured from your smartphone.
Next we will talk about how to set it up.
Automatic
To carry out the automatic connection procedure, you need to visit the official website. Next you need to do the following:
- Log in to your personal account by entering your username and password.
- You need to go to the section related to Internet settings.
- On the page that opens, click on the “Get settings” button.
- After this, the settings will be installed on the smartphone.
Note! It should be noted that with this configuration option, user participation is not required to enter the received parameters. This will be done automatically. After receiving the message, Internet access will be configured.
There is another option for automatic configuration. To receive and activate the settings, you will need to call 679.
Manual
In order for your smartphone to be able to use the Network from Tele2, you must perform the following steps:
- Go to settings.
- In the list that opens, select “More”, then the rest opens. You need to tap on the line “Mobile network”.
- Next, proceed to setting up the access point.
- After clicking on “+” you can begin creating a new connection.
- A form for entering parameters will open.
- Here you will need to write the name of the connection and indicate the address of the access point. You need to use “tele2 internet” as the name. The access point address is as follows: “internet.tele2.ru”.
- In the context menu, click on the “Save” line.
The created access point is selected to work by default. After this, the entered parameters take effect.
Note! In order to start working on the Internet, you need to activate the “Mobile data transfer” item.
Tariff 7 gigabytes
Connection It is worth considering that the tariff includes the possibility of calls and SMS, but it is intended for the Internet, so calling tariffs are unprofitable for the user. The Internet plan allows you to connect several types of tariffs, which differ in the volume of Internet traffic and some additional bonuses. Additional programs: program for automatically shutting down the computer Power Off v6.3.0.2 RUS , program for taking screenshots and editing images PicPick v.3.0.1 RUS .
APN Settings
An automatic procedure is usually used to set the Access Point Parameters (APN). Once the device driver is installed, the initial settings should be installed automatically. However, this does not always happen. One of the reasons may be an incorrectly selected modem model. In such a situation, you need to enter the necessary parameters manually. For Tele2, Internet settings for the modem are done as follows:
- Go to the official website of the company and go to your personal account page.
- Log in to it.
- Enter the required parameters. Internet.tele2.ru is indicated as the access point. Note that a proxy server is not used. You do not need to enter a login or password.
- Confirm entry.
Entering parameters when setting up the Tele2 modem is simple, and any user can perform it with virtually no risk of making a mistake.
Tariff plans and services
Let's talk about setting up Internet tariffs for a 3g modem for a laptop with the Tele2 operator. Today, the provider offers to connect a SIM card with the established “Internet for devices” tariff. This TP is focused not on dial-ups, but on Internet services. The subscription fee is 450 rubles. The user is provided with 15 GB. Once the traffic is exhausted, network access is temporarily suspended. You can check the service status by dialing * 155 * 021 #.
You can connect to any tariff plan through your profile on the official website, choosing at your discretion based on your need and ability to pay:
- Tariff 50 GB. The subscription fee is 999 rubles per month. To connect, you must enter the USSD command number - * 155 * 701 #, and to disconnect - * 155 * 700 #. To check the service status, enter * 155 * 70 #. The advantage of this TP is that the rest of the unused traffic is transferred to the next month. The provider also provides its users with unlimited Internet from 00.00 to 06.00 in the morning.
- TP 20 GB. The subscription fee is 699 rubles. To activate the tariff, dial * 155 * 691 #, to disconnect, enter the same numbers, only instead of one at the end they put “0”. You can check the status by dialing * 155 * 69 #.
- Tariff 7 GB. For monthly traffic use, subscribers will have to pay 299 rubles. You can connect the TP through a USSD request - * 155 * 671 #, disable - * 155 * 670 #, check the status - * 155 * 67 #. Users are provided with unlimited Internet on social networks, free viewing of movies, and unlimited Yandex navigation. The remaining unused traffic is transferred to the new month.
- TP “Internet for tablet”. Price – 499 rubles. To activate the tariff, dial * 155 * 681 #, and to disable it you must enter * 155 * 680 #. Checking service status – * 155 * 68 #. The TP is valid when traveling outside your region. Unused traffic rolls over to the next month.
If Internet traffic ends prematurely, you can additionally add gigabytes through the user’s personal account until the counter is updated:
- “100 MB of traffic extra.” The offer is valid for a day, 15 rubles will be debited from the subscriber. To connect you need to dial * 155 * 281 #.
- “3 GB extra.” The cost of the service is 150 rubles. The offer is valid for 30 days. Connection – * 155 * 181 #.
- “5 GB extra.” The cost of the service is 250 rubles. The offer is valid for 30 days. To activate, you must enter the USSD command – * 155 * 231 #.
Setting up a 3G modem "Tele2"
The 3G standard provides high speed Internet access. In order to fully use it, you need to configure this gadget correctly. You need to do the following:
- Insert the SIM card into the modem.
- Connect the device to the USB connector.
- Enter the settings and select the “Network” and “Options” sections.
- You must indicate that the connection type used is RAS (modem). The remaining parameters will be set automatically.
- You must confirm the entered data and exit.
It is recommended to perform the setup in a 3G coverage area. This way, you can immediately see the result of the work done.
Note! Such a network has much greater coverage than 4G, but the access speed, although high, will be somewhat lower than that of the next generation network.
Connecting your phone as high-speed Internet
You can also use your phone as a router. To do this, the mobile phone must be connected to the PC using a USB cable or via Bluetooth by adding new equipment.
- In the Start menu, Control Panel, Sharing Center, Create and set up a new connection.
- Here select “Set up a telephone connection” and “Next”.
- Select the desired device for your device and enter the parameters: Samsung: *99**1*# Simens, Alcatel, Panasonic: *99***1# Sony, LG, Nokia: *99#
- Leave the username and password fields blank.
- Click “Connect”, where after 5 minutes the network should appear.
Setting up a 4G modem "Tele2"
Using the 4G standard provides users with the highest speed Internet connection. When connected, the necessary parameters are usually installed automatically. If this does not happen, then you must enter them manually. To do this you need to do the following:
- You need to connect a 4G modem to your laptop or computer.
- The system will recognize the new device and install the necessary drivers.
- Then you will need to install the Tele2 Connect program.
- After installing it, you need to launch the application and click the “Connect” button. After this, the connection to the Internet will be established.
The connection in this case is similar to that for 3G modems in accordance with the instructions, but there are some peculiarities here. To install the program, use the installation disk. To run the application, you may need to copy Autorun.exe from the installer to your hard drive.
It is important that 4G connectivity is available in this location.
Possible problems and errors
After carrying out the above procedures, errors and system failures may occur. Even though all the rules have been followed, the system may be subject to critical violations. There are 4 reasons why equipment stops functioning normally:
- Adverse weather conditions or slow speed. When there is strong wind or rain outside, the Internet connection may noticeably drop out. Accordingly, the data transfer speed will be minimal, and otherwise disappear altogether. This may also be due to the high load on one network.
- Incorrect connection. In this case, you need to independently check the signal level between the modem and the laptop. There is a screen on the body of the Tele2 product that displays the signal level. If this is not the reason, then you need to check the main balance for the amount of cash.
- Problems with the SIM card itself. If the SIM card stops working, then it should be checked for mechanical damage. The card must be carefully examined to make sure that there are no chips or nicks on the surface of the contacts. If water gets in, the SIM card should be thoroughly dried without using a hot air stream. After this, you need to insert the element back into the modem and reconnect. If these steps do not help, then you need to contact the nearest service center, since the card cannot be repaired further. Company employees are required to replace the damaged unit.
- Incorrectly activated device. This result occurs only if the modem was installed incorrectly. To do this, you will first need to remove and reinsert the node into the laptop. If the result does not meet expectations, you should manually reinstall the drivers. In some cases, the built-in program does not work with the current version of Windows. The problem could also be a faulty USB port or the modem itself. Under such circumstances, you should contact a repair center.
Tele2 routers: their types and approximate cost
The official online store of the Tele2 network offers us a choice of two devices - a 3G and 4G router. They differ both in possible data transfer speed and in price. Below we will give them detailed characteristics and tell you how much each of them costs.
Attention! Prices are given from the official website of the online store of the Tele2 operator in the Moscow region.
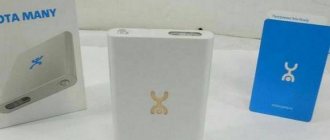
Wi-Fi router with 4G Tele2 SIM card - characteristics
- Price — 3,190 rubles
- The largest number of devices for connection is 10
- The maximum possible data reception/transmission speed is up to 100 megabytes per second.
- Battery capacity - 2000 mAh
- LTE FDD support - 800/1800/2600 MHz
- Support UMTS/HSPA+ - 900/2100 MHz
- GSM support - 850/900/1800/1900 MHz
- Wi-Fi - 802.11b/g/n
Wi-Fi router 3G - characteristics
- Price — 1,899 rubles
- The largest number of devices for connection is 10
- The maximum possible data reception/transmission speed is up to 42 megabytes per second.
- Battery capacity - 1500 mAh
- Support UMTS/HSPA+ - 900/2100 MHz
- GSM support - 850/900/1800/1900 MHz
- Wi-Fi - 802.11b/g/n
The operator has many interesting services that will make your communication more convenient and will help you communicate with loved ones even if they are a thousand kilometers away from you. You can read about how to connect to Tele2 here.
So, to a professional, the above data will tell, if not everything, then a lot. And if you are not very well versed in technology, then a brief comparison of both models can say the following: the 4G router undoubtedly wins over the 3G router in many respects - it has a more powerful battery, which means it will work longer without additional power; It supports more advanced data reception technology, thanks to which the connection will be more stable and processes such as downloading large files or watching videos online will be faster and without interference.
But, do not forget that if the signal level is not high enough, then even the most advanced device will work mediocrely and produce a weak signal. The signal level, as you know, is determined by the distance between you and the nearest tower of your cellular operator, so before purchasing, take an interest in the coverage map (this is the frequency of towers installed in the area) of the area you need.
Do you want to know what Tele2 Internet tariffs are available for a modem? You can read about this in our other article, also located on this site.
3Ginfo
Firmware and unlocking of branded modems/phones/routers/tablets
We are VKontakte
Our channel
Vote
Latest Visitors
- Goldenito [ 34 min, 8 sec ago ]
- rash_b [2 hours, 20 minutes, 9 seconds ago]
- maxsychev [5 hours, 23 minutes, 54 seconds ago]
- arthi [ 9 hours, 46 min, 50 sec ago ]
- Emil [ 9 hours, 58 min, 8 sec ago ]
- Walewgen [ 12 hours, 35 min, 57 sec ago ]
- s.kolach [ 13 hours, 24 min, 25 sec ago ]
- Anony [18 hours, 47 minutes, 2 seconds ago]
- KKURU [ 1 day, 4 hours, 4 min, 0 sec ago ]
- Aleksey64RUS [ 1 day, 4 hours, 25 min, 52 sec ago ]
Main menu
Welcome,
Tell us about us
Login via loginza
Mini chat
eugeneration
Apr 27: 20:46 rash_b, thank you very much.
through the calculator it turned out eugeneration
Apr 27: 20:43 rash_b, flash is also not suitable
rash_b
Apr 27: 20:42 eugeneration, Flash code may be required when updating the firmware.
Which can be calculated in the online calculator: https://3ginfo.ru/custom/new_unlocker.php eugeneration
Apr 27: 20:41 3Ginfo.ru does not fit
rash_b
Apr 27: 20:40 eugeneration, flash code
eugeneration
Apr 27: 20:36 When installing the firmware, it requires a password.
Which? rash_b
Apr 27: 05:26 rublik2009, both are suitable.
You can install any rublik2009
Apr 27 : 04:56 For the E-173 modem for Russia, which Dashboard is better to install?
3.5 or 3.0 or is there a better one? saf1971
24 Apr: 18:42 thank you very much
rash_b
24 Apr: 17:16 saf1971, no, reality.
Online
Guests: 62, Users: 0.
online record: 467 (Users: 0, Guests: 467) at 13 Jun: 09:42


