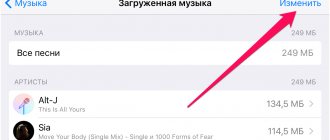
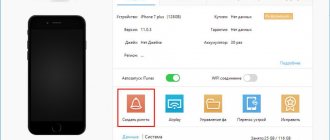
Mobile technology users switching from Android gadgets to iPhone are often surprised by the fact that they cannot transfer music directly to the memory of the Apple device and are forced to use additional software. But the fact remains that the user of an iOS device will have to master the iTunes program if he intends to download music from a computer to an iPhone. Fortunately, the iTunes program is not at all complicated - detailed instructions will help you figure out how to download music to your iPhone.
How to add songs to iTunes?
Launch iTunes.
All your music added or purchased from iTunes will appear in the Music section under the My Music tab. You can transfer music to iTunes in two ways: by simply dragging it into the program window or directly through the iTunes interface.
In the first case, you will need to open the music folder on the screen and the iTunes window next to it. In the music folder, select all the music at once (you can use the keyboard shortcut Ctrl+A) or selected tracks (you must hold down the Ctrl key), and then start dragging the selected files into the iTunes window.
As soon as you release the mouse button, iTunes will begin importing music, after which all your tracks will appear in the iTunes window.
If you want to add music to iTunes through the program interface, in the media combine window, click on the “File” button and select “Add file to library.”
Go to your music folder and select a certain number of tracks or all of them at once, after which iTunes will begin the import process.
If you need to add several folders with music to the program, then in the iTunes interface, click on the “File” button and select “Add folder to library.”
In the window that opens, select all music folders that will be added to the program.
If the tracks were downloaded from different sources, often unofficial, then some tracks (albums) may not have a cover, which spoils the appearance. But this problem can be fixed.
Download your entire iTunes library via USB
The easiest way is to copy your media library to your iPhone via a cord. To do this, you must first download all the music to iTunes (the procedure is described above), and then follow these steps:
- Connect your iPhone to your computer using a USB cable. Wait until all the necessary drivers are downloaded for the device and it appears in the list of available ones.
- Open iTunes. The iPhone should appear in the main window in the list of connected devices. In the upper left corner, click on the smartphone icon.
- In the Settings section, select Review. The available configurations will be displayed on the right side of the window. Scroll the tab to the “Options” block. Here, check the boxes next to “Sync automatically if iPhone is connected.”
- Other settings if necessary. For example, enable automatic bitrate reduction for high-quality tracks to a certain level.
- Through the “Settings” block, find and go to the “Music” tab. On the right side of the window, check the box next to “Synchronize music” and select “Entire library.”
- Click "Apply" to begin the process of copying audio files to iPhone. Once the operation is completed, the device can be disconnected from the computer.
After this, all songs from iTunes will be available on the iPhone. This method is suitable for cases when there is no music on your smartphone at all, and you want to download your favorite songs from your computer to it.
How to add album art to music in iTunes?
Select all the tracks in iTunes using the keyboard shortcut Ctrl+A, and then right-click on any of the selected songs and select “Get Album Artwork” in the window that appears.
The system will begin searching for covers, after which they will immediately be displayed for the found albums. But not all album covers can be discovered. This is due to the fact that there is no accompanying information for the album or track: the correct album name, year, artist name, correct song title, etc.
In this case, you have two ways to solve the problem:
1. Manually fill in the information for each album for which there is no cover;
2. Immediately upload a picture with the album cover.
Let's consider both methods in more detail.
Method 1: filling out information for the album
Right-click on the empty icon without a cover and select “Details” from the context menu that appears.
The “Details” tab will display information about the album. Here you need to make sure that all fields are filled out, but correctly. Correct information about the album you are interested in can be found on the Internet.
When the empty information is filled in, right-click on the track and select “Get Album Artwork.” Typically, in most cases, iTunes will successfully download the cover art.
Method 2: adding a cover to the program
In this case, we will independently find the cover on the Internet and upload it to iTunes.
To do this, click on the album in iTunes for which the cover will be downloaded. Right-click and select “Information” in the window that appears.
The “Details” tab contains all the necessary information to search for cover art: album name, artist name, song title, year, etc.
Open any search engine, for example, Google, go to the “Pictures” section and insert, for example, the name of the album and the name of the artist. Press the Enter key to start the search.
The search results will be displayed on the screen and, as a rule, the cover we are looking for will be immediately visible. Save the cover version to your computer in the best quality for you.
Please note that album covers must be square. If you couldn't find an album cover, find a suitable square picture or crop it yourself in a 1:1 ratio.
Having saved the cover to your computer, we return to the iTunes window. In the “Details” window, go to the “Cover” tab and in the lower left corner click on the “Add Cover” button.
Windows Explorer will open, in which you need to select the album cover you downloaded earlier.
Save the changes by clicking the “OK” button.
Using any method convenient for you, download covers for all empty albums in iTunes.
We are glad that we were able to help you solve the problem. Thank the author and share the article on social networks. Describe what didn't work for you. Our specialists will try to answer as quickly as possible.
Users may experience iTunes not syncing new music to iPhone. The problem may arise unexpectedly: until recently there were no errors, and now the audio recordings are not transferred to the computer or phone. Let's figure out why iTunes can't read iPhone content and how to fix it.
Add songs manually via iTunes
This method is suitable if all the music has already been pre-loaded into the iTunes library and is displayed in the corresponding tab of the program. If necessary, edit the tags (artist, album, genre) in advance. Procedure:
- Take the original USB cable from your iPhone. Use it to connect your smartphone to your computer. Wait until an icon appears in the tray indicating that the synchronization was successful.
- Launch the iTunes program. If you don’t have it, then download the distribution from the official website (pay attention to the choice of operating system and bit depth). It is important to use the latest version of the program (by default, updates are installed automatically when connected to the Internet).
- If you already have iTunes, but the songs are not copied, then go to settings and check if you have the latest version. macOS users should also check for updates to the operating system itself.
- On the left side of the window, find the “Media Library” block. If necessary, select a specific item (artists, collections, video clips) to work only with files of a certain type or format.
- All matching media files will be displayed on the right side. Select the ones you want to copy and check the box next to them.
- Hold and drag (using the Drag and Drop function) the marked files onto the iPhone icon (in the lower left corner).
Wait while music, videos, and other media files are copied to your device. After this, disconnect the smartphone from the computer. The library will be automatically updated and the downloaded tracks will be available for listening.
If you want to download a ringtone to your iPhone not through official Apple stores, but using third-party services, then first upload it to the iTunes library (via your computer). After this, update the audio library using any method described in the article.
Update and recovery
If you've tried all the methods and iTunes still can't read your iPhone content, try updating your device's firmware. You can update over-the-air or through iTunes. In this case, it is better to use iTunes, since it does not sync content.
- Connect your iPhone to your computer. Launch iTunes and select your device. It will be named after its model - 4S, 5, 6 Plus, etc.
- Go to the Review tab. Click Update.
- Click "Download and Update". iTunes will download the update files and flash the device firmware.
The only limitation for updating is jailbreaking the iPhone. If you try to update a jailbroken device in this way, it will lead to an “eternal apple” - the operating system will no longer start.
downloading/updating program files
Instead of updating, you can restore your iPhone to factory settings. This procedure is performed only through iTunes.
Before restoring your device, create a backup copy. Back up your device. If you can't sync all your content on your computer, not just music, then save a backup to iCloud.
data recovery
After creating a backup, connect any iPhone model to your computer, launch iTunes and on the “Browse” tab, click “Restore.”
As a result of the reset, you will get a clean device, as if you just bought it from the store. Restore music and other music from the backup to it and try syncing with iTunes again.
Published by ProfiAppler
Part 3. Streaming Services to Sync Music on iPhone without iTunes
You can also sync music from your computer to iPhone using streaming programs such as Spotify, SoundCloud, YouTube Red, Deezer, Microsoft Groove, Pandora, etc. Since music streaming services work the same way, we will take Spotify as an example. to show you how to sync music to iPhone.
As the best music streaming service, Spotify contains a variety of tracks. You can listen to any songs at any time.
✏️ They write to us:
Olga MP3 files added to the iTunes library are not displayed on the iPhone. How can I access my added personal music?
Olga: I add mp3 files to the iTunes library on my computer. iCloud Photo Library included. In theory, this file should also appear in the library on the iPhone, just as all other added personal music is displayed. But for some reason this file is not visible either on the phone or on the tablet. How can I access my added personal music? Could this be related to the new iOS?
First, make sure iCLoud Photo Library is turned on. On an iOS device, open: Settings -> Music and turn on the slider next to iCloud Music Library.
On Mac and PC, in the iTunes application, open Settings and turn on the checkbox next to iCloud Photo Library.
Make sure you're using the same Apple ID on both iOS and Mac (PC).
1. Create a new playlist in iTunes on Mac (PC). 2. Transfer there several tracks that you want to see available on iOS devices. 3. On the Clouds shortcut, next to the song, right-click and select Add to iCloud Library. 4. Wait until the songs are downloaded to the Library (in iTunes, a download circle will appear in the upper right corner). 5. Sign out of the Music app on your iOS device and sign in again. 6. On your iOS device, open your Media Library -> Playlists and select the newly created playlist. There will be added songs.
← Return to help section
> Didn't find what you were looking for?
How they offer to add music to Apple
Cupertino residents offer to interact with the Music application on the iPhone through the iTunes on the computer.
1. Launch the iTunes app on Mac or Windows.
2. Sign in to your Apple ID from the Account menu.
3. Go to system settings to the General tab and enable the iCloud Photo Library .
4. Now open the menu File - Add to Library... and select the desired tracks from your computer.
The process of dropping songs
Uploading music to iPhone via iTunes is quite simple, but the process takes a lot of time due to the nature of the download and its design. Initially, you will need to transfer the desired file to the “Library” of the player, and then synchronize with your smartphone. The following are instructions for a better understanding of how to do this correctly:
- Launch the iTunes application on your computer after logging into your Apple ID.
- Now we add songs to the application’s “Library”. To do this, click “Add file to library”, and then select suitable tracks from an arbitrary folder on your computer. The download will start automatically and a playlist will be created.
- If desired, the track data is changed or your own covers are added so that when listening to the musical composition it looks aesthetically pleasing and beautiful. To edit, click on the track and select “Information”.
- We connect the iPhone to the computer using Wi-Fi or a direct connection via cable.
- After connecting, go to the “Music” tab, and then synchronize the tracks with the phone’s memory as shown in the image.
Features of adding music
First, before starting the process of transferring songs from your computer to your smartphone, you need to install the iTunes application for the Mac OS or Windows operating system. The program is downloaded from the company's official website. After installing iTunes on your PC, log into the application using the same Apple ID “account” data that your iPhone works with.
iTunes does not work with all popular audio formats. For example, the player does not support WMA from Microsoft, as well as FLAC. Among the “friendly” ones are M4A (Apple Lossless), MP3, WAV, AAC and AIFF.
When loading other formats, the addition will not occur, then programs for converting audio files will come to the rescue.
How to download music to iPhone
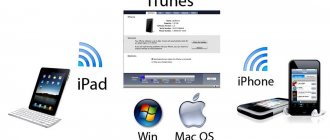
You can download music to an iPhone or any other iOS device (iPod Touch or iPad) in several ways:
- from a computer via iTunes;
- from a computer through the iTools file manager;
- via the Internet without connecting to a computer (for devices with jailbreak).
The first 2 methods involve downloading music content from the hard drive of a personal computer based on Windows or Mac OS X. The latter allows you to download music from the Internet directly from your iPhone without having to connect it to your PC.
Unfortunately, not all well-known music formats are supported by iTunes, which means they cannot be downloaded to your library.
Music format for iPhone
iTunes understands the following audio file formats:
- MP3 (from 16 to 320 Kbps);
- MP3 VBR;
- AIFF;
- AAC Protected (from iTunes Store);
- Audible (2,3,4 format);
- ALAC (Apple Lossless);
- WAV.
Officially, the list of music formats supported by iTunes does not include the popular WMA (Windows Media Audio); when you add WMA files, they are automatically converted to AAC with a bitrate of 128 kbps (by default).
If you cannot upload a file to your iTunes library, then this format is not supported and it must be converted to any other from the list above.
Suitable music file formats for iPhone/iPhone
If you are planning to download music to your iPhone/iPhone or iPad/iPad, then you definitely need to remember what formats your iPhone device supports . Here is the list of files:
- MP3 VBR.
- AAC (8 to 320 kbps, also from iTunes Store)
- Audible (2, 3, 4, Audible Enhanced Audio, AAX and AAX+)
- AIFF.
- WAV.
- ALAC (Apple Lossless).
As you can see, there are no WMA files here. You don't have to worry as all files are quickly converted to a format that will be supported. If after trying to download the file it doesn't work, then you will need to convert it.
Downloading music to iPhone/iPhone via iTunes
This method of downloading songs to iPhone/iPhone and iPad/iPad is considered the most popular today.
- If you want to take advantage of the flexible search feature, then you will definitely need to register special ID 3 tags. Thanks to this, you can group the files that you will download.
- If necessary, you can also decorate the music tracks. This process does not take much time, and once completed, your posts will have a special cover.
- If necessary, it is possible to make each entry completely individual. To complete this process, you will need to make a custom equalizer. You can also make an individual volume level for each recording.
- iTunes now allows you to group your recordings into separate groups.
- You can upload files by grouping them by genres and compositions.
As you can see, downloading files in this way can have not only disadvantages, but also certain advantages. Now, if you need to download music to the memory of your iPhone (iPhone) or iPad/iPad, you need to follow these recommendations:
- Launch iTunes. To use this library, you will need to install the latest version of iTunes.
- After logging into this system, you should add a new file. If necessary, you can download these files separately. In Windows, you need to press the “ ctrl+o ” keys simultaneously.
- Now try organizing your music collection yourself. To complete this process, you will need to upload custom tags and also upload a cover image.
- You should also remember that the track names may simply not match the file names.
- You can easily fix this and sign the album at your discretion in “ Information ”.
- When your collection is completely ready for download, then you will just need to go to the “ Music ” section.
We want to remind you once again that if you download a file and it is not supported, then you definitely need to use a converter. It allows you to convert all files in the required format.
Synchronizing music files from iTunes with iPhone/iPhone
To download music to iPhone via iTunes from your library, then you will need to synchronize your device. To complete this process, you will need to follow the following guidelines:
- 1. Try connecting your device via USB or wi-fi .
- 2. Try running iTunes.
- 3. After going to the section, select your device.
4. After going to the “ Options ” section, you will need to select the item where it says “ process music manually ”. This is necessary so that even after you have downloaded music to your iPhone/iPhone that does not fit the format, it can independently adapt to your device.
- 5. Now you can go to the “ Music ” tab and synchronize your device.
- 6. If necessary, it is possible to download all files by checking the “ Entire media library ” checkbox. It will also be possible to manually select each file that will be subject to synchronization.
- 7. For selective downloading, select “ Favorite playlists ”. If you are sure that your device will have enough memory, then you can completely download the entire collection.
- 8. Now you need to select the playlists you want to download. There will be checkboxes here indicating whether accepted or cancelled. If you do not do this, then all data will be discarded. Along with your content, you will need to check the “ Automatically fill free space ” option if you want to fill all the free space
- 9. After you finish your selection, be sure to click the “ Apply ” button.
- 10. Once the synchronization is complete, you will just have to enjoy your completed work.
How to upload (download) music to iPhone/iPad using iTools
Today you can also find an affordable alternative to downloading music to your iPhone using iTools. It also allows you to download music efficiently. To complete this process, you will also need to sync your device. Before you start synchronizing, you will need to install iTools on your computer. This program is considered a universal manager. It allows you not only to download, but also to upload the necessary content.
In addition, the ability to transfer music from iPhone to computer is available. You can also perform this process in reverse order. The program has quite high functionality. With its help, you can easily enter all the necessary meta data.
To use this service you will need to follow our recommendations:
- 1. Connect your device to your computer via a USB cable.
- 2. Now you will need to use import. You can do this by going to the “ Music ” folder, right-clicking on any empty space and selecting “ Add ”.
- 3. Having marked the desired songs on the computer (by diagonally grabbing the mouse or alternately pressing and holding the “ Ctrl ” key), add it to the list using the “ import ” button.
- 4. After this, you can download your music by selecting the files and clicking “ Import to Device ”. This process does not take much time.
- To the left in the “ Music ” folder (under the name of your device) you can see the presence of these files.
- Now you can listen to music downloaded to your iPhone on the device.
Benefits of downloading music through iTools:
- Using the program is free.
- If necessary, you can transfer music to your iPhone/iPhone without using synchronization.
- After downloading, you can find the content in the “music” section.
- High speed download of music files.
In addition to its advantages, this system may also have a number of disadvantages.
The main disadvantages of downloading via iTools include:
- There is no support for Russian language functions (English).
- A global search is available for use here.
- When downloading songs to your iPhone/iPhone, duplicates may appear.
Now we will move on to learning the last method of downloading music (songs) to iPhone, iPad and iPod from the Internet without a computer. The ability to download music without a computer is very popular among users of devices of this brand. Thanks to this method, you can easily download music directly from your phone or tablet.
Downloading music to iPhone/iPhone from the Internet without a computer
Currently, there are two options for downloading music from Internet sites to iPhone without a computer:
- Without Jailbreak Using File Manager
- With jailbreak.
Downloading music to iPhone/iPhone from the Internet without jailbreak
To do this, you need to install it on your iPhone (or iPad).
- 1. Using the Safari browser, find the composition you like and click the download link (for example, from the site zaycev.net).
- 2. The browser will offer several actions, where we select “ Copy ” - copy.
- 3. Open the File Manager program.
- 4. Paste the copied link by holding your finger on the input line and clicking “ Paste ”.
- If a window opens without a line, to add a link, click the “ + ” plus icon, top left.
- 5. Remove the text after “ .Mp3 ” from the address bar (if the link is not accepted, temporarily put any letter after “ .Mp3 ”)
- 6. Here the link has already been accepted by the program and click “ Done ” (if a letter was added after “ .Mp3 ”, then now it must be removed).
- 7. If everything was done correctly, the file will be downloaded immediately.
- 8. Now the song. you can listen. It is not yet possible to transfer devices to the media library without jailbreak. (If you know how to do this, you can write in the comments, it will be added to the article.)
Downloading music to iPhone/iPhone from the Internet with jailbreak
The method we decided to provide you with is the last one. To use it, you need to remember that the device must be jailbroken . If necessary, you can use a special bootloader. It's called the App Store. This device has the ability to independently play music while downloading. This is quite convenient, since the music you plan to download will be in the application. If you want to listen to it by going to the “ music ” tab, then you won’t succeed.
If your device is jailbroken , then you can download your device directly to the playlist. To take advantage of this process, you should install Cydia – Bridge.
Before using Bridge, you should remember that in order to download, you will need to find a direct link.
- 1. To do this, launch Safari on your device, go to the website zaycev.net, for example, select the required song and click on the download link.
- 2. We need a direct link to the file, since this site takes you to the next page, here we click the download link again.
- 3. Now copy this link to your clipboard.
- 4. Launch your Bridge and go to the “Download ” .
- 5. There is a field here where you need to paste your link by clicking on the “ Url ” paste field and holding for a few seconds until “ Paste ” appears. After pasting the link, you will be able to see the download begin.
- 6. After completing your download, you can set the file meta data. If necessary, you can select the cover (this application can also allow you to listen to music that will be downloaded).
- 7. Fill in the required fields. Then you can select Import. Once the download is ready, you will need to click the “ Import ” button.
- 8. Now the downloaded composition will be available in Media Library .
To date, Bridge is considered the only program that allows you to download files directly. To install this application, you should remember that it is paid. Its cost is $10. This system is capable of running on various engines. Thanks to it, you can easily download music to your iPhone and transfer the track to your media library.
As you can see, today there are various ways that allow you to transfer music to your iPhone/iPhone and iPad/iPad. This process can be completed quite simply. If you have difficulties, then try to familiarize yourself with all the installation processes in more detail. If necessary, you can study the photos, which show detailed information about the download. We hope that these instructions will help you download quality music.
How to Download Music to iPhone via iTunes
Probably the most complex and longest method available, but it also has a number of advantages:
- in iTunes you can register ID3 tags for flexible search, grouping and organization of music files;
- all music tracks can be decorated with covers that will be displayed in the native iOS Music application, the media library will become colorful and pleasing to the eye;
- Individual music files can be assigned independent equalizer settings and assigned their own volume level;
- iTunes allows you to group music files into playlists, which are transferred to the iPhone during the synchronization process;
- iTunes allows you to download your entire media library or groups of files by playlists, genres, albums and artists to your iPhone at once.
As you can see, along with all the shortcomings, downloading audio files to an iPhone via iTunes has the right to life and may be in demand for someone.
In order to “upload” music into the memory of an iOS device, you must first download it to the iTunes library.
- Launch iTunes (“use” the latest version).
- Go to “File -> Add to Library” and select the folder containing the downloaded audio files or a separate file. You can also upload files using the combination “Ctrl+o (letter)” in Windows and “Command+o” in Mac OS X, or by dragging the corresponding folder or file into the media harvester window.
- Organize your music collection (fill in ID3 tags, add covers, create playlists). Please note that the names of the music tracks may not match the names of the files on your hard drive; iTunes loads and uses the file metadata specified in the ID3 tags.
- The collection is ready for download and is available in the "Music" section.
Once again, I draw your attention to the fact that if any file has not been downloaded to the library, it is not supported by iTunes and needs to be converted; WMA files are converted automatically.
Sync Music from iTunes to iPhone
In order for music from the iTunes library to be loaded into the iPhone’s memory, you need to synchronize it:
- Connect your device to your computer using a USB cable or via Wi-Fi.
- Launch iTunes (if the program is closed).
- Go to the “Overview” tab in the “Devices -> Model of your device” section.
- In the “Options” list, check the box next to “Process music and videos manually”, this will allow you to flexibly configure the synchronization of the collection (entirely or separately by genres, artists, albums and playlists).
- Go to the “Music” tab and check the box next to “Sync music”. Music content synchronization settings will become available.
- If you want to download all the contents of iTunes, select “Entire Library” and a song counter will appear.
- If you don't need the entire collection or it doesn't fit in your device's memory, select "Featured playlists, artists, albums and genres."
Please note that along with the contents of the collection, the option “Automatically fill free space with songs” has appeared. Select it if you want to fill all the free space with music.
- Select the playlists, genres, artists and albums you would like to download (check the boxes). The amount of free space in the device memory is displayed in the panel next to the “Return” and “Apply” buttons.
- After completing your selection, click on the “Apply” button and wait for the synchronization process to complete.
- Once the synchronization is complete, the music from iTunes will be available on your iPhone, enjoy!
Download music via Wi-Fi
To be able to synchronize with iTunes via Wi-Fi, two conditions must be met simultaneously:
- The PC has a Wi-Fi adapter.
- Wi-Fi on the gadget is also in perfect order.
To synchronize via Wi-Fi, you need to follow these instructions:
- Connect your gadget to your PC.
- Launch iTunes .
- Select your device and go to the Browse tab in Settings.
- Scroll down and you will see the Settings block. Here you need to change the button from “Sync automatically” to “Sync with this iPhone via Wi-Fi.”
Then click the “Apply” button below.
- Next, click the "Sync" button and wait until the synchronization is completed.
How to Download Music to iPhone from Computer Using iTools
There is a wonderful alternative to iTunes that allows you to download music to your iPhone from your computer as quickly as possible without synchronizing them, it’s called iTools ().
iTools is a universal file manager that allows you to download/upload content (music or video) to/from iPhone from/to a computer running Windows or Mac OS X.
Among other things, this manager allows you to transfer music from your iPhone to your computer and back, and the audio files will be available directly in the native iOS Music application.
It does not have the functionality of iTunes in organizing a music collection, but many do not need this, because metadata can be registered directly in the operating system environment.
- Connect your device to your computer with a USB cable and launch iTools.
- Go to the Music menu and click the Import button.
- Select the required files and click Open.
- Done, the selected files will be downloaded to the device’s memory and you can listen to them in the Music application.
Please note that if you download the same file through iTunes (as described above) and through iTools, you will have 2 identical files in the Music app on your iPhone.
Benefits of downloading music through iTools:
- distributed completely free of charge;
- content is downloaded without synchronization, and this is a huge time saving (a large collection and a lot of software increases the time of synchronizing the device with iTunes exponentially);
- downloaded content is available in the Music application (as when syncing an iPhone with iTunes);
- works with devices without jailbreak;
- high download speed.
Disadvantages of iTools:
- there is no support for the Russian language (it is not needed to download music);
- does not allow editing ID3 signatures (take care of this in advance);
- If you download the same file through iTunes and iTools, there will be duplicates in the Music app.
The third and final method for downloading music content into the memory of an iOS gadget allows you to download it from the Internet directly from your iPhone.
Transfer via iTools
We figured out how to transfer new music through iTunes, but this is not the only way to transfer songs to a mobile device. If you don't like the syncing theme, use an alternative to iTunes - iTools. It allows you to transfer tracks without synchronization, as through a regular conductor.
- Launch iTools.
- Connect your iPhone/iPad to your computer.
- Open the Music tab in iTools.
- Click the Import button and add the files. Supported formats – MP3, AAC, AIFF, WAV, Apple Lossless.
- Click "Open" to start the process of transferring music to the connected device.
The main drawback of iTools is the lack of tools for organizing your music collection. If in iTunes you can create playlists and edit the title and description of songs, then iTools acts as a conductor, only allowing you to transfer files to the device.
Published by ProfiAppler Don't forget to read the comments, there is also a lot of useful information there. If your question is not answered, but later comments are answered, then your question is answered in the article, respect other people's time.
You may also be interested
Create a ringtone directly on iPhone
How to download music to iPhone (from the Internet without iTunes)
It should be immediately noted that this method works on a jailbroken iPhone or iPad. You can, of course, use downloaders from the App Store like iDownload Pro () with a built-in media player, but the downloaded music will be stored in the application itself. It will be impossible to listen to it along with the entire collection from the native iOS Music application, which is very inconvenient.
If you have a jailbroken iPhone or iPad, you can download music from the Internet directly to the device’s media library. To do this, you need to install a tweak from Cydia - Bridge. Officially available in the BigBoss repository (listed in Cydia by default), all devices with iOS 5.x-7.1.x are supported.
Before you can take advantage of Bridge, you need to find a direct link to download the music file. Direct means without redirection (forwarding), the need to enter captcha, logins and passwords.
- On your iPhone, launch Safari and go to a site where you can get a direct link to the required audio file, for example, let it be: https://get-tune.net/.
- Select the desired track and long tap on the “Download” icon or inscription to open the Safari menu, which allows you to: open the link, open the link on a new page, place the page on the reading list, copy the link and cancel.
- Select "Copy". The direct link will be copied to the clipboard.
- Launch Bridge and go to the "Download" menu to the "Enter URL" page.
- In the only field, paste the copied link (tap on the field and hold your finger until the context menu appears in which select “Paste”), tap on “Go” (Continue). The download process will begin.
- Once completed, Bridge will allow you to assign unique metadata to the file: Title, Artist, Album, Genre, Track No., and also select a cover image for the recording from the Photos application (photo stream or photographic films). The application also allows you to listen to the downloaded file.
- Fill out the required fields (or leave them arbitrary) and tap on the inscription “Import”. The file will be imported into your iPhone's library and will be available with assigned metadata in the Music app. Ready!
Bridge is not the only program that allows you to download audio files directly to the iPhone’s memory; there are several more, for example, MewSeek. The application is officially available in Cydia in the BigBoss repository, it costs 4 times more than Bridge ($9.99), but it also has more (with emphasis on the “and”) functionality: a built-in search engine based on various search engines. The applications work identically; in the video below you can familiarize yourself with the installation and operation of MewSeek and choose the best one for yourself.
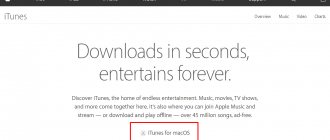
Download iTunes
to download iTunes only from the official Apple website - when downloading from third-party sites, there is a risk that the iPhone or iPad will be infected with Trojans or other viruses. The download is free - the latest version can be found here. To download the program, enter your email address in the “Email” field and click “Download”:
When the download is complete, locate the file with the . exe in your downloads folder and run it. Next, wait for the installation to complete and, when completed, open iTunes .