Most new iOS users often ask whether they can download music or a song to their iPhone, because there is no way to download files directly to the gadget’s memory. Because of this, you have to use third-party programs. But there is no choice but to learn how to use iTunes. It is worth noting that the music on iTunes is very diverse, and everyone can find tunes to suit their taste.
Related article: How to transfer music from Mac to iPhone using iTunes, Waltr or iTools?
What formats does iPhone and iTunes understand?
iTunes and Apple mobile devices can accept the following types of music files:
- MP3 (from 16 to 320 Kbps);
- MP3 VBR;
- AIFF;
- AAC Protected (from iTunes Store);
- Audible (2,3,4 format);
- ALAC (Apple Lossless);
- WAV.
As you may have noticed, the presented list of supported formats does not include the common WMA type - Windows Media Audio. The system in iPhone smartphones and the iTunes utility automatically converts this format to AAC with a bitrate of 128 kbps. It is also worth noting that these settings are set by default.
Qualified specialists do not recommend changing these settings if the user has little understanding of the iPhone. Also, if such parameters do not suit the owner of the mobile device, he can seek help from a technician at any service center or mobile salon.
If a downloaded music file cannot be played in iTunes, this may indicate that the type of this file does not match the utility parameters. You can solve the problem by converting the file extension to one of the above types.
How to delete music from iPhone, iPad and iPod touch. Method 2
Step 1: Go to Settings → Music .
Step 2. Select the “ Downloaded Music ” section.
Step 3: Click “ Change ” and remove artists whose music you no longer need on your device. Note that you can delete a specific album or even a song. To do this, you need to select the artist and click “ Change ” on the page that opens.
In the same menu you can delete all songs stored on the device:
We've sorted out iTunes, let's move on to advanced methods. The first is to use a file manager for iPhone, iPad and iPod touch. The choice of file managers is huge, but we settled on iTools, a free and time-tested tool.
As with the second method of transferring music to mobile devices via iTunes, the beauty of using iTools is that there are no unnecessary synchronizations. The utility only downloads music and does not do anything else at this time, which is why the transfer occurs as quickly as possible. Why then use iTools if iTunes, when properly configured, allows you to download music to Apple mobile devices without full synchronization? The answer is simple - iTools is much less demanding on computer resources compared to iTunes.
Transferring music via iTunes
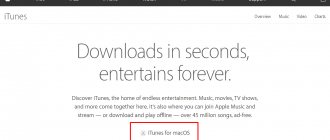
The presented option is considered the fastest way to transfer music to an iPhone from a personal computer. If iTunes is not yet installed on your computer, you will need to install it from the official Apple website
After the presented utility is installed, you must complete the following steps:
- Connect your mobile device to the computer, after which the following message will appear on the screen: “Trust this computer”, answer in the affirmative;
- Then open the utility. If the system requires updating, click on the appropriate button, and then restart your personal computer;
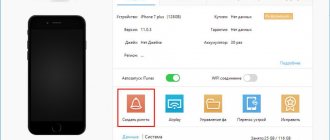
- Now you need to click on your iPhone icon and select its model. Then the system will automatically redirect you to the iPhone page;
- Click on the "File" button, which is located in the upper left corner of the page. A new menu should open in which you will need to click on the “Add to Library” button;
- Select the folder with the added music and click on the “Select folder” button. After this, the process of importing new music files into the mobile device library will begin;
- At the end, you need to open the “Music” section and check the box next to the “Synchronize music” item, as well as next to the “Entire music library” item. Then click on the “Apply” button.
It is worth noting that the presented method has both disadvantages and advantages.
Advantages and disadvantages
When transferring music, the quality of the files is not lost.
All files are saved.
The user can import an unlimited number of files.
The utility's interface is not the most convenient.
The user can group files only by albums.
The utility does not track changes in music files.
Follow the link to watch a video that shows how to do this:
How to add album art to music in iTunes?
Select all the tracks in iTunes using the keyboard shortcut Ctrl+A, and then right-click on any of the selected songs and select “Get Album Artwork” in the window that appears.
The system will begin searching for covers, after which they will immediately be displayed for the found albums. But not all album covers can be discovered. This is due to the fact that there is no accompanying information for the album or track: the correct album name, year, artist name, correct song title, etc.
In this case, you have two ways to solve the problem:
1. Manually fill in the information for each album for which there is no cover;
2. Immediately upload a picture with the album cover.
Let's consider both methods in more detail.
Method 1: filling out information for the album
Right-click on the empty icon without a cover and select “Details” from the context menu that appears.
The “Details” tab will display information about the album. Here you need to make sure that all fields are filled out, but correctly. Correct information about the album you are interested in can be found on the Internet.
When the empty information is filled in, right-click on the track and select “Get Album Artwork.” Typically, in most cases, iTunes will successfully download the cover art.
Method 2: adding a cover to the program
In this case, we will independently find the cover on the Internet and upload it to iTunes.
To do this, click on the album in iTunes for which the cover will be downloaded. Right-click and select “Information” in the window that appears.
The “Details” tab contains all the necessary information to search for cover art: album name, artist name, song title, year, etc.
Open any search engine, for example, Google, go to the “Pictures” section and insert, for example, the name of the album and the name of the artist. Press the Enter key to start the search.
The search results will be displayed on the screen and, as a rule, the cover we are looking for will be immediately visible. Save the cover version to your computer in the best quality for you.
Please note that album covers must be square. If you couldn't find an album cover, find a suitable square picture or crop it yourself in a 1:1 ratio.
Having saved the cover to your computer, we return to the iTunes window. In the “Details” window, go to the “Cover” tab and in the lower left corner click on the “Add Cover” button.
Windows Explorer will open, in which you need to select the album cover you downloaded earlier.
Save the changes by clicking the “OK” button.
Using any method convenient for you, download covers for all empty albums in iTunes.
We are glad that we were able to help you solve the problem. Thank the author and share the article on social networks. Describe what didn't work for you. Our specialists will try to answer as quickly as possible.
Users may experience iTunes not syncing new music to iPhone. The problem may arise unexpectedly: until recently there were no errors, and now the audio recordings are not transferred to the computer or phone. Let's figure out why iTunes can't read iPhone content and how to fix it.
Using Google Drive
In this case, you will need to follow the instructions below:
- First, open Google Drive on your personal computer and click on the “Create” button;
- A menu should open in which you will need to click on the “Upload files” line, after which you must select the files required to transfer;
- Click on the “Open” button, which is located in the lower right corner of the page. The music download process will then begin;
- After the data is transferred to Google Drive on your personal computer, you will need to launch the same application on your mobile device;
- Now select the necessary music files and click on the “Make available online” button.
After the user completes the steps described above, he will be able to listen to downloaded music through the Google Drive application, even without an Internet connection.
Advantages and disadvantages
In case certain files have been deleted, the user can restore them.
Built-in history of file changes.
If desired, the user can share the music with friends.
You cannot synchronize folders with music outside the program.
The program is inconvenient to use on a mobile device.
It is possible that a failure may occur during the file download process.
How to download to iPhone without iTunes
This method of downloading music to iPhone without iTunes is only for jailbroken devices. You can use downloading applications, for example, iDownload Pro, but the downloaded music will be stored in the application itself, and it will be impossible to mix music from there and from the smartphone into one playlist.
If you have a jailbreak, you can download directly to the smartphone’s media library, for which you need to install a tweak from Cydia – Bridge, which can be found in BigBoss. (thebigboss.org/hosting-repository-cydia)
To download, you need a direct download link without any redirections, the need to enter a captcha or authorization parameters. How to proceed in this case:
- On iPhone, open Safari and open the resource that provides direct links.
- Select a given track, and long-tap on its icon to open the Safari menu, in the context menu that opens, click on the “Copy” item, after which a link directly to the music will appear on the clipboard.
- Open Bridge, then the “Download” menu and paste the copied link into the link field.
- Click on the “Go” button, which will start the download.
- Give the downloaded file your own metadata.
- Fill in the specified fields, click on “Import”.
Choose a method that is convenient for you and act.
Via iTools
The presented utility is an alternative to the iTunes application and also allows you to send music from a personal computer to an iPhone. Moreover, iTools allows you to import absolutely any content to a mobile device both through personal computers with the Windows operating system and through Mac OS X.
Music transferred from a personal computer to an iPhone will be immediately available on the mobile device in the Music application.
Music is transferred as follows:
- To begin, connect your mobile device to your personal computer using a wire;
- Then run the presented utility on your personal computer and go to the tab called “Music”. Also, click on the “Import” button;
- Then select the required music files and click on the “Open” button.
Advantages and disadvantages
You can use this utility completely free of charge.
Music loads quite quickly due to the lack of synchronization.
The music will be immediately available on your smartphone in the Music program.
There is no Russian language in the program.
The user cannot edit ID3 signatures.
Alternative way to download music
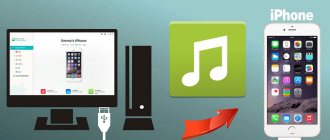
Owners of Android devices do not have such difficulties with synchronizing music - they connect their gadgets to the computer, directly transferring music tracks to memory. Much the same can be done on the iPhone. To do this, it uses the iTools application, which works without the help of the bulky and somewhat slow iTunes multimedia processor .
In order to transfer music to the iPhone, you need to launch iTools and connect the smartphone to the computer. As soon as it is determined (the name of the gadget appears in the program window), you can start downloading music - go to the “Music” tab, select the selected tracks and simply drop them here with the mouse. The main advantage of this approach is the high speed of transferring files from a computer to an iPhone.
iTools can be used to transfer other types of files. But you need to remember that it is not a full-fledged file manager. However, this is a very convenient program, characterized by high speed.
Rate this article
VLC
Using this service you can also transfer music. This is done as follows:
- Download the VLC for Mobile utility on your iPhone. Then launch it and activate the option to transfer files via WI-FI network in the “Access via WI-FI” section, which is located in the upper left corner;
- Notice the network address that appears. You must open the same link on your personal computer through any browser;
- Then add music to the control window of this utility via your computer by clicking on the plus button. After this, the system will automatically start synchronization, and you will be able to listen to music through VLC on your iPhone.
It is worth noting that the files will be displayed in the utility. Moreover, the user will be able to listen to music even without an Internet connection.
Advantages and disadvantages
You can fix damaged files.
Clear interface.
The utility may freeze or even crash when transferring music.
Hotkeys don't always work.
Downloading music to iPhone from VK
Now the social network Vkontakte is the main source of music for many users. There is a large amount of music content there. It is quite logical to be able to listen to tracks on your iPhone from there directly.
There is no such functionality in the native VKontakte application. But there are other applications that provide a similar opportunity. Apple's anti-piracy policy does not allow them to be in the AppStore catalog for a long time. Such applications can be downloaded from shared accounts.
You should download and open the application. In it you enter the login and password for your VKontakte account to use the social network’s media library.
Such programs can provide full access to the music section of the social network. You can use the search to select the desired track and download music to your iPhone from your account wall and the wall of your friends or group.
AcePlayer
In this case, you will first need to connect your iPhone, on which the AcePlayer utility was previously installed, to your personal computer and open the player. You also need to allow your computer to access files on your smartphone.
Then launch iTunes. In the utility window that opens, open the “Programs” section and go to the “Shared Files” tab. Next, you need to click on the “Add files” button and specify the path to the music. After completing these steps, the player will download the selected music files to the memory of the mobile device.
It is worth noting that in this case the user will not need to convert files on the IOS system, since the program does this automatically.
Advantages and disadvantages
Has hardware data acceleration
Clear interface
Built-in sound normalizer.
The utility may not work on weak devices.
Lots of annoying advertising.
How to open song lyrics in Apple Music
Step 1: Launch the Music and start playing any song.
Step 2: Open the mini player.
Step 3: Click the " Show " button in the " Words " section. The lyrics of the song will appear on the screen.
However, let's finish with Apple Music, because there are a couple more interesting points on the topic of listening to music on Apple devices. Let's start with an extremely popular request among users about how to download music from an iPhone, iPad or iPod touch to a computer. iTools will again help with this task.
Dropbox app
This program is the most common cloud storage. And to transfer music, the user must install it on a mobile device. Then you will need to follow the instructions below:
- Connect your iPhone to your personal computer and allow access to files, and then open the folder called “Dropbox”;
- Transfer all the necessary music files, after which the data will automatically synchronize;
- Launch the utility on your smartphone and see if all the music has been added to it. It is worth noting that the user will not be able to listen to music without an Internet connection.
If you want to listen to music without the Internet, you will need to import files from the utility using third-party programs. Any music players can help with this.
Advantages and disadvantages
You can recover deleted data.
Free version available.
You can search for files.
There is no translation into Russian.
Small amount of available space when using a free subscription.
Update and recovery
If you've tried all the methods and iTunes still can't read your iPhone content, try updating your device's firmware. You can update over-the-air or through iTunes. In this case, it is better to use iTunes, since it does not sync content.
- Connect your iPhone to your computer. Launch iTunes and select your device. It will be named after its model - 4S, 5, 6 Plus, etc.
- Go to the Review tab. Click Update.
- Click "Download and Update". iTunes will download the update files and flash the device firmware.
The only limitation for updating is jailbreaking the iPhone. If you try to update a jailbroken device in this way, it will lead to an “eternal apple” - the operating system will no longer start.
downloading/updating program files
Instead of updating, you can restore your iPhone to factory settings. This procedure is performed only through iTunes.
Before restoring your device, create a backup copy. Back up your device. If you can't sync all your content on your computer, not just music, then save a backup to iCloud.
data recovery
After creating a backup, connect any iPhone model to your computer, launch iTunes and on the “Browse” tab, click “Restore.”
As a result of the reset, you will get a clean device, as if you just bought it from the store. Restore music and other music from the backup to it and try syncing with iTunes again.
Published by ProfiAppler
Via eMusic
Sending music is carried out as follows:
- Register or log in to the eMusic website;
- Then click on the “Upload Music” item, after which a window will open in which you should add your favorite tracks;
- Then install the same utility on your mobile device and log in to it.
The user will be able to listen to music both through the provided service and by exporting files to a third-party application from eMusic.
Advantages and disadvantages
You can listen to audio files without an Internet connection.
Convenient program interface.
There is a recommendations section.
The utility only supports MP3 format.
Music on a flash drive for iPhone
If you don't want to buy software to be able to listen to music on your iPhone, then there is a method that helps many users. We are talking about a flash drive with a lightning connector, which is used for iPhone or iPad devices.
At its core, this is a standard type flash drive, but it has an additional Lightning interface. If you transfer music to a flash drive from your computer, you can listen to it on your iPhone without any problems. Another way is to transfer music to the device’s memory and listen to it later.
Here's one: an interesting flash drive for iPhone X with a memory card
The iPhone has a file system that does not allow either third-party applications or the user to freely interact with other applications and system files.
Using a flash drive on an iPhone is possible using a special companion application. For example, Leef iBridge 3 Mobile Memory has a convenient specialized application for managing files and transferring them to a smartphone.
Video: Leef Bridge review
Via Evermusic
This utility can work with many well-known cloud storage services. In this case, the user simply gets access to the files stored in the storage.
To transfer audio files from a personal computer to a mobile device, you must follow the steps below:
- Open any cloud storage that supports the Evermusic program on your personal computer and save the music folder to it;
- Install this application on your mobile device;
- Open the player menu and connect to it the disk to which you previously transferred the files;
- At the end, indicate in the application the music that you want to save in the memory of your mobile device.
It is worth noting that the free version displays a small amount of advertising.
Advantages and disadvantages
You can save files from cloud storage to your mobile device.
The utility supports many different formats.
User-friendly interface.
Ads are displayed, which you can get rid of only after purchasing the extended version.
In offline mode, the system may crash.
There may be glitches during the file download process.
✏️ They write to us:
Olga MP3 files added to the iTunes library are not displayed on the iPhone. How can I access my added personal music?
Olga: I add mp3 files to the iTunes library on my computer. iCloud Photo Library included. In theory, this file should also appear in the library on the iPhone, just as all other added personal music is displayed. But for some reason this file is not visible either on the phone or on the tablet. How can I access my added personal music? Could this be related to the new iOS?
First, make sure iCLoud Photo Library is turned on. On an iOS device, open: Settings -> Music and turn on the slider next to iCloud Music Library.
On Mac and PC, in the iTunes application, open Settings and turn on the checkbox next to iCloud Photo Library.
Make sure you're using the same Apple ID on both iOS and Mac (PC).
1. Create a new playlist in iTunes on Mac (PC). 2. Transfer there several tracks that you want to see available on iOS devices. 3. On the Clouds shortcut, next to the song, right-click and select Add to iCloud Library. 4. Wait until the songs are downloaded to the Library (in iTunes, a download circle will appear in the upper right corner). 5. Sign out of the Music app on your iOS device and sign in again. 6. On your iOS device, open your Media Library -> Playlists and select the newly created playlist. There will be added songs.
← Return to help section
> Didn't find what you were looking for?
Features of transferring audio files
An iPhone cannot be used as a portable flash drive, so you can’t simply copy music from your computer to a folder on your smartphone. Transferring media content from a PC is only possible through iTunes. The method has its own nuances:
- Before synchronizing your audio library with your iPhone, download the tracks to your computer and add them to your iTunes library.
- For each music track, you can manually register or change tags (artist, title, genre, etc.), and upload covers. The information will be displayed in the iPhone player and is necessary for correct scrobbling (if you use similar services), convenient search and sorting of the library.
- You can download all tracks of individual artists, albums, and playlists from iTunes to your iPhone at once.
Additionally, when copying tracks, you need to consider the supported file types. iTunes does not work with the WMA format, but when transferred it is automatically converted to AAC. For a complete list of supported file types, see the program description.
About the methods
It is important to understand that every modern phone has a certain set of utilities and features that make working with the device easier. And iPhone is no exception.
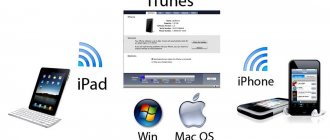
You can transfer music to Apple devices:
- using iTunes;
- directly from the Internet;
- via iTools.
In the latter case, synchronization does not take place. But this method of transmitting music will still be discussed below. They use it quite often.