Author of the article
Kristina Gorbunova
Higher education in the specialty “Information Systems”. In the field for more than 7 years, he develops websites on WordPress and Tilda.
Ask a Question
If the network connection is unstable, data is transmitted poorly or the Internet stops working altogether. You can cope with this problem without the help of a technical service or calling an engineer to your home. Let's figure out why the Internet doesn't work and ways to solve problems.
A specific site is not working
Users often encounter a situation where an Internet connection is established, but the desired web resource does not work.
This problem occurs for the following reasons:
- local blocking of the site by Roskomnadzor;
- temporary unavailability of the web resource for all users;
- blocking a specific visitor by the site administration by IP address;
- errors when obtaining the site's IP address.
VPNs can help you cope with local blocking. When blocking a user by IP address, if it is dynamic, just turn off the router for 3-5 minutes and then turn it on again. The user will reconnect to the network, and the provider will assign him a different IP.
An error in obtaining a site's IP address is most often associated with a poorly functioning DNS server. You can register DNS manually. The DNS server from Google is considered the most universal and accessible. His address is 8.8.8.8.
The procedure for installing a DNS server on Windows 7, 8, 10:
- Open the Network and Sharing Center by clicking on the network connection or Wi-Fi icon and selecting Network and Internet settings.
- Click on “Change adapter settings”. Select the desired network connection and open properties.
- In the settings window that opens, find “Internet Protocol version 4 (TCP/IPv4).” Open its properties.
- Move the slider from automatically obtaining a DNS address to using the specified one. Specify 8.8.8.8 as your preferred DNS server and 8.8.4.4 as your alternate.
Some providers provide users with their DNS addresses. One of them can be specified as an alternative, but the main one must be the Google server.
Different Wi-Fi networks may cause interference
Analyze Wi-Fi with Wi-Fi Explorer Lite on Mac
It is also important to understand that today it is not only the incoming connection that matters, but also the interference that surrounding Wi-Fi networks create. With an increase in their number, as well as the intensity of use, the questions that may be associated with this also increase. To assess the extent of the problem, you can use Wi-Fi Explorer Lite for Mac, Acrylic WiFi Home for Windows, or AirScout Live for Android. I couldn't find anything useful for the iPhone. Most likely, the App Store has limitations related to wireless network analysis.
Using the above utilities, you can see which channels the Wi-Fi access points of others are operating on. The more networks are in the same range, the worse it is. They begin to interfere with each other, which leads to a decrease in speed. But the channel can be replaced.
The problem is on the provider's side
After the user has made sure that the wires, router and computer are in order, they need to contact the service provider and try to find out why there is no Internet. Providers usually warn about planned technical work, but during unscheduled breakdowns the network may suddenly disappear.
Phone numbers of major Internet providers in Russia:
| Rostelecom | 8 800 100 0 800 |
| Beeline | 8 |
| HOME RU | 8 |
| TTK | 8 |
| Skylink | 8 |
| Wifire | 8 |
| Megaphone | 8 or 500 |
| MTS | 8 |
Balance
Most users usually forget about this reason, but the answer to the question of why Beeline home Internet does not work can be a simple lack of money in the personal account. To make sure there are funds on your balance, you must:
• Log in to your personal account; • On the initial page you will see a block that displays the balance status.
Another way is to call 8-800-700-8000. Give the contract number and you will find out the status of your personal account.
Check the Internet on other devices
If the Internet does not work on your computer at all via the cable from the router, try connecting to the network on another device. You can use a laptop, smartphone or tablet. If Wi-Fi works but the wired connection is not established, carefully inspect the LAN cable. The connector should not have cracks or other damage.
To check the availability of the Internet on your smartphone or tablet, open the “Settings” section.
Tap on the “Wi-Fi” item. Make sure the connection is active.
Open any browser on your mobile device and try to load a website. If the Internet works stably, then the problem is in the computer or network cable. For more accurate diagnostics, it is recommended to connect the router to another computer: laptop, netbook or desktop PC.
Checking Internet speed via Wi-Fi
First Speedtest results using Wi-Fi
The next step is to check Speedtest while using Wi-Fi. With its help you can understand how the router processes the Internet that enters the apartment. In many cases, the problem with the speed of connecting to the World Wide Web may be with it. We pay attention to the same parameters: download and upload speed, losses. In my case, the speed turned out to be noticeably lower than the declared one and the one that gets into the apartment. It turns out that the router is unable to transmit the Internet to my workplace wirelessly. You may have a similar problem. Now you need to understand whether the router can operate at the desired speed.
Switch to a wired connection
If your wireless internet stops working, try connecting to the network via cable. This is especially true for laptop owners when the Wi-Fi signal suddenly disappears. Almost all laptops (with the exception of ultra-thin ones) have a connector for connecting a network cable. You need to connect the wire from the router to it.
There is no additional need to reconfigure the router. If the Internet appears on the laptop with a cable connection, then the problem lies in the functioning of Wi-Fi on the router.
Ways to solve it:
- Check that your Wi-Fi connection settings are correct.
- Make sure your router's antennas are working properly.
- Update the router firmware.
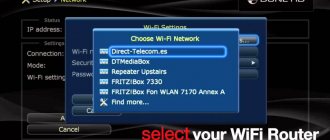
You need to check your Wi-Fi connection settings in the router’s web interface. You can access it at 192.168.0.1. or 192.168.1.1. Authorization data in the web interface is usually indicated on the bottom of the router case. Some devices are supplied configured by default. In this case, the sticker contains the name of the wireless network and the authorization key.
After logging into the web interface, go to the “Wireless Mode” section. Make sure the network name is in English. In the “WPA Key” field, enter the password that you will use to connect mobile devices to the Internet. Save the settings and restart the device.
If you still can't connect to the Internet, check the encryption type. AES must be specified in this paragraph. The encryption key version must be WPA2.
Let’s take a closer look at the “Cannot connect to this network” error. This problem occurs if the user changed the wireless connection settings or forgot to specify a new password for the Wi-Fi network. The problem is solved by checking the settings in the router’s web interface and re-entering the Wi-Fi password in the wireless connection settings.
What to do if nothing helps
When you can’t solve problems on your own, you should contact your provider. Specialists will always be able to help from a distance. Other alternative repair methods and expert advice:
- The computer has an extension installed that conflicts with Beeline file documents. It is important to find it, pause it or delete it.
- The hardware memory is full. All disks are checked to detect the problem.
- If the error code is 868, then you need to call the call center or write a request to the virtual mailbox at the address: [email protected]
You can contact support through the official portal using “Feedback”.
Sometimes resetting the router helps. To do this, press the “RESET” button and hold it for about a minute. After these steps, the device will return to factory settings. Next, the initial version is re-configured, and when reset, the program file is installed again, and the search history is erased.
Network connection disabled
This happens if the network adapter is disabled due to a system error. You can activate it in the “Network and Sharing Center” located in the Control Panel. Click on change adapter settings.
Check if the network card is enabled. If the device icon is gray, it means it is disabled. Right-click on the board icon and select “Enable”.
Important point ! If the network adapter icon is missing, it means the drivers are damaged or the device is disabled in the BIOS. If the connection is configured via a USB modem, you need to check whether its software works correctly. If the device malfunctions, the driver must be reinstalled.
Without internet access
The situation when the connection is established, but there is no Internet, is caused by various reasons:
- The WAN cable does not fit tightly into the router port;
- The router settings have changed;
- problems with the provider;
- incorrect network connection parameters.
Make sure that the twisted pair fits tightly into the router connector. When testing, you can directly connect the WAN cable to the built-in network adapter, and then configure the connection. If the connection is established, then there is a problem with the router port.
Router settings can change for various reasons: due to a software failure, a sudden power outage, or the action of malware downloaded to the PC. It is recommended to check them through the web interface.
By default, when you configure a connection to a DHCP network, your computer automatically receives other settings. But if the provider has issued the user a static IP address, you need to register it in the connection properties. If the computer does not connect to the router, you may also need to specify the IP address in the settings.
The reason is on Rostelecom's side
Sometimes a company faces massive accidents. Rostelecom often improves its technologies, which causes users’ Internet to drop for a while. Sometimes this even happens in several regions.
On the Internet, information about such events immediately appears in the news feed. Therefore, you only need to pay attention to the news in online media.
TCP/IPv4 network settings
Connection problems due to failure to obtain an IP address and other parameters can be resolved by configuring TCP/IPv4. All procedures are carried out in the Network and Sharing Center. Click on “Change adapter settings”.
Open the local network connection properties.
Find the TCP/IPv4 protocol in the settings that open. Select it and click on “Properties”.
The protocol properties will open. By default, it automatically obtains an IP address and DNS server.
To register settings from your provider, select “Use the following DNS server addresses” and “Use the following IP address.”
Please enter your IP address carefully. The subnet mask is determined automatically. The “Default Gateway” item specifies the IP address of the device through which the computer will connect to the Internet. For most routers this is 192.168.1.1. But be sure to check the IP address in the instructions for your device.
After entering all the parameters, click “Ok”. For the settings to work correctly, restart your computer.
MAC Address Binding
If the new router does not distribute the Internet via cable, contact your provider. Some companies tie network access to one device. For example, if the Internet is tied to the modem's MAC address, it will not work with a direct connection via cable. This is due to the fact that the network card and the router have a different address.
There are three options to solve this problem:
- Clone the device's MAC address. The identifier registered with the provider is registered in the settings of the new router.
- Find out the MAC address of the new router, call your provider and ask to change it in your personal account settings. Some companies provide this option to clients in their personal account.
- Change provider. Most modern companies have abandoned MAC address binding because it does not provide protection against password theft and unauthorized access to the Internet. The network simply does not start when changing the router.
The router's MAC address is indicated on a sticker located on the bottom of the router case. The data for accessing the web interface is also indicated there. These numbers and letters must be entered in your personal account or reported to the provider.
Changing the MAC address is also a relatively simple procedure. You need to log into the router's web interface. Open the “Network” section and go to the “MAC Address Cloning” tab. In the “MAC address on the WAN” section, you can manually enter the required numbers and letters or click on the “Clone” button to copy the identifier from your computer.
Be sure to save the changes and reboot the router.
To affect network stability?
Let's go through the reasons that may affect the quality of the connection.
Provider and user equipment
If access to the Internet constantly disappears and is restored, the problem may be on the side of the provider - the intermediary between users and the network. That is, you first need to contact the service provider’s technical support and report any problems.
So, the company can replace a damaged cable, update equipment or carry out unscheduled repairs.
Also, the stability of the connection is affected by a break in the communication channel. For example, when connecting via ADSL/Dial-Up, a telephone line is used and you can check the functionality by the presence of beeps in the handset of your home telephone. If they are not there, then the connection is broken.
However, such a connection is rare today, since almost all providers have switched to fiber optic cable. Therefore, you need to check the twisted pair cable that connects to the router. The wire just needs to be connected to the PC network card. If the connector indicator is not green, but yellow or red, it may be broken somewhere.
To check whether the router and network card are working correctly, you need to open Device Manager. So, Windows 7 users can open the context menu on the “My Computer” icon, select “Properties” and click the “Device Manager” button. On XP, the tab is called "Hardware".
In the proposed list, all that remains is to find a network card or wireless module. Missing equipment indicates failure. If there is an exclamation mark on the icon, it does not work correctly.
Correctness of the entered settings
Basically, network connections are configured once and there is no need to return to them. However, if the settings are incorrect, or the user has installed malware that affects the operation of the system, additional verification will be required. You need to check whether the data entered is correct.
Virus programs
There is often a situation where malware specifically blocks the connection. The user cannot open certain sites, download selected content, or access to the network is periodically blocked.
You can verify that an unstable connection is due to the influence of viruses in the “Safe Mode with Network Driver Support” mode. So, before loading Windows, you need to hold down F8 to select this mode.
If network interruptions disappear, the antivirus will help restore the full functioning of the Internet.
Watch a video about why the Internet slows down and crashes here:
Hosts file
Viruses often change the contents of the hosts file when downloaded to a computer. This manifests itself in the fact that when opening social networks through a browser, the user sees a message about account blocking and a request to provide current contact information. And you shouldn’t do this if the Internet does not work on a specific site. It is necessary to restore the default values in the hosts file.
Procedure:
- Go to C:\Windows\System32\drivers\etc and open hosts using Notepad.
- Find the line localhost name resolution is handled within DNS itself and delete all values except 127.0.0.1 localhost and ::1 localhost.
If there are no entries in the file, then there is no need to add them there. This means the Internet is not working for another reason.
The free AVZ utility is suitable for restoring the host file by default. After downloading the program to your computer, go to the "File" section and select "System Restore."
A window will appear asking you to select settings. Check the box next to “Clean up Hosts file”. Click Perform Operations.
Restart your computer after restoring hosts.
Viruses
Malware is one of the reasons why your computer does not have an Internet connection. Network problems occur after loading a website or installing a program from unverified sources. The only way to fight viruses is to run a comprehensive program (antivirus) to remove them.
If your computer does not have an antivirus by default, download and run Kaspersky Virus Removal Tool or Dr.Web CureIt. The program will quickly scan your PC and remove malware. When checking the system, requests to disinfect or erase files will periodically appear. Track them.
If, due to viruses, the operating system does not start or freezes when you turn on the PC, you can use Kaspersky Rescue Disk.
Procedure:
- Save the program to a USB flash drive and restart your computer.
- Select boot from USB drive in BIOS.
- Wait for the database update to complete.
- Run a system check. Carefully read requests to delete and disinfect files.
The duration of the verification procedure depends on the size of the SSD or HDD and the number of files stored on the physical media. In the program, you can select which drives, folders and files you want to scan. But you should use this option if you have 100% knowledge of the location of malware in the system. If the type of virus is unknown, check all files on all hard drives connected to the PC at the time of infection.
Another way to solve Internet connection problems is to restore the system from a checkpoint. It will help not only if a virus is accidentally downloaded to your computer, but also if drivers or some software cause errors in the operation of components. The recovery procedures are slightly different in Windows 7 and Windows 10.
Running System Restore in Windows 7:
- Open System and Security in Control Panel.
- Open the System application.
- In the window that appears, go to the “System Protection” tab.
- Click on the “Restore” button.
- In the window that appears, click “Next”.
- A window will open with available restore points. You can check the box next to “Show other restore points.” Then, in addition to the last created point, the previously created points will also appear.
- Confirm the action.
- Please read the warning. After the reboot, system recovery will begin.
Starting the recovery procedure in Windows 10:
- Open Control Panel. Find the "Recovery" item. Click on it.
- In the window that opens, select “Run System Restore.”
- Select a restore point. View other restore points.
- A window will open with a brief description of the restore point. Click Next. The computer will restart and the system state will be rolled back to the selected date.
You can launch System Restore in Windows 10 from a special boot screen. In order to launch it, you need to hold Shift and click on the “Restart” item in the Start menu. A window will open with a choice of actions.
Go to the Troubleshooting or Advanced Options tab. There you will find the System Restore application.
After system recovery is complete, it is recommended to download comprehensive antivirus software and scan your computer. It is advisable that the selected program includes a firewall and a traffic filter to protect against hacker attacks.
Antivirus and Firewall
Often problems with network access arise when the antivirus or firewall is configured incorrectly. They can be fixed very simply by disabling installed third-party security programs. If the Internet is working after deactivating your antivirus, firewall, and Windows Defender, you need to understand their settings.
To disable Windows Firewall:
- Open Control Panel. Type “firewall” into the search bar.
- In settings, go to the “Turn on and off” section.
- Disable it for the network you are using.
After the built-in firewall is disabled, check the internet status. If network access works again, then the problem was in this software.
To disable the antivirus, you need to find its icon in the tray, next to the clock and right-click on it. Next, find the shutdown item and select the time period.
Cable check
Often, users do not even suspect that the problem may be a torn or broken cable. Walk along the entire cable from the end point to the start point and carefully inspect the condition of the fiber.
If your cable is hidden under a plinth, cornice or other material, contact the operator by phone. The operator on duty will be able to remotely diagnose your connection and tell you whether the problem is with the cable.
Drivers
The reason why there is no Internet on a PC may be that the drivers are not working properly. The network adapter or modem appears in Device Manager, but does not work correctly. To fix the problem, you need to remove the old driver and then install a new one by downloading it from the manufacturer’s website.
To remove the driver:
- Open Device Manager.
- Right-click on the network adapter or modem. Go to device properties.
- Select "Remove device".
- Restart your computer.
- Install the driver downloaded from the manufacturer's website.
Resetting network settings
If there is no Internet on your computer, try resetting the network settings. Windows 10 has a special option for this. To reset network settings:
- Open Windows Settings. To do this, click on start and click on the gear.
- Go to the “Network and Internet” section.
- In the “Status” subsection, find the “Network reset” item. Click on it.
- Click on "Reset Now". Confirm the action.
- After resetting the network settings, the computer will reboot.
In Windows 7 and earlier versions of the OS, you can reset settings through the command line.
For this:
- Type “cmd” into the Start menu search bar.
- Run Command Prompt as Administrator.
- Enter two commands – netsh winsock reset and netsh int ip reset c:\resetlog.txt. After entering each command, press Enter.
- Restart your computer. Network settings will be reset.
If the network works fine when you turn on the computer, but the Internet disappears after a while, try resetting the DNS cache. To do this, you need to run the command line again as an administrator and enter the command ipconfig /flushdns.
Resetting the router
The procedure can be carried out manually or through the technology’s web interface. There is a special Reset button on the back of the case. For most devices, it is recessed into the body and can only be pressed with a pin. This arrangement protects the user from accidentally pressing the button.
To reset the router settings, hold this button for 10-15 seconds. The reset can be considered complete when all indicator lights on the device blink.
If the Wi-Fi connection is working properly, you can connect to the router using Android and iOS devices. Open your browser and go to 192.168.1.1. Go to the "System Tools" section.
Click on the “Factory settings” item. To reset the settings, click on the “Restore” button.
What network speed does the router support:
- 802.11a - up to 54 Mbit/s;
- 802.11b - up to 11 Mbit/s;
- 802.11g - up to 54 Mbit/s;
- 802.11h - up to 54 Mbit/s;
- 802.11i - up to 54 Mbit/s;
- 802.11-2007 — up to 54 Mbit/s;
- 802.11n - up to 600 Mbit/s with four antennas and up to 150 Mbit/s with one antenna;
- 802.11-2012 - up to 600 Mbit/s with four antennas and up to 150 Mbit/s with one antenna;
- 802.11ad - up to 600 Mbps with four antennas and up to 150 Mbps with one antenna;
- 802.11ac - up to 6.7 Gbps with eight antennas and up to 433 Mbps with one antenna;
- 802.11af - up to 6.7 Gbps with eight antennas and up to 433 Mbps with one antenna;
- 802.11-2016 - up to 6.7 Gbit/s with eight antennas and up to 433 Mbit/s with one antenna;
- 802.11ah - up to 6.7 Gbps with eight antennas and up to 433 Mbps with one antenna;
- 802.11ai - up to 6.7 Gbps with eight antennas and up to 433 Mbps with one antenna;
- 802.11aj - up to 6.7 Gbps with eight antennas and up to 433 Mbps with one antenna;
- 802.11aq - up to 6.7 Gbps with eight antennas and up to 433 Mbps with one antenna;
- 802.11ay - up to 6.7 Gbit/s with eight antennas and up to 433 Mbit/s with one antenna;
- 802.11ax - up to 11 Gbps.
Find the type of protocol your router works with - it will tell you about the maximum speed it supports. You should also understand that the average speed may be slightly lower than stated. For example, my TP-Link Archer C60 router supports 802.11ac. However, it does not have the necessary set of antennas to operate at 6.7 Gbps, its maximum is 433 Mbps. During the test via Speedtest, the router showed a little more than 44 Mbit/s for download, which is much lower than the 100 Mbit/s stated and approximately 90 Mbit/s that gets into the apartment. We need to look for the problem.
Problems with the router or adapter
If the router does not connect to the Internet via cable, this may be caused by problems with the PC's network adapter. To check, connect the provider's ethernet cable to this computer and try setting up the connection. If the network connection is established, then the problem is with the router. If the connection does not work, then the problem is in the network adapter.
Inexpensive routers have poor cooling. When used for a long time, they heat up, which leads to hardware errors. In this case, it is recommended to reboot the router manually. After the device turns off, you need to wait 5 minutes and then turn it on again.
You can change the channel for your Wi-Fi network
In my case, it is impossible to change the channel via Tether, so for this you need to use the web version of the TP-Link admin panel
If you see that there are too many other Wi-Fi networks on your channel, you can replace it. This can be done through the router settings menu - it is advisable to choose the one that is as free as possible, then there will be fewer problems. But it is important to understand that it is better to scan the network at different times in order to identify the most free channels throughout the day. Actually, you can change the channel through the settings. With 2.4 GHz networks everything is not so simple, because there are too few channels. But when using 5 GHz, interference is unlikely to occur at all - in such networks the operating range is smaller and there are more channels.
BIOS
The network card and built-in Wi-Fi module can be enabled/disabled in the BIOS (UEFI). A component can be deactivated without user intervention due to an unscheduled computer restart, a driver error, or an incorrectly installed OS update.
Before starting the BIOS, make sure that the network adapter is not listed in Device Manager. If a component is displayed there, but the “Disabled” icon next to it is lit, then you just need to enable it. If the network adapter is not listed in Device Manager, check its status in the BIOS. Information about the required component can be found in the following sections:
- Integrated Peripherals;
- On-board device configuration;
- Advanced - Hardware.
Some BIOS versions have separate sections called Ethernet, NIC. You need to find the Lan Controller item and make sure its status is Enabled.
Switching to 5 GHz makes life a lot easier
Personally, I always use the word Speed in the name of 5 GHz networks
If your router supports the 5 GHz frequency band, be sure to use it. It has many more channels, so it’s much more difficult to clog them all. What's more, it covers a smaller surrounding area, making it highly unlikely that your neighbor's Wi-Fi network will overlap. However, you are unlikely to be able to completely switch to 5 GHz. This frequency range really doesn’t have such a large coverage area, so you can use two connections at once: both 2.4 GHz and 5 GHz. The first one will do a great job with smart home gadgets, and the second one is suitable for a computer, smartphone, tablet and TV.