When connecting to the Internet, the Dom.ru provider provides a new subscriber with a very good Netgear WNR612-2EMRUS router for free. Unfortunately, this router does not have the most convenient firmware installed, which makes it almost impossible to make any changes to the network connection settings:
- Connection type depending on the dynamic or static IP address of the computer;
- Wireless network protection and encryption method;
- Setting up a Wi-Fi network (authorization data);
- Router throughput;
- Other detailed settings.
Therefore, an advanced user who wants to get maximum connection quality from an existing free router cannot do without reflashing this router from dom.ru. This article will provide detailed instructions on how to reflash a router from the Dom.ru provider yourself and use the free device to 100% of the capabilities provided by src=»https://telecomspec.ru/wp-content/uploads/2016 /10/Settings-window-for-firmware-from-provider.png" class="aligncenter" width="567″ height="450″[/img] In general, the action plan for flashing the Dom.ru router is as follows view:
- Downloading original firmware from the manufacturer;
- Changing settings for network connection;
- Launching an automated process for replacing the router firmware;
- Reboot and put the router into operation.
As you can see, replacing the router firmware is quite simple. Below you will find detailed information on each action item.
Downloading original firmware from the manufacturer
Content
- 1 Download original firmware from the manufacturer
- 2 Change settings for network connection
- 3 Automating the process of replacing router firmware
- 4 Reboot and put the router into operation
Of course, before you remove the original software from your existing router, you need to download new one. We recommend doing this from the official website of the manufacturer Netgear using this link: https://support.netgear.com/product/WNR612v2.
If you have a different router model from Netgear, then on the same official website you can find the firmware specifically for your device. To determine the model, look for the markings on the sticker on the back of the router.
After downloading the software, save it on the local drive of your computer, naming the destination folder and the file itself exclusively in Latin characters. The actual firmware file will have the extension .img. For example, you can create a new netgearsoft folder on drive C: and save the firmware file in it under the name netgearnew.img.
How to reflash a router - step-by-step instructions
Every day the Internet becomes more and more firmly entrenched in our lives. Therefore, high-quality and fast access to the network is the key to success. But often when connecting, problems and various questions may arise that in every possible way prevent you from achieving your goal. One of them is a glitch in the router firmware. In the event of such a malfunction, most owners of their devices take them to a service center, but you can reflash the router at home.
Why does the router need a software update? The need to flash the device is usually caused by the following reasons.
- Disable Wi-Fi.
- Router freezes.
- The DHCP service does not work to automatically configure a network connection.
- The VPN connection is not established.
- Slow data transfer speed.
It should be noted that the process of updating the router firmware is almost identical on all devices, regardless of the manufacturer’s brand. Therefore, this article will discuss the general course of action that must be performed in order to update the router firmware.
First of all, you need to determine the router model. To do this, you just need to turn the device over. There will be a sticker on the bottom cover of the case indicating its model and version. All this information needs to be remembered; it will be useful when choosing firmware.
It should be noted that the largest segment of the market in Russia is occupied by routers from TP-Link and D-Link, so most likely you will have to look for firmware there. The manufacturer's website is also indicated on the bottom cover of the device.
- After logging into the site, you must enter the name of the Wi-Fi router model in the site search bar.
- Then choose the appropriate model.
- Go to the "Downloads" section. In the “Software” tab, you need to select the appropriate version that was indicated on the sticker.
- After this, all that remains is to download the firmware and unpack it to any convenient place.
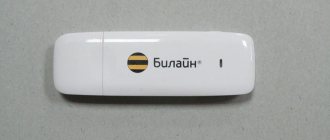
Recently, large companies such as Beeline or MTS have been selling Internet routers on behalf of their brand. For such models, the firmware is usually created separately. It is located on the Internet provider’s website, similar to the previous point, in the “Downloads” section.
You can also find improved or so-called modified firmware. To do this, simply enter the router model in the search bar. But no one can guarantee that the files that get onto the computer will not be a virus or will not completely damage the router when flashing the firmware. This method is not recommended for those who are doing flashing for the first time.
In order to update the router, you need to disconnect the provider's network cable, and also disable Wi-Fi on all devices that are connected to it. These measures will protect the device from possible interference and interference from outside.
Thus, the device must be connected only to the electrical network and the computer from which the router firmware will be updated.
Since the device is turned on and off several times during flashing, it cannot constantly support one Wi-Fi network. That is why firmware is installed only via a network cable and cannot be done via a Wi-Fi network.
First, you need to go to the web interface of the router itself. This is done quite simply: on the same back cover of the router case there is another sticker, which contains data that allows you to get into the internal settings of the device.
Typically, such data is contained under the heading “Default settings”, which means that these settings were preset by default by the manufacturer. Under the heading there is an IP address, as well as a login and password for accessing the internal settings of the router.
The IP address must be entered into the address bar of the browser (standard 192.168.1.1 or 192.168.0.1). After which the router’s web interface will launch and prompt you to enter your login and password to access the settings (standard admin and admin).
After you have gained access to the router settings, you need to make a restore point. To do this, go to the “Device Operation” or “System Tools” tab and look for the “Backup and restore” or “Restore settings” section there. Next, you need to click on the “Backup” button and save the file with the current settings to any convenient location on your hard drive.
Whenever manipulating the software, it is recommended to create a parameter restore point. This is done in order to restore existing settings in case of unforeseen situations. This can save you not only nerves, time, but also money that can be spent on calling a specialist from your Internet provider.
Next, we proceed directly to the firmware. You need to go again to the “Device Operation” or “System Tools” tab and find the “Firmware update” or “Software Update” section there. Select the new firmware file that was downloaded earlier by clicking the “Select file” button. After which you need to flash the router, confirm the selected actions and wait until the firmware is completed.
You cannot perform any actions with the router while flashing the firmware. This can lead to a failure during which the old firmware will be removed, but the new one will not yet be installed. In such cases, the chances of restoring the device at home will be very small.
After successfully updating the router, you need to restore the previously existing settings. The file that was created earlier is just useful for this.
Thus, the procedure for flashing the router is quite simple and does not require a lot of time, however, it must be done with a certain amount of care, since incorrect actions can lead to damage to the device. After correct flashing of the router, the device will work stably, quickly and without any failures, providing the signal quality declared by the manufacturer.
Changing network connection settings
Before uploading a new firmware file to the device’s memory, you need to modify the network connection settings. To do this, connect the device to the computer via a “LAN” cable. In “Network Connections”, open the connection settings, select “Use the following IP address” and manually enter the following network parameters:
- IP address: 168.1.2
- subnet mask: 255.0.0
- default gateway:168.1.1
The network settings are ready, and now you can start the process of flashing your router.
Main router models
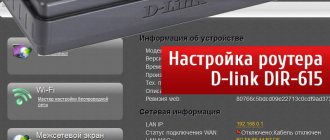
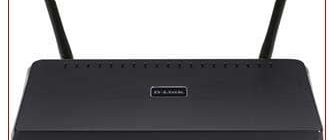
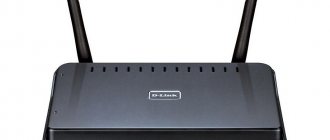
D-Link DIR-615 K/R1A
A good router that provides reliable speeds of up to 300 Mbit/s. This ensures 100% efficiency of any provider's tariff plan. Like most other models, in addition to the wifi module, it has 4 ethernet ports for connecting devices that are not capable of connecting to a wireless network.
D-Link DIR-300 NRU
More than a D-Link router, production has already been discontinued. But its capabilities are enough to create a fairly fast - up to 150 Mbit/s - network within a small apartment. It is also equipped with ethernet ports and the data transfer speed through the cable will be higher.
ZTE ZXHN H118N
ZTE is a Chinese company that now also produces smartphones. Nothing special can be said about this router - a standard economy class router, perfect for home use.
ZTE ZXHN H218N
The only but important difference between the H218N model and the H118N is the presence of telephone fxs ports that allow you to set up telephony. The setup occurs automatically when the device is connected to the network. The model is available with one and two fxs ports, but dom.ru offers its subscribers only a version with two ports.
Netgear EVG1500-1EMRUS (N300 Ethernet IAD EVG1500 Combo)
Dom.ru offers this model if the subscriber needs to connect phones through a router more often than routers from the ZTE line. Particularly interesting is the fact that the latest firmware or technical support can only be obtained from the provider, since this model is not available on the manufacturer’s website.
Netgear JWNR2000-4EMRUS
The JWNR2000 model is perfect for subscribers who, in addition to the Internet, want to set up an IPTV connection by allocating one of the ports for a set-top box. Overall, this is a good, stable device that produces the same 300 Mbit/s with the best wifi network reception.
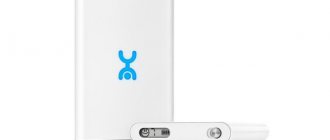
Netgear WNR612-2EMRUS
Probably the most common model of routers distributed by Dom.ru. Its capabilities are much weaker than the previous ones - only two ethernet ports, there is no ability to connect telephony and IPTV, the wireless network speed reaches 150 Mbit/s, but for most subscribers there is no need for more - and this functionality is more than enough.
Of course, subscribers are not limited in their choice of only these routers - there are others that the provider provides to its subscribers. Among them there are also dual-band options that allow you to organize a wireless network with high speed and free from interruptions, despite the large number of connections.
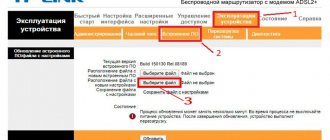
Automating the process of replacing router firmware
At this step, the new software will be introduced into the memory of the router from "dom.ru" and displace the existing one. To do this, you need to upload the firmware file using the special tftp protocol, which is called by a simple command tftp -i 192.168.1.1 put c:netgearsoftnetgearnew.img through a terminal window. The command line window is opened by running the cmd.exe program. However, in order to upload a new file to the router, you need to ensure that this process is performed immediately after connecting the computer and the router. Having opened the same terminal window, check with the command ping 192.168.1.1 -t. As soon as the LED light under the LAN blinks and the ping passes, you need to immediately start running the firmware command via the tftp channel.
To simplify this delicate process, you can use a special bat file, which contains all the necessary commands. You can download this file here: https://f1-it.ru/downloads/netgear.zip
Login to the site
Good topic.
Same thing for me, I once got a router from Dom. Ru I dealt with this provider for exactly 1 month. In fact, I got this router for only 500 rubles (the cost of a month of Internet))))) Then I had to ask for the same thing! And I’ve been using it for about 2 years now. True, it’s on rental terms, that is, when I disconnect from them, I’ll have to return the router. But I think no one will check what firmware is there))
And you left the House. ru and who is your provider now? Doesn’t the new provider have its own specific requirements for the router? They usually refuse to connect their networks to “foreign” equipment. For example, I wanted to leave Rostelecom for Beeline, so the manager said that I needed to purchase their equipment! and Rostelecom gave me their router and TV set-top box, for which I have to pay monthly until 2021
From Home. ru, I went to the Kabinet provider (Eskaterinburg), filled out an application, got my Internet connection, reflashed the router, set it up and used it without problems. I haven’t heard anything about any obligations. I had another provider, they immediately offered me to buy or rent their router (I don’t remember exactly), refused, said I don’t need WI-FI (Deceived) They threw me the Internet, connected and configured the router, used it the same way without problems.
Reboot and put the router into operation
As soon as a notification appears that the file was transferred successfully, wait about 8-10 minutes and reboot the router. After flashing, enter the following address https://192.168.1.1 in the address bar of any browser, where we enter new settings for login and password. Then everyone adjusts the network connection settings in this menu. Save these individual settings and start enjoying using the free router from Dom.ru for work and leisure on the Internet.
As you can see, if you reflash even a free router, which is issued by the Dom.ru provider with far from the best software, you can optimize its operation, providing it with a much larger set of settings. Almost every user can do this if you follow our instructions. We hope that the above instructions for reflashing the router will definitely help you.
Did you like the article? Share with friends:
NETGEAR Router from
The Dom ru router is designed to work with the Dom.ru provider, which is a provider of services to the population, such as high-speed Internet access, digital television and telephone communications. By agreement, some router manufacturers sell their devices with settings for a given provider. Specialized firmware is also being developed. Let's look at devices from NETGEAR and ZTE.
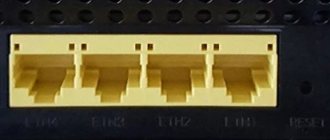
The Wifi router home ru from this manufacturer is equipped with two lan ports for connecting local network devices to it, and one wan port for connecting to the provider. Next to the wan port there is a button recessed into the case for resetting the settings to factory settings and a connector for connecting the power supply.
The firmware of the Dom ru router, discussed in the next chapter, is already configured to work with the Dom.ru provider. Make any changes to the router settings only if absolutely necessary; the most optimal settings are already preset from the beginning.
The dom ru router is configured, like most routers, in any web browser. The device's network address is printed on a label on the bottom of the router.
To enter the settings, the first thing you need to do is connect the router to the computer via a network cable. Next, enter 192.168.0.1 in the address bar of the browser. It is important to know that the router address must be entered into the address bar of the browser, and not the search bar.
From this window you can change your region of residence, the device’s mac address, IP address, and flash your home ru router (manually or automatically).
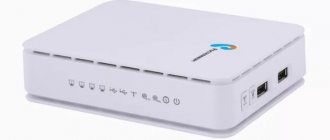
The home ru-wi-fi router from this manufacturer is already equipped with four lan ports, a button for automatically setting up a wireless network, a button to turn the Wi-Fi module on and off, and a USB port with support for 3G modems.
First of all, we also connect the device to the computer, and in any web browser, type 192.168.0.1 in the address bar. The main window will open in front of us, in which the dom ru wifi router provides all the necessary information about the current settings and connection status.
Subscriber login, tariff plan, device IP address (provided that the network is connected), Wi-Fi mode, key encryption type, wireless network name and hidden network key.
The Domru router offers small settings: changing the login and password for connecting to the network, the operating mode of the Wi-Fi module, the radio channel and the type of security key encryption.
Router features
The routers provided by the company are classified as customized, so they have non-standard firmware installed. It is not possible to reflash the device with other software.
Dom.Ru makes technical changes to routers that do not allow the installation of third-party firmware. For example, flash memory is specially replaced in devices with “cut down” ones, as a result, even factory software simply does not fit into the allotted memory space.
Doma.Ru specialists develop their own modifications of microprograms, the characteristics of which ideally match the size of the memory installed in the equipment. However, this device cannot operate on other networks.
Setting up the Dom.ru remote control: One comment
How to set up a crooked remote control from Rostelecom. I’ll warn you right away - not everyone can tune in; out of three, one of me was able to learn. We simultaneously press the “volume up and channel up” buttons on the remote control; if the “set-top box power” LED lights up (top center), then the remote control is learning. Then we take the TV remote control (our original one), point it at the Rostelecom remote control receiver and press the button we need (let’s say “volume up”). On the Rostelecom remote control, the power LED of the set-top box should blink, then press the corresponding button on this remote control (volume up). The TV LED on the Rostelecom remote control will light up. When it goes out, the remote control has learned the code. And so on with every button that is needed. It's boring to read, it's quick to do... I sat for a year with two remote controls on Harper TV, now with one. From the console.
Task: Watch video on TV from a PC without using flash drives and an HDMI cable (distance between PC and TV, 10 meters).
Available equipment: 1. TV without Wi-Fi; 2. Wi-Fi router from Dom.ru (free rental); 3. Laptop with Wi-Fi. The easiest way, provided that the TV has an RJ-45 socket: Connect a router to the TV and connect to the laptop via Wi-Fi or twisted pair (you can use 4-wire cables): Link to video (For owners of a TV with Wi-Fi, you can do everything in 5 minutes via Wi-Fi.)
In my case, the TV does not have an RJ-45 jack, but there is HDMI and a HUMAX HD 7000i set-top box from the provider (for watching digital TV). The set-top box has RJ-45 and is connected to the TV via HDMI - so now I can connect the TV to a PC via twisted pair or Wi-Fi. The router is located next to the laptop and is connected by the cable that came in the kit, approximately 1.5 m (the connection between the router and the laptop can be organized via Wi-Fi)
At the moment, the Er-Telecom company is providing a NetGear WNR612v2 wi-fi router. This router has firmware installed that NetGear can only work with from this provider. What to do if you change your provider or want to install this device in another place where the Internet is provided by another company? It's simple - you need to change the firmware. In principle, if you follow the instructions below, there is nothing complicated about it.
TV
- Why flash a TV receiver?
- How to flash a console: basic methods
- Tuner firmware using a USB flash drive
- Updating a TV set-top box via WiFi
- Using a computer
- Where can I get the firmware?
Blog about modems, routers and gpon ont terminals.
I’ve been meaning to make instructions on how to set up the Dom.ru universal remote control for a TV for quite some time, but somehow I didn’t have the time. Finally decided to catch up. The Er-Telecom company (Dom.ru brand) has been offering subscribers since 2012, being the main competitor for Rostelecom. All other telecom operators do not have a similar IPTV subscriber base. The main feature of the service is the use of a special set-top box, which connects to the TV on one side and to the home router on the other. To control the set-top box, a special universal remote control is used. It can also be configured to control the TV - volume, on/off, switching video inputs. I’ll tell you how to do this now.
Humax HD 9000i remote control
This remote control was used for Humax HD 9000i TV set-top boxes. I haven't seen it on other models. Here is a description of the button functions:
In addition to controlling the set-top box, it can be linked to the TV to control the volume and turn it on/off. There are two ways to configure this Dom.ru remote control on your TV.
Quick method: This is suitable when you need to configure the Dom.ru remote control on a TV of one of the popular brands. The sequence of actions is as follows: 1) Turn on the TV. 2) Press and hold the red Home.ru button until the indicator blinks twice. This is programming mode. 3) Press and hold the button with the number corresponding to the brand of your TV:
4) As soon as the TV turns off, release the button. Remote control binding is completed.
Manual setup: For all other brands of TV, setup of the Dom.ru remote control is performed using codes. We do this: 1) Turn on the TV. 2) Press and hold the red Home.ru button until the indicator blinks twice. This is programming mode. 3) Find the code for your TV here and enter it. After entering the last digit, the indicator will blink twice. 4) Check the agreement by pressing the power button or volume button. If the TV does not respond, repeat steps 2 and 3, entering the following code for your TV manufacturer from the table.
Humax HD 7000i Remote
The Humax HD 7000i STB set-top box uses this Dom.ru remote control. It is also universal and can be configured not only for different TV models, but also for a DVD player. video recorder or audio system.
Brief table of codes for setting: SAMSUNG 004, 009, 015, 016, 018, 019, 025, 026,050, 063, 071, 078, 089, 124, 137, 161 LG 025, 154, 161 PHILIPS 007, 008, 0 09,010 , 011, 012, 013, 014,018, 019, 023, 089, 110, 124, 138, 160,161, 172, 177 SONY 005, 017, 039, 087, 172, 173, 174, 175,176, 177 , 178, 179, 180 , 181, 182, 183,184, 185, 186, 187, 188, 189, 190, 191,192, 193, 194 PANASONIC 156, 020, 021, 022, 023, 024, 026, 030,035, 036, 0 38, 040, 042, 043 , 050, 065,068, 070, 079, 099 TOSHIBA 017, 026, 038, 040, 069, 106, 108, 172 SHARP 017, 019, 030, 043, 172 HITACHI 016, 017, 025, 031, 032, 035, 037 , 042,048, 063, 094, 095, 096, 097, 099, 102,108, 109, 110, 111, 112, 113, 114, 124,148, 172, 177
Full table of codes for the Humax HD 7000i remote control - download.
The procedure for setting up the remote control on the TV:
1) Using the button for switching control modes, select the TV mode. The button will blink once. 2) Keep the button pressed for 3 seconds until it starts to light up. 3) Enter the three-digit code of your TV manufacturer. The button will flash after each digit is entered. After entering the last digit, it will blink twice. If the negotiation was successful, the TV will turn off. 4) To complete the setup of the Dom.ru remote control, press the OK button.
If the device does not turn off, then the code did not match. Repeat the setup again, but with a different code.
Universal remote control Dom.ru 5304-ERT
This Dom.ru remote control is suitable for almost all TV set-top boxes and has two operating modes - STB control mode and TV control mode. When switching to the first mode, the indicator blinks green, in the second – red.
By default, the remote control is configured to work with the Humax HD 7000i set-top box and Samsung TV. Other models require additional configuration.
How to set up a universal remote control Dom.ru
To set up the remote control on your TV, do the following:
- To enter programming mode, press and hold the TV button. The indicator will turn red. 2) Enter the four-digit digital code of the TV from the table:
3) The indicator light should flash red twice. If an error occurs, it will blink red once.
Changing the console code
If you need to reconfigure the Dom.ru universal remote control from one set-top box to another, then you need to do the following:
1) Press and hold the STB button. The indicator should turn green. 2) Enter the four-digit code of the TV set-top box from the table:
3) The indicator should blink briefly green 2 times. In case of an error, it will blink long green 1 time.
Resetting the remote control
In order to return the Dom.ru remote control settings to factory settings, do the following:
1. Press both STB and TV buttons at once and keep them pressed for 5 seconds. 2. The indicator should blink 4 times. This means that the settings have been reset.
Remote controls for KAON, DMT, IMAQLIQ set-top boxes
At the time of this writing, Er-Telecom’s arsenal includes several models of set-top boxes that came with remote controls, but I couldn’t find any information on setting them up on a TV. These are DMT HD 5000, IMAQLIQ, KAON NA 1620 and HD 6000i set-top boxes.
It is completely unclear whether this remote control is universal or not and whether it has the ability to control the TV. If you have this information, write in the comments and I will add it.
Did it help? Recommend to your friends!
Where to download the firmware
The official update for the tuner is available on the official website or offered for automatic installation. Often there is no need to download such software, because the update is performed in semi-automatic mode (we will look at how to do this correctly below). The situation is different when you need firmware for the Dom ru TV set-top box for free viewing. In such circumstances, you need to look for third-party software and take conscious risks when installing it.
Why do you need firmware?
In the domestic market, the most popular devices are from Rostelecom and Cadena. They pick up all free Russian television channels.
Receiving a good quality digital TV signal results in excellent picture and sound. Channels can be caught automatically or searched manually. For those who upgraded the Rostelecom TV set-top box, it became possible to watch TV channels from the playlist, regardless of tariff restrictions. In addition, after updating the firmware, the set-top box turned into a convenient media service with WiFi and DLNA connections.
Negative factors include the lack of some services. The device itself is a modified foreign set-top box, and unnecessary functionality has been removed.
For domestic consumers, the interface is made in Russian. The Cadena console regularly receives updates, which are published on the official website. They mainly affect the interface and menu design. The receiver provides a TV program for the week ahead, support for subtitles and teletext, parental controls and many other useful functions.
For those who like to record certain broadcasts, this function is provided. To do this, you need the appropriate firmware version and a memory card with enough capacity to record video.
In the future, the recorded material can be played back using the media player built into the console.
Preparation
If the image on your TV has deteriorated or doubts creep in that digital TV is not working as it should, you should think about updating the software.
It is necessary to prepare for this process. To do this, you will need to download the necessary files and have a computer or laptop.
Firmware for a TV set-top box from Rostelecom is done using a computer with a free Ethernet input.
The set-top box will be connected to it. In addition, you will need a network cable that will connect the set-top box and the computer.
The software you will need is mcast.exe and dualserver (or its equivalent). You need to download the latest firmware files from the company's website. They will be called "bootstrap" and "imageupdate".
It is not recommended to flash the device using third-party tools if at least one official update has not been installed.
Cadena devices will require a USB flash drive with a capacity of up to 8GB formatted in FAT32. The firmware downloaded from the site will be recorded on it.
How to update the software of the Dom ru set-top box
In most cases, you can get by with a regular update issued by the hardware manufacturer. In this case, you can get additional options and avoid negative consequences for the installed software.
- When the update window appears, click OK or Install update.
- Do not perform any activities during the download period.
- Wait until the download completes and the equipment restarts (after the process is completed). If this does not happen, restart the Dom ru console yourself.
After completing these steps, an improved version of the software is available to users. Knowing how to update the Dom ru TV set-top box, you can avoid risks and get additional functions.