Features of connecting a desktop computer to a Wi-Fi network
Selecting a Wi-Fi adapter
Frequently Asked Questions (FAQ)
After building a home Wi-Fi network that combines laptops, mobile phones and tablets, the owner of a stationary personal computer has a question: how to connect the computer to Wi-Fi. Most often, such a PC was previously connected directly to a network cable, and it does not have a built-in wireless module.
You can solve the problem in Moscow in the following ways:
- installing an additional router, followed by a wired connection to a PC. Advantages - the ability to significantly increase and improve the quality of wireless home Internet coverage. The main disadvantages are the high cost of the router; experience with configuring “bridge” type routers is required;
- Another option for connecting a PC to Wi-Fi is to connect the built-in Wi-Fi module. In this case, you create a stable wireless connection from the PC to the wireless network. The only drawback is the need to dismantle the cover of the system unit and the knowledge of installing devices into the PCI bus;
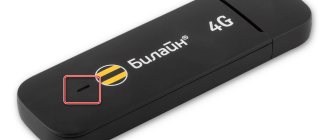
- The best option is to use an external Wi-Fi module, also known as a “Wi-Fi flash drive” or “whistle”. Its advantages are that it is a budget solution, does not require special skills, and provides stable computer access to the network.
Hardware enable
Usually, even those who do it for the first time do not have problems connecting to a wireless access point. Nevertheless, we will provide brief instructions for beginners who have just started using the “tens”.
So how do you establish a Wi-Fi connection? Naturally, the wireless network needs to be turned on:
- Using the hardware button, turn on the wireless module. This can be either a separate key or a combination of buttons, most often Fn and one of a number of functional ones (F1-F12). After this, the corresponding indicator should light up.
On Asus laptops, Wi- Fi includes the Fn + F3 button combination.
- In the tray, find the network adapter icon and click on it, then select the desired interface to connect to the network.
- Select an access point and connect to it.
- If there is protection, if the connection is established for the first time, you will have to enter a password to enter this wireless network.
- You will then be prompted to become part of your home network. If the answer is positive, your laptop or computer will be detected on your home local network by all other participants.
Method 4: Hotkeys (laptop)
The option with hot keys will also help laptop owners: as a rule, on some position of the F-row you can find an element with the Wi-Fi logo - it must be pressed in combination with Fn to activate the required function.
Some devices (for example, models from HP) have a dedicated button, also indicated by a wireless network icon.
No Wi-Fi power button
Why there is no button to turn on Wi-Fi on Windows 10, where to look for wireless network settings and how to turn on Wi-Fi on this OS - about everything in the following video:
Not all models of laptop computers have a separate key to enable and disable the Wi-Fi module. Someone cannot find it or the combination assigned to this action does not work. In such cases, the Wi-Fi wireless module must be turned on manually.
- Open “Network and Sharing Center...”. You can do this through the “Control Panel” or the network adapter icon in the “Notification Center”.
Method 1: System tray
The simplest and most convenient method of activating Wi-Fi in Windows 10 is to turn it on through the so-called system tray area.
- Take a look at the lower right corner of the taskbar - the zone we need is located there. Left-click (or tap with your finger/stylus if your device has a touch screen) on the network icon - when Wi-Fi is turned off, it looks like this.
- Next, wait a couple of seconds until the required adapter turns on, which will be indicated by the blue backlight of the button.
- Now simply select one of the suitable networks (for example, from your home router), provide a password if required, and connect to it.
Done – the problem in question is solved.
Driver
If the wireless connection is not established, first of all we check whether the Wi-Fi adapter driver is installed.
- To do this, open “Device Manager”.
- We expand the network adapters branch and check whether the wireless radio module is in their list.
In our case, only the network card is detected, but there are no drivers for the Wi-Fi adapter; it is displayed as an unidentified device.
- Download the driver for it. Since there is no wireless Internet on the laptop, we connect the network cable and download the driver. You can download it from another computer or use the software disc that came with the laptop. The source of the software should be the official website of the modem or laptop manufacturer.
The driver may need to be rolled back to a previous version if the situation arose after the next update.
Connecting a desktop computer to a wireless network using an internal network card
Step 1. Remove the side panel from your system unit.
Step 2. Install the wireless network card into the appropriate slot (usually a PCI or PCI-express slot).
Important! Network cards may have one or more antennas. The greater the number of installed antennas, the wider the Wi-Fi coverage area and data transfer speed. To avoid mistakes, it is worth remembering that the required amount can be calculated as follows: for each antenna, the speed increases by approximately 70 Mb/s.
Remove the side panel from the system unit and install the wireless network card in the appropriate slot
Step 3. Install drivers for the new network card.
Step 4. Set up a connection to your wireless modem. To change the network adapter settings, you need to enter the “Control Panel” and change the viewing mode to “Small icons”.
Go to “Control Panel” and change the view mode to “Small icons”
Step 5. Access to changes in the properties and settings of the network card is available via the “Network Sharing Center...” link.
Option “Network Sharing Center...”
Step 6. In the directory that opens, use the link in the left frame “Changing adapter settings.”
Click on “Change adapter settings”
Step 7. Changing the network adapter settings occurs through its properties. Call the context menu and use the desired item.
Click on “Properties”
Step 8. The settings you need are stored in the “Internet Protocol Version 4 (TCP/IPv4)” subdirectory. You can open it by double-clicking, or by selecting this item and clicking on the “Properties” button.
Subdirectory “Internet Protocol Version 4 (TCP/IPv4)”
Step 9. Specify the settings for your wireless connection and save them using the “OK” button.
Important! Make sure that there are no two identical IP addresses on the same network, otherwise a data sharing conflict will arise, and, in fact, only the device that received this address before the others will work. If your wireless router distributes IP addresses automatically, use this option.
Specify wireless connection settings and connection
Adapter is not active
If, instead of the “Available” status, “No connections available” or “Disabled” is displayed, you must enable the wireless Wi-Fi adapter, since it is disabled at the software level.
- Open “Device Manager” in a convenient way, for example, through “Settings”.
- Expand the section with network cards, call the context menu of the device marked with a gray icon with a down arrow, and through the context menu call the “Engage” command.
How to view saved keys
Finding out the Wi-Fi key in Windows ten is also quite simple. To do this, click “Start” and select “Network Connections” there.
Switch to available network connections
Next, open “Adapter Settings”.
Go to adapter settings
After that, in the proposed list, click “Wireless Network” and in a small window click on the “Status” line.
Launching the “Connection Status” item
Then open “Wireless Network Properties” and in the “Security” section allow the display of entered characters.
Network password
Now the password for the secure network will always be visible in the “Network Security Key” entry form.
To view passwords for inaccessible networks, open the command line or Windows PowerShell as an administrator.
Launching the Command Console
Then enter “netsh wlan show profiles” into the console and press “Enter”.
Network data
To get all the information about the Network, you need to enter “netsh wlan show profile name=Real key=clear” in this console.
Complete network details
Now the cipher from the secure network is visible in the “Key Contents”.
Displaying the key in the console
Network unavailable
We also offer you to watch a video that will help you solve problems with Wi-Fi on laptops with Windows 10:
Now let's move on to the problems. When you turn on Wi-Fi on Windows 10, the icon for turning on the wireless adapter becomes inactive after several clicks on it, which resulted in nothing. A red cross appears next to the network icon. And all this after updating the radio module driver (more on that later) and enabling it at the software and hardware levels.
- Open “Settings” and go to the section responsible for setting up the Internet and other network connections.
- Set the first switch to the “On” position.
- If the button is not active or its value is automatically returned, remove the network card drivers. After you restart your computer or update your hardware configuration, the software will be installed automatically. This will reset all network settings on the PC, which reduces the likelihood of an error occurring.
Setting up a Wi-Fi module
A newly installed module requires configuration of its parameters. You need to start by checking the functionality of the local network, using devices that are already configured to work in it.
Preparing your computer
In order to set up Wi-Fi on your computer, you need to install the software necessary for its operation. It consists of drivers for a specific adapter model. A driver is a small program that allows the operating system (OS) to see the hardware with which it must communicate. If the driver is not installed, the OS will not connect to this device during operation.
Airplane mode
If the Wi-Fi network disappears on Windows 10, then this mode may be to blame. When it is launched, all communication interfaces are deactivated.
If the Wi-Fi icon is missing in the Notification Center, the following steps will most likely help.
- Open “Settings” and select “Network, Internet”.
- Switch to the Airplane Mode tab and move the trigger switch to the Off position to start all wireless communications.
By following these recommendations, you will probably be able to connect to a wireless access point. Please ask any remaining questions below.
Changes in Windows 10
This operating system has many useful options and design solutions that are not available in older versions of the OS. Moreover, many say that it is also designed for tablets.
PC with Wi-Fi Internet
Main changes in this system:
- design and principle of Internet connection. Now you can organize the design of the system and work on the Internet in a few clicks;
- automatic installation and update of drivers. This feature allows you to avoid program conflicts. This improves the performance of the PC and the system as a whole.
As for Internet options, the new system implements the “Limited Connection” tool. This function allows you to control the amount of Internet traffic consumed by your PC. If the user reaches the limit, the system will notify him about this and offer to disconnect the connection so as not to pay extra money for additional traffic packages. This tool is relevant for 3G, 4G Internet, because providers often offer clients traffic packages of 15-50 GB.
Important! For maximum system performance, you must install all important updates recommended by Windows developers.
How to connect a wifi adapter to a computer
Connect and configure a WiFi router
Most likely everyone will be able to access the Internet.
The next step is to make sure that our personal computer, which does not have a Wi-Fi router, begins to catch the Wi-Fi network. To do this, we will need to purchase a wifi adapter
and install it on the computer.
By using such a USB adapter,
your computer will truly be able to receive Wi-Fi over the air without being tied to wires, thereby you can move your PC to any convenient place at any time.
Moreover, we installed the router for the purpose of getting rid of wires in the house. If you don’t know how to choose an adapter, read the topic about “ Best USB Wi-Fi adapters
”.
After we installed the router, configured the Wi-Fi network in the house, if this means an office at work, then all our mobile gadgets such as a portable laptop, mobile phone, tablet will instantly find and connect to the Wi-Fi network, without wires “ by air." If for some reason you still don’t know how to set up a Wi-Fi router, I recommend reading this topic Setting up a Wi-Fi router - TP-Link TL-WR841N router. Because in these devices the manufacturer took care of a built-in Wi-Fi receiver, and we are talking about a computer that was not initially equipped with this Wi-Fi adapter and most likely would also like to connect to the global network without the hassle of wires. For these purposes, there are a couple of options:
The first method most likely will not work for us, since it involves connecting our computer to the Internet by laying a network cable to it. And since our topic is about Wi-Fi adapters, this option will not suit us.
But here is the second method, which we will consider just for us. This option suits us in this case. Now we will look at two types of adapters, internal and external; simply put, a Wi-Fi adapter that looks like an additional board is inserted into a special PCI slot located in the middle of the computer, called internal. Installing it requires a little knowledge. And it looks like the pictures below.
The most convenient and easiest to set up and use is the external Wi-Fi adapter that we will connect to a desktop computer today. After you read this topic, the computer will finally become independent of network cables, turn into a portable one and be able to catch a Wi-Fi network over the air. It was one of these USB Wi-Fi receivers that I installed on my PC, the appearance of which you will find in the pictures below; such Wi-Fi adapters are also called flash drives.
Now that we have already become a little familiar with what wi-fi devices and devices there are, it’s time to start connecting it to the computer.
Let's start installing the wifi adapter on a TP-LINK computer
Let's start by taking the Wi-Fi adapter and connecting it to the computer. Despite its small size, I recommend connecting it to the USB connectors located on the back of your computer. Let's assume that all your sockets are occupied, then to connect the TL-WN725N adapter you can use various extension cords or the one included in the kit.
After you insert the device into the USB socket, your operating system will begin to automatically search for drivers; as a rule, it finds them itself; it is possible that Windows will not find them and will throw an error. Don’t worry, ignore it, then insert the disk that comes with the kit and install the drivers and utilities from the disk. If the installation disk is missing for some reason, I recommend searching in search engines for the Wi-Fi adapter model; in my case it is TL-WN725N. Well, if you haven’t already found it, I recommend that you read this topic: How to find the driver for any uninstalled device.
I see no point in describing the process of installing drivers. Now we just have to wait for the installation to finish. After the installation is complete, in the notification panel where the clock is located, you will be able to see the status of your Internet connection in the form of sticks with a yellow snowflake, this will indicate that our Wi-Fi adapter has found networks available for connection.
Now click on this status to connect Wi-Fi, if there is an available network to connect to, select it and click on the “Connection” button.
After clicking, a window appears, here we need to enter the password for the Wi-Fi network and below, as shown in the photo, click “OK”.
Congratulations if you see white sticks in the network status - this will indicate that your computer has connected to the Wi-Fi network. Congratulations!
As I said, this procedure takes very little time to connect and configure our WiFi network adapter TP-LINK TL-WN725N, and most importantly, thanks to this device, we connected to the Wi-Fi network over the air independently.
Using such adapters, whether from TP-LINK or any other company, installing them and putting them into operation is not particularly difficult, for which many thanks to them. Such adapters on the market are usually not expensive, but they have a lot of benefits.
Now a few words about what kind of adapter to buy to connect a personal computer to a Wi-Fi network? I think that there is absolutely no difference, it’s just that external USB adapters are more versatile and easier to install and configure, especially since you can take it and install it on another PC at any time.
Now you understand how convenient and practical it is to use a USB Wifi adapter to connect your home computer to the World Wide Web and, most importantly, very quickly and easily without dragging a bunch of network cables around the house. Good luck to everyone, don’t forget to share the topic and ask questions in the comments.
Increased network security
To increase the security of your wireless connection, experts advise doing the following:
- use WPA2 encryption protocol;
- Be sure to set a strong network password of at least eight characters (must consist of numbers, small and capital letters, and special characters). It is recommended to change it periodically (at least once a quarter). You also need to periodically change the password and administrator name of the router;
- there is no need to use WPS, but you must regularly ensure that this function is turned off;
- turn off the router when not needed.
These simple steps will further protect your home WI-FI network from hacking.
Thus, setting everything up is quite simple if you follow the step-by-step instructions above. It is necessary to carry out actions in the PC settings; it is also important to configure everything on the router. However, even a novice user will not have problems with this.