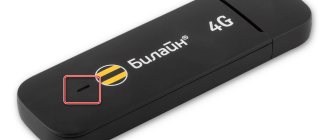
Today, the Internet has become an integral part of human life, because it allows you to work more fruitfully, communicate and search for the necessary information. But in many areas there is still no cable Internet, so people buy USB modems. These devices are functional and mobile, which allows them to be used to access the network almost anywhere in our vast homeland.
Modems operating in 3G/4G networks of cellular operators allow you to access the Internet from any laptop. This is considered an ideal solution if it is not possible to connect to the Internet using fiber optic cable or satellite communication. Moreover, these devices are very compact and easy to use.
If you do not know how to connect a USB modem to laptops, then below we will describe this procedure in detail. Also, thanks to this article, you can learn how to turn on the modem.
How to connect a modem to a laptop
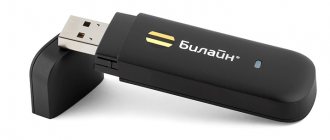
With the active development of Internet technologies, first 3G and then 4G modems appeared. These are compact devices that allow you to use the mobile Internet using a special SIM card for modems. This means that you can access the network on the street, in the countryside at home, without any wires. Any such device connects to a laptop without additional cords directly into the USB port for flash drives. Often, when purchasing a modem from an operator, you can only use it with a specific SIM card, so people resort to flashing their devices to be able to use any cards.
When connecting a modem to a laptop, the user needs to know a few things. The first thing you need to do is turn on the laptop itself. Before connecting the modem, you must remove the protective cover from dust and dirt and plug the unit into any free and working USB port. Usually the ports are located correctly and the user will not experience any difficulties when connecting to them. If the modem does not fit in, then you need to turn it 180 degrees along the axis and try to plug it in again. It is also important to check the port contacts for dust, debris and other foreign objects.
Important! It is worth remembering that excessive persistence in connecting can damage the contacts of both the portable device and the computer itself.
Some devices have a power button, and if the modem does not turn on and is not detected, then you should switch it to the “On” position. As soon as it is detected by the system, the installation of drivers will begin, which will be completed by the operating system inscription “The device is installed and ready for use” from the tray, where the icon of the connected device will appear.
Also, many modems contain a special indicator light in the case that shows the power-on status and network usage when it blinks.
Connecting to the Internet in the city is very easy. Usually people simply come to the provider’s office and draw up an agreement or order a connection online. Literally in one day, if not less, specialists appear at the Internet site, install the cable, connect it to the router or personal computer and configure all the parameters. It is also possible to provide many promotions and discounts to new subscribers. In remote areas, it is unprofitable to do this, and many operators simply do not provide services in villages and significant distances from the city. This is when modems come to the rescue, allowing you to access the mobile Internet (like on a phone) at an acceptable speed.
In order for the 3G modem to work correctly, the user must insert a disk with setup instructions into the disk drive and follow them. Most of these disks contain a “Quick Setup” function that allows you to automatically install all the necessary additional drivers and programs. As in the first case, after the driver is installed correctly, a corresponding entry about the successful installation of the software will appear in the tray in the USB control panel.
Important! There are also cases when errors occur during installation and the program crashes. To solve this problem, they most often do this: remove the disk, remove the modem drivers, restart the PC and insert the installation disk again. If this does not help, then there is either a problem with the disk or the device.
Windows 7, 8, 10
For correct operation of modems on Windows 7, 8, 8.1 or 10 systems, you must follow simple instructions:
- Connect the device and wait for automatic synchronization and driver installation. If there is a disk with software, then insert it and install drivers from it;
- Determine whether the modem has appeared in the operating system by looking at the tray icon. Check the driver in Device Manager in the “Modems” tab;
- If the device is detected, you can begin setting up a connection with the operator;
- Go to the “Control Panel” through the Start menu or in any convenient way;
- Find the item “Network and Internet” or “Network and Sharing Center”;
- Select the “Set up a new connection or network” link;
- Decide on the connection type and click “Next”;
- Select the modem for which the connection is being created (in case there are several of them installed or when another one was installed and the system remembered it);
- Enter all the required network parameters, dial-up number, connection name (any) and login with password;
- Wait for the parameters to be accepted and the network connection to be established;
- After the connection has been successfully completed, exit the settings window and return to the “Network and Sharing Center”;
- Select the link “Change adapter settings”;
- Right-click on the created connection and select “Create a shortcut”, which will subsequently be transferred to the desktop for easy connection to the Internet.
To connect to the Internet, you will need to click on the shortcut and enter the username and password for the provider’s services. If desired, they can be saved and made visible. Disabling occurs in the same way: double click on the shortcut - “Disable”.
Windows XP
The instructions for connecting a modem in Windows XP are not much different from the actions with newer versions of operating systems:
- Complete all steps to connect the device and install its drivers;
- Go to the Control Panel, where you find Network Connections and click on “Create a new connection”;
- Wait for the New Connection Wizard to start and select “Connect to the Internet” in the first dialog box, and “Set up a connection manually” in the second;
- Check the box next to “Via a regular modem” and select your pre-connected device from the list;
- Specify the connection name, dial-up number (default #777);
- Enter the username and password from your Internet service provider;
- Complete the setup and add a connection shortcut to the desktop by checking the appropriate box in the last window before exiting;
- Go to the desktop and open the shortcut;
- In the window that opens, select “Properties” - check the box next to your modem and click “Configure”;
- Specify the maximum network connection speed and activate the “Hardware flow control” function;
- Apply and save settings.
Starting and turning off the Internet is carried out in exactly the same way as on newer systems.
Checking adapter properties
If the problem due to which there is no access to the Network is software and, accordingly, can be solved directly from your computer device, then it can be easily fixed. First of all you need to check the properties of the adapter
, and it's easy to do.
First, click on the Internet icon, and then select “Network Settings”. Here you will need the “Ethernet” item, and in it select the “Configure adapter settings” line.
A window will open in front of you where you select the desired network, then right-click on the “Properties” button, then again on the “Properties” button. Another window will open where you need to check whether the “birds” are checked next to IP version 4 and IP version 6. If the checkboxes are unchecked, check them again. The Internet may not be working due to an IP address not being received.
Algorithm for connecting a modem to a laptop
How to install a Yota 4G LTE modem on a computer: step-by-step instructions
As has already become clear, first of all you need to connect the modem to any working USB port. Then, in automatic mode, the system will begin installing drivers and other software for the correct operation of the device. If everything is successful, an autorun window will open asking you to install other drivers. There is no need to give up on that. Having selected the language and specified the installation path of the files, if possible, all that remains is to wait for the process to complete.
Important! If all previous steps were completed correctly, then the connection is already available for use and the Internet will appear automatically.
Fixing potential problems when connecting a modem to a laptop
Using a smartphone as a modem for a computer via a USB cable
But sometimes this doesn’t happen, and then there are two options: call a technician to your home or try to create the connection yourself. For the second option, the step-by-step sequence of actions is as follows:
- Find “Network connections”;
- Create a new one and select “Internet Connection”
- Be sure to select manual installation;
- Select the modem required for setup;
- Specify the name of the new connection, as well as data for authorization on the provider’s server. They are issued along with the modem or upon signing a service agreement;
- Leave the checkboxes on the items about “Connection by default” or “Collection of registration data” in order to minimize the risk of connection problems in the future;
- Create a shortcut on your desktop for easy access, as well as turning the network on and off.
If all fields are filled out correctly, an icon will appear in the tray or notification area, symbolizing the successful operation of the device and the new connection.
Reliability
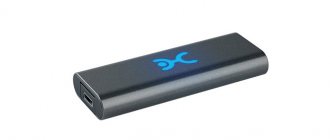
Compared to external modems, the internal receiver has a higher level of signal reception and transmission , which guarantees high data exchange speeds in modern networks. This advantage of the built-in receiver is provided by a larger antenna area. Just compare the sizes of the modems - a USB gadget can be equipped with a maximum 5-centimeter antenna, while the built-in WWAN module has an antenna comparable to the length of the laptop lid.
To be fair, in an area with good coverage you won't notice much of a difference between using an internal or external modem. But what about those times when the phone is far from 5 out of 5 bars? In the area of uncertain reception, the Internet will begin to slow down, and the slightest interference threatens to cut off the signal altogether. The antenna built into the laptop will allow you to get the highest quality and reliable communication even in the border reception area.
Updating modem drivers
Reasons why a laptop does not see a 3G or 4G modem for mobile Internet
If suddenly a successful connection that was working reliably suddenly stopped functioning or the Internet speed began to sharply decrease or “jump,” then most likely it is necessary to update the drivers for the device. You can do it this way:
- Find “Control Panel” in the Start menu;
- In it, select “Device Manager” and find the tab with modems;
- Select the required device and remove elements of its software;
- Restart the laptop and reconnect the modem;
- Wait for the drivers to install. If it does not start, then you should return to the “Device Manager” again, find your modem and, by right-clicking, select “Update drivers manually”.
Important! You can update the software package in another way: find the official website of the modem manufacturer, where you can download the current version of drivers in the appropriate section.
How to choose the right 3G or 4G LTE modem for a laptop
In order not to encounter difficulties when connecting the modem and setting it up, you must carefully select the device before purchasing. Conventionally, all modems can be divided into two categories that determine the maximum supported speed:
- Up to 3.6 Mbit/s;
- Up to 7.2 Mbit/s.
It is on this basis that modems are divided, which will be discussed below. Knowing exactly what category of equipment a person needs, you can significantly narrow down your choice and not be distracted by unnecessary models.
The following universal devices can transmit up to 3.6 Mbit/s: Huawei E160G, Asus T-500, Samsung Z810, Huawei E220, and Novatel X950, Novatel MC990D, Huawei E169G, BandLuxe 120 have speeds up to 7.2 Mbit/s. Apart from these companies, they perform well recommended by companies such as ZTE, Megafon, MTS, Beeline, although the latter often use devices from other companies with their own firmware by agreement.
In addition to the speed characteristics, when choosing, you must be guided by the following factors:
- A price category for people who do not want to overpay;
- Availability of a modem package for advanced users;
- Appearance and design solution for aesthetes;
- Software for those who want to fine-tune.
How to connect a modem to a laptop: expert advice
A modem is a fairly popular device these days. It allows you to access the Internet on a portable device anywhere in the world. Despite its simplicity, it requires a number of configurations and software for correct and optimal operation. There is no need to rush through installation and connection, because it is better to spend a couple of minutes reading the instructions than to make everything even worse and more complicated. You should consider all the features of the procedure and advice from specialists, which are as follows:
- Before directly connecting the modem, you must turn on the netbook and wait until the operating system loads completely. Only in this case will it begin to recognize the inserted device;
- Next, you need to remove the cap, which covers the USB modem input interface from dirt and foreign bodies that can damage it and damage it;
- The modem is inserted into any free and working USB port of a personal computer or laptop;
- Wait until the device is detected and its main components are loaded for further work. After the process is completed, a corresponding notification will be displayed;
- In addition to the notification, an AutoRun dialog box will be displayed, in which you need to select the AutoRun exe file and run it;
- Select a convenient installation language, specify the installation path and wait until the programs and drivers are installed;
Important! Further actions involve setting up a connection to the provider, which was fully described in the paragraphs above for the most popular operating systems.
Thus, it was explained how to connect the Internet via a modem to a laptop and how to rid yourself of simple but common mistakes. If you follow the instructions, you can easily install any modem on any laptop, be it HP, Samsung, Asus, DELL.
Podgornov Ilya Vladimirovich All articles on our site are audited by a technical consultant. If you have any questions, you can always ask them on his page.
Settings in the Windows operating system
Now let’s figure out how to connect the Internet on a laptop in the operating system settings.
PPPoE
PPPoE is one of the subtypes of connection using DSL. To configure the Internet using this protocol, you must create a new connection in the Network and Sharing Center.
Next, we install the connection option we are interested in; in Windows it is called “High-speed (with PPPoE)”.
Now all that remains is to set the required user authentication data. To do this, you need to look at the password in the contract, after which you can return to the laptop and enter the user name and password.
Static or dynamic IP
If you have chosen a static IP address, then in order to install the Internet, you (or a specialist from the provider) will need to manually set the subnet parameters, the provider’s gateway address, the DNS address and your IP address on the laptop. This data must be provided by the service provider. And if you have a dynamic IP connected to your laptop, then the setup process will be even simpler: you won’t have to enter the static parameters specified in the contract, all parameters are set automatically.
To set up the Internet in Windows, you need to select the monitor icon in the notification panel, right-click on the mouse or touchpad and select the second item in the drop-down menu (“Network and Sharing Center”). In the menu that appears, look for our network card.
Right-click on your mouse or touchpad and go to the “Properties” menu.
After this, the TCP/IPv4 protocol is configured.
The connection settings will depend on which IP address is used - dynamic or static.
Which of these two types of Internet settings is better to connect for a laptop will depend on several factors.
- The service provider you choose must have the technical ability to provide a static IP address.
- If there is such an opportunity, then you need to study the tariffs for the service of providing a static address and, taking this into account, decide whether it is profitable for you to pay for such an additional option.
- A static IP address can be useful if you plan to use your laptop for business and you need a reliable connection to regularly access the same trusted websites, for example, to make payments. On the other hand, the disadvantage of a static IP address is that your actions on the Internet may be easier for attackers to track, because you access all sites from the same address.
VPN over l2tp pptp
Some service providers provide access to the World Wide Web using a VPN. To set up the Internet, go to the network connection settings and select “connect to a workstation.”
Next, select the option “use my Internet connection.”
All that remains is to set any name for the connection name and enter the data provided by the provider.
Checking for adapter availability
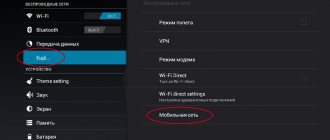
Without an active Wi-Fi adapter, the laptop will not be able to join the wireless network. If your laptop model does not have Wi-Fi, you will need to purchase an adapter separately and connect it. Then you need to enable Wi-Fi in the laptop settings. In addition, of course, you will need an Internet source - for example, a home modem.
Installing the driver
If the laptop does not want to connect to the Wi-Fi network, then the problem probably lies in the lack of a driver. This happens in older versions of Windows; in this case, the required driver will have to be installed manually. In Windows 10, the necessary driver is installed automatically.
To check for driver availability on a laptop running Windows operating system, you need to go to Device Manager. Next, pay attention to what is displayed on the laptop screen on the “Network Adapters” tab. If there is no driver for connecting to Wi-Fi, a picture of the device and an exclamation mark on a yellow background will be displayed.